Tearing Down the Nest Protect
Nest Labs keeps churning out cool gadgets - let's see what makes them tick!

You probably know Nest Labs - the tech company focused on "reinventing unloved but important home products." You've probably seen them in the news recently as they were just purchased by Google for $3.2 billion USD.
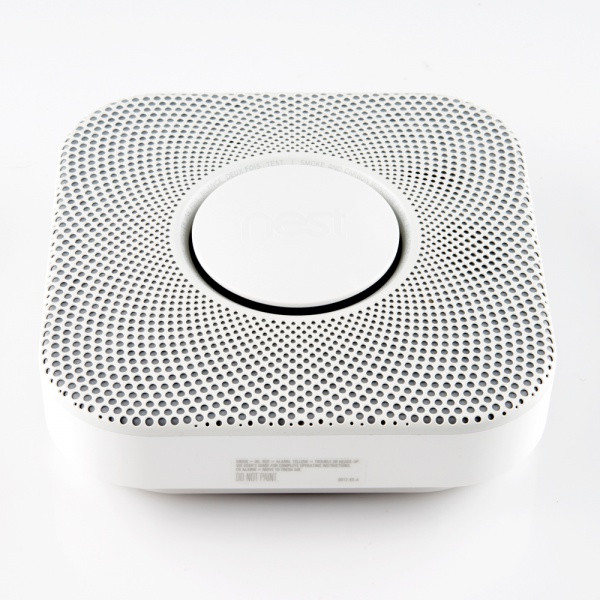
Nest is best known for their smart WiFi-enabled thermostat. Recently, Nest released a smoke/CO detector that hopes to take the device from the screeching hockey puck on the ceiling we all know and hate, to an intuitive device to help keep your home safe.
When we heard Nest was coming out with another product, we simply had to have one. Not to install in the office, but rather to rip into tiny pieces and see what makes it tick. So today, we are happy to show you the Nest Protect Teardown.
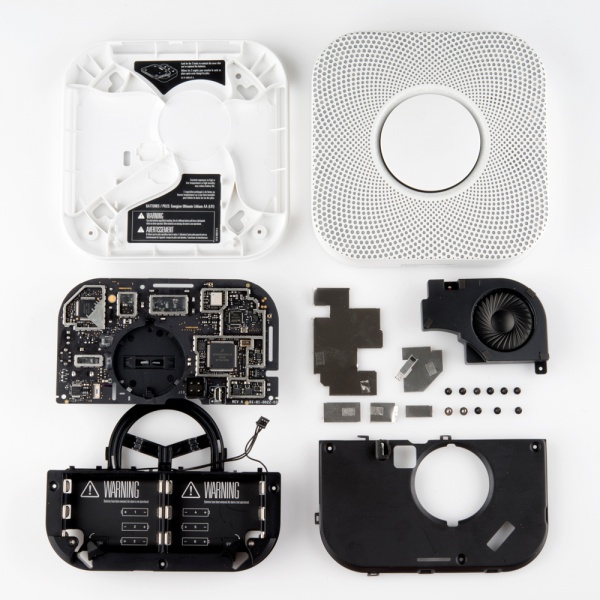
Our Creative Technologist Nick Poole got his hands on the protect and went to work - the results are pretty cool. It's not an overly complex device, but there are certainly some interesting bits that make the device tick.


Great teardown! That blurry part is almost certainly a color sensor. I've used one in the past that looks very similar: TCS34717. The placement of the detector on the die isn't exactly the same, so it's likely not this exact part, but I bet the specs are pretty similar.
these folks might try this product next: spark labs attempt at an 'open' Nest thermostat
It's not very aesthetically pleasing, the large glowing digits over-power any fine art paintings that may be hanging on the living room walls or reflect off a big screen TV. Much prefer something more subtle.
Awesome teardown!
Regarding the humidity sensor, my best guess is that they're using that to try to weed out false-positives caused by cooking. For example, I imagine that if they see abnormal intense humidity (steam) followed by smoke, they'll give it a short grace period (30 seconds?) to see if it's something the cook got under control. Hmm, or maybe quite simply they'll use an elevated smoke-detection threshold if the humidity is much higher than the usual baseline.
If it really was a super detector for everything, it would detect radiation, radon, methane, mercury vapor, UV light, viruses, & pollen. Instead, it just records your every movement.
Great info on this product. Certainly love finding out about all the various sensors in it.
One suggestion to Nick (and anyone else at SFE who take pictures of components: when taking pictures of those tiny devices with a DSLR, remove the lens from the camera and flip it around. As in, shoot with the lens reversed. If you don't have a lens reversal ring, get one. You can do it by hand by just holding the lend against the body and pushing the iris lever with your finger to open it. I posted a few pictures showing the differences between taking a regular picture and zooming in to the components, versus shooting with a reversed lens (and being able to capture just the components in question because you're able to get so much closer): Reversed lens photography
Thanks for the tips! I'm actually pretty familiar with photography and macro photography in particular. Not that it matters, we have a wonderful staff photographer. The component pics were cropped from the picture of the whole board, they weren't taken poorly and individually, lol. As I mentioned in the comments for the tutorial, I hope to get these photos replaced soon I really wanted to get this out at soon as Google bought Nest.
Yeah, I figured they were cropped from the original. It's a lot of fun to do macro photography on small parts like that. I've done entire motherboards just for the shear fun of it. But I used a reversed lens as opposed to a macro.
The reverse lens trick is neat, It will usually get me a little closer with my kit lens than the cheap macro 'filter' that I tend to use. Had I known that the pictures of the individual components were going to be so sought after I may have snapped them real quick. As you can probably tell there's a mix of nice professional looking photos (care of TheDestroyer) and crappy cell phone pictures that I took while taking the thing apart. I've been given the privilege of tearing things down whenever we deem it appropriate, though, so we'll have a better system for doing mid-teardown pics in the future.
As for the lens itself, it's easier done with a full manual lens where you don't have to hold the iris open. I use my old F100 lenses on my DSLR for that purpose. I can set the aperture on the lens and not have to hold it open like you would on a fully automatic lens where there's no ratchet ring to control the iris. If you don't have any manual lenses, just get a cheap one on eBay, it'll do the job.
Google could of hired the the whole design team for a lot cheaper than buying the company for 3.2billion.. Kewl product but nothing that innovative...
Curse you Sparkfun!....for being so curiously addicting!