- Home
- Product Categories
- Robotics Kits
- Hexapod Chassis Kit


Hexapod Chassis Kit
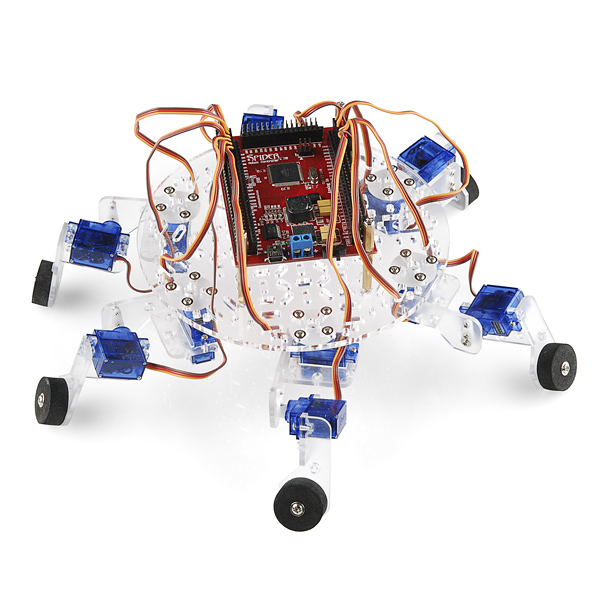
After playing with this energetic little walker, we can't decide whether it's cute or terrifying. Dagu's done it again with a robotics kit that's easy to assemble and fun to hack. The 12-servo Hexapod Chassis Kit provides you with everything you need to give your robot 6 legs of terrifying cuteness. Simply supply a servo controller and some power and you're ready to go.
The 12-Servo chassis has two joints per leg: a hip and a knee. Several types of gait can be achieved by lifting the knee and sweeping the hip to take a step. The legs are distributed equidistantly around the circular base. Each leg has a foam-rubber "foot" that helps provide traction when it's walking on smooth surfaces.
If you've ever contemplated world-domination, may we suggest an army of these? If you're not sure what controller to use, Dagu also makes a custom controller (the "Spider" controller) for this kit which you can find in the related products below.
- 1 x Laser-Cut, 4mm Thick, Acrylic Base Plate
- 12 x ABS leg segments
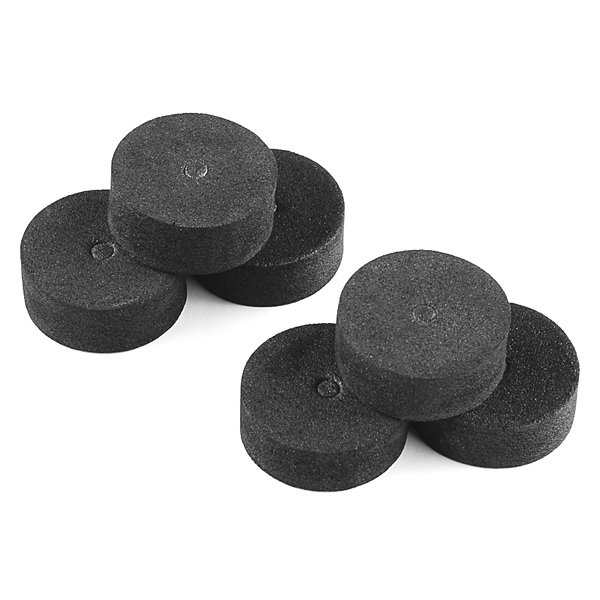
- 6 x Foam Rubber Feet
- 12 x 9g Mini Servos
- A Bag of Screws
- Cute/Terrifying
- Base Plate has Several Universal Mounting Holes
- 6 Legs with 2 Servos Each
- Foam Rubber Feet for 'Grippage'
- Easy and Quick Assembly
Hexapod Chassis Kit Product Help and Resources
Core Skill: Robotics
This skill concerns mechanical and robotics knowledge. You may need to know how mechanical parts interact, how motors work, or how to use motor drivers and controllers.
Skill Level: Competent - You may need an understanding of servo motors and how to drive them. Additionally, you may need some fundamental understanding of motor controllers.
See all skill levels
Core Skill: DIY
Whether it's for assembling a kit, hacking an enclosure, or creating your own parts; the DIY skill is all about knowing how to use tools and the techniques associated with them.
Skill Level: Noob - Basic assembly is required. You may need to provide your own basic tools like a screwdriver, hammer or scissors. Power tools or custom parts are not required. Instructions will be included and easy to follow. Sewing may be required, but only with included patterns.
See all skill levels
Core Skill: Electrical Prototyping
If it requires power, you need to know how much, what all the pins do, and how to hook it up. You may need to reference datasheets, schematics, and know the ins and outs of electronics.
Skill Level: Competent - You will be required to reference a datasheet or schematic to know how to use a component. Your knowledge of a datasheet will only require basic features like power requirements, pinouts, or communications type. Also, you may need a power supply that?s greater than 12V or more than 1A worth of current.
See all skill levels
Comments
Looking for answers to technical questions?
We welcome your comments and suggestions below. However, if you are looking for solutions to technical questions please see our Technical Assistance page.
Customer Reviews
No reviews yet.
Ouch, another SparkFun impulse buy coming up...
Hi, I'm having small issues with my kit and hoping I can get some advice. First and foremost, is 4 AA's enough to power all these servos? I'm experiencing lots of twitching and am assuming that that is a product of not enough current. Thanks.
4 AA cells probably do not provide enough current for the 12 servos. You can find more information at this post on Let's Make Robots. According to above post, you need a minimum of 7V. You probably need a battery pack which can supply 3A or more. Many rechargeable batteries can source more current than alkaline cells. Edit: I should have read more carefully. I see you have the robot up and running. Very good.
I remedied it. Remember to have a common ground between the controller power and the servos power.
Does anyone know if Sparkfun sells a battery that would work to power this chassis adequately (using the spider board)?
Hi, do you have the specs for the servos? I'm thinking to buy this chassis, using an Arduino to control it. And I plan to use a 3500mAh 7.2v NiMH pack to power the servos and provide enough amperage, but not sure if it will cause overvoltage and damage the servos. I would really appreciate your feedback. Thanks.
It'll work fine. I'm using a 7.2v 3300mAh NiMH pack to power mine and it works great.
I just uploaded a video of this robot walking, I control it via WiFi with arrow keys on keyboard.
nice one again..
Hexapod Chassis Kit ROB-11497, is a very interested design to me. I'm a PhD. Student of control engineering working on robot navigation. Can you pls. Work with me for the success of my research?
Kindly give me the clue my email is mmjibrin@yahoo.com
Engr. MUSA, Muazu Jibrin
Does anyone have a wiring schematic? And what is being used as the power supply?
If you are using the sample code then you will see in the code it tells you what servo connects to what pin of the Spider controller. E.G.
sv[0].attach(29,800,2200); // knee1
This means you need to attach the servo for knee 1 to pin 29. Learn more about the Arduino servo command here: http://www.arduino.cc/en/Reference/Servo
If you are using a Spider controller then it can work with any voltage from 7V to 30V as long as you battery and wires can supply at least 3A (NiMh and LiPo batteries are best).
Someone please respond, What is the range of this controller? Can I use a X-bee transceiver or something to control the chassis using a computer or a laptop? What is the board that is used in this product and what language is used to program it? How much weight can this product bare. Can It be used to climb small obstacles in its path?
Refer to OddBots post just a couple posts above this one. It uses an IR receiver. So your range is line of site basically. But I'm sure you could add an Xbee or other transiver to it if you wanted.
What is the board that is used in this product and what language is used to program it? How much weight can this product bare. Can It be used to climb small obstacles in its path?
Can we get some dimensions for the servos, please?
In the video, Robert uses Spider controller sample code to control the Hexapod with an IR remote. What additional components would I need to order to do this?
The original sample code just uses an IR receiver plugged directly into the spider controller with pin 10 used as the signal pin, pin 11 supplying GND and pin 12 supplying +5V.
Sample code can be downloaded from here: https://sites.google.com/site/daguproducts/home/download-page
FYI, A Parallax Propeller is great for controlling multiple servos. Here's a link to my 18 servo Popsicle Stick Hexapod project. I made the legs too long but you can see how the QuickStart board can control the servos just fine. (The QuickStart is half the price of the Spider board.)
This is one application where the multiple processors on the Propeller shine since one processor is dedicated to sending the servo pulses the other processors (cogs) can take care of other robot business (wireless communication, inverse kinematics, world domination, etc.).
You can also control up to 12 servos with an Arduino. Check out my instructable here.
You'll probably notice various SparkFun stuff in there :). The battery I'm using as well as on of the servo tilt brackets. Also all the jumper wires are SparkFun vintage - oh, and the FTDI breakout board. :)
is the controller board included?
No, it's fifty bucks more (if you choose the Spider board).
Is there any way we can get a no servo version of this kit? I've got a bunch of 9g servos lying around i was meaning to get brackets for and this would suit them pretty well.
bummer. we can't get it without the servos, sorry! should be relatively easy to copy though. I might be wrong, but aren't there a lot of open source design files for the body of the robot? maybe you could send those to ponoko or something and have them made?
Good idea, thanks for the reply!
How much weight can this platform carry?
I'll do a little experiment and get back to you tomorrow. I can tell you know, though, it isn't a whole lot because those servos don't have much surplus torque.
Well, I put a little bucket on its head and filled it with office supplies. I found that below 8oz its capable but approaching 8oz it's very unhappy. At 1 pound servos begin self-destructing.
Hope that's helpful (don't worry, I'll nurse this one back to health. No robots were killed in the testing of this metric)
Hope your robot is doing fine! Any recommendations on a stronger servo to use in order to carry a bigger payload?
Sorry for such a late reply, but I've used HobbyKing HXT900 servos in several projects and they seem to be very strong for their size.