- Home
- Product Categories
- Kits
- SparkFun BigTime Watch Kit


SparkFun BigTime Watch Kit
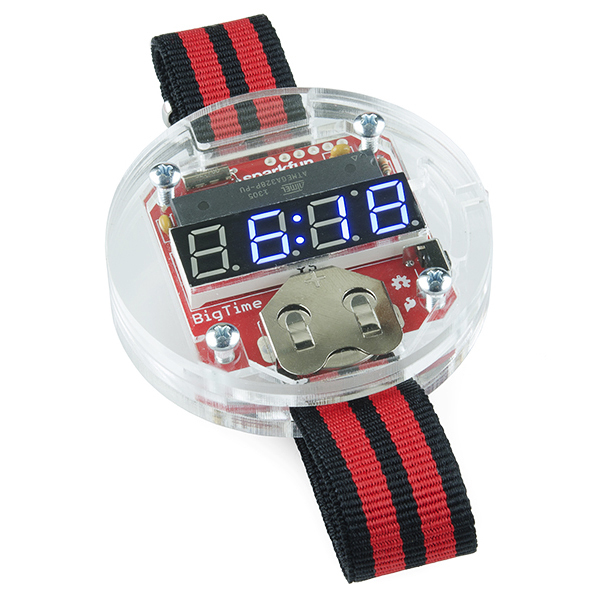
The SparkFun BigTime watch kit is a geekishly stylish digital watch with a NATO style watch-band and a slick acrylic enclosure. If it seems familiar, that's because it's essentially our open-source branch from the SpikenzieLabs' Solder:Time kit. The heart of the kit is the much venerated ATMega328 using a 32kHz clock-source to keep time. To check the time, just press the button on the side of the watch and it pops up on a 4-digit 7-segment LED display. Thanks to some low-level hackery, the ATMega is running at super low power and should get an estimated 2 years of run time on a single CR2032 coin cell!
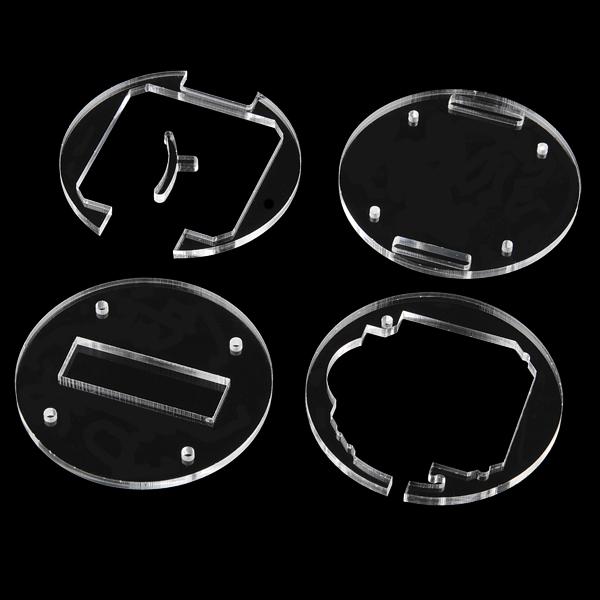
The BigTime is a through-hole kit with a low parts-count, so it makes a great project for beginning solderers. After you've finished soldering together the PCB, simply stack the acrylic pieces around it and screw them together with the included screws. Once that's done, pop in the coin-cell battery and go show off your nerd bling!
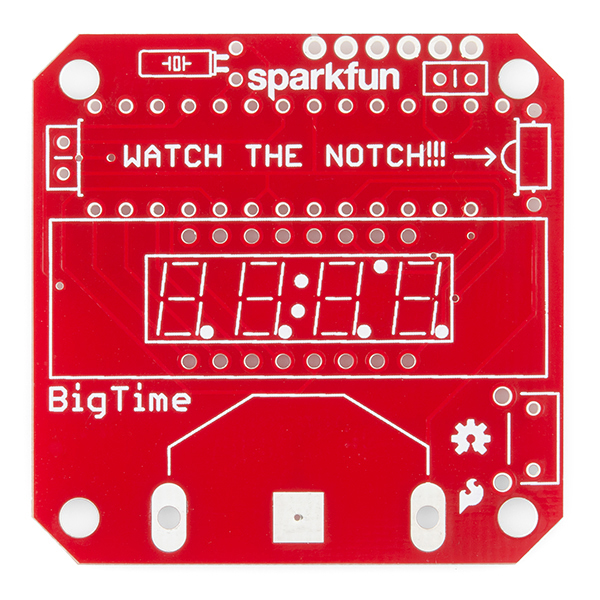
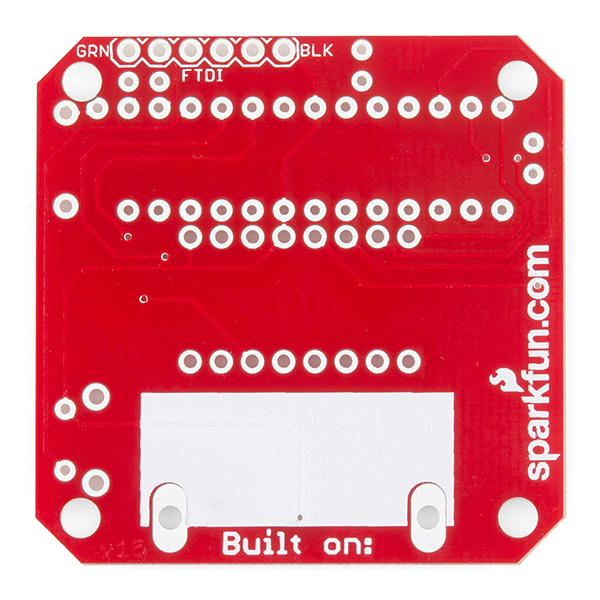
Did we mention that the watch kit is super hackable? An FTDI header is broken out to the side of the board and the watch-firmware is running on top of a bootloader! This means that all you need to do to add your own code is to open up Arduino or Wiring and select "Arduino Pro or Pro Mini 3.3V/8MHz w/ ATmega328" as your board.
This version of the watch uses brass inserts for a more secure enclosure. It also uses a new NATO style strap.
Note: Due to the requirements of shipping the battery in this kit, orders may take longer to process and therefore do not qualify for same-day shipping. Additionally, these batteries can not be shipped via Ground or Economy methods to Alaska or Hawaii. Sorry for any inconvenience this may cause.
Replaces:KIT-11178
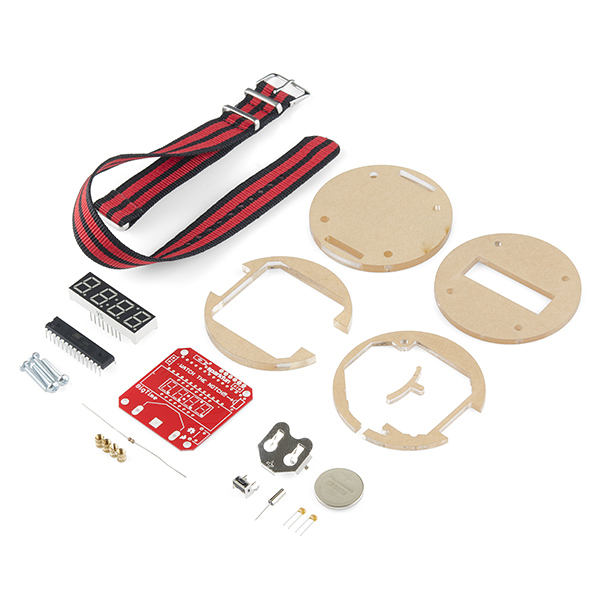
- 1 x Pre-programmed ATMega328 DIP IC
- 1 x 4-Digit 7-Segment Display
- 1 x 32kHz Crystal
- 1 x 10kOhm Resistor
- 2 x 0.1uF Capacitors
- 1 x Right Angle Tactile Button
- 1 x 20mm Coin Cell Battery Holder
- 1 x 20mm Coin Cell Battery
- 4 x 4-40 Phillips Screws
- 4x 4-40 Threaded Brass Inserts
- 1 x NATO style Watch Band
- Acrylic Enclosure Parts
- Assembly Guide
- Very hackable ATMega328-based kit with Arduino bootloader
- All through-hole components
- Estimated 2-year battery life
- Laser-cut acrylic enclosure
- Large, easy-to-read display
- Adjustable NATO style watch-band
- Schematic
- Eagle Files
- Datasheet (ATmega328)
- Assembly Guide
- GitHub
- Product Video
SparkFun BigTime Watch Kit Product Help and Resources
Core Skill: Soldering
This skill defines how difficult the soldering is on a particular product. It might be a couple simple solder joints, or require special reflow tools.
Skill Level: Rookie - The number of pins increases, and you will have to determine polarity of components and some of the components might be a bit trickier or close together. You might need solder wick or flux.
See all skill levels
Core Skill: DIY
Whether it's for assembling a kit, hacking an enclosure, or creating your own parts; the DIY skill is all about knowing how to use tools and the techniques associated with them.
Skill Level: Noob - Basic assembly is required. You may need to provide your own basic tools like a screwdriver, hammer or scissors. Power tools or custom parts are not required. Instructions will be included and easy to follow. Sewing may be required, but only with included patterns.
See all skill levels
Core Skill: Electrical Prototyping
If it requires power, you need to know how much, what all the pins do, and how to hook it up. You may need to reference datasheets, schematics, and know the ins and outs of electronics.
Skill Level: Rookie - You may be required to know a bit more about the component, such as orientation, or how to hook it up, in addition to power requirements. You will need to understand polarized components.
See all skill levels
Comments
Looking for answers to technical questions?
We welcome your comments and suggestions below. However, if you are looking for solutions to technical questions please see our Technical Assistance page.
Customer Reviews
4.2 out of 5
Based on 6 ratings:
1 of 1 found this helpful:
My son had a great time soldering!
My son likes watches and he gained much satisfaction from soldering this small kit together. We weren't able to program the chip after soldering on a 6-pin header and attempting to upload the TV-B-Gone code with the Adafruit 3.3V FTDI cable. Also we probably have to drill a hold in the face in order to fit the 5mm IR LED. Need debugging help!
1 of 1 found this helpful:
Amazing watch
Me being an 8 grader, this was a piece of cake to do. Only issue I ever encountered was when I thought I lost the "clicker" because it was so small, and when the AtMega leads and the 8-segment display leads were too tall and required trimming. Also, while soldering, I was careless enough to fill the FTDI header with solder globs. Only complaints there, but most of them were my problem.
Now 3 for 3!
A year or so ago, I bought 2 Simon kits and a Big Time Watch kit for a couple of grandkids. The watch was a hit for the 12 year old. The 9 year olds liked Simon, but this year a 10 year old and a 7 year old asked for the Watch. So last week we built them. I'm happy to report that everything worked the first time. The 7 year old now has a watch that's almost as big as her hand! No hacking yet, but they know it's possible. Now they're busy with their dad building an underwater robot.... Watch out Aqua-Man!
The best way to start!!!
I had a lot of fun doing it, and also I wear it daily, actually I would like to have much more choices of this gradually increasing the complexity, to start a serious project from my own, great idea, I love it!!!
Plastic case cracked in assembly
Soldering up this watch was superbly fun, and helped my soldering skills immensely. The directions were clear and easy to follow. Though the watch was a bit large for my wrist, I hung it off my bag and used it throughout the day. Only problem was during assembly of the plastic case, there was a plastic plug in one of the screw holes, not sure if this was intentional or not. I couldn't remove it with my fingers so I trued using an electronics screwdriver to push it through, which promptly cracked that piece in half. I superglued it up and thought I was good. One week later it fell apart and I lost some of the components. Now I can't use it in its case but I'll mount it in a block of wood or something.
Totally Rad -- too bad it's no longer available
We bought three of these and have built two of them so far. Instructions and assembly is easy for newbies like us. We soldered one of the resistors a little too high and the clear plastic face would not complete fit, so we had to redo that one. The switch on the side is a little dubious but it works. 9 year old boy thought this was the coolest thing ever and wore it around. 12 year old daughter was too cool for it and she wasn't interested in wearing it. Watch face is huge. It's probably not designed for daily use. This was a cool product for us to learn soldering and following simple instructions. Too bad it's retired.
Tech Support Tips/Troubleshooting/Common Issues
Modifying the Example Code
An old archived tutorial briefly explained how to reprogram the BigTime Watch => https://www.sparkfun.com/tutorials/370 . Looking at the Eagle files for the BigTime watch [ https://www.sparkfun.com/products/11734 ], it looks like a majority of the pins are being used to control the 7-segment display. There are some pins available by you would need to solder directly to the Atmega328P for access. The Tx and Rx pins you can also use to send data with an XBee transceiver. The Vcc pin is connected to the battery but not to the FTDI header. I recommend using the 3.3V FTDI [ https://www.sparkfun.com/products/9873 ] and mini-B cable [ https://www.sparkfun.com/products/11301 ]. The tutorial had recommended 5V for the FTDI but the logic levels do not match since the BigTime watch is using 3V coin cell battery while the FTDI is using 5V. Under the"Absolute Maximum Ratings" in the datasheet for the Atmega328P [ http://www.atmel.com/images/atmel-8271-8-bit-avr-microcontroller-atmega48a-48pa-88a-88pa-168a-168pa-328-328p_datasheet_complete.pdf ], it is recommended that the voltage be within +/-0.5V tolerance for the Vcc.
To upload code, make sure to select the “Pro/Pro Mini 3.3V w/Atmega328” board definition. If you need the default example code or other example firmware, they are is located in the GitHub repository [ https://github.com/sparkfun/BigTime/tree/master/Firmware/BigTime ] .
You would need some breakaway header pins [ like these https://www.sparkfun.com/products/116 ] to connect to the header pins on the board. You don't necessarily need to solder to the FTDI pins. Usually by placing a little force against the male header pins and the plated through holes of the boards should work. You do not need a lot of force. Just enough so that the metal contacts are touching sufficiently during upload.
I just finished building the Big Time Watch with my granddaughter and the Simon game with my grandson (11 and 9, respectively). My approach to the soldering part was to show them how by soldering one joint, then watching as they soldered all the rest. The girl is now proficient with soldering, and the boy is nearly as proficient. Both projects worked immediately on completion, and now two grandsons want the watch! Thank you for a couple of excellent through-hole soldering kits. We may soon try reprogramming the Simon. The boy has a fiendish idea for Simon reprogramming.
I may not have this kit, but i can say that it has inspired me to try and make own mobile electronic timepiece. Al tough instead of a simple 7 segment display i went the geekier route and designed a pocket watch variation that displayed in BCD like the binary clocks one can find on gadget stores(if you gonna go techy you might as well go all the way!). Got a design ready and sent to a batch PCB fabrication (bring on the purple!). Next stop a case and perfecting the code.
Its exciting when you see a existing something like this and think of a way to make one of your very own yet unique in its own way. Thank you very much for the inspiration!
I have one of these, and just realized it is the perfect portable platform for sensors, with its battery and LED display. Could you please, please break out one or two of those unused analog pins in the next version?
How big is the watch? What are the dimensions?
The strap will go around your wrist, probably even your ankle- it's nice and long but can easily be trimmed shorter. The face itself is about 2 inches (50cm) across, and it's about 1/2" (12mm) thick.
I'm a little bit of a noob at GitHub, and when I go into the Firmware folder for BigTime, there's a bunch of different sketches. I'd like to modify my BigTime based on the sketch that's already running on it, but which one of the sketches is it actually running? Thanks for your support!
Great question! Apologies that isn't more clear in the repo- I'll get that fixed. The sketch that comes pre-loaded is here.
Great kit for teaching kids to solder. I picked one up and the Denver Maker Faire and taught my 10 year old to solder with it. My daughter is up next. In the net rev, rotate the band 90 deg so you can see the signature box and so the top it turned the right direction.
Thanks for putting this kit together!
Is this kit available in Red 7-Segment Display?
Sadly, no. You could hack in a red display but I'd recommend against it, as the low forward voltage of the LEDs would cause excessive current drain and kill the battery superfast.
I've put red displays into these with good results. The code has options to increase the blanking interval between scans for different color displays. Because there aren't true resistors on the LEDs you'll be overdriving a red display, but the blanking improves the battery life.
Help, please! Having problems with reprogramming using "FTDI basic". Arduino IDE compiles the code and starts uploading, but fails after a couple of seconds with:
What am I doing wrong? (I have one of the older versions of the kit, but it's Atmega328p as well. I don't remove the battery for reprogramming... should I? )
What board do you have selected in the Arduino IDE? You should have the "Pro/Pro Mini 3.3V w/Atmega328" option selected.
Also, you definitely need the battery connected. The power supply from the FTDI connection isn't connected on the board, to avoid accidentally shorting the battery to the USB supply.
Thanks for the reply, actually it did reprogram despite the error message. As I tried the original firmware I didn't notice that. (I was testing the FTDI adapter.) And yet it gives me an error message each time I click "Upload"...
Went together with no problem. Looking at ways to re-program.
Fun kit I assembled at the NoCo maker faire. However I think the acrylic is a bit large, it would make for a better geeky watch if the casing was the same shape as the board I feel.
Very nice, easy to build. However the acrylic parts, especially the one with the cut for the "push-button" presser, is extremely weak. It lasted ... 1 day ! Too weak in a place were it broke down easily. No particular stress. Everything is nice now but there is no anymore the possibility to press the pushbutton. I'm trying to glue it but I really think will not work. Two questions .. there is a way to have that part in another material stronger ? Like aluminum for example ? Or at least is possible to order a replacement ?
Oooooo. The band looks really nice now. Which, besides a few little things with the acrylic, is probably the only thing that bothered me with the previous versions. Thanks again all you smart people over in Colorado!