- Home
- Product Categories
- Raspberry Pi
- Raspberry Pi Display Module - 4.3" Touchscreen LCD

Raspberry Pi Display Module - 4.3" Touchscreen LCD
Most widgets could benefit from a shiny touchscreen interface. Unfortunately, it's usually not easy to hook up a touchscreen and driving a display is often too taxing on your controller. 4D Systems has solved this problem by creating a series of touchscreens with on-board controllers then combining them with adapters for popular platforms like Raspberry Pi and Arduino!
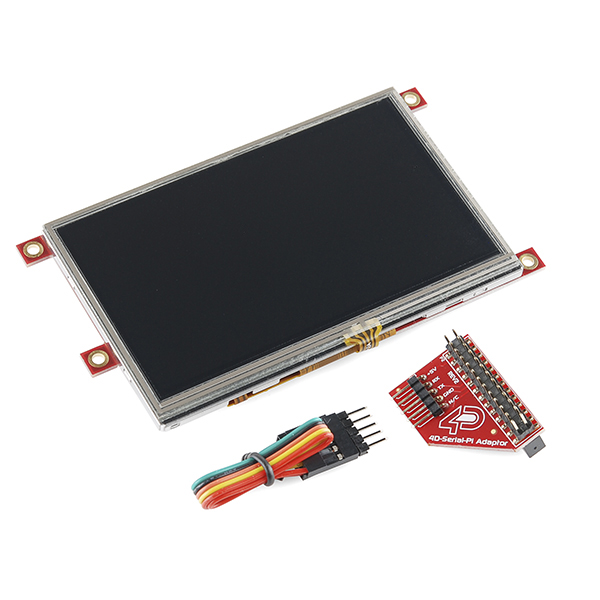
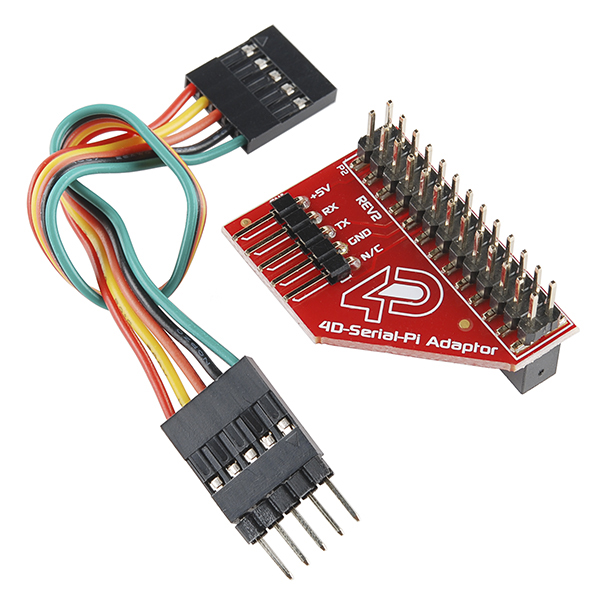
The Raspberry Pi Display Module Pack includes a uLCD-43-PT 4.3" LCD Display with Resistive Touch, a 4D Pi Adapter and 5 way interface cable. It customizes the uLCD-43-PT Display specifically for interfacing with the Raspberry Pi, to provide a quick and easy interface without any wiring hassles.
The RPi Display Kit lets you quickly connect the 4D Pi Adapter Shield to your Raspberry Pi, connect the 5 way cable between the Adapter and the Display Module, and be connected in seconds to start programming. There's even a comprehensive library written to communicate with the Raspberry Pi, allowing Visi-Genie (A serial-based interface design tool) events to be easily understood by the Raspberry Pi and user code.
Like the other displays from 4D Systems you will need a USB Serial adapter to program this module. Unfortunately, our FTDI Basic Breakout won't work. Check the Recommended Items section below for 4D Systems' µUSB-PA5.
Note: This is not a monitor for the Raspberry Pi, it is an LCD module that requires programming.
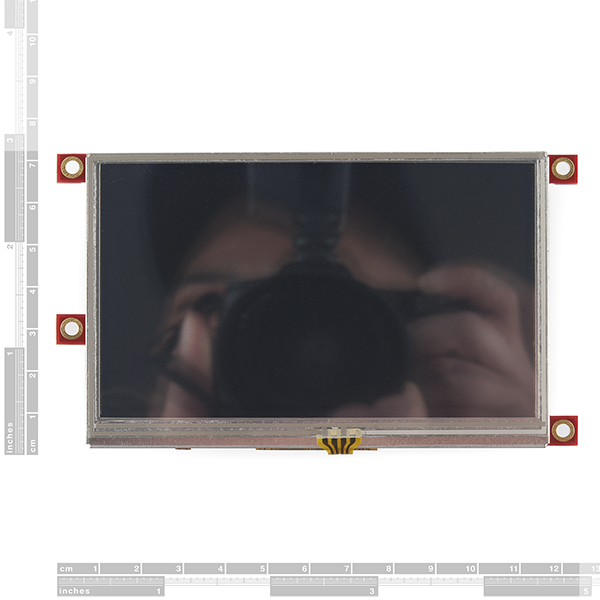
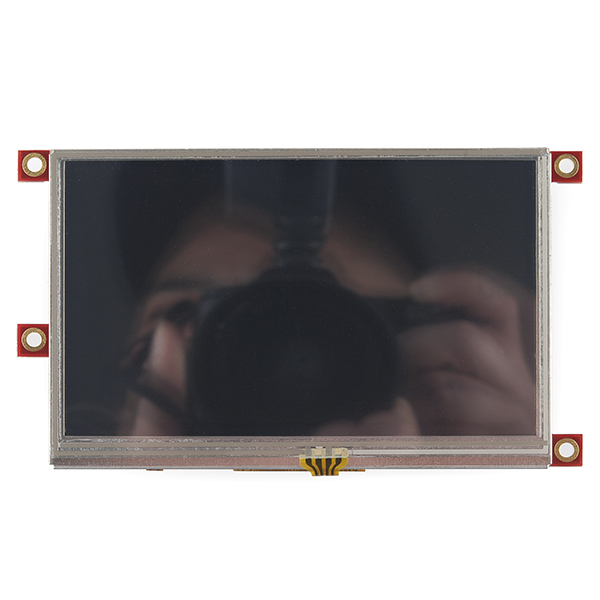
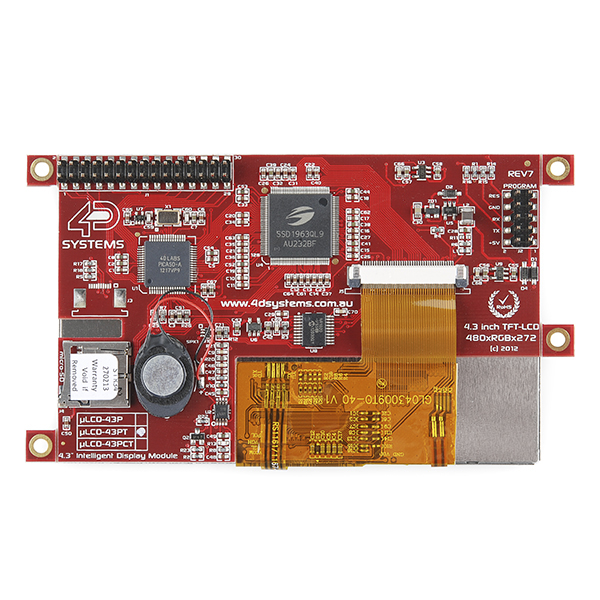
- uLCD-43-PT Display Module with Resistive Touch
- 4D Pi Adapter Shield
- 5 way ribbon cable (this is not the Programming Cable)
- Display Module powered directly off the Raspberry Pi's 5V bus
- Serial commands from the Raspberry Pi
- Comprehensive Raspberry Pi Libraries (For Serial or ViSi-Genie)
Raspberry Pi Display Module - 4.3" Touchscreen LCD Product Help and Resources
How to Run a Raspberry Pi Program on Startup
September 18, 2018
In this tutorial, we look at various methods for running a script or program automatically whenever your Raspberry Pi (or other Linux computer) boots up.
Python Programming Tutorial: Getting Started with the Raspberry Pi
June 27, 2018
This guide will show you how to write programs on your Raspberry Pi using Python to control hardware.
Core Skill: Programming
If a board needs code or communicates somehow, you're going to need to know how to program or interface with it. The programming skill is all about communication and code.
Skill Level: Rookie - You will need a better fundamental understand of what code is, and how it works. You will be using beginner-level software and development tools like Arduino. You will be dealing directly with code, but numerous examples and libraries are available. Sensors or shields will communicate with serial or TTL.
See all skill levels
Core Skill: Electrical Prototyping
If it requires power, you need to know how much, what all the pins do, and how to hook it up. You may need to reference datasheets, schematics, and know the ins and outs of electronics.
Skill Level: Rookie - You may be required to know a bit more about the component, such as orientation, or how to hook it up, in addition to power requirements. You will need to understand polarized components.
See all skill levels
Comments
Looking for answers to technical questions?
We welcome your comments and suggestions below. However, if you are looking for solutions to technical questions please see our Technical Assistance page.
Customer Reviews
1 out of 5
Based on 1 ratings:
2 of 2 found this helpful:
Doesn't work
And the reply from Sparkfun was to contact 4D Sparkfun wiping hands clean ... awesome!
Hi, I've contacted you directly via email. Hopefully we can help sort this out with your module. Thanks
Resistive touch is so 20th century... :/
Resolution: 480x272 for the uLCD-43 by the way
I had a hard time getting the calculator demo to work. The demo project was set up for 9600 baud and I could not get communication until I set the projects baud to 115200.
Is it possible to hook up two of these to one RPi?
It might be doable if you use a USB to UART adapter and plug the second displays interface into that.
Annoying gotcha alert: if you intend to use any of the GUI design tools or modify the programming of the board (which is the whole point) you need one of these adapters
I will try to use one .. I like Resolution
Is this using a Sharp LQ043 series display? I have one that I really need a driver board for, this board would be perfect if I can get one sans the display!
Arduino, or RPi... Ugh.. Why do you make us choose?!? What if I want to buy the screen separately and hook it to a basic stamp, or my microwave oven?! PLEASE sell these screens separately from the adapter boards so we can buy 2 adapters and one screen, or two screens, and one adapter, etc....
Also.. How about a nice case for a screen mounted on an arduino or RPi, making a nice project box for a "final" project??
Mouser sells the Arduino shield (971-ARDUINOADPTRSHLD) and RPi adapter (971-4DSERIALPIADPTR) separately if you need them. They are inexpensive because they only pickup power and the serial port (4 wires) ... everything else resides on the display module.
The adapter shield actually holds the programming. 4D designed it that way, not Sparkfun. Take a look at the images. It even looks like it has a microSD card slot. Interesting. Brief doc says you can store multimedia on it for animations and such, or for things such as data logging.
Actually, the programming is held on the board behind the screen. All the adapter shield does it break out the pins on the back to the Arduino or RPi footprint. Technically, the RPi and Arduino shield can be interchanged if you're willing to do some wiring.
@CrazyCreator - have you seen any examples of how to rewire the RPi to Arduino Adapter. In light of Arduino Kit availability - might be a good fit.
Gaver
In any way does this has the ability to act as a screen for RPi, I mean shows the OS GUI?
I wish someone would figure out how to do this, and write a tutorial.
It could be, in a sense. You can't see the GUI, however by default, the Raspbian kernel enables command line output over the serial interface at 115200 baud. I have connected the serial lines to a BlueSmiRF silver and opened a serial terminal on my laptop, I must say it's really quite cool. I suppose you could program the screen to act as a simple serial terminal and it would work.
I was wondering the same thing.