- Home
- Product Categories
- Kits
- SparkFun Binary Blaster Kit

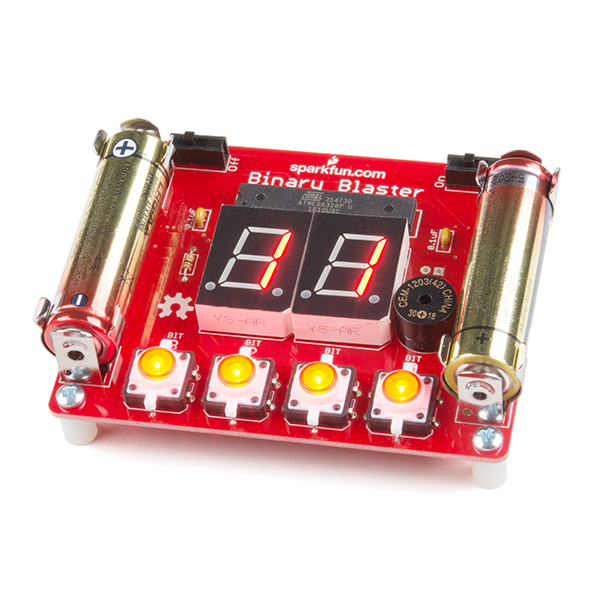
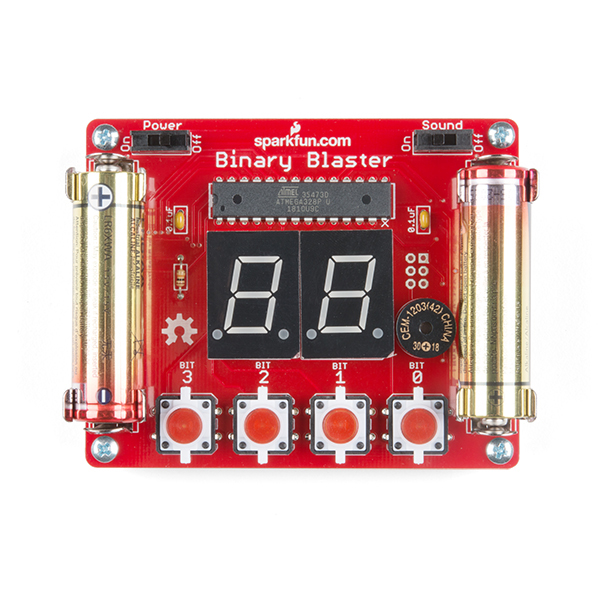
Binary Blaster is a game designed to help teach what binary numbers are and how to convert from decimal (and hexadecimal) to binary quickly. The game displays a value on the dual 7-segment displays, and the player is challenged to press the buttons in a way that represents the binary equivalent. Pressing a specific button allows a player to “set” that bit while leaving a button alone leaves the bit “clear”. There are four buttons on the Binary Blaster, each one represents a bit giving the player 15 different binary number possibilities. If the player gets all 15 correct, they win! Additionally, each blaster also displays a time score after each game, giving the player the ability to keep track of their fastest speed and practice to get even faster!
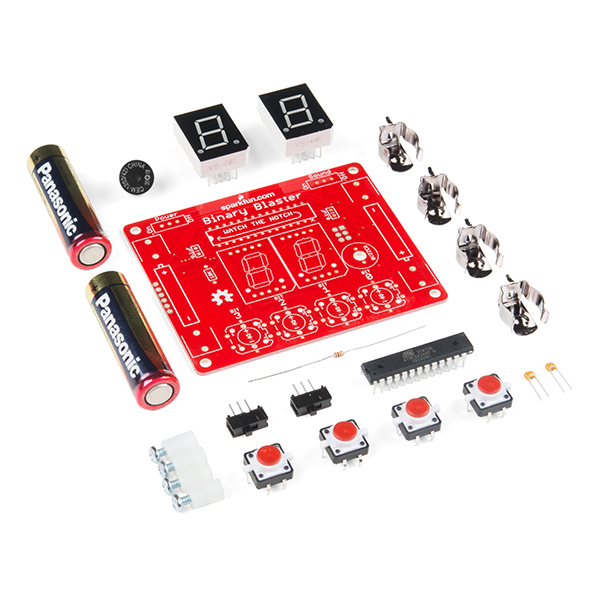
Each Binary Blaster comes as an easy to assemble PTH soldering kit, and it’s up to you to solder it all together! If you’re new to soldering and looking to learn about the wonderful world of binary, then the Binary Blaster Kit is a great place to start!
- 1x Binary Blaster PCB
- 1x Programmed ATMEGA328
- 1x PTH Buzzer
- 1x Resistor - 10K
- 2x Capacitor - 0.1uF
- 2x 7-Segment Red LED
- 2x Mini Power Switch
- 2x AA Battery
- 4x AA Battery Holder
- 4x LED Tactile Button - Red
- 4x Phillips Machine Screw - 4-40, 3/8"
- 4x Nylon Standoff - 4-40, 3/8"
- Schematic
- Eagle Files
- Datasheet (ATMEGA328)
- Assembly Guide (Assembly Instructions & How to Play)
- GitHub (Design Files & Example Code)
- Product Video
SparkFun Binary Blaster Kit Product Help and Resources
Binary Blaster Assembly Guide
March 13, 2014
Learn how to assemble and play the Binary Blaster Game from SparkFun Electronics.
Core Skill: Soldering
This skill defines how difficult the soldering is on a particular product. It might be a couple simple solder joints, or require special reflow tools.
Skill Level: Rookie - The number of pins increases, and you will have to determine polarity of components and some of the components might be a bit trickier or close together. You might need solder wick or flux.
See all skill levels
Core Skill: DIY
Whether it's for assembling a kit, hacking an enclosure, or creating your own parts; the DIY skill is all about knowing how to use tools and the techniques associated with them.
Skill Level: Noob - Basic assembly is required. You may need to provide your own basic tools like a screwdriver, hammer or scissors. Power tools or custom parts are not required. Instructions will be included and easy to follow. Sewing may be required, but only with included patterns.
See all skill levels
Core Skill: Electrical Prototyping
If it requires power, you need to know how much, what all the pins do, and how to hook it up. You may need to reference datasheets, schematics, and know the ins and outs of electronics.
Skill Level: Rookie - You may be required to know a bit more about the component, such as orientation, or how to hook it up, in addition to power requirements. You will need to understand polarized components.
See all skill levels
Comments
Looking for answers to technical questions?
We welcome your comments and suggestions below. However, if you are looking for solutions to technical questions please see our Technical Assistance page.
Customer Reviews
4.8 out of 5
Based on 5 ratings:
1 of 1 found this helpful:
Great Learning Experience - Fun to boot!
Had a great time learning to solder, and helps me learn binary and hex :)
Great intro item.
Simple kit and straight forward. Took no longer than an hours to complete. Designed as an intro to soldering, though it would be interesting to see a breakdown on how the circuit actually works.
Amazing project for starters
Binary blaster is a great project for kids who are learning soldering. It teaches you binary to decimal conversion as well.
Great solder practice and becomes a toy!
Built this kit to freshen up some old skills. Great build and turned into something fun for the kids to play with to boot.
One minor nit: all of the buttons had at least one lead that was bent because they were all jumbled up in a bag. Everything works, just something to check on if you end up buying this kit.
Good soldering lesson and works
Learn decimal to binary
This.. erm... Seems a little expensive for what it is.
Edit: SF just reduced the price from $39 to $29. I think that is ~much~ more reasonable. Thanks SF!
It's a bit over priced, sourcing all the components from spark fun it's $27.45 (Opting for the more expensive version if once exists such as the ATMega) so they're charging about $12 for the board and development work
Yeah, that's if they were going by their own retail prices. Most likely, they ordered the components wholesale for pennies on the dollar. I really love sparkfun, I know a young business isn't easy to maintain, but some times I disagree with their pricing policies.
To be fair, they also had to flash the firmware and bootloader. It does have the Arduino bootloader installed, after all.
The Atmega I included already is configured for Arduino with Optiboot for UNO, not to mention most big distributers will allow you to order chips preprogrammed with what ever you'd like
I tend to agree. It's a Simon with two 7 segment LEDs. It costs nearly $15 more than the Simon. Which itself is a little steep.
The Simon has the custom buttons and surrounding bezel. I would expect that to raise the cost of the Simon kit by a small amount.
Odd.
Can you reprogram it with the FTDI basic breakout?
Sure can! Use the 3.3V logic version, and supply power with batteries. Although, if you have a 5V version, you can change the logic level by changing the solder jumper on the bottom side of the board. Also, we wrote a tutorial on how to reprogram the Simon Says that may be helpful. The hardware is pretty similar, and it has the same bootloader. Good luck!
These LED buttons would make an awesome DIY BCD clock kit! You could use the buttons as a nifty way to set the time in HH:MM:SS format. I submitted the project idea to your team via the Contact Us form last week ;)
Anyone else notice that the numbers always come in the same order on a power cycle?
Thanks for letting us know! This may have been overlooked during beta testing because there wasn't much power cycling going on - just a whole lot of playing rounds! Either way, I wonder if a call to the randomSeed() function on an unused analog pin could help get the first game to be unique.
The shuffle_sequence() function actually proved to be one of the more challenging parts of the code. When I first started writing that function, I looked around a bit to see if anyone else had some "shuffle code" in C++. I found this article, which proved to be quite helpful, but the solutions provided were still quite long and I wasn't sure how well some of the lines would work within Arduino. I ended up using the built in Arduino random function to choose my index for each pull. I guess it turns out the first time you call the Arduino random(), it really isn't that random. It's still interesting to me that the first game sequence is exactly the same on each power cycle. Has anyone else experienced something similar when using the build in random() function?
Thanks for the response :) I haven't looked at the code yet, but it seems at first glance to be a random seed issue. As far as a random sorting algorithm, I wonder if you could try assigning a random number (seeded, of course) from some large range (say 0 to 99; larger than [0, 15] to reduce probability of duplicates) to each of the decimal values 0-15, then sort on their random sorter value (we'll see how this formatting comes out):
I added a randomSeed from A0 (during setup) and it seems to have solved the issue. I've played 5 rounds (each time with a power cycle) and it gave me a new unique order each time! Thanks again for catching this and commenting about it here.
I just committed my revised code to the github repo, so if you have a 3.3V FTDI basic you can upload the latest sketch and try it yourself. We will be pre-programming all of our ICs for the kit to have the latest code, so all future kits should have the correction.
I like your approach for the shuffle, but I have a few questions:
1) Would you store all of this data in one long array? Or would each pairing be it's own two-spot array?
2) Once you've plugged in a new set of random sorterValues, How would you sort them?
3) Does randomly choosing from 99 options (rather than 15) increase the randomness significantly?
Awesome to hear you had success with the randomSeed() call! You can also call randomSeed(millis()) at the start of a new game in cases where you have no unused pins (I use it on my Meggy Jr RGB). This would also work well since Binary Blaster has something analogous to a "startup screen", where the time spent there is indeterminate, and the time between games is indeterminate too.
If I were to implement a random sorter, I would probably do something like what's below (to balance efficiency and readability):
where QuickSort is a standard in-place quick-sort algorithm, with the only modification being that the BinaryValue.sorter value is used in the comparisons instead of the binary value itself.
In answer to your third question, I'm more thinking about getting reasonably far from less interesting cases like sorter = random(2), where two numbers have a higher chance of staying next to each other. I haven't validated the math but if you use random(x + 1), then the chance of two sorter numbers colliding (resulting in the binary values staying next to each other) would be (1 / x)^2, which is asymptotic in its plot. So eventually, for a large value of x, increasing x wouldn't have as much of an effect on randomness.
The datasheet link is a 404.
This is similar to a Picoblaze design project my lab partner, Nathan, and I did at Cal Poly SLO in Winter 2010 for our CPE269 course (Computer Design & Assembly Language Programming). We used a Xilinx FPGA (Spartan 3), with their PIcoblaze processor core, on a Digilent Nexys 2 dev board. We interfaced a Votrax SC-01 speech synth. Nathan came up with the idea of doing a binary code entry game. You would be given a random decimal value and had to use four switches to enter the BCD equivalent value of the number shown on a 7-segment display. Only did numbers between 0 and 9. You would place the switches in the right configuration (up was a 1 and down was a 0) and press a button to check your answer. The speech processor would say the number you entered, then state whether you got it right or wrong, then ask you to enter again if you got it wrong. Three wrong answers in a row would add the phrase "What are you, a business major?" We created a 8bit counter and a 256 byte ROM in the FPGA core using VHDL. The 256 byte ROM contained all of the phonemes for the phrases (lower 6bits were the speech data, bit 7 was set for the very last entry in the phrase). The code would load the address of the beginning of the speech phrase and enable the counter. The Votrax had the ability to self feed itself and clock the counter at its own pace. The very last byte generated an interrupt telling the Picoblaze code to disable the counter and load the address for a silence phoneme. That was a very fun project to do because I got to make use of one of my favorite chips - the Votrax SC-01. I originally tried to use the General Instruments SPO256 that I had found on a board from a thrift shop. But the voice quality on that chip was not as good as the Votrax - which I robbed from an Alien Group Voice Box used on the classic 8bit Atari computers.
Haha, I love the three wrong answers phrase. Thanks for sharing!
Timing out is the only way you can lose Binary Blaster, but three wrong answers is also a good way to go. We liked timeout failure because it allows the player to try many times (within the 4 second window). It also adds an element of urgency to the game. We've been passing it around the tech shop and there's a bit of a competition going for the best time score. There's talk of a double elimination bracket going down some afternoon, but we shall see. I'm definitely game, but I'd like to get at least 8 players.
I'm interested to know more about the voice synth feature in your project. Do you need something as powerful as an FPGA to control it, or would it be possible to use something like the ATMega328? I really like the idea of using a synth voice as user feedback!
I'm thinking of delving into this (i'm starting to get into microcontrollers). Would this be a good intro? I have a decent background in ELECTRICAL systems (I work at a local Power Utility), but not so much on the ELECTRONIC side.
While a fair bit more expensive, I think the SparkFun Inventor's Kit may be more what you'd be looking for, or perhaps a combination of an Arduino (RedBoard) + Danger Shield. Both options give you a wide range of input/output elements and really make it easy to reprogram the microcontroller - all you need is a USB cable and a computer. With this kit, you would require a separate programmer - either one that interfaces with the board, or that can program the IC directly ( in which case you'd want to not solder it directly to the board :) )