
ProtoSnap - E-sewing Kit: Getting Started Guide, Part 2
This is a continuation of the E-Sewing Kit Getting Started Guide, and I will walk you through snapping the components apart and sewing them to your project!
If you need any tips on the SUPER basics of sewing an e-textile circuit -- including threading the needle, thread length, and sewing tips -- check out this tutorial: http://www.sparkfun.com/tutorials/313
If you're ready to go, let's continue!

Requirements
Now that you've seen how the circuit works and what the components do, let's take a look at the rest of your kit. You should have:
- Swatch of screen printed fabric
- Small envelope of needles
- Bobbin of thread
- Coin cell battery
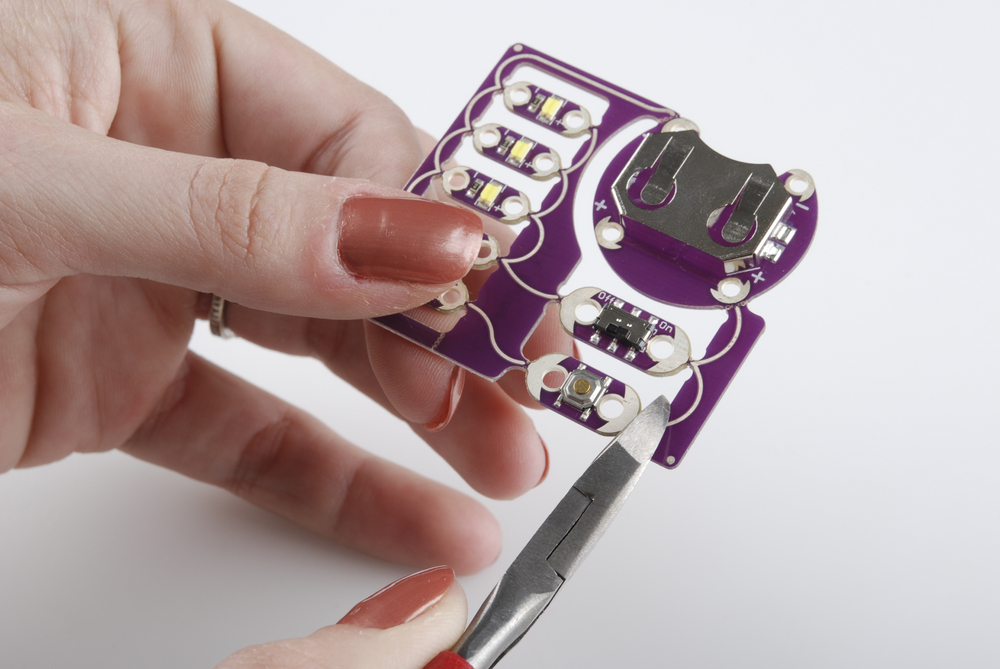
Before you can use these materials to sew down your circuit, you'll have to snap it out of the panel. You can do this by hand, but some of the sew tabs are a little bit delicate. We recommend using a pair of clippers to snap the connections. Feel free to take out any mid-day aggressions with the clippers. It's a very satisfying snap!
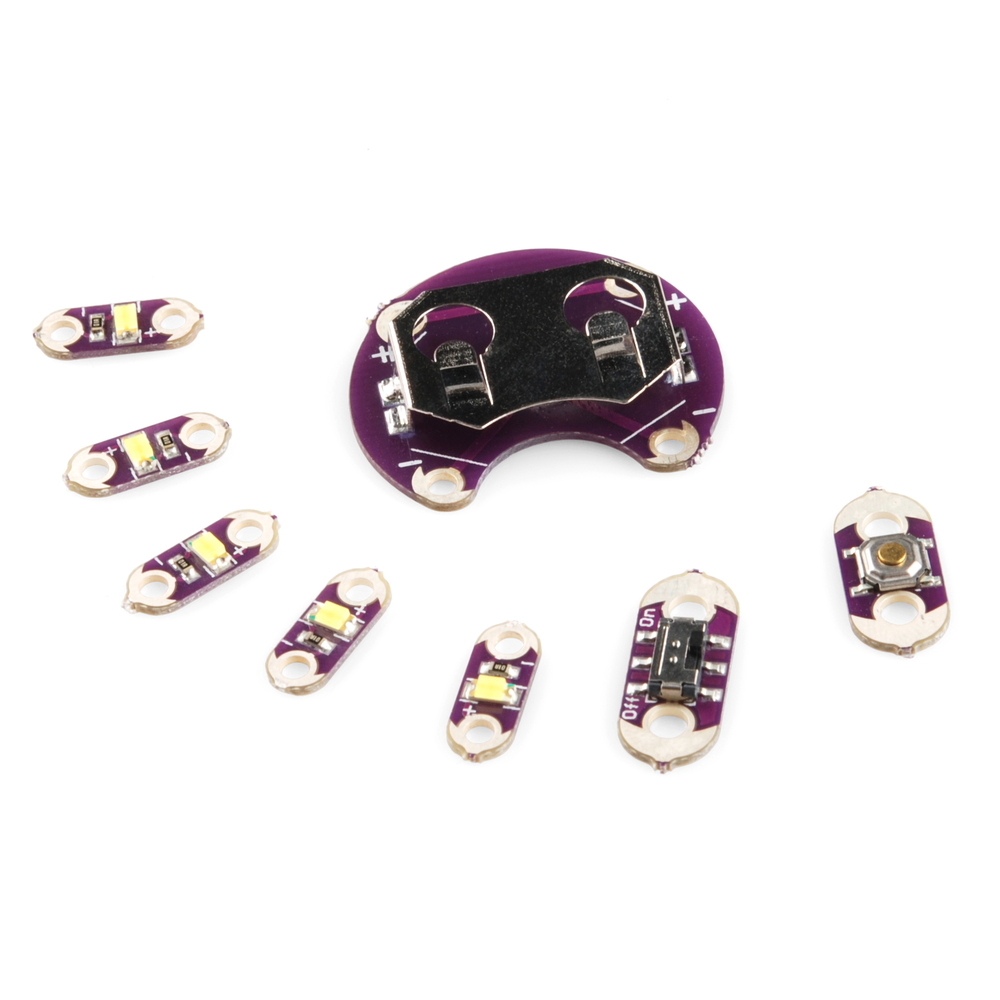
Take a quick inventory to make sure nothing went flying off while you were clipping it. You should still have:
- A battery holder
- 5 LEDs
- A switch
- A push button
Let's Get Sewing
Do you have reading glasses? Go ahead and put those suckers on!
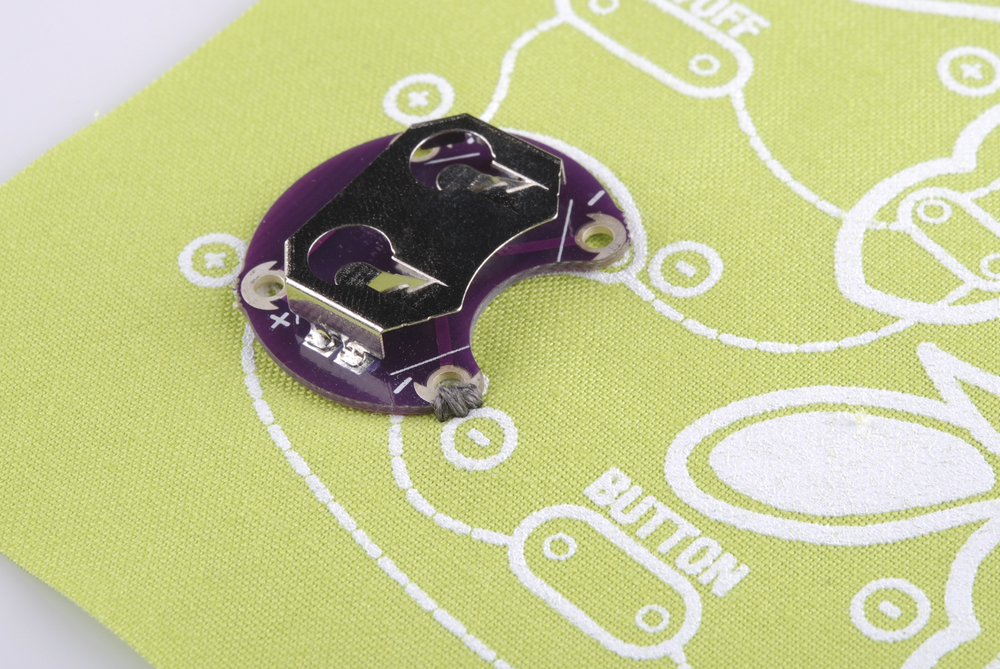
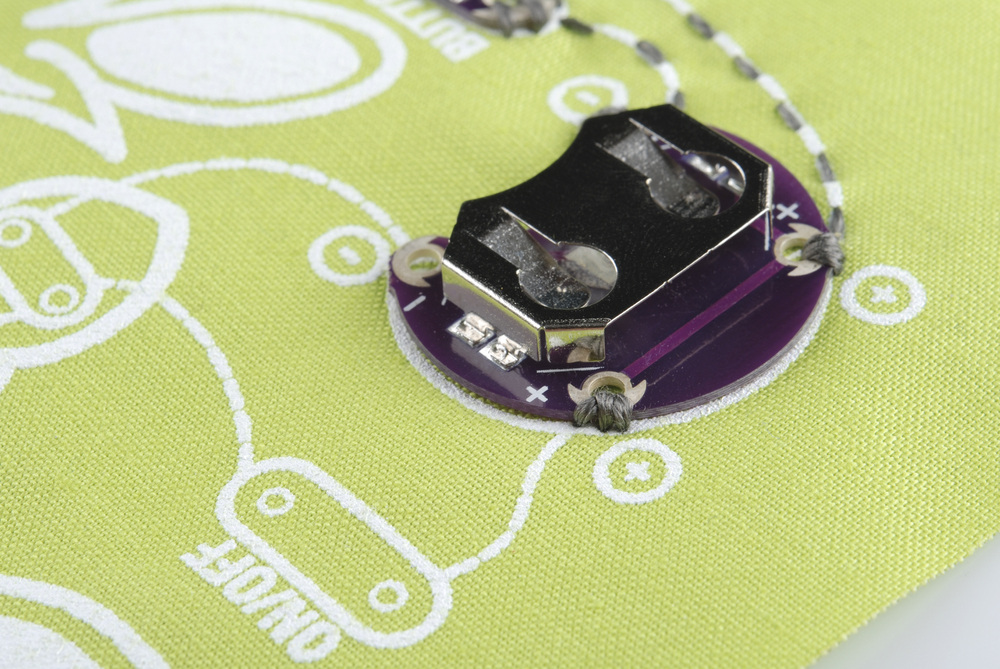
Let's start with the battery, on the negative side. There's a screen printed picture of the battery on your swatch of fabric. Get the battery lined up with that, and sew down the bottom negative hole. You want to loop several stitches up through the hole and back down outside it.
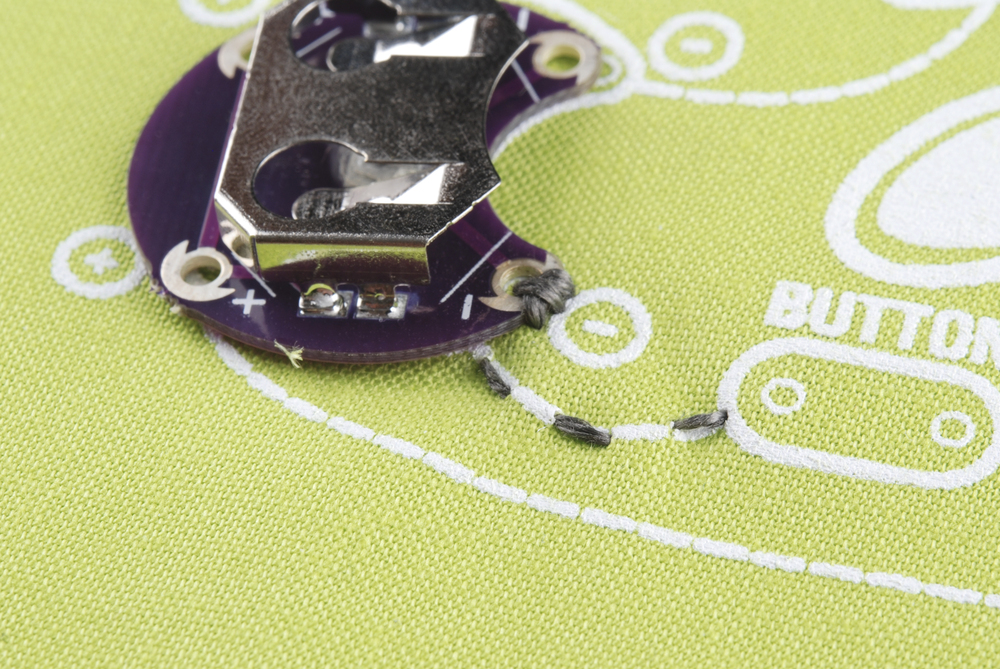
From there, sew a few stitches to the space marked for the button.
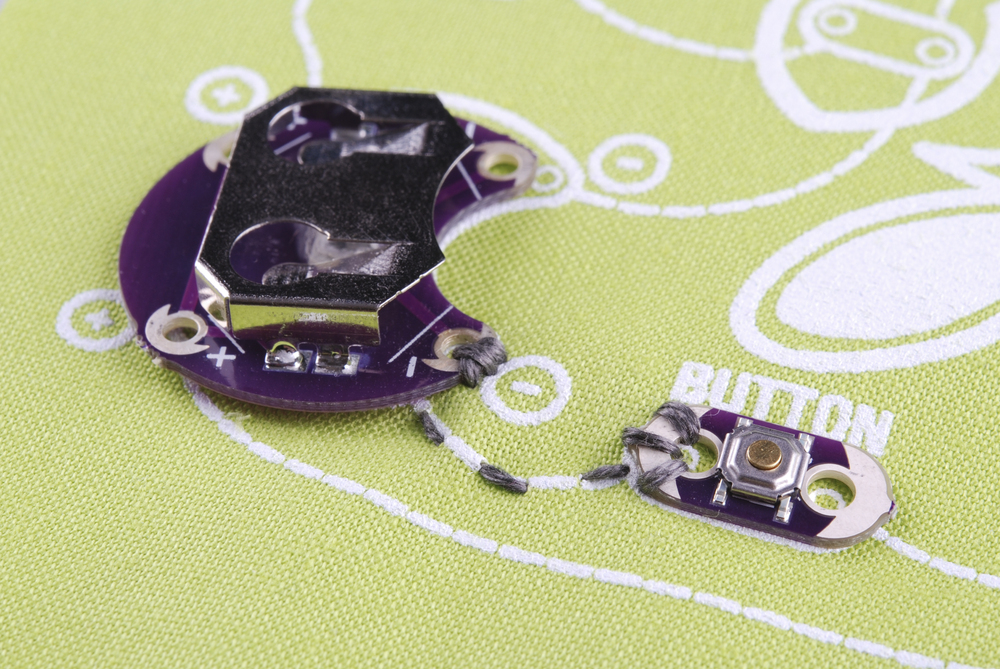
Sew the button down with a few stitches, just like you did with the battery holder.

Then flip the fabric over, tie a knot to secure what you've sewn so far, and cut your thread off. This step is important -- and easy to miss -- but without it, your button won't do anything!
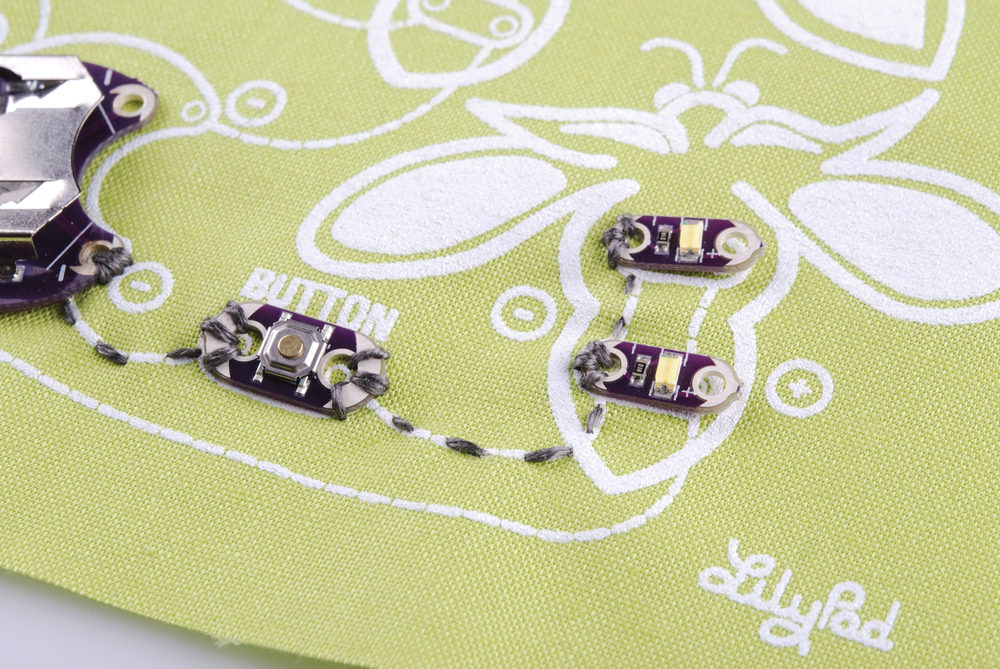
Re-knot your thread and sew down the other side of the button. Then, sew a few stitches to where the first LED goes, and sew down the negative side. This is where your reading glasses come in. I know that the + and – on these things are TINY, but it's important that you make sure you're sewing down the negative side. Once that's attached, go ahead and stitch up to the negative side of the second LED and sew that down as well.
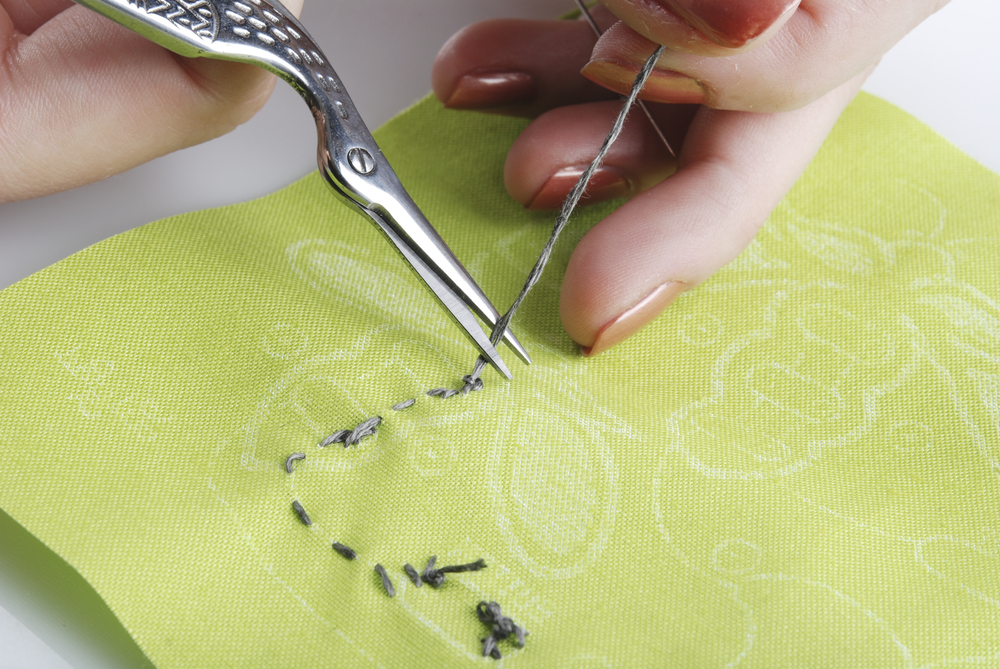
Once again, flip over your fabric, knot the thread, and cut it off. While you're over here, make sure that the traces on the two sides of the button don't touch. If they do, shorten the tails of your thread and cut any stitches connecting them.

Re-knot your thread and sew down the positive sides of the LEDs the same way you did the negative sides.
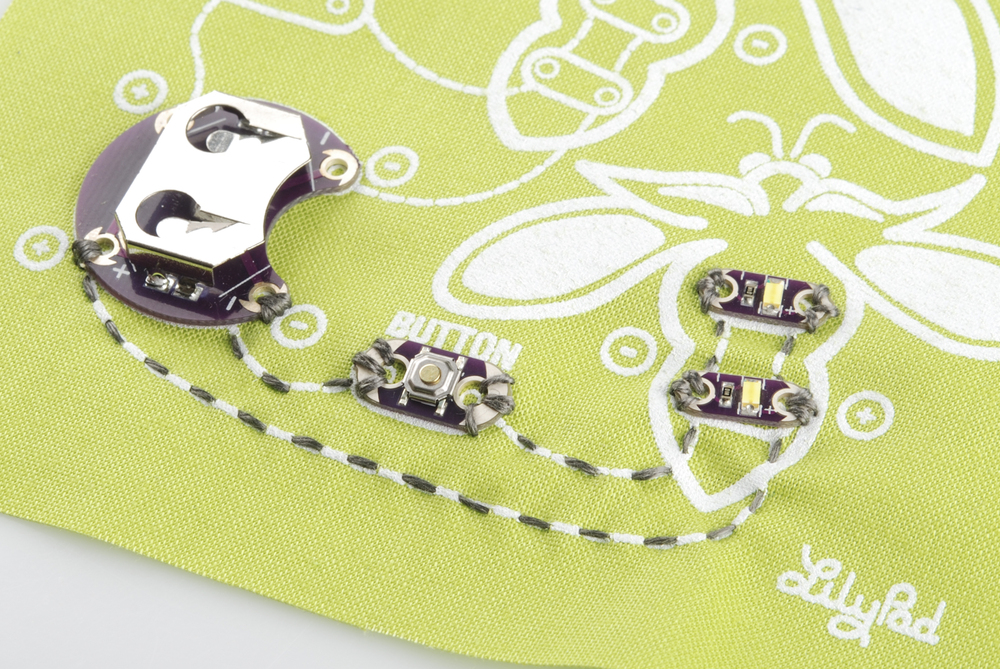
Sew along the white line from the LEDs back to the positive sew-tab on the battery, and sew it down with a few stitches. Tie a knot, cut your thread, and that's one side done! If you'd like, you can go ahead and put the battery in (words facing up), and push the button. Both lights should illuminate. If they do, feel a cool rush of exhilaration blow your hair back. If they don't, double check that there is no thread touching across the positive and negative traces -- you should be able to see if there is. If you don't see anything, check that you've tied and cut your thread in the places mentioned above, and that the traces are solid along any path where you were not asked to tie and cut the thread. Take the battery back out before starting the second circuit.
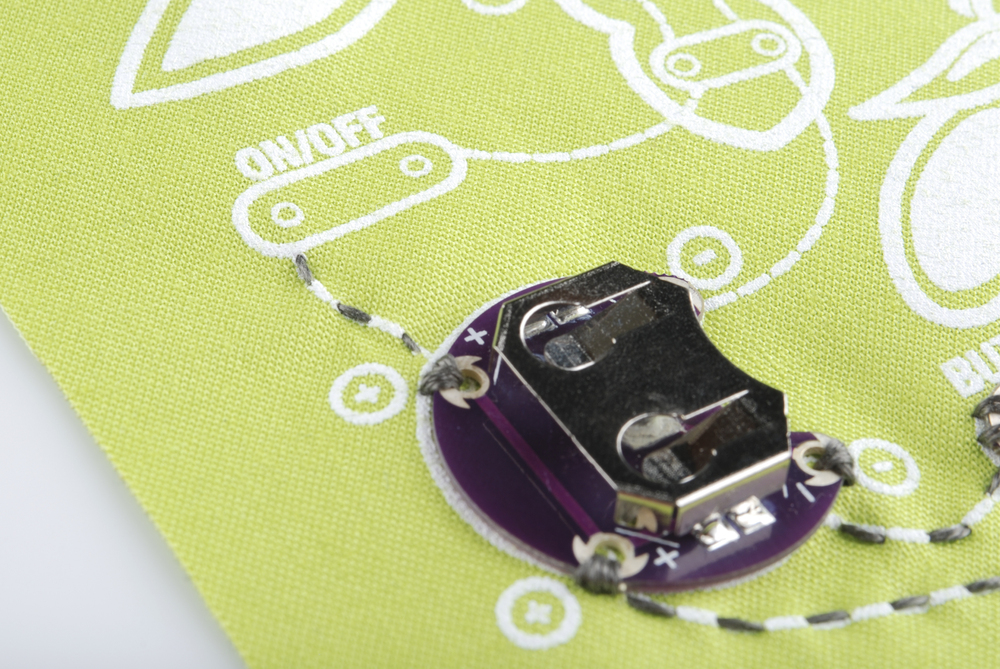
On the second side, begin by sewing down the positive tab of the battery.
Sew a few stitches from here to the first side of the switch print on the fabric. Does this feel familiar? It's because you're now an e-textiles veteran, coming back in for your second circuit, which is awesome!
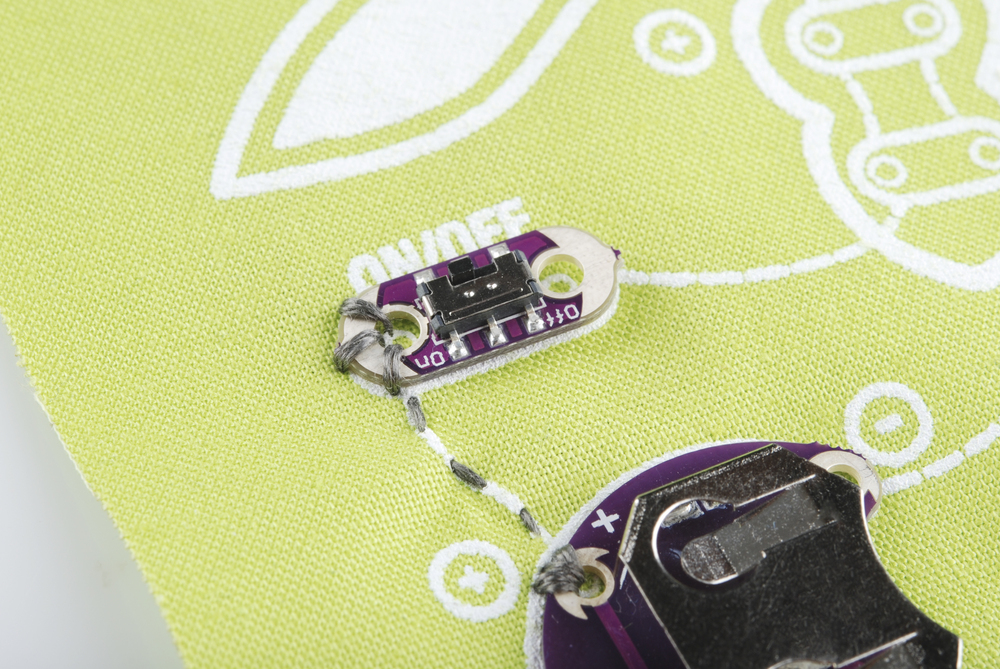
Sew down the first side of the switch with a few stitches.
Once again, tie a knot and cut your thread off, nice and short.
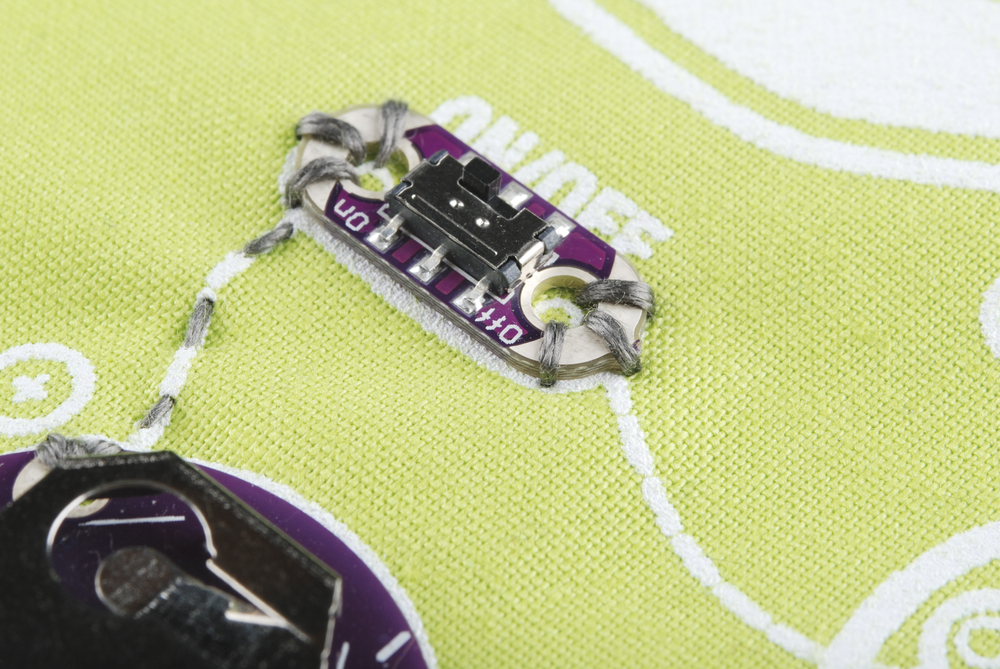
Re-tie your thread and sew down the second half of the switch.
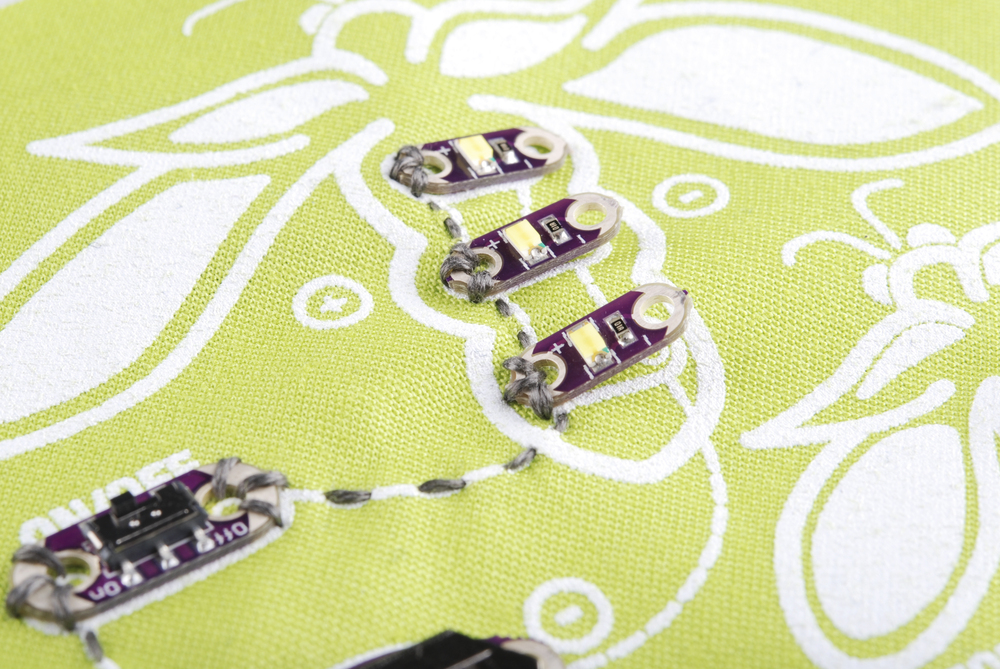
Sew from the second side of the switch to the large firefly, and sew down the positive sides of the LEDs. We did the negative sides first last time, so make sure you don't get mixed up -- look carefully!

When the positive side of all three LEDs is done, knot and cut your thread again.
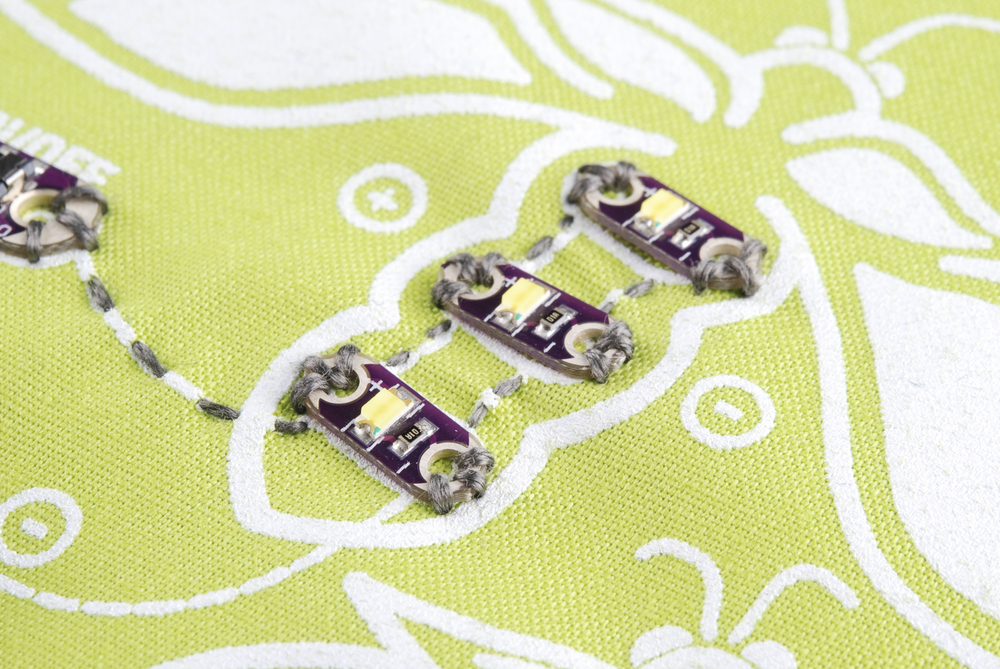
Re-knot your thread and sew all three of the negative sides of the LEDs together. I forgot to get a picture of the last step, but by now you're probably way ahead of me! Follow the negative trace line on the fabric back to the last sew-tab on the battery, and sew the tab down with a few stitches. Knot and cut your thread, put in your battery again, and it should look like this:
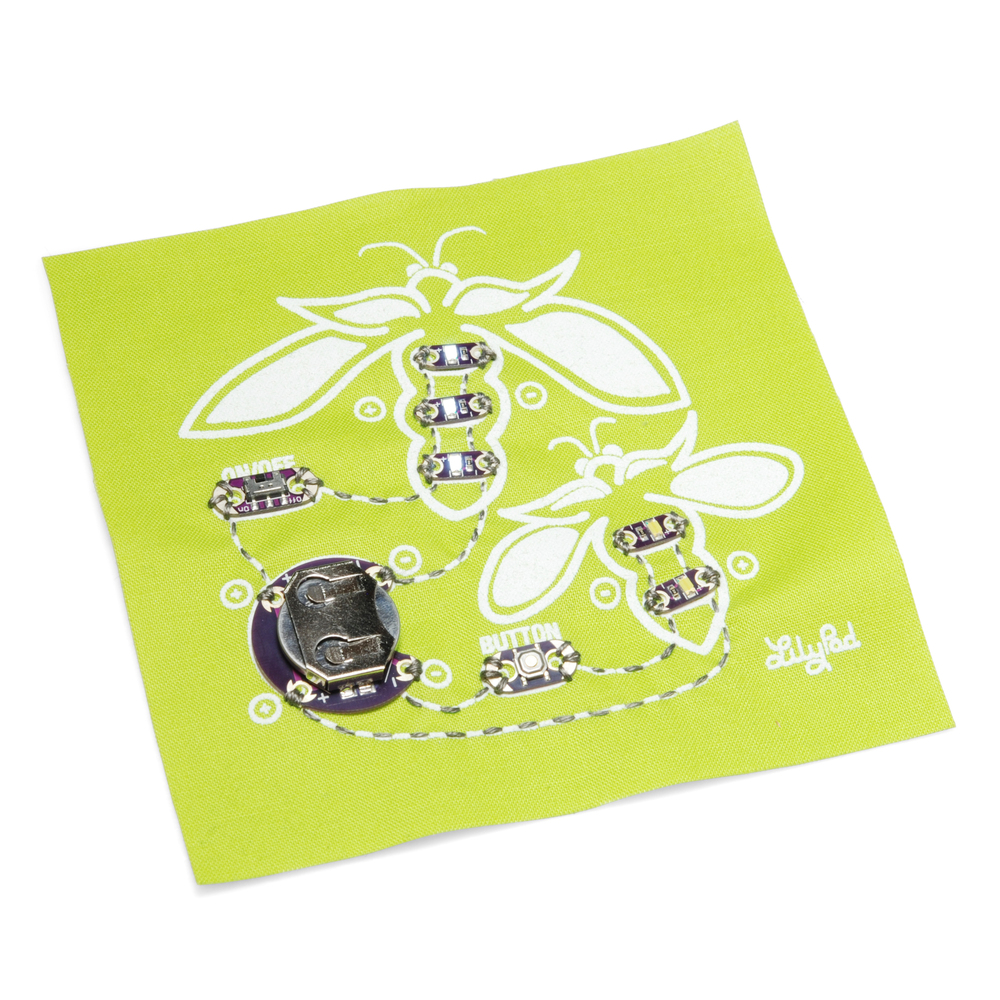
When your switch is turned to 'ON' (the 'on' printed on the purple switch itself, not the 'on' printed on the fabric), the large firefly should be lit up. When you press the button, both fireflies should be lit!

Congratulations! You're done!
Troubleshooting
If anything isn't turning on, go back and look for places where the positive and negative traces touch. This can happen across the LEDs, the battery, or on the lines you've sewn between the fireflies and the battery. It can also happen off-and-on anywhere the thread tails of your knots are long, so clip those short. If either the switch or the button isn't doing anything, you've probably bypassed it. Make sure that one side of the switch isn't in contact with the other side. If the thread on the two sides is touching, that's contact, so clip it short! Still having problems? Make sure you get a picture of both sides of the circuit, and email it to techsupport@sparkfun.com
Resources
Want to try some more advance E-Textiles? Check out these tutorials!
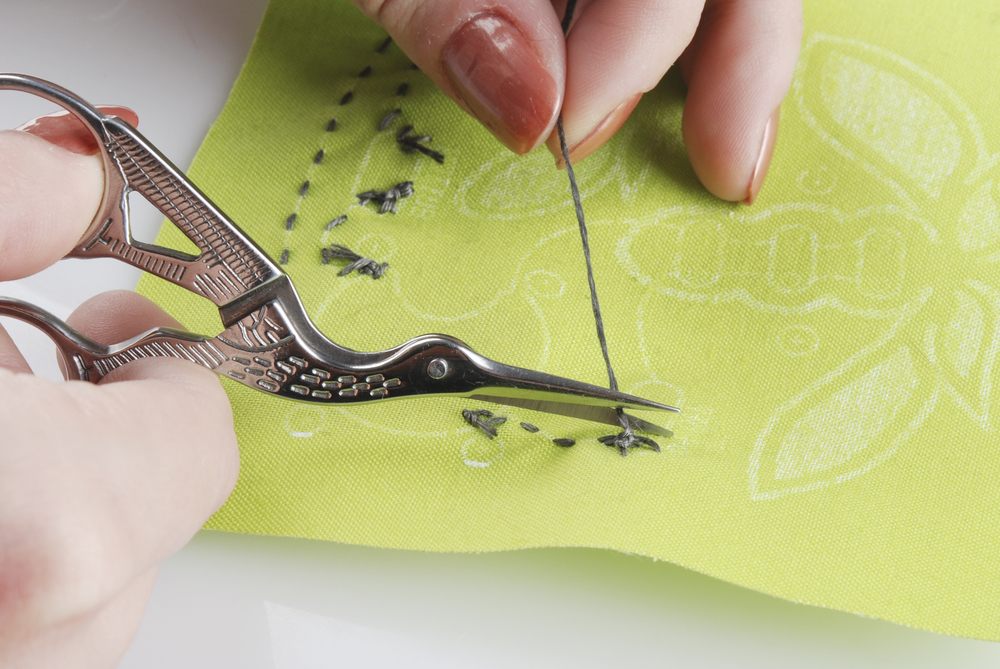
WHERE DID YOU GET THOSE SCISSORS
Aren't they wonderful? You can find them in most craft stores, usually next to BOTH the sewing scissors and the embroidery supplies. They're a pretty traditional style, not too hard to find, also, quite cheap. Mine were less than $10, and a really good set is still totally reasonable: http://www.amazon.com/Gingher-01-005280-Embroidery-Scissors-2-Inch/dp/B000UUCA62/ref=sr_1_9?s=arts-crafts&ie=UTF8&qid=1350077872&sr=1-9&keywords=embroidery+scissors
Dia, if I put all 5 of those LEDs into one circuit, it tends to flicker and go through the battery life extremely quickly (much quicker than the 2.5 hours it calculates out to be expected). Is there a e-Sewing resistor that can be put in the circuit? Or is there something about the distance covered with the amount of thread that needs to be considered? We are just sewing a lighted design into an adult size t-shirt.
I was just wondering, I might have missed this in the other tutorials but does the conductive thread for the circuit have to be continuous? If I sew half-way and run out of thread, is there a way to keep the connection between the thread?
Good question! It does have to be continuous, but if you have to stop mid-trace, it's easy to reconnect! Since the thread is uninsulated, just run the first stitch of the new trace through the last stitch of the old trace, so that the thread is firmly in contact. You can also knot the thread into the old trace if that feels better or more secure to you. So long as new and old are touching, it will work just fine!