
SparkFun Ethernet Shield Quickstart Guide
Equip your Arduino with network/internet connectivity using the SparkFun Ethernet Shield and the powerful Ethernet library!
In this tutorial, we'll cover how to get up and running with the SparkFun Ethernet Shield. Requirements, hardware, assembly, and programming will all be covered. Follow along, and your Arduino should be skimming Twitter and hosting webpages in no time!
Requirements
In addition to the shield, you'll need a few more bits and pieces to get the most out of the SparkFun Ethernet Shield:
Headers (and soldering tools)
Headers provide the shield with a solid, electrical connection to your Arduino. You've got a few options when it comes to headers, but for most shields I recommend the stacking headers. These allow you to plug wires, or even other shields, into the unused Arduino pins.

You will need to solder those headers into your shield. So, if you don't already have one, I'd recommend getting a good, cheap soldering iron, and some solder. A stand wouldn't hurt either, and it might save your carpet. (More on this in the assembly section below).
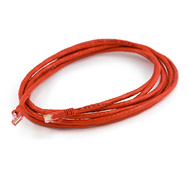
An Ethernet cable
This will interface between your Ethernet Shield's RJ-45 jack and a router or switch. CAT5, CAT6, really anything with a pair of RJ-45 terminations should work. Find a length that works best for you - 1, 3, 5, or 10 feet. Or make your own cable to find your best fit!
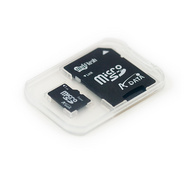
µSD Card (optional)
You'll quickly find that the Ethernet-equipped Arduino sketches use a big chunk of the Arduino's SRAM and flash. If you want to host webpages, or read and store information, a µSD card is a great way to expand upon the Arduino's rather limited memory. You won't need a high-capacity card - 1GB or so will certainly do - though really any SD card you've got lying around should work.
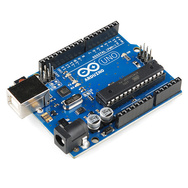
Arduino Development Board
While the Ethernet Shield could work with just about any development platform, it's certainly best suited for Arduinos. If you're looking for an Arduino to pair with this shield, I'd recommend the rock-solid Arduino Uno. Other Arduinos (Mega, Leonardo, Due) should work with the Shield, but you may need a TransmogriShield to move pins around.
Arduino Software
No revelations here, you'll need the Arduino IDE to program the Arduino. Fortunately for us, the IDE comes with a fantastic Ethernet library as well as an SD library. If you don't have the most recent version, you can download it from Arduino's downloads page.

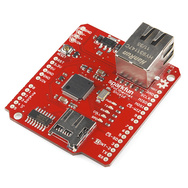
Hardware
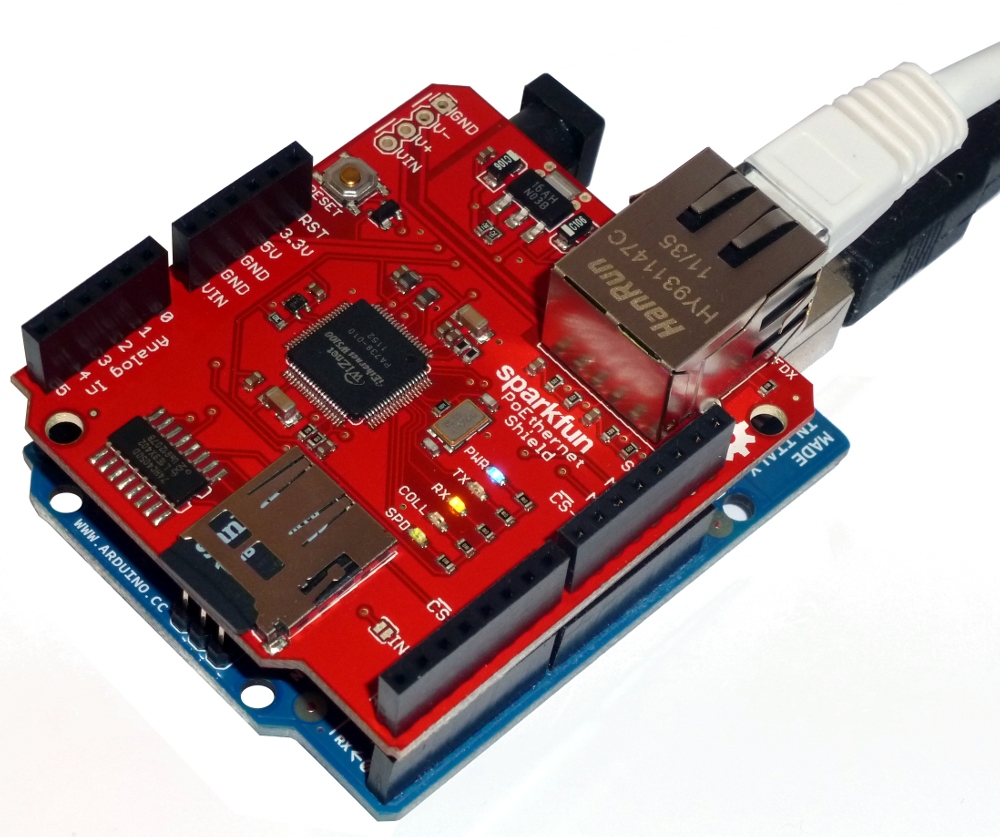
The SparkFun Ethernet Shield is comprised of two stand-out components - a Wiznet W5100 TCP/IP embedded Ethernet controller and a µSD socket.
 The W5100 is a powerful little chip, which implements all sorts of complex network protocols - TCP, UDP, ICMP, IPv4, ARP, IGMP, PPPoE, and the physcial Ethernet layer. This alleviates a lot of programming stress on us and memory stress on the Arduino. All of the communication between the W5100 and the Arduino is SPI-based and handled using the Ethernet library, which we'll discuss in the firmware section below.
 The W5100 is supported by a number of components - capacitors, a crystal, reset monitors - but most especially an Ethernet jack, actually a MagJack. Inside that little RJ-45 jack are a number of transformers and magnetics required for isolating Ethernet signals (you could say this jack is...more than meets the eye). There are even some LEDs poking out the end.
 The µSD socket extends near the edge of the shield, where the card should be inserted. The socket sits next to a 74HC4050 (high-to-low level shifter), which handles all of the 5V-to-3.3V voltage shifting (those delicate µSD cards shouldn't be subjected to 5V signals).
Some of the less spectacular components (don't tell them I said that) on the Ethernet Shield include a reset button, 3.3V regulator, and a number of blinky LEDs. The reset button works just like the one the Arduino itself, though it'll also reset the W5100. The LEDs include a power indicator LED, as well as a number of status LEDs (Ethernet receive/transmit, collision, and speed) tied to the W5100, which will appear to have a mind of their own.
What I'd really like to stress in this section is which pins the shield requires of the Arduino. Here's a table of the six pins used by the shield:
| Arduino Pin | SparkFun Ethernet Shield Pin Function |
| 2 | W5100 - Interrupt output (optional, set with jumper) |
| 4 | SD Card - Chip select |
| 10 | W5100 - Chip select |
| 11 | SD Card and W5100 - MOSI |
| 12 | SD Card and W5100 - MISO |
| 13 | SD Card and W5100 - SPI Clock |
In general you'll want to avoid using the chip-select pins (4 and 10) for anything else. If you have other SPI devices, you should be able to link them up on the same SPI bus (pins 11, 12, and 13).
Pin 2 is actually not used by default on the shield. There's a jumper on the top side of the board if you want to enable the W5100's interrupt output (I don't think the Ethernet shield makes use of this pin regardless, though).
The SparkFun Ethernet Shield, particularly the Wiznet W5100, can be a power-hungry little beast. It's recommended that you use a power supply that can source at least 400mA. Powering the shield over USB will work in most cases, though it wouldn't hurt to power your Arduino via a 9V wall-wart.
The W5100's hunger for power will cause it and the 3.3V regulator to heat up. This is normal, especially when the chip is doing a lot of work. They should never get untouchable hot, but they might get too-hot-to-comfortably-leave-your-finger-on-for-extended-periods hot.
Assembly
There's really just one step in this section: soldering!
If you've never soldered before, that's OK! This is actually a perfect place to start - all of the solder points are through-hole and well-spaced. However, I'd really recommend checking out our soldering crash course first. Read the guide, watch the video, and you'll pick up some good tips that will help your first soldering experience go more smoothly.
There are four headers to solder. The real challenge in soldering these headers is getting them straight and aligned with eachother and the mating Arduino headers.
Insert the headers through the top-side of the Ethernet Shield board so the extra-long pins extend out the bottom. I like to insert all four of my headers before soldering any of them. When plugging them in, make sure the 6-pin headers go into the 6-pin holes and the 8-pin headers to the 8-pin holes.
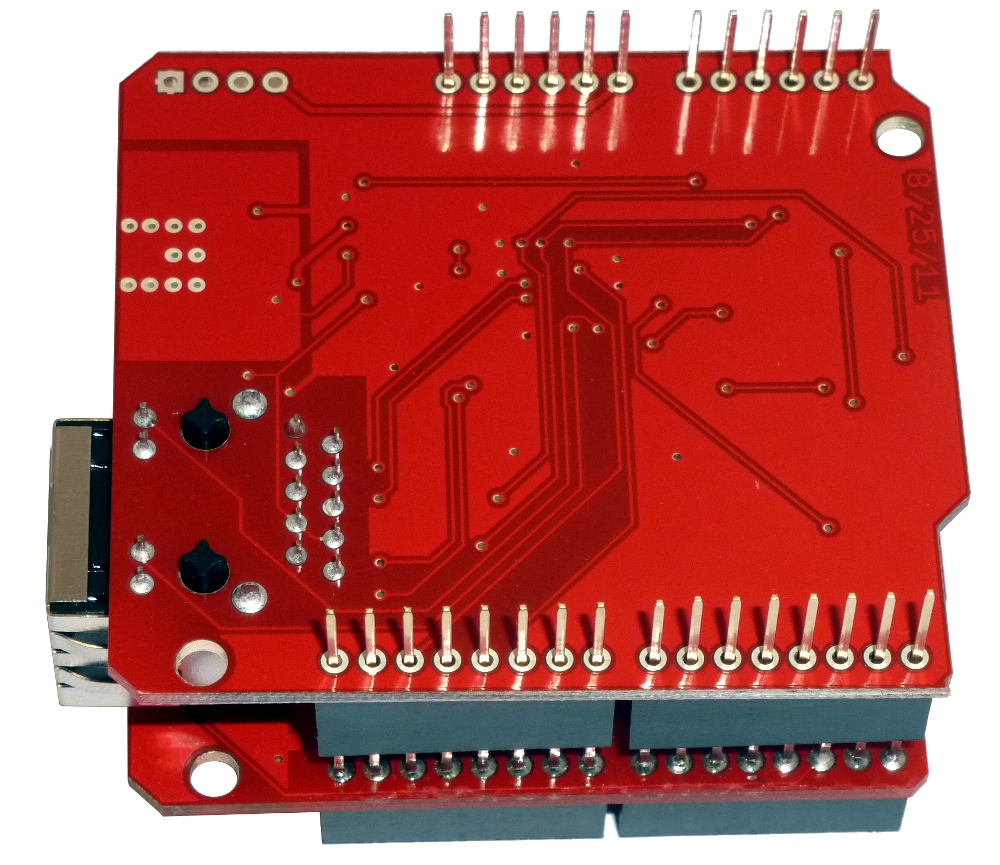
Now, flip the board over, and solder all 28 connections. Try to keep the header pins extending from the bottom of the shield as perpendicular to the PCB as possible. If you have another shield, it does a great job holding those headers straight (like in the above picture).
Once the shield is soldered, feel free to plug it into the Arduino. Make sure none of the pins bend and they all go into their mating Arduino pins.
You can also plug a µSD card and Ethernet cable into the Ethernet Shield. The µSD card goes into the shiny little socket on the end of the board; insert it so that the card's logo is facing up. Plug one in, and feel that satisfying, locking click.
You'll also need to plug that Ethernet cable to something on the other end. It could be an RJ-45 wall-jack, an Ethernet switch, router, or an ad-hoc something-or-other.
Finally, once you've gotten all of that plugged in, power up the Arduino. You should be able to power it off the USB cable. And, with that, you should see some blinkies! The PWR LED should illuminate for sure. You may also see the SPD, and RX/TX light up/blink too. Also look for the green and yellow LEDs on the magjack to light up as well.
Time to upload some code to the Arduino!
Firmware
The examples in this section will all make use of the Arduino Ethernet library. This library comes with Arduino, so no downloading or installing required. I'd encourage you to check out all of the example sketches for the Ethernet library. Go to File -> Examples -> Ethernet -> and pick a sketch to check out, most should work without any modification.
The Ethernet library allows the Arduino to turn into one of two Ethernet devices: a client or a server. Turning your Arduino into client allows you to connect to and request data from servers. For example, your client could make an http request to Twitter, and search for a tweet. Let's discuss a client example first.
Ethernet Client
Load up the TwitterClient example in the File -> Examples -> Ethernet menu. This is my go-to example for making sure my Ethernet Shield is working. This example connects to Twitter and uses its API to search for "arduino". It displays the results in the Serial Monitor.
There are a few functions and variable declarations I'd like to point out in this example. First, near the top, we declare an array named mac, and an IPAddres named ip:
byte mac[] = {  0x00, 0xAA, 0xBB, 0xCC, 0xDE, 0x01 };
IPAddress ip(192,168,1,20);

// initialize the library instance:
EthernetClient client;
...
char serverName[] = "api.twitter.com";  // twitter URL
That mac variable is what will become the MAC address of your Arduino - a 6-byte value, which should be unique to a network, and represents the physical network address of your device. Every Arduino Ethernet sketch will need to declare a MAC address. These are declared as an array of bytes (in this example the MAC address becomes 00-AA-BB-CC-DE-01) but I'd encourage you to create your own MAC. Just remember it's a hex value, so only use 0-9 and A-F, and it must be six bytes.
The ip variable declares a static IP address for your Arduino. The value above would set the static IP address of the Arduino to 192.168.1.20. You may have to change this value, depending on your network subnet and gateway addresses. Also know that this variable is optional. Hopefully you don't even have to use it. The Ethernet library has DHCP functionality, which means your Arduino can be assigned a dynamic IP by a DHCP server. This is great for client sketches where knowing our IP doesn't matter as much.
Finally, we make a call to the EthernetClient class to create an instance named client. The client object is going to be widely used through the rest of this sketch - whenever we want to connect to a server or send/receive data.
Finally, the serverName string is set to the Twitter URL. The Ethernet library has DNS built in, so you don't have to seek out IP addresses if you don't want to! This string will be used later, when we attempt to connect to Twitter.
Next let's look inside the setup() function, where you'll see this:
  if (!Ethernet.begin(mac)) {
    // if DHCP fails, start with a hard-coded address:
    Serial.println("failed to get an IP address using DHCP, trying manually");
    Ethernet.begin(mac, ip);
  }
Ethernet.begin() should be called in every Ethernet sketch. It's used to initialize the Ethernet library as well as the network settings on your Arduino. Notice that there are two different calls to Ethernet.begin(). The first call puts solely the MAC address as a parameter. This version of begin attempts to grab a dynamic IP address from a DHCP server. If that fails, it tries to connect using the static IP defined earlier.
Finally, check out the connectToServer() function:
void connectToServer() {
  // attempt to connect, and wait a millisecond:
  Serial.println("connecting to server...");
  if (client.connect(serverName, 80)) {
    Serial.println("making HTTP request...");
    // make HTTP GET request to twitter:
    client.println("GET /1/statuses/user_timeline.xml?screen_name=arduino&count=1 HTTP/1.1");
    client.println("HOST: api.twitter.com");
    client.println();
  }
  // note the time of this connect attempt:
  lastAttemptTime = millis();
}
This function uses the client.connect() to attempt to connect to Twitter's API on the TCP port (80). Following that, it makes an HTTP GET request to the server asking for at an address of api.twitter.com/1/statuses/user_timeline.xml?screen_name=arduino&count=1. For more info on what that means check out the Twitter's API Documentation. Basically, we're seeking out the timeline of @arduino, and looking at the single most recent tweet they've sent. You could even look at other user's timelines by replacing arduino with sparkfun or whatever your favorite twitter stream may be.
Finally, in the loop, assuming the Arduino connected to the twitter server, we'll read in the HTTP data returned. Much of the loop is devoted to parsing the returned data, so we end up with something like this if we peer into the Serial Monitor:
Attempting to get an IP address using DHCP:
My address:192.168.20.53
connecting to server...
making HTTP request...
>@aoqassam nice :)
My address:192.168.20.53
connecting to server...
making HTTP request...
>@aoqassam nice :)
Go have some fun with Twitter, or learn how to setup your Arduino as a server next.
Ethernet Server
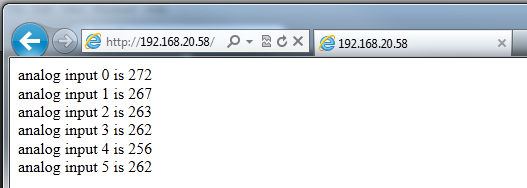
Another great example included with Arduino's Ethernet library is WebServer. Find it under File -> Examples -> Ethernet. This sketch sets up the Arduino as a server device, and hosts up a webpage whenever a client connects to it. The webpage is simple - it shows the status of the analog pins - ,but it goes a long way to showing what can be done.
At the top are some familiar variable definitions - mac and ip. The IP address definition becomes much more important in this case, because you'll need to know the IP address when pointing your browser to the Arduino. You may need to modify the ip variable to conform with your network's gateway. The default 192.168.1.177 will work for networks gateways like the common 192.168.1.0, but it may need to be modified for others. Also make sure the IP address you pick isn't already in use by another device on the network, creating an IP address conflict. IP addresses must be unique!
You can still opt to use DHCP, by removing the ip parameter from the Ethernet.begin(mac) line. Keep in mind that, with dynamic address assignments, your IP address could change from reset to reset.
In this sketch, the EthernetServer class is used to create an object named server on port 80 (TCP). And server.begin() is called to initialize the server.
In the loop we wait for a client to connect. Once we get something, the Arduino serves up a simple HTML webpage. client.println's and client.print's are used to serve up HTML code.
Try it out! Upload the code, and point your computer's web browser to the IP address assigned to your Arduino. You may need to open up your Serial Monitor to find out what IP address it was assigned. That'll result in something like this:
server is at 192.168.20.58
new client
GET / HTTP/1.1
Host: 192.168.20.58
Connection: keep-alive
Cache-Control: max-age=0
User-Agent: Mozilla/5.0 (Windows NT 6.1; WOW64) AppleWebKit/537.11 (KHTML, like Gecko) Chrome/23.0.1271.91 Safari/537.11
Accept: text/html,application/xhtml+xml,application/xml;q=0.9,*/*;q=0.8
Referer: http://192.168.20.58/
Accept-Encoding: gzip,deflate,sdch
Accept-Language: en-US,en;q=0.8
Accept-Charset: ISO-8859-1,utf-8;q=0.7,*;q=0.3
client disonnected
new client
GET /favicon.ico HTTP/1.1
Host: 192.168.20.58
Connection: keep-alive
Accept: */*
User-Agent: Mozilla/5.0 (Windows NT 6.1; WOW64) AppleWebKit/537.11 (KHTML, like Gecko) Chrome/23.0.1271.91 Safari/537.11
Accept-Encoding: gzip,deflate,sdch
Accept-Language: en-US,en;q=0.8
Accept-Charset: ISO-8859-1,utf-8;q=0.7,*;q=0.3
client disconnected
new client
GET / HTTP/1.1
Host: 192.168.20.58
Connection: keep-alive
Cache-Control: max-age=0
User-Agent: Mozilla/5.0 (Windows NT 6.1; WOW64) AppleWebKit/537.11 (KHTML, like Gecko) Chrome/23.0.1271.91 Safari/537.11
Accept: text/html,application/xhtml+xml,application/xml;q=0.9,*/*;q=0.8
Referer: http://192.168.20.58/
Accept-Encoding: gzip,deflate,sdch
Accept-Language: en-US,en;q=0.8
Accept-Charset: ISO-8859-1,utf-8;q=0.7,*;q=0.3
client disonnected
new client
GET /favicon.ico HTTP/1.1
Host: 192.168.20.58
Connection: keep-alive
Accept: */*
User-Agent: Mozilla/5.0 (Windows NT 6.1; WOW64) AppleWebKit/537.11 (KHTML, like Gecko) Chrome/23.0.1271.91 Safari/537.11
Accept-Encoding: gzip,deflate,sdch
Accept-Language: en-US,en;q=0.8
Accept-Charset: ISO-8859-1,utf-8;q=0.7,*;q=0.3
client disconnected
Notice the IP address it lists for your Arduino server. Assuming your computer's on the same network, you should be able to open up your favorite web browser, type the IP address into the address bar and GO. You should be greeted with a webpage like below. Which reloads itself every five seconds or so. If you've got some HTML-fu try modifying or adding more client.print's to make your webpage prettier.
Resources
Here are some documents related to the Ethernet Shield itself which you might find useful:
- Schematic - If you'd like more in-depth information on the SparkFun Ethernet Shield's hardware setup, check the schematic out.
- Eagle Files - These are the PCB design files, shared because this hardware is open source! You can download and use Eagle Lite for free to view these files.
For more information on the Arduino libraries used:
Thanks for reading! I hope this has gotten you well on the way to creating the next super-awesome, network-enabled Arduino project. If you're left with any burning questions, comments, or feedback, please post away in the comments below!
I could really use some spec data sheets for the v2, v3, v4 and the v6 6DOF green boards fro my college assignment.
Hey, richtig super Internetseite. Woher hast du das Theme oder ist das selbst programmiert? Leased line quote