21st Century Fashion Kit: Inflation
 Dia, Member #313449
 Create the Inflatable Shape

Start with two layers of plastic. Draw a pattern with the ballpoint pen, and leave an opening for the fan.
Add an additional inch of material around the edge of the pattern to create a seam allowance, and cut the pattern out (you can eyeball the inch). You will later fuse the seam allowance together with the iron.
Tip: Place a couple of heavy things on the plastic tablecloth to hold the two layers in place while you are cutting. I used my pattern weights.Fold the long scrap of cotton fabric in half, so it is 2” wide, and iron it. You will be using the fabric as a press cloth, so that you do not melt plastic on your iron.
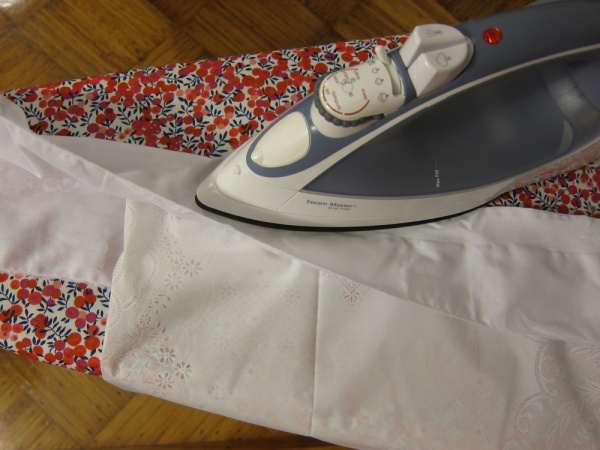
Fuse the tablecloth by sandwiching the edge of the two patterns inside of your press cloth. With your iron on the wool setting, press along the outer 1” edge of the shape holding the iron in place for 10 seconds as you press (make sure to leave the opening for the fan). Wait until the press cloth has completely cooled to touch, and then carefully peel off the cloth. Test after removing the press cloth the first time.
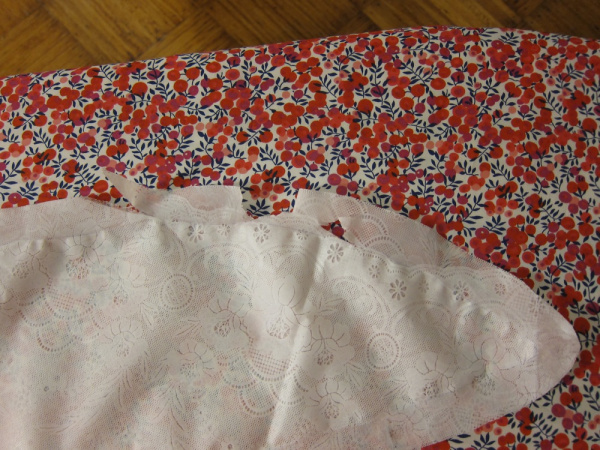
Is the iron too hot? If you are unable to remove the press cloth because the tablecloth has melted into it, or if the tablecloth tears from being heated too much, then lower the temperature of the iron or press for a shorter amount of time.

Is the iron too cold? Hold each piece of tablecloth between two fingers and gently pull them apart. If the tablecloth separates because it has not fused together then raise the temperature of the iron.
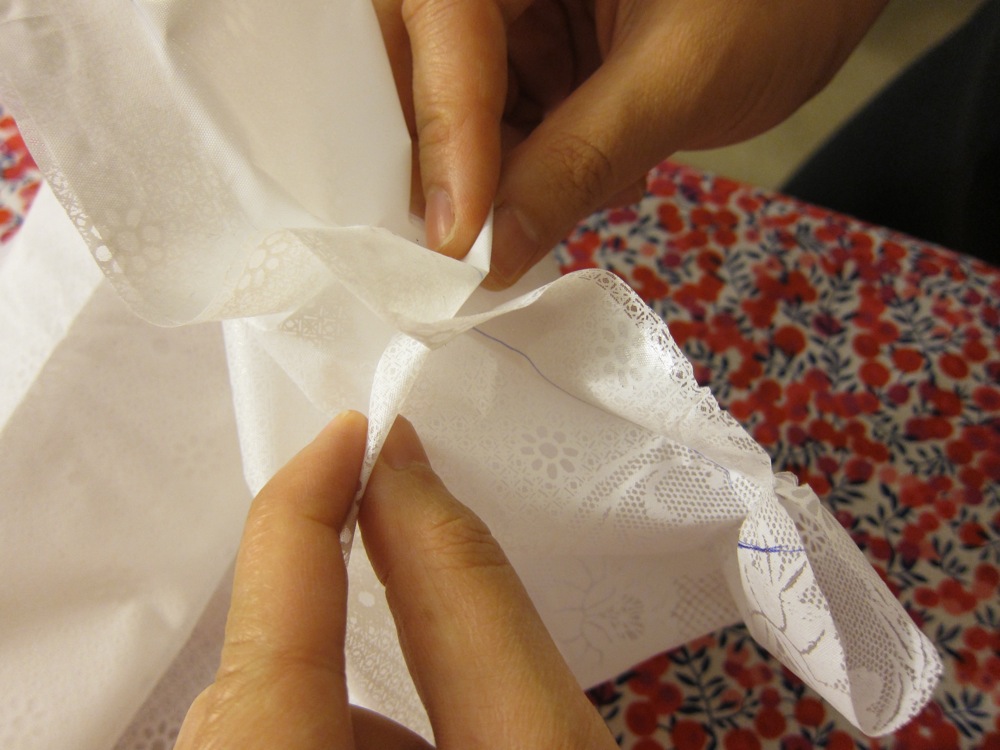
Turn your shape inside out to hide the fused seam.
Tip: If you arrange the press cloth so that the fold of the cloth is right next to the edge of the plastic patterns it will help you fuse your plastic more accurately.

