Activity Guide for SparkFun Tinker Kit
This Tutorial is Retired!
This tutorial covers concepts or technologies that are no longer current. It's still here for you to read and enjoy, but may not be as useful as our newest tutorials.
View the updated tutorial: Tinker Kit Circuit Guide
 Joel_E_B,
  bboyho
 Circuit 9: Temperature Sensor
Want to create a DIY environmental monitor or weather station? You can use a small, low-cost sensor like the TMP36 to make devices that track and respond to temperature. In this activity, you will read the raw 0--1023 value from the temperature sensor, calculate the actual temperature, and then print it out over the serial monitor.
Parts Needed
You will need the following parts:
- 1x Breadboard
- 1x SparkFun RedBoard
- 3x Jumper Wires
- 1x TMP36 Temperature Sensor
Didn't Get the Tinker Kit?
If you are conducting this experiment and didn't get the Tinker Kit, we suggest using these parts:


New Components
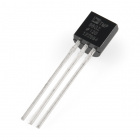
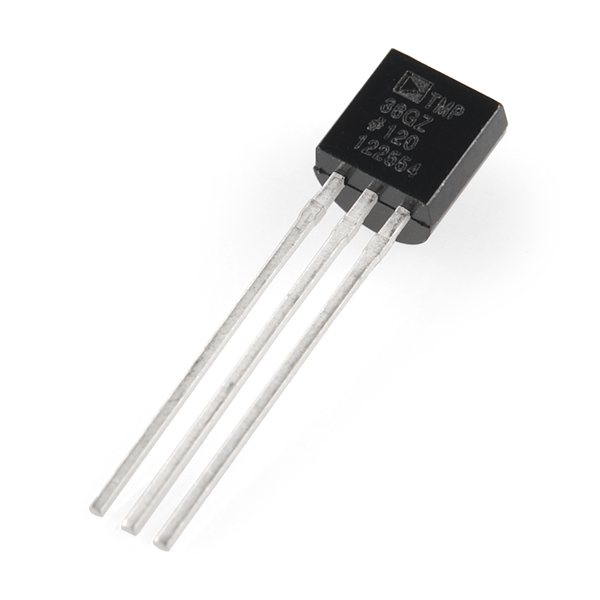
TMP36 Temperature Sensor
This temperature sensor has three legs. One connects to 5V, one to ground, and the voltage output from the third leg varies proportionally to changes in temperature. By doing some simple math with this voltage we can measure temperature in degrees Celsius or Fahrenheit.
New Concepts
Algorithms
An algorithm is a process used in order to achieve a desired result. Often, the information needed to create an algorithm lives in the part's datasheet. This sketch uses a few formulas to turn a voltage value into a temperature value, making them all part of the larger temperature-retrieving algorithm. The first formula takes the voltage read on analog pin 0 and multiplies it to get a voltage value from 0V--5V:
language:c
voltage = analogRead(A0) * 0.004882814;
The number we are multiplying by comes from dividing 5V by the number of samples the analog pin can read (1024), so we get: 5 / 1024 = 0.004882814.
The second formula takes that 0--5V value and calculates degrees Centigrade:
language:c
degreesC = (voltage - 0.5) * 100.0;
The reason 0.5V is subtracted from the calculated voltage is because there is a 0.5V offset, mentioned on page 8 of the TMP36 datasheet. It's then multiplied by 100 to get a value that matches temperature.
The last formula takes the Centigrade temperature and converts it to a Fahrenheit temperature using the standard conversion formula:
language:c
degreesF = degreesC * (9.0/5.0) + 32.0;
Together, these three formulas make up the algorithm that converts voltage to degrees Fahrenheit.
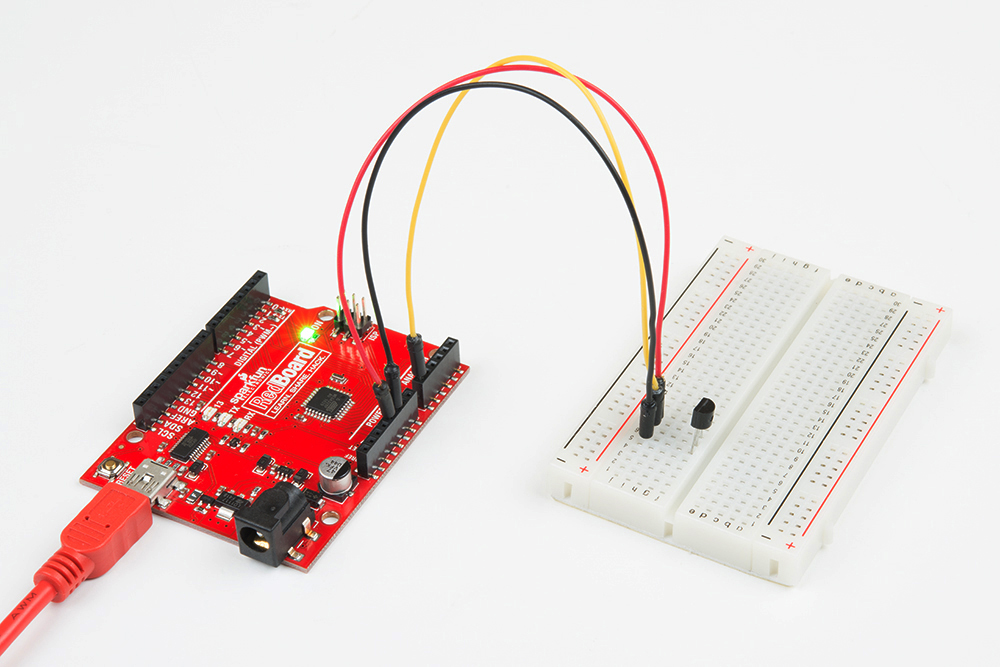
Hardware Hookup
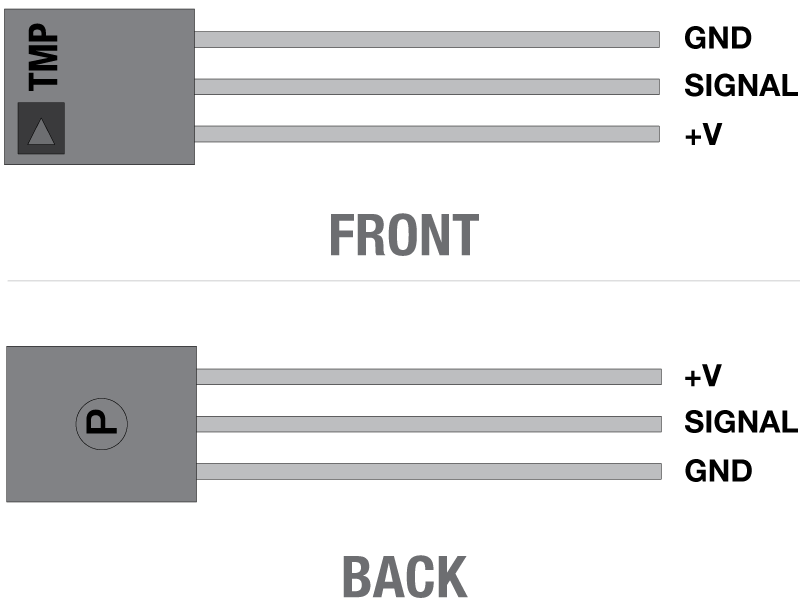
| Polarized Components | Pay special attention to the component’s markings indicating how to place it on the breadboard. Polarized components can only be connected to a circuit in one direction. |
The temperature sensor is polarized and can only be inserted in one direction. See below for the pin outs of the temperature sensor. Pay very close attention to the markings on each side as you insert it into your circuit.
Ready to start hooking everything up? Check out the circuit diagram and hookup table below to see how everything is connected.
Circuit Diagram
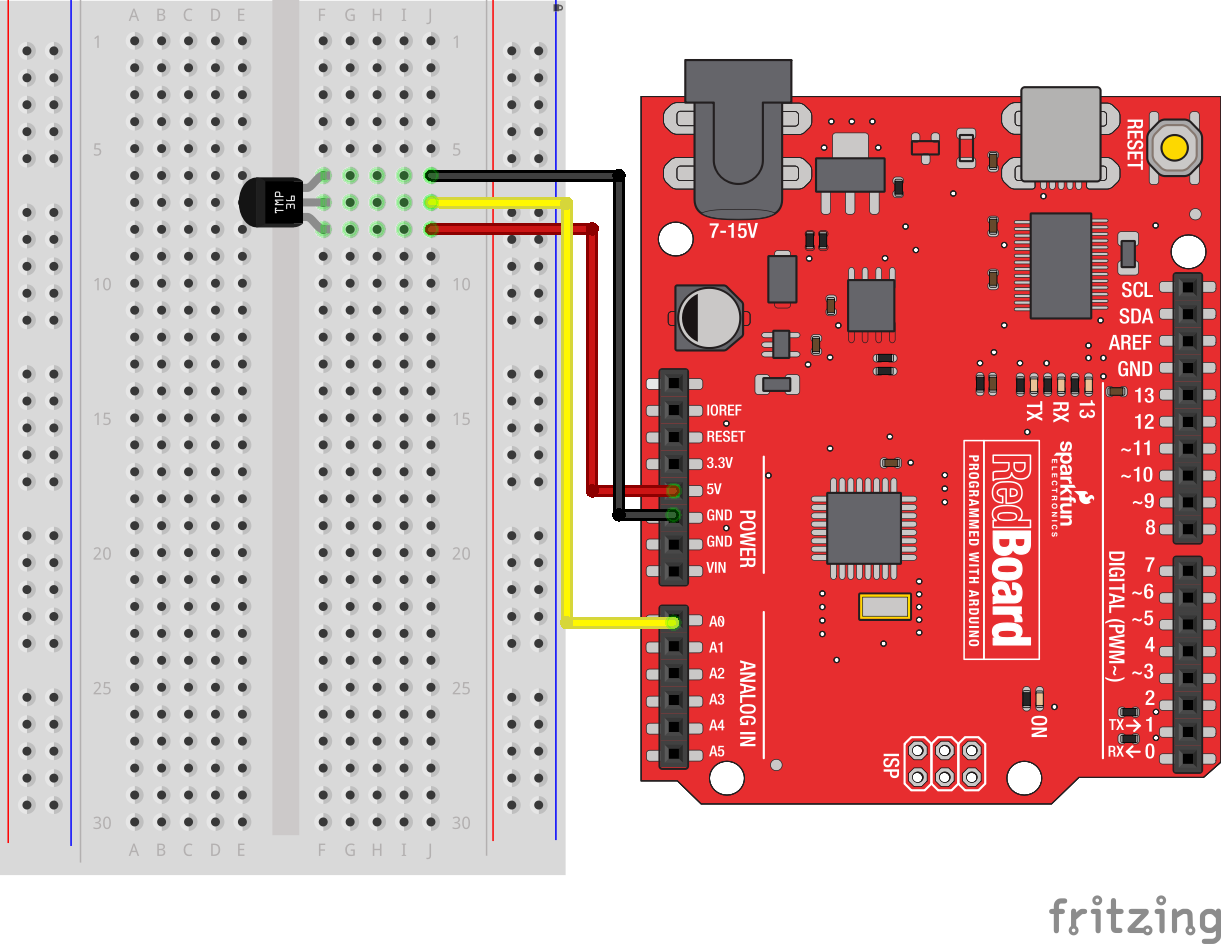
Hookup Table
| Component | RedBoard | Breadboard | Breadboard | Breadboard |
|---|---|---|---|---|
| TMP36 Temperature Sensor | F6 (GND) | F7 (Signal) | F8 (V+) | |
| Jumper Wire | J6 | GND( - ) | ||
| Jumper Wire | Analog Pin 0 (A0) | J7 | ||
| Jumper Wire | J8 | 5V ( + ) |
Open the Sketch
Copy and paste the following code into the Arduino IDE. Hit upload, and see what happens!
language:cpp
/*
SparkFun Tinker Kit
Circuit 9: Temperature Sensor

Use the "serial monitor" window to read a temperature sensor.

This sketch was written by SparkFun Electronics, with lots of help from the Arduino community.
This code is completely free for any use.

View circuit diagram and instructions at: https://learn.sparkfun.com/tutorials/activity-guide-for-sparkfun-tinker-kit/
Download drawings and code at: https://github.com/sparkfun/SparkFun_Tinker_Kit_Code/

*/

//analog input pin constant
const int tempPin = 0;

//raw reading variable
int tempVal;

//voltage variable
float volts;

//final temperature variables
float tempC;
float tempF;

void setup()
{
  // start the serial port at 9600 baud
  Serial.begin(9600);
}


void loop()
{
 //read the temp sensor and store it in tempVal
 tempVal = analogRead(tempPin);

 //print out the 10 value from analogRead
 Serial.print("TempVal = ");
 Serial.print(tempVal);

 //print a spacer
 Serial.print(" **** ");

 //converting that reading to voltage by multiplying the reading by 5V (voltage of       //the RedBoard)
 volts = tempVal * 5;
 volts /= 1023.0;

 //print out the raw voltage over the serial port
 Serial.print("volts: ");
 Serial.print(volts, 3);

 //print out divider
 Serial.print(" **** ");

 //calculate temperature celsius from voltage
 //equation found on the sensor spec.
 tempC = (volts - 0.5) * 100 ;

// print the celcius temperature over the serial port
Serial.print(" degrees C: ");
Serial.print(tempC);

//print spacer
 Serial.print(" **** ");

// Convert from celcius to fahrenheit
tempF = (tempC * 9.0 / 5.0) + 32.0;

//print the fahrenheit temperature over the serial port
Serial.print(" degrees F: ");
Serial.println(tempF);

//wait a bit before taking another reading
delay(1000);
}
What You Should See
The Arduino serial monitor will show the temperature in Celsius and Fahrenheit. The temperature readings will update every second. An easy way to see the temperature change is to press your finger to the sensor.
Here's an example of what you should see in the Arduino IDE’s serial monitor:
TempVal = 223 **** volts: 0.719 ****  degrees C: 21.94 ****  degrees F: 71.48
TempVal = 224 **** volts: 0.723 ****  degrees C: 22.26 ****  degrees F: 72.06
TempVal = 224 **** volts: 0.723 ****  degrees C: 22.26 ****  degrees F: 72.06
TempVal = 224 **** volts: 0.723 ****  degrees C: 22.26 ****  degrees F: 72.06
TempVal = 224 **** volts: 0.723 ****  degrees C: 22.26 ****  degrees F: 72.06
TempVal = 224 **** volts: 0.723 ****  degrees C: 22.26 ****  degrees F: 72.06
TempVal = 223 **** volts: 0.719 ****  degrees C: 21.94 ****  degrees F: 71.48
TempVal = 223 **** volts: 0.719 ****  degrees C: 21.94 ****  degrees F: 71.48
Program Overview
- Get the analog value from the TMP36.
- Print the raw temperature value to the serial monitor.
- Convert it back to a voltage between 0 and 5V.
- Print the voltage value.
- Calculate the degrees Celsius from this voltage.
- Print the Degrees C.
- Calculate the degrees Fahrenheit from same voltage.
- Print the Degrees F.
- Wait for a second before taking the next reading.
Code to Note
| Code | Description |
|---|---|
| Voltage Conversion Algorithms | Many of the sensors that you will use with your microcontroller work by changing a voltage in some predictable way in response to a property of the world (like temperature, light or magnetic fields).
Often, you will need to build an algorithm that converts these voltages to the desired value and units. The temperature sensor is a great example of this code. We use three equations to convert a voltage value into degrees in C and F.
voltage = analogRead(A0) * 0.004882814;
degreesC = (voltage - 0.5) * 100.0;
degreesF = degreesC * (9.0/5.0) + 32.0;
|
Coding Challenges
| Challenge | Description |
|---|---|
| Display the temperature in degrees Kelvin | Try adding an equation so that the temperature is displayed in degrees Kelvin (you will have to look up the formula for converting from degrees Celsius or Fahrenheit to Kelvin). |
| Display a LED bar graph | Try changing the code so you can display the temperature visually as a LED bar graph. |
| Display values from another sensor | You can swap out the TMP36 for a potentiometer, photoresistor or other sensor and display the new set of values. |
| Add an RGB LED | Add an RGB LED that changes color based on the temperature. |
Troubleshooting
| Problem | Solution |
|---|---|
| Sensor is warm or hot to the touch | Make sure that you wired the temperature sensor correctly. The temperature sensor can get warm to the touch if it is wired incorrectly. Disconnect your microcontroller, rewire the circuit, and connect it back to your computer. |
| Temperature value is unchanging | Try pinching the sensor with your fingers to heat it up or pressing a bag of ice against it to cool it down. Also, make sure that the wires are connected properly to the temperature sensor. |
| Values not printing to serial monitor | If you see text but no temperature values, there could be an error in your code. If you see no text at all, make sure that you are on the correct serial port using a baud rate of 9600. |