Assembly Guide for RedBot with Shadow Chassis
 HelloTechie
 SFUptownMaker
 Shawn Hymel
10. Run It!
Now that we have built the RedBot, we should verify that it works. If you would like a more in-depth explanation of how to program your robot, visit the Experiment Guide for RedBot with Shadow Chassis. This will work with the RedBot Basic Kit as well as the RedBot SIK.
Install Drivers
To program your robot right from your browser, you will first need to install some FTDI drivers. Follow the steps in How to Install FTDI Drivers to do that.
How to Install FTDI Drivers
June 4, 2013
Install Arduino
Note: This example assumes you are using the latest version of the Arduino IDE on your desktop. If this is your first time using Arduino, please review our tutorial on installing the Arduino IDE.
If you have not previously installed an Arduino library, please check out our installation guide.Install RedBot Library
We have written our own library to simplify the programming and interface to the RedBot motors, encoders, sensors, and other peripherals. You'll need the SparkFun RedBot Arduino Library. You can obtain these libraries through the Arduino IDE's Library Manager. Search for Sparkfun RedBot Library to install the latest version. If you prefer downloading the archived library from the GitHub repository and manually installing it, you can grab them here:
Power the RedBot
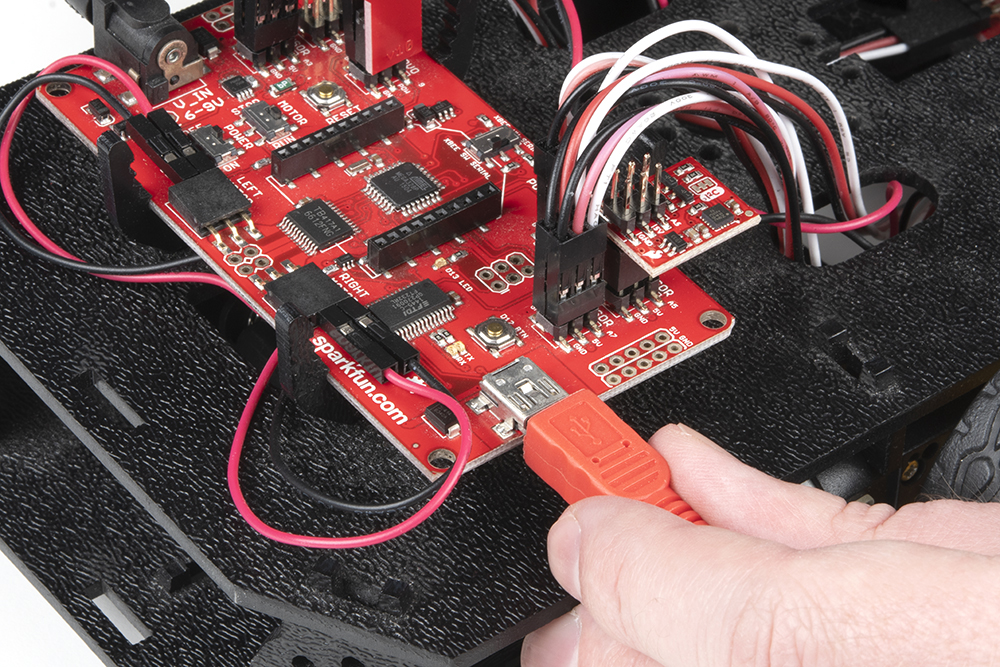
To program the RedBot, make sure you have the FTDI drivers from above installed. Plug in the RedBot using a USB mini cable.
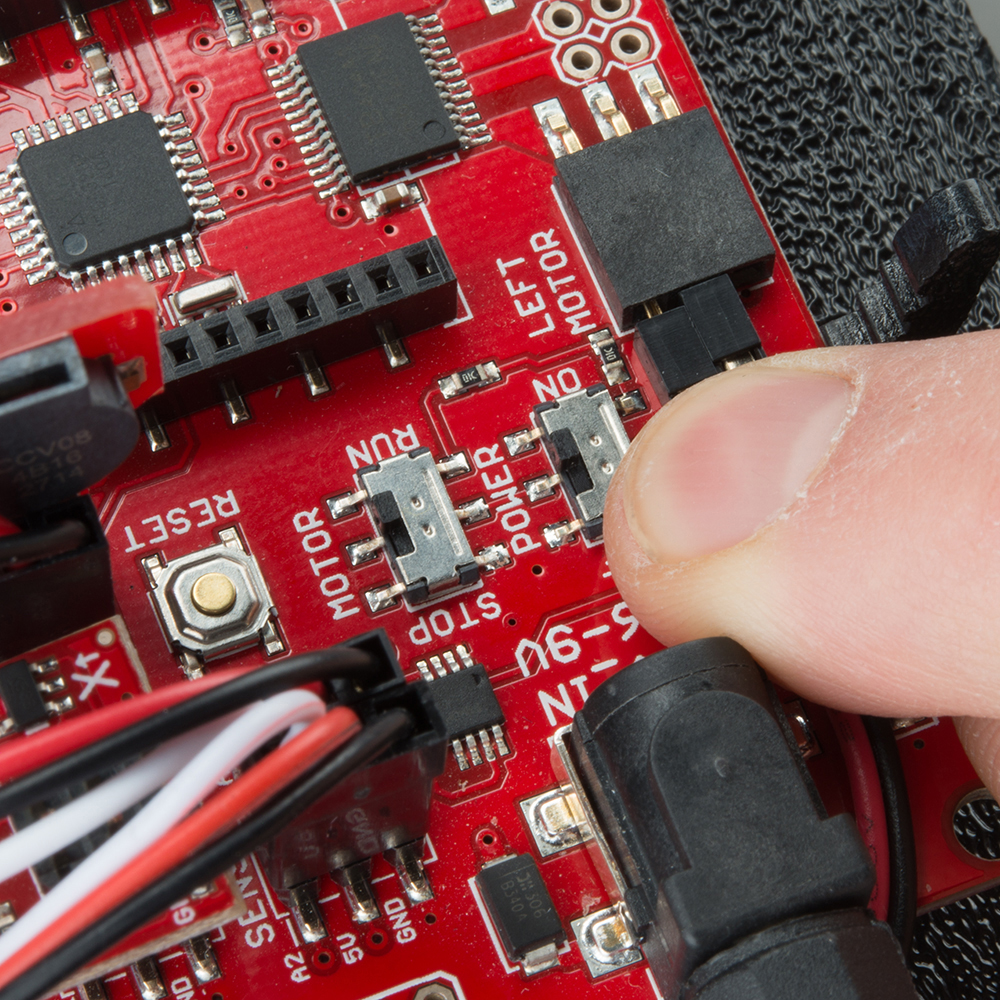
Turn the RedBot POWER switch to ON and the MOTOR switch to RUN.
Upload Test Code
language:c
/***********************************************************************
 * Exp2_DriveForward -- RedBot Experiment 2
 *
 * Drive forward and stop.
 *
 * Hardware setup:
 * The Power switch must be on, the motors must be connected, and the board must be receiving power
 * from the battery. The motor switch must also be switched to RUN.
 *
 * 23 Sept 2013 N. Seidle/M. Hord
 * 04 Oct 2014 B. Huang
 ***********************************************************************/

#include <RedBot.h>  // This line "includes" the RedBot library into your sketch.
// Provides special objects, methods, and functions for the RedBot.

RedBotMotors motors; // Instantiate the motor control object. This only needs
// to be done once.

void setup()
{
  motors.drive(255);   // Turn on Left and right motors at full speed forward.
  delay(2000);         // Waits for 2 seconds
  motors.stop();       // Stops both motors
}

void loop()
{
  // Nothing here. We'll get to this in the next experiment.
}
In the Arduino IDE, select "Arduino UNO" for the board. Select COM port for the RedBoard (this will be the number or name that appears when you plug in the RedBoard). Then click upload.
WARNING: If the MOTOR switch is set to RUN, the RedBot will move forward (quite rapidly) for 2 seconds. You might want to pick the RedBot up so that it doesn't run away from you!
The RedBot will drive forward for only 2 seconds and then stop. If you want to run the code again, you will need to press the RESET button on the RedBot Mainboard.