Favorited
Favorite
3
Introduction
The SparkFun AzureWave Thing Plus is a Feather form-factor development board equipped with the AW-CU488. The module features the Realtek RTL8721DM integrated single-chip low power dual band (2.4GHz and 5GHz) wireless LAN . It also consists of a dual processor core: Real-M300 CPU (Armv8-M, Cortex-M33) and Real-M200 CPU (Armv8-M, Cortex-M23). Connect the SparkFun AzureWave Thing Plus to the cloud to grab current weather conditions in your area, post sensor data to a server, control the lights in your next home automation project, or even calculate the Fast Fourier Transform (FFT) of an input audio signal!
In stock
DEV-19957
The SparkFun AzureWave Thing Plus is a Feather form-factor development board equipped with the AW-CU488.
Required Materials
To follow along with this tutorial, you will need the following materials at a minimum. You may not need everything though depending on what you have. Add it to your cart, read through the guide, and adjust the cart as necessary.
28 available
CAB-15424
These 2m cables have minor modifications that allow them to be be plugged into their ports regardless of orientation on the U…
1
In stock
DEV-19957
The SparkFun AzureWave Thing Plus is a Feather form-factor development board equipped with the AW-CU488.
Note: Click below for a wishlist of the minimum parts.
Tools
You will need a soldering iron, solder, and general soldering accessories for a secure connection when using the plated through holes.
In stock
TOL-14456
This adjustable-temperature soldering iron is a great tool for when you don't want to break the bank but need a reliable iron…
16
Out of stock
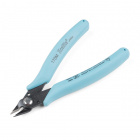
TOL-14782
These are simple flush cutters from Excelite that give you a way to cut leads very cleanly and close to the solder joint.
2
In stock
TOL-09163
This is your basic tube of unleaded (Pb-free) solder with a no clean, water soluble resin core. 0.031" gauge and 15 grams
4
Bundled Kits! Check out the following tool kits with some of the soldering irons and accessories listed earlier!
Retired
TOL-11805
This assortment of tools is great for those of you who have experience with tools but need a fresh set of new parts for your …
Retired
Retired
TOL-14681
This assortment of tools is great for those of you who need a solid set of tools to start your workbench on the right foot!
Retired
Prototyping Accessories
Depending on your setup, you may want to use IC hooks for a temporary connection. However, you will want to solder header pins to connect devices to the plated through holes for a secure connection. For those using the stackable headers, you will want to cut or pull a pin from the 6-pin header to connect to the rows of 1x5 pins on the AzureWave Thing Plus.
In stock
PRT-12002
This is your tried and true white solderless breadboard. It has 2 power buses, 10 columns, and 30 rows - a total of 400 tie i…
48
In stock
PRT-00116
A row of headers - break to fit. 40 pins that can be cut to any size. Used with custom PCBs or general custom headers.
20
In stock
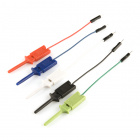
CAB-09741
These are good quality IC test hooks with a male connection wire. Instead of a single hook, these have two hooks that are cap…
10
In stock
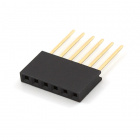
PRT-09280
This is a 6-pin female header, with extra long legs -- great for stacking Arduino shields.
Pins are spaced by 0.1".
In stock
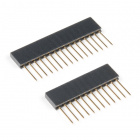
PRT-15187
These stackable headers are made to work with the [SparkFun ESP32 Thing Plus](https://www.sparkfun.com/products/14689) to con…
Qwiic Cables
For those that want to take advantage of the Qwiic enabled devices, you'll want to grab a Qwiic cable.
In stock
KIT-15081
To make it even easier to get started, we've assembled this Qwiic Cable Kit with a variety of Qwiic cables from 50mm to 500mm…
21
In stock
PRT-14427
This is a 100mm long 4-conductor cable with 1mm JST termination. It’s designed to connect Qwiic enabled components together…
Retired
PRT-14429
This is a 500mm long 4-conductor cable with 1mm JST termination. It’s designed to connect Qwiic enabled components together…
1
Retired
In stock
PRT-14425
This is a jumper adapter cable that comes pre-terminated with a female Qwiic JST connector on one end and a breadboard hookup…
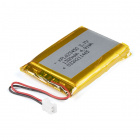
LiPo Battery
A single-cell Lithium-ion battery can be connected to the AzureWave Thing Plus (AW-CU488) for portability.
Out of stock
PRT-18286
Slim, extremely light weight batteries based on Lithium Ion chemistry. Each cell outputs a nominal 3.7V at 1250 mAh and is IE…
1
In stock
PRT-13851
This is a very small, extremely lightweight battery based on Lithium Ion chemistry, with the highest energy density currently…
11
In stock
PRT-13854
These are very slim, extremely light weight batteries based on Lithium Ion chemistry. Each cell outputs a nominal 3.7V at 850…
2
Retired
PRT-13813
Slim, extremely light weight batteries based on Lithium Ion chemistry. Each cell outputs a nominal 3.7V at 1000 mAh!
8
Retired
Suggested Reading
If you aren't familiar with the Qwiic system, we recommend reading here for an overview if you decide to take advantage of the Qwiic connector.
We would also recommend taking a look at the following tutorials if you aren't familiar with them.
Installing Arduino IDE
A step-by-step guide to installing and testing the Arduino software on Windows, Mac, and Linux.
Arduino Shields v2
An update to our classic Arduino Shields Tutorial! All things Arduino shields. What they are and how to assemble them.
Installing Board Definitions in the Arduino IDE
How do I install a custom Arduino board/core? It's easy! This tutorial will go over how to install an Arduino board definition using the Arduino Board Manager. We will also go over manually installing third-party cores, such as the board definitions required for many of the SparkFun development boards.
Serial Communication
Asynchronous serial communication concepts: packets, signal levels, baud rates, UARTs and more!
Logic Levels
Learn the difference between 3.3V and 5V devices and logic levels.
I2C
An introduction to I2C, one of the main embedded communications protocols in use today.
Analog vs. Digital
This tutorial covers the concept of analog and digital signals, as they relate to electronics.
 QCPete
 bboyho


