Battery Babysitter Hookup Guide
 jimblom
Example Hardware Hookup
There are a variety of ways to integrate the Battery Babysitter into your project. Below is an foundational example circuit, which takes care of I2C wiring, but does not power the Arduino from the Babysitter.
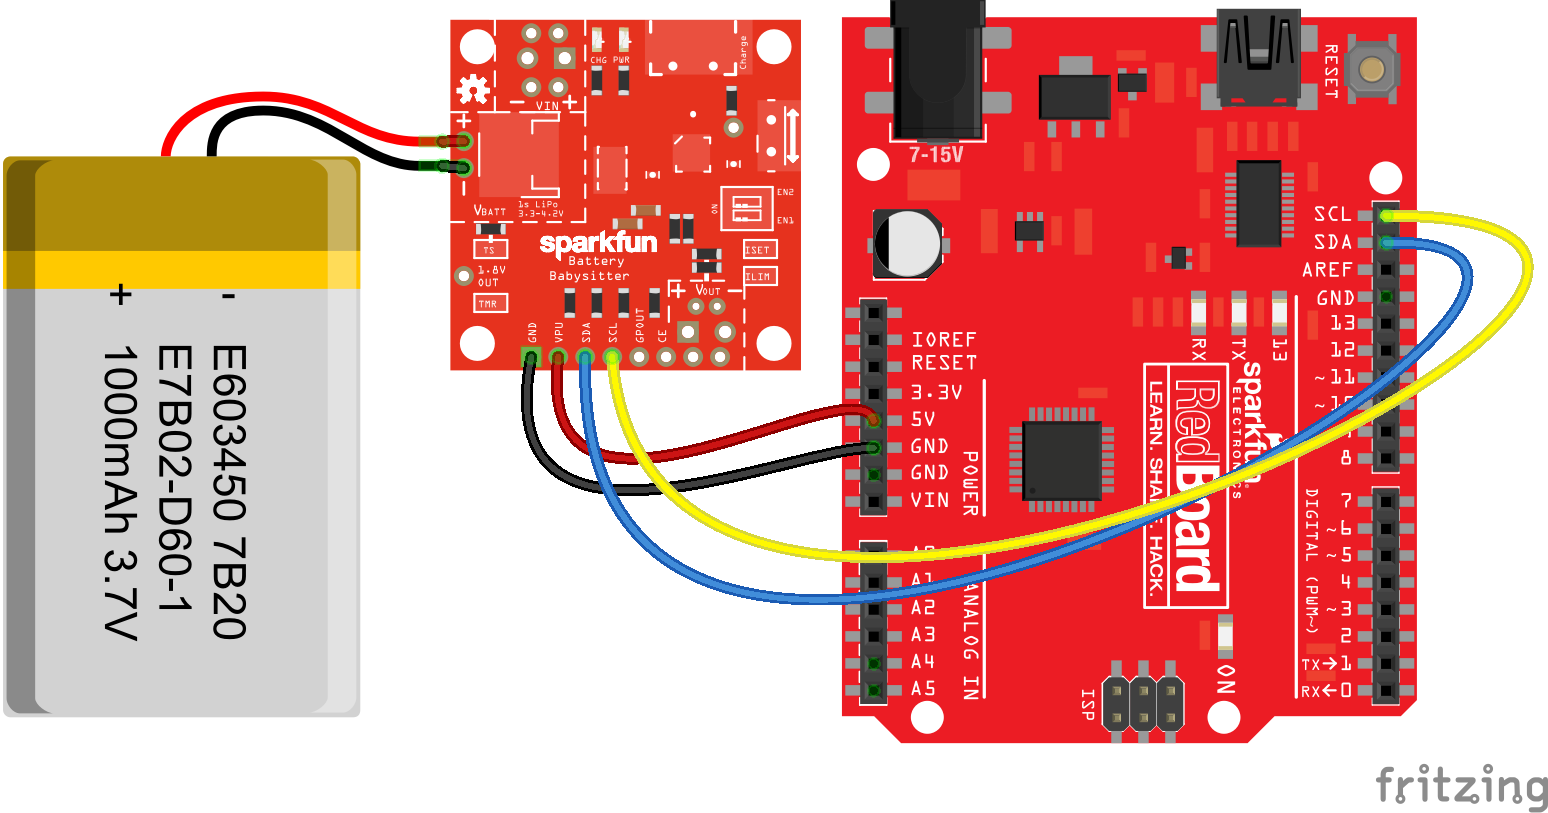
Optionally, a wire can be connected from the Battery Babysitter's VOUT pin to the Arduino's 5V pin -- powering the Arduino at somewhere between 3.4 and 5.5V. These pins should only be connected when the Arduino is not connected to USB, though; while you're testing out the I2C interface and using the serial monitor for debugging, it's best to leave that wire out.
Powering an Arduino From the Battery Babysitter
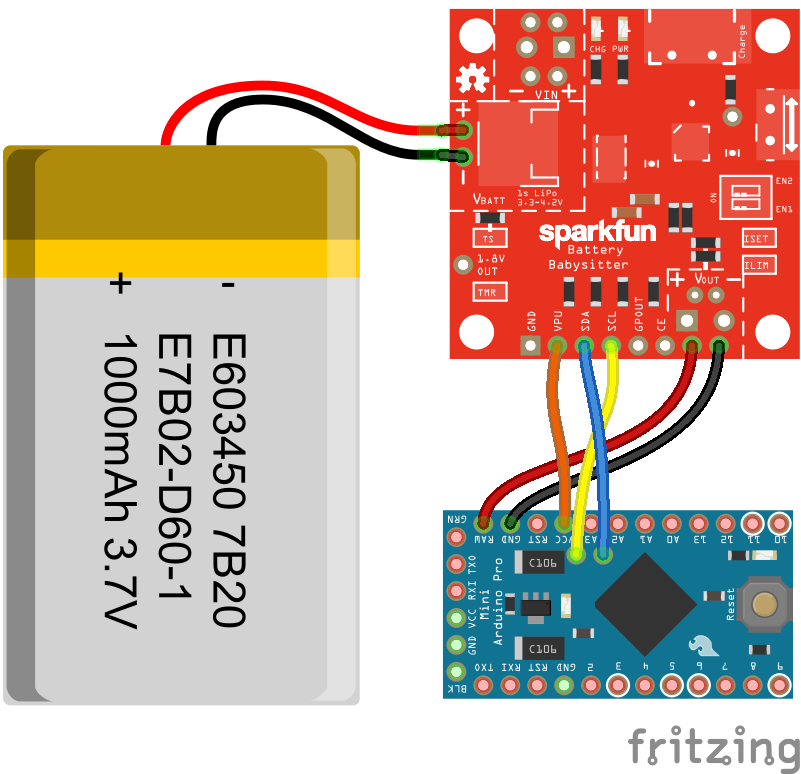
The Battery Babysitter is best-suited to powering 3.3V-based devices, like the Arduino Pro Mini 3.3V/8MHz, ESP8266 Thing, SAMD21 Mini Breakout, or Particle Photon. In those cases, you should be able to connect VOUT of the Battery Babysitter to your development board's "VIN" pin, where the Babysitter's output will be safely regulated down to 3.3V.
For example, here's the babysitter connected to an Arduino Pro Mini 3.3V:
When the Babysitter is powering a 5V-based Arduino – RedBoard, Arduino Uno, etc. – the Arduino's 5V regulator will be underpowered and will likely run close to the Battery Babysitter's output voltage, anywhere between 3.4-5V. That means an Arduino running at 16MHz may be underpowered.