Beginner Parts Kit Identification Guide
 jimblom,
  bboyho
 Inputs
Headers
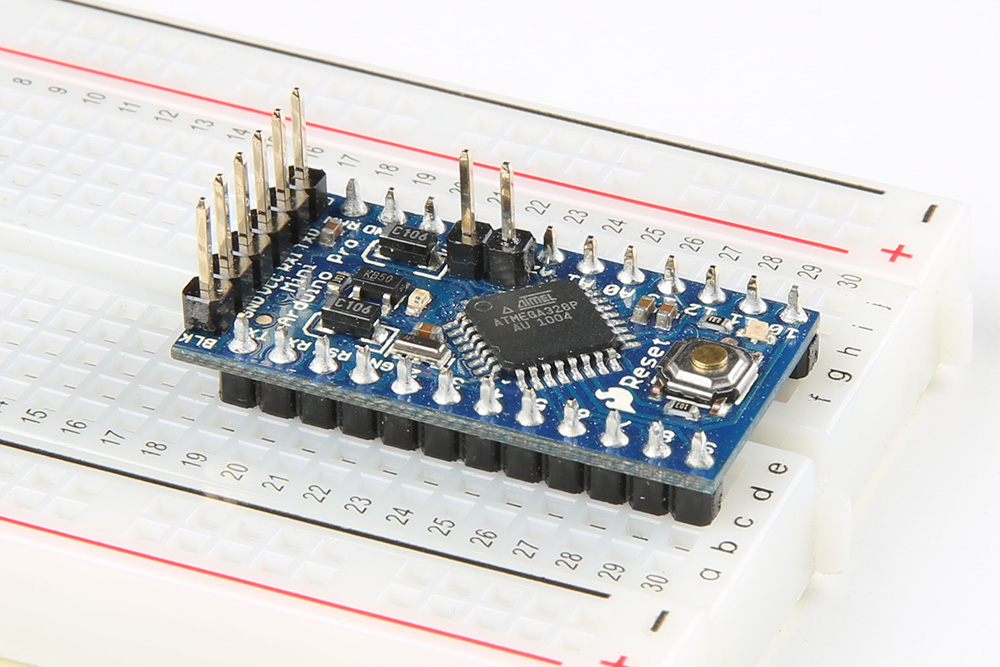
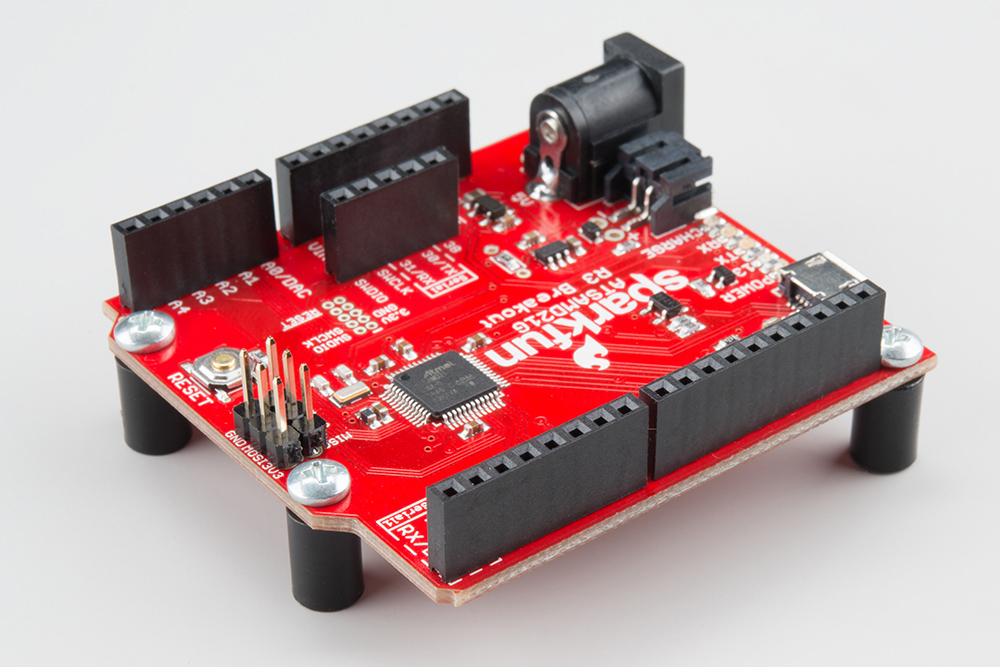
This happy couple isn't all that exciting, but they're an important component nevertheless. If you ever find yourself with a SparkFun breakout board, you may need to solder in one of these headers to form a solid, electrical connection between the board and another component. The male headers are useful if you want to plug the breakout board into a breadboard, while the female headers are useful for plugging wires into. You can also use them to help solder pins to boards.
 |
 |
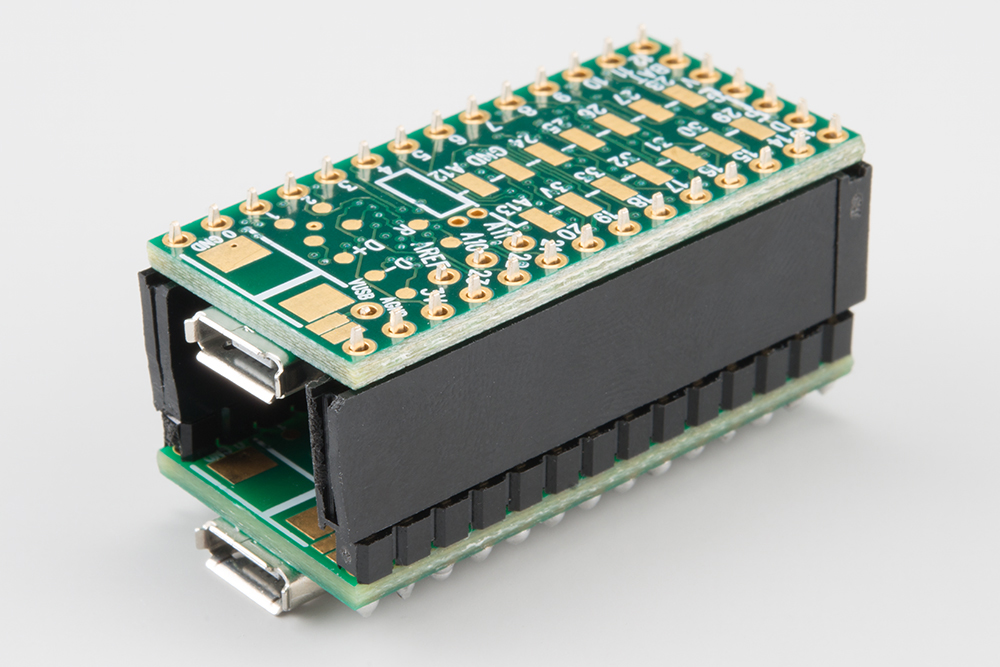 |
| Male Headers Soldered on Arduino Pro Mini | Female Headers Soldered to SAMD21 | Teensy's Stacked to Help with Soldering Soldering |
These headers come in sets of 20 pins, and can be broken into smaller sets with a set of clippers.

The Inputs
Mini Power Switches and Push Buttons
At the heart of any great project is user input, exactly what these switches and buttons are built for.
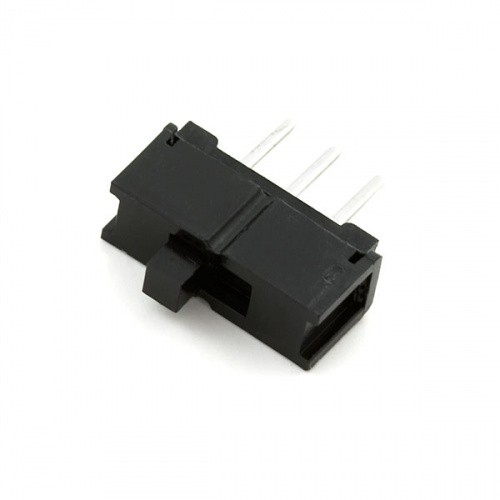
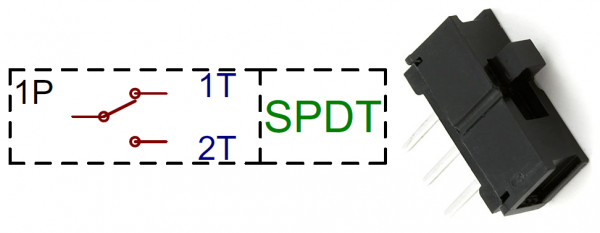
The Mini Power Switch often lands roles as on/off control, but it can control many other functions. This single-pole/double-throw (SPDT) switch has three terminals, one of the two outer-terminals will be connected to the middle one, whichever one it is will depend on the direction the switch is flipped in. It's all pretty intuitive.
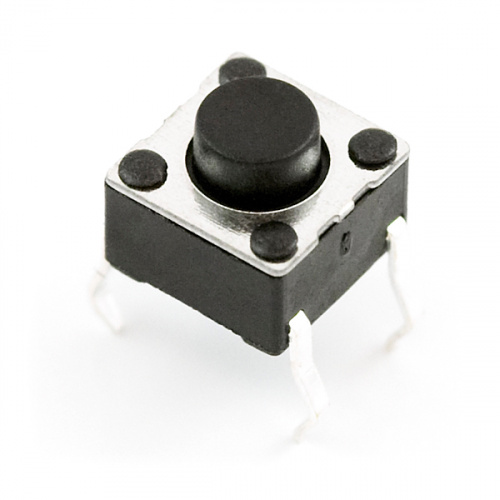
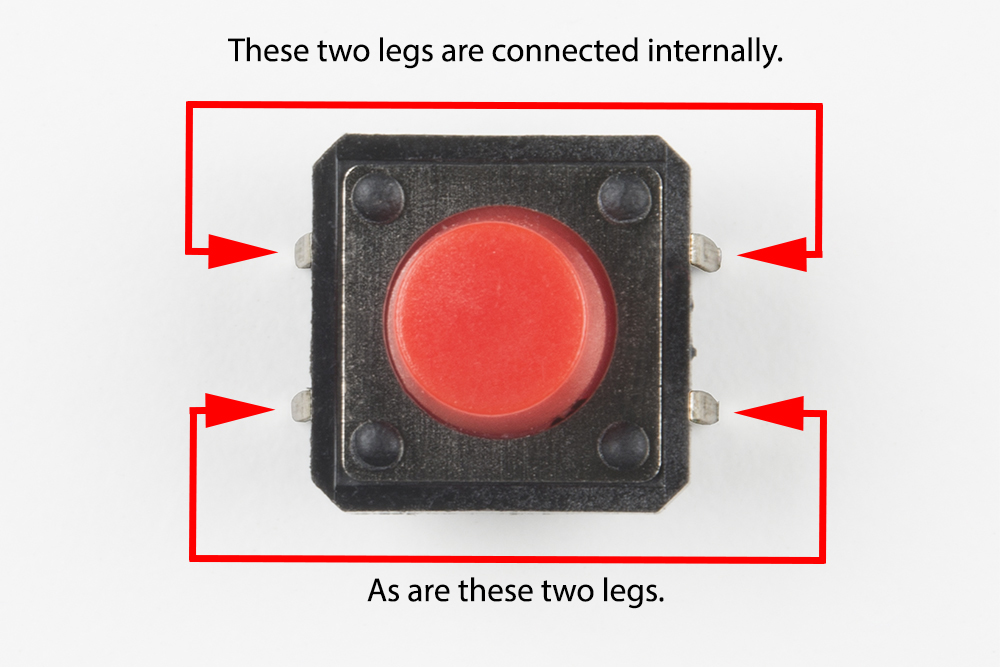
The Push Buttons have two terminals; of the four leads two on each side are shorted together. When the small black button is depressed, the terminals are shorted together, otherwise the button acts as an open circuit. Where the switch is used as an on/off control, the button is used for more momentary control, like a quick reset. Here's an annotated top view of a 12mm colored button annotated.
For more information, check out our switch basics.
Button and Switch Basics
May 7, 2013
The Potentiometer - 10kΩ
The only real resistive component in the Parts Kit is the 10kΩ potentiometer. Like the buttons, a potentiometer can be used as a form of input; for instance if you've ever set a speaker's volume to 11, you were probably rotating the knob of a potentiometer.

The potentiometer has three terminals. The resistance across the two outer terminals will always be 10kΩ. Meanwhile, as the knob is rotated, the resistance between the center terminal, called the wiper, and either of the two outer terminals will vary from 0 to 10kΩ.
For more information about this variable resistor, check out our resistors tutorial.
Resistors
April 1, 2013
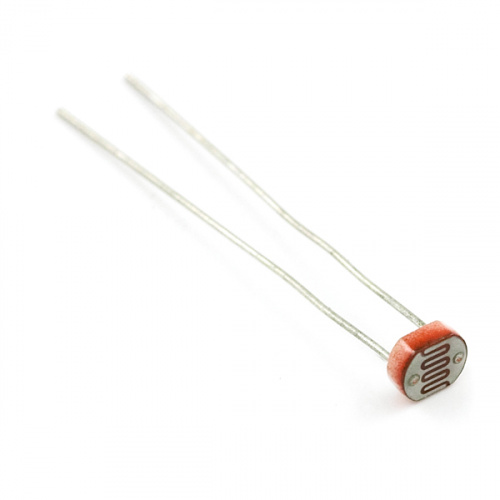
The Photocell
This component also goes by the name of photoresistor. It's a really neat device that functions almost like a potentiometer, except that the wiper's been replaced with a light-sensitive semiconductor material. The resistance between the two terminals of the photocell are dependent upon the amount of light that's incident upon the top of the cell. In complete darkness the resistance will be around 1MΩ while in bright light the resistance may be as low as 1kΩ. Photocells obviously make great light sensors, if you want a device to only turn on when you've flipped a light switch, the photocell would be a perfect player in your project.
For more information, check out the photocell hookup guide.