Building the HUB-ee Buggy
This Tutorial is Retired!
This tutorial covers concepts or technologies that are no longer current. It's still here for you to read and enjoy, but may not be as useful as our newest tutorials.
 Nick Poole
Rolling Chassis
Alright! Build time!
The first step is to actually mount the HUB-ee wheels to the Protoshield PCB. This will create a little robot base that we can sit the Redboard on top of. The HUB-ee wheels come with a plastic right angle bracket. Go ahead and screw that to the wheel hubs using your M3 bolts. Once you have the wheels connected to the brackets, find a good spot to mount them. About midway on either side of the board worked well for me. Just line up the brackets where you want to put them, and mark the bolt pattern with a pen.
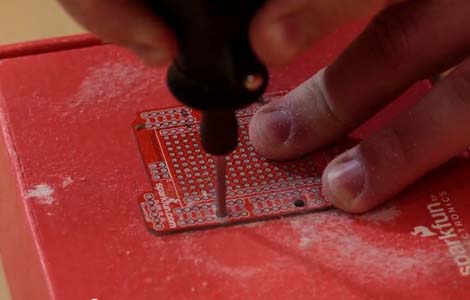
Now take your drill (or rotary tool with a drill bit), and drill holes to mount your wheels. Once you've drilled your holes and you're sure that they line up, go ahead and put the 4-40 bolts through, and connect the wheels to the Protoshield.
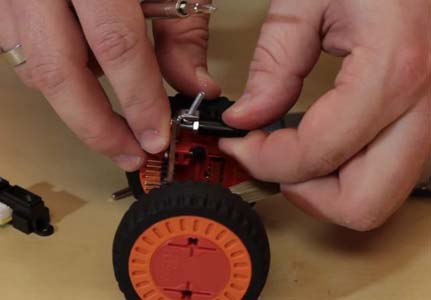
At this point you'll have a pretty wobbly little platform so we'll have to add a few standoffs to keep it stable. Drop one of your 1/2" 4-40 bolts through the mounting holes on two opposite corners of the Protoshield. The standoffs aren't quite long enough to keep the bot from falling over, so we need to bolster them with a little bit of bolt length on either side. For the bolt on the "back" of the robot (now's a good time to decide which is the back, I chose the side without the FTDI header), add a nut, and tighten it up the the board. Now put another nut on there, and snug a standoff against the nut. By twisting the nut and the standoff against each other you can force them to stay put on the bolt. Now take another 4-40 bolt, put a nut on it, and screw it into the other end of the standoff. Now the head of that bolt should be touching the ground and keeping the bot upright.
Do the same thing on the opposite corner, but, instead of using a nut to secure the top bolt, use the threaded side of a 4-40 right angle bracket. This bracket will hold our Sharp IR sensor in place. Make your life easier by putting a 1/2" 4-40 screw through the other hole on the angle bracket before using it to secure the standoff bolt.
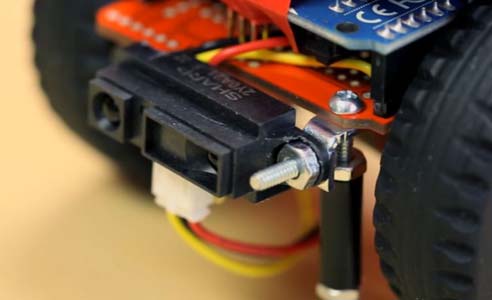
Pick up the Sharp IR Sensor, mount it onto the protruding 4-40 screw, and secure it using a nut. Now that the chassis is complete, let's concern ourselves with a brain...