Cryptographic Co-Processor ATECC508A (Qwiic) Hookup Guide
 QCPete
Example 4: From Alice to Bob
Example4_Alice.ino and Example4_Bob.ino. You will need to use both of these to complete this Example. We recommend opening two separate instances of Arduino, this way you can setup each one with its own com port for uploading and serial terminal.
Hardware hookup
For Example 4, you will need to setup two Artemis boards with two co-processors, and connect a couple jumper wires between them. Using the Artemis Redboard, there is no soldering required for this setup.
Connect both of your Artemis boards to your computer using USB-C cables. Connect a Cryptographic Co-processor to each board using a Qwiic cable.
The board on the left is Alice. The board on the right is Bob. Connect Alice's TX1 pin to Bob's RX1 pin. Also connect GND to GND for good measure.
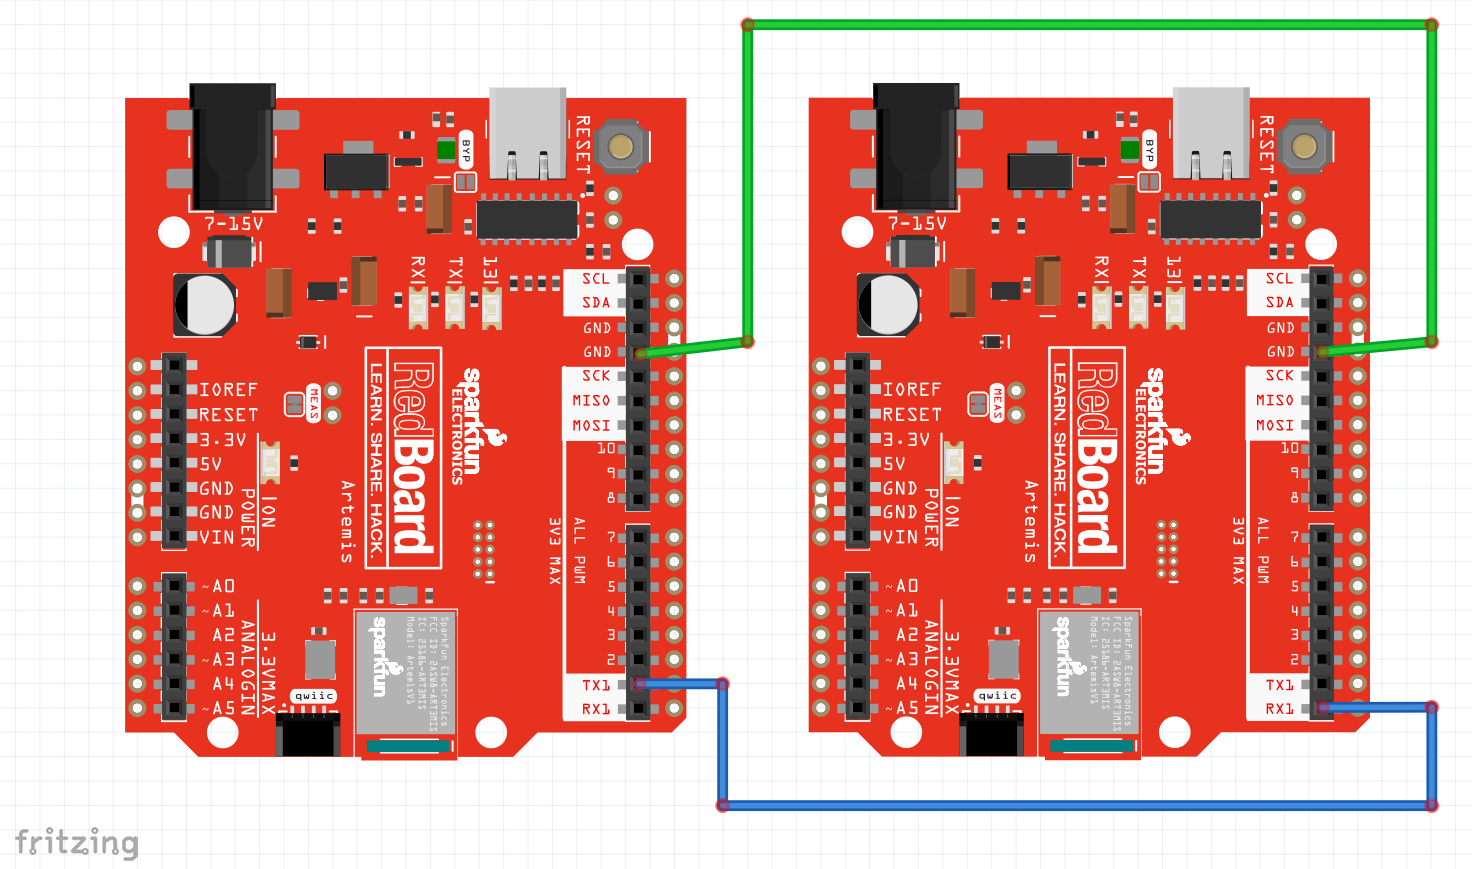
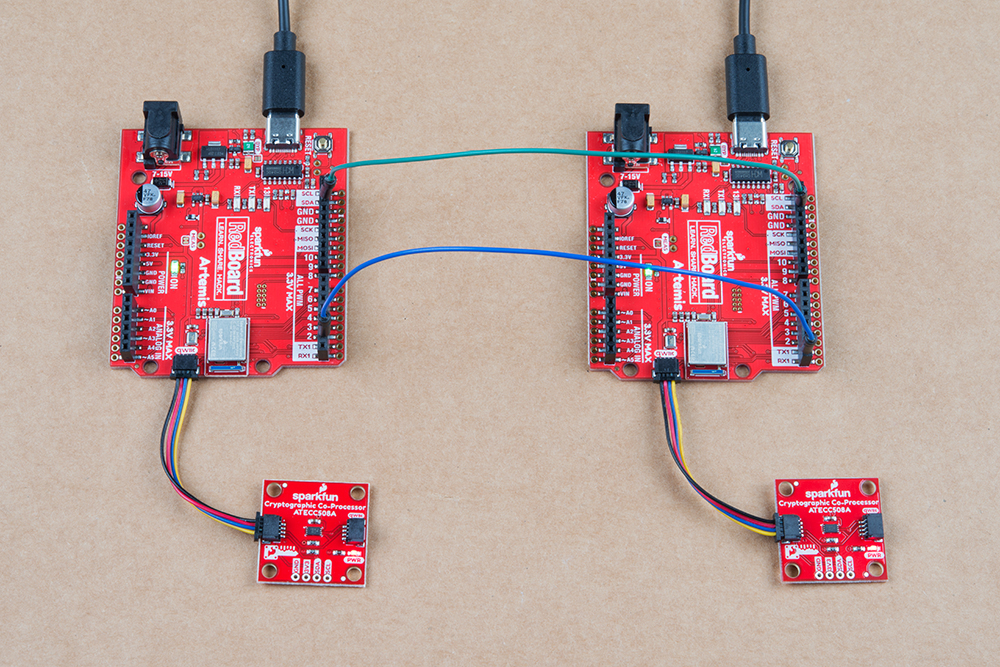
Note, both Alice and Bob need their own co-processor. So you're complete setup should look something like this:
Code setup
We will need to copy/paste Alice's public Key into the top of Bob's Sketch. First upload Alice's sketch to Alice, then watch her terminal at 115200. Copy her public key.
Now go over to Bob's sketch. Delete the place holder "blank" public key at the top, and paste in Alice's public key. Upload Bob's sketch to Bob.
Now watch both Alice's and Bob's terminal at 115200. Type a y into Alice's terminal, and she will send a signed message to Bob. Watch Bob's terminal. He will receive the message and verify it.
Watch this looped video to see it all happen. (click to enlarge).
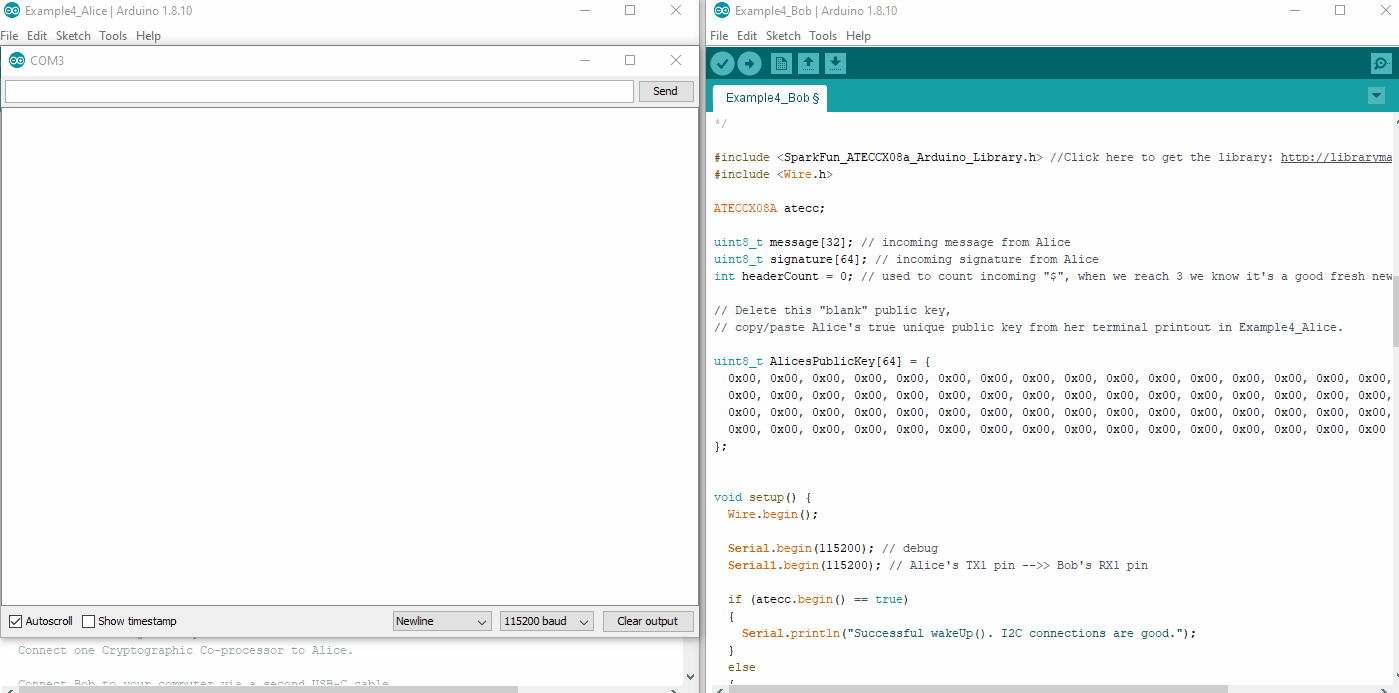
Example4_Alice.ino and Example4_Bob.ino working in conjunction. (Click to Enlarge) Things to note about this:
We are now using two separate co-processors! In this example, Bob is simply using his co-processor as a verification engine. This could be accomplished by any computer that can compute ECC signature verification. But it's really quite nice to offload this calculation to a co-processor, and it will perform the calculations very fast.
Alice signed her message with her private key and she gave her public key to Bob. Hopefully the private vs public thing is starting to sink in.
Bob used an external public key (Alice's) to verify the authenticity of Alice. He could potentially name this anything he wants. And he could store lots of them, if he wanted to be able to verify messages from other senders.
Alice will most likely make her public key truly public and let everyone know about it. Once everyone has it, then she can send authenticated messages to anyone she likes, and they will truly know that it came from Alice.
It does not have to be a one-way street. The example could easily be reversed and Bob could give Alice his public key. When they both have shared their public key with the other, they can both send and verify.
The Code
As mentioned above, this example has two sketches. The purpose of splitting it up allows us to build upon the first three examples, and communicate securely between two completely separate systems.
Alice's sketch is actually quite similar to the Example2_Sign.ino, although it also sends the message and signature out it's TX1 pin.
Let's take a closer look at the important stuff within Alice's sketch:
language:c
//Let's create a digital signature!
atecc.createSignature(message); // by default, this uses the private key securely stored and locked in slot 0.

// Now let's send the message to Bob.
// this will include three things:
// (1) start header ("$$$") ASCII "$" = 0x24 HEX
// (2) message (32 bytes)
// (3) signature (64 bytes)

// start header
Serial1.print("$$$");

// message
// note, we use "Serial.write" because we are sending bytes of data (not characters)
for (int i = 0; i < sizeof(message) ; i++) Serial1.write(message[i]);

// signature
// Note, in Example4_Alice we are printing the signature we JUST created,
// and it lives inside the library as a public array called "atecc.signature"
for (int i = 0; i < sizeof(atecc.signature) ; i++) Serial1.write(atecc.signature[i]);
At the top of this code block, you can see she is using atecc.createSignature(message), just like in Example2_sign.
Then Alice sends everything to Bob, including a start "header" ($$$). This is simply used to avoid errors during transmission and helps ensure that Bob hears the entire message.
One important thing to note is that when Alice sends her message and signature to Bob, she uses the Serial1.write() function, because she is sending data (not ASCII characters).
Now let's take a closer look at the important stuff in Example4_Bob.ino. Bob's sketch is actually quite similar to Example3_Verify.ino, although he receives the message and signature on his RX1 pin.
language:c
// Delete this "blank" public key,
// copy/paste Alice's true unique public key from her terminal printout in Example4_Alice.

uint8_t AlicesPublicKey[64] = {
0xB4, 0x07, 0x88, 0x28, 0x8C, 0xFA, 0x71, 0xBA, 0x08, 0xE3, 0x38, 0xE0, 0x4A, 0x17, 0x68, 0xCC,
0x3E, 0xCD, 0x48, 0xA8, 0x11, 0x52, 0xDD, 0x37, 0xA1, 0xC2, 0x55, 0x75, 0x81, 0xBE, 0x4E, 0x7E,
0x78, 0x98, 0x95, 0xF6, 0x6D, 0xE7, 0x1C, 0x9A, 0x36, 0xE6, 0xB0, 0x14, 0x5D, 0x50, 0x67, 0x91,
0x7C, 0x41, 0xB8, 0x99, 0x20, 0x75, 0x3A, 0x7D, 0xA1, 0xFB, 0xF5, 0x5E, 0x8A, 0x65, 0xF5, 0x8A
};
At the top, you need to copy in Alice's public key. Bob will need this to verify any messages and signatures he receives. Note, yours will be different than what I'm showing above.
language:c
void loop()
{
  if (Serial1.available() > 0) // listen on Serial1
  {
    // check for start header
    byte input = Serial1.read();
    //Serial.print(input, HEX);
    if (input == '$') headerCount++;
    if (headerCount == 3)
    {
      delay(100); // wait for entire message to come into Serial1 buffer (96 bytes at 9600 baud).

      headerCount = 0; // reset
      Serial.println("Message Received!");
      Serial.println();

      for (int bytes = 0 ; bytes < 32 ; bytes++) message[bytes] = Serial1.read();

      for (int bytes = 0 ; bytes < 64 ; bytes++) signature[bytes] = Serial1.read();

      printMessage();

      printSignature();

      // Let's verirfy!
      if (atecc.verifySignature(message, signature, AlicesPublicKey)) Serial.println("Success! Signature Verified.");
      else Serial.println("Verification failure.");
    }
  }
}
Above, we have Bob's entire loop(). He is listening for incoming data on his RX1 pin. If he hears the expected $$$, then he starts reading in the message and the signature, storing them in variables for later use.
Then Bob uses the atecc.verifySignature() function to see if everything is authentic. Note his third argument to this function - he is using AlicesPublicKey!