Digital Sandbox Experiment Guide
 jimblom,
  bri_huang
7: If This Then That
Fading from the last experiment was working just fine until we got to the maximum brightness level of 255. What happens then is a mystery known only to the compiler (and you, once you learn a little something about data types). What if we added "catch" to force that fade variable to reset when it hits a certain value?
Background Information
This experiment introduces the if statement, one of the most fundamental programming structures. Not only are if statements important for computers, they also rule most of the decisions we make in our lives: If it's cloudy outside, then pack your umbrella. If you're hungry, then make a sandwich. Like us, computers use if statements to make choices.
An if statement requires two components to be complete: a condition and a consequence. A condition is a value or mathematical operation that evaluates to either true or false. If the condition evaluates to true, then the consequence is executed. The consequence can be a code block of any size - one block or hundreds of blocks.
If the condition in the if statement is false, then the consequence is skipped, and the program starts running the code following the if block.
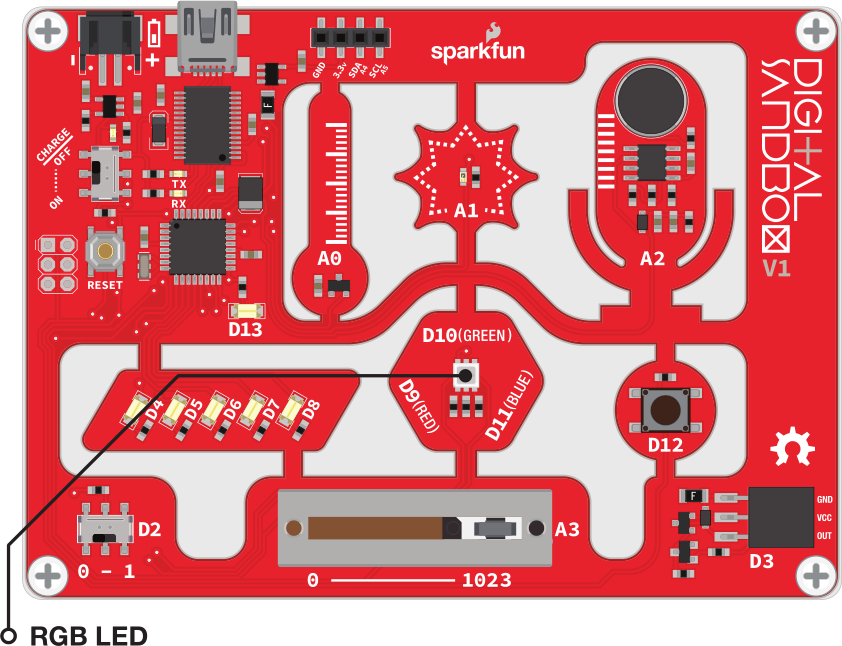
Active Parts
Code Components
Here are the blocks required to limit the fade value of our LED.
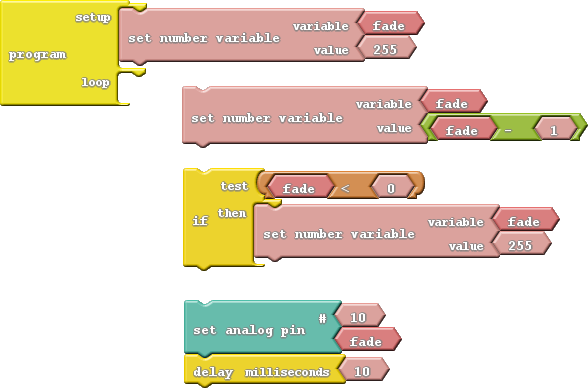
There are two new blocks to mention here:
- If: The star of this experiment can be found under the Control bin. The If block requires at least two blocks to be snapped into it: the conditional and the consequence. In this case, the consequence is just a single block - Set Number Variable. The conditional part of the if block is a logical operator block.
- Logical Operator: Logical operators are symbols which operate on one or two values and evaluate to either true or false, which makes them perfectly suited for the if statement conditional! In this case we'll be using the less than (<) operator. If the value to the left of the < symbol is less than the value on the right, then the operator is true. If the left is not less than (either greater than or equal to), then the condition will evaluate to false.
Do This
In this sketch, we want the blue LED to progressively go from super bright to off, and repeat that cycle endlessly. We'll use a variable called fade to keep track of the analog output value. At the very beginning of each loop, we'll subtract 1 from the fade variable.
Then, after subtracting from fade, we need to use an if statement to make sure it's not out of bounds. The if statement in this sketch states that if fade is less than 0 (that would mean it's a negative number), then set fade to 255.
Finally, once we've generated our fade value, we can set pin 10 (or pick another LED if you please) to that analog output value.
Now upload and enjoy a nice, controlled fade.
Further Explorations
- Can you make the fade work the other way? Start at 0, fade up to 255, and then go back to 0. (Hint: You'll need to flip the logical operator around.)
- Make it even smoother! Can you make it fade smoothly up and smoothly down in the same sketch? From 0 to 255, then 255 to 0, then 0 to 255, then back again.