EL Wire Hoodie
 bboyho
Prepare the EL Wire
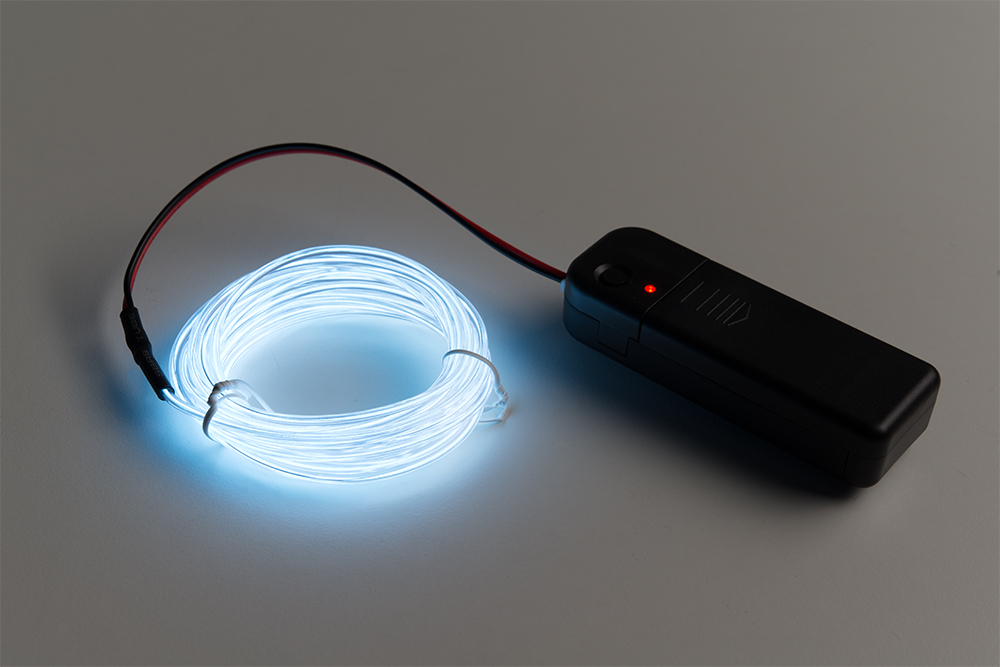
Testing the EL Wire and EL Inverter
Before sewing the EL wire to a piece of clothing, make sure to test it out to see if it is functioning. To test, connect the EL wire to an inverter. In this case, we are using AA batteries and the 3V EL inverter battery pack.

With the battery in the EL inverter battery pack, press the button to test. If the EL wire lights up, both the EL wire and EL inverter are good to go!
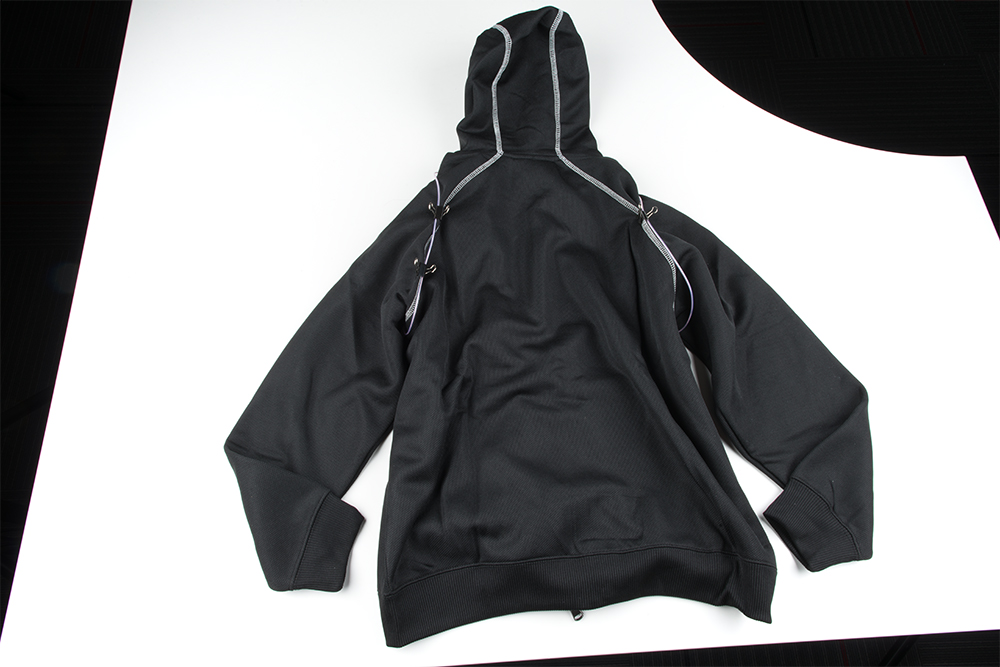
Planning the Path
Plan out where to add EL wire. While you can sew the EL wire on the arms, it will be harder due to the amount of room available to work with in the arm. The easiest would be to follow the edge of the hoodie. To hold down the EL wire when sewing, we will be using binder clips. Depending on what you have, you could also try to use pins or tape. Place the EL wire into the binder clip and clamp it down against the fabric. Make sure to avoid clamping the EL wire down where the binder clip pinches as this can damage the corona wires.
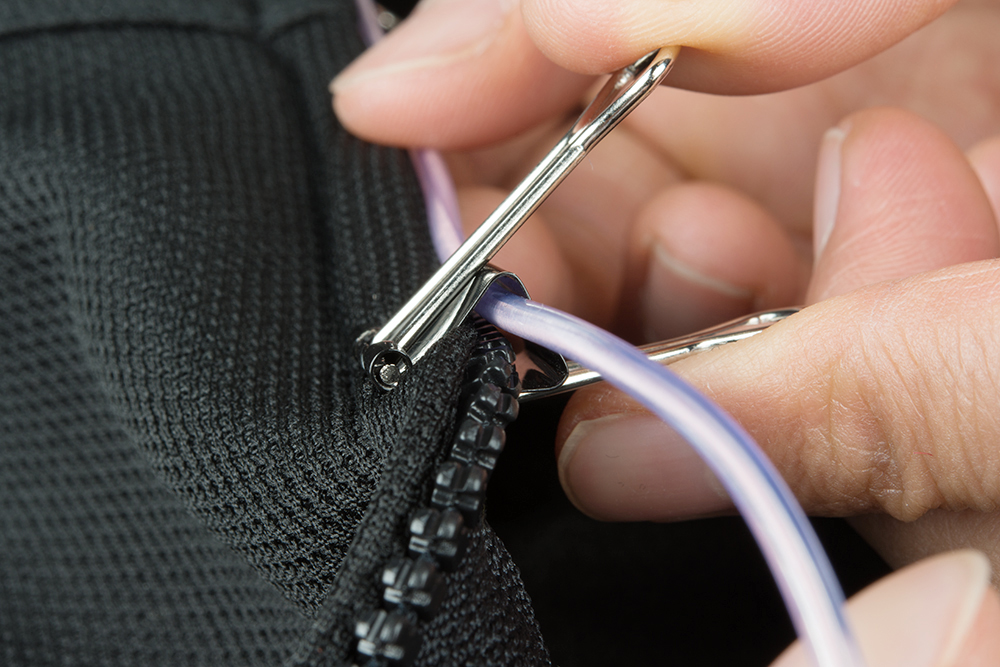
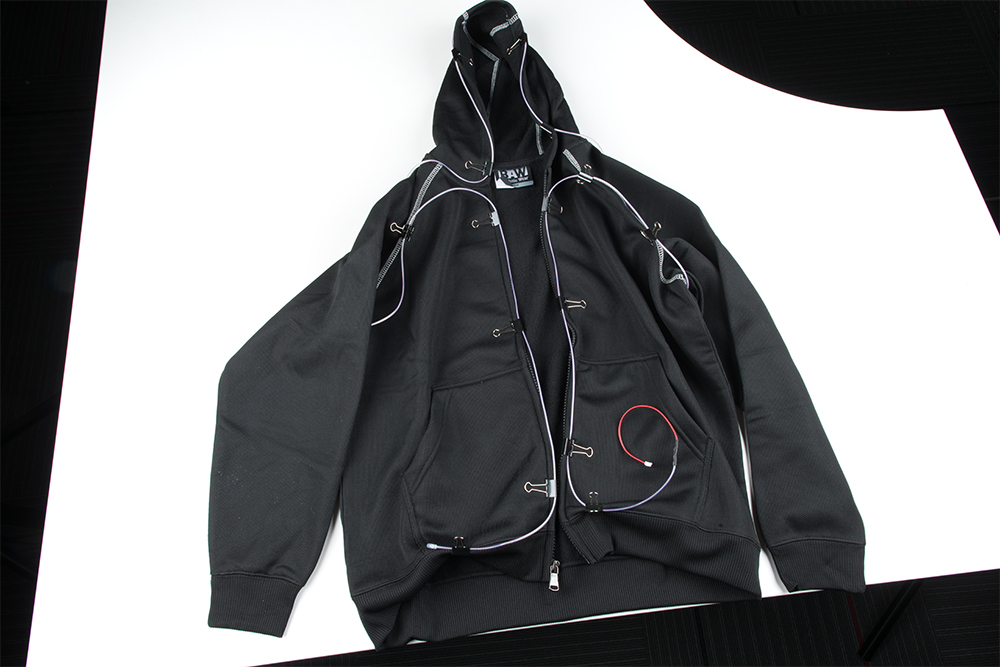
In this case, all 3 meters of EL wire were used starting under the pocket, running up the side of the zipper, around the shoulders, up to the brim of the hood, around the shoulders, down the zipper, and ending at the pocket on the other side. Make sure to avoid sharp bends. If you decide to use a shorter length, you can cut the EL wire. Just make sure to re-seal the cut end with hot glue, otherwise you could end up getting a good jolt..
 |
 |
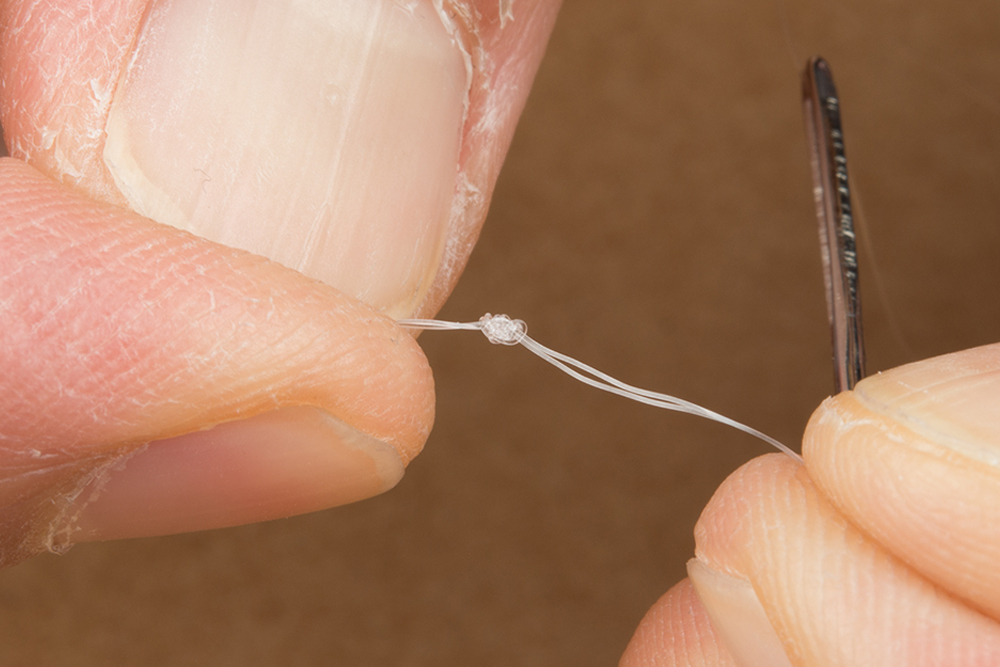
Prepare the Needle and Thread
For this tutorial, we will double up the clear thread. Prepare your needle and thread by inserting the end of the clear thread through the eye (opening) of the needle and pull it through. Cut about an arms length of thread (approximately 2 feet long) to work with. Tie the two ends of the fishing wires into a knot. You may need to use the needle to help guide the knot close to the end of the thread.

Repeat the steps again for a second knot. Cut of any excess tail left over.