ELasto-Nightlight
 Chelsea the Destroyer
Let's Build a Rabbit - Pt. 1
Ok, here we go! Now that you know what we're working toward, here is an exploded diagram of how our circuit will work:
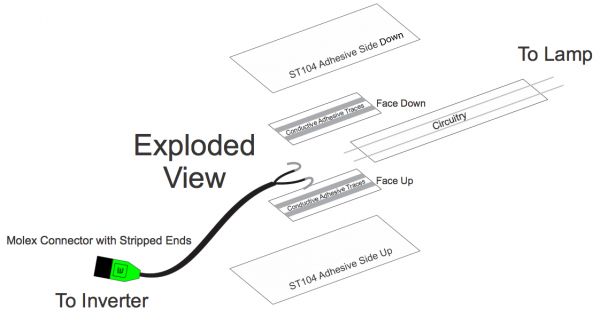
First thing's first, charge your inverter up by plugging the included mini USB cord into the inverter and using your computer or a USB wall adapter to charge it. The light should turn green when it's charged.
Then we will prep the wire bits that will connect to form our circuit. The Molex connector comes with four wires sticking out: red, tan, blue and green. However, we only need the red and tan ones, so using snippers, your hobby knife, or your BARE HANDS, cut off the green and blue wires, leaving the red and tan intact with some little tails of bare wire sticking out. We're halfway done with the wire parts!
Check out the ribbon of circuit tape, which looks like two parallel, grey strings inexplicably encased in a material that looks like it should glow-in-the-dark but sadly does not. You will notice in the exploded view that the circuit tape has exposed conductive thread at each end and that the circuit tape in your hand does not. This is because nothing comes easy in life, and that's the way it is. So, wield thy hobby knife and make a cut on each edge and across the middle section of the tape, perpendicular to the thread - WITHOUT cutting into the thread at all (because that will make our connection pointless) - and wiggle the sheath of tape right off of those wires, leaving about 1/3 of an inch exposed. Like this:
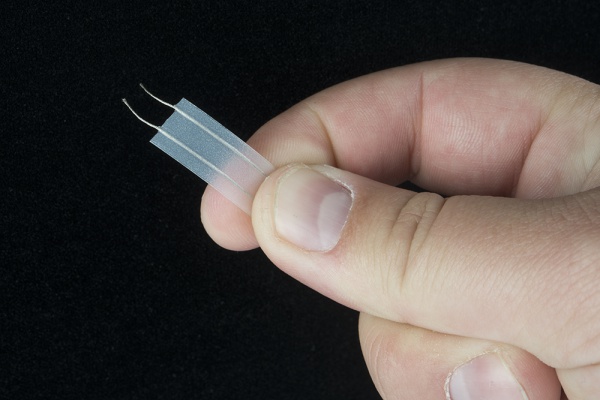
Repeat this on the other end of the tape. Note: You don't have to use ALL of the tape you have, it just depends on how much of a "cord" you need on your lamp. I only used about a foot.
Ok, the wires are ready! Let's push on.