ESP8266 WiFi Shield Hookup Guide
 jimblom
 Introduction
The ESP8266 is a popular, inexpensive WiFi/microcontroller system-on-chip (SoC). Although it can be programmed like any microcontroller, the ESP8266's popularity was gained as a simple, serially-controlled WiFi gateway. Using an AT command set, any microcontroller with a UART can use the ESP8266 to connect to WiFi networks, and interact with the rest of the Internet world over TCP or UDP. It's an easy (and cheap!) way to get your Arduino on the Internet!
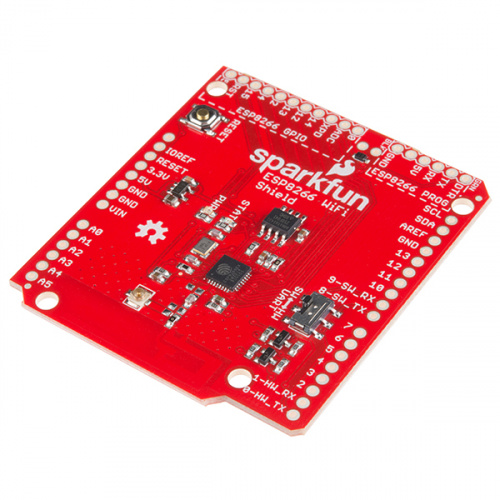
There are a variety of designs based around the ESP8266, including tiny, modular boards and more accessible development boards like the SparkFun ESP8266 Thing. The ESP8266 WiFi Shield finds a middle ground between the Module and the Thing -- it comes pre-flashed with an AT-command firmware, so it can be controlled by any UART, but it also breaks out and provides command access to all of the ESP8266's I/O. It comes in the familiar Arduino Shield shape, and should work with any similarly-sized Arduino-compatible development board out there.
Whether you want an introduction to the ESP8266 -- without leaving the comfortable hardware confines of your Arduino -- or you just have a back-stock of Arduino's that need an inexpensive gateway to the Internet, the ESP8266 WiFi Shield may meet your needs.
Covered In this Tutorial
This tutorial details the hardware and firmware design behind the ESP8266 WiFi Shield. It also explains how to use the Shield with an Arduino-compatible development board and the Arduino IDE. The guide is broken down into a few sections, which you can navigate around using the bar on the right. Those sections include:
- Hardware Overview -- The main components and hardware features of the Shield are covered in this section.
- AT Firmware Overview -- Documentation links, and a quick introduction to the firmware running on the ESP8266 WiFi Shield.
- Hardware Assembly -- Tips and tricks for assembling your WiFi Shield.
- Installing the ESP8266 AT Library -- Everything you should need to install the ESP8266 AT Arduino library.
- Using the ESP8266 AT Library -- Pointers to help get you started writing an ESP8266 Arduino sketch of your own.
- (Re-)Programming the ESP8266 -- Take the ESP8266 WiFi Shield further by loading your own code onto the shield! The ESP8266 is even Arduino compatible.
Required Materials
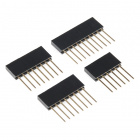
The ESP8266 Shield surrounds the WiFi SoC with everything it should need to operate and connect to a WiFi network. All you need to add to it are headers, some solder, and an Arduino. Here are a list of parts we use in the tutorial, in case you want to follow along:


Instead of the RedBoard, you should be able to use almost any other Arduino-compatible development board -- the Uno or Leonardo for example.
You'll also need a set of soldering tools, if you don't already have them. A simple iron and some solder should really be all you need.
Suggested Reading
Before delving headlong into this tutorial, there are a few concepts you should be familiar with. Check out these related tutorials, if their content sounds foreign to you:
- What is an Arduino? -- What is this 'Arduino' thing anyway?
- Arduino Shields -- All things Arduino Shields. What they are and how to assemble them.
- Serial Communication -- Asynchronous serial communication concepts: packets, signal levels, baud rates, UARTs and more!
- How to Solder - Through-hole Soldering -- Are you new to electronics and soldering? Have you soldered before but need a refresher? Do you solder all day everyday but still feel you could use a few tips and tricks? This tutorial with cover everything you need to know about through-hole soldering.