Experiment Guide for the Johnny-Five Inventor's Kit
 rwaldron
 reconbot
 D___Run___
 lyzadanger
 Shawn Hymel
Experiment 4: Reading a Push Button
Introduction
In Experiment 3, you journeyed into the fun world of input by reading data from an analog sensor. This experiment continues that journey, moving now into digital input. You'll learn how digital input differs from analog input, and you'll meet a useful new component: the push button (also sometimes called a momentary switch). You'll learn how to control a single LED with button presses, and then how to control multiple LEDs from multiple buttons.
Preflight Check
Whoa there, Turbo! If this is your first experiment with the Johnny-Five Inventor's Kit (J5IK) and the Tessel 2, there are a few things you gotta do first:Suggested Reading
The following tutorials provide in-depth background on some of the hardware concepts in this experiment:
- Switch Basics — Push buttons are a kind of a switch (a momentary switch)
- Pull-up and Pull-down Resistors — Pull-up and pull-down resistors are commonly used in circuits with digital logic
Parts Needed
To complete this experiment, you'll build two circuits. You'll need the following parts:
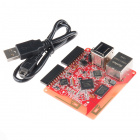
- 1x Tessel 2
- 1x Breadboard
- 2x Standard LED (any color is fine)
- 2x Push Button
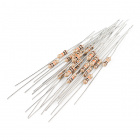
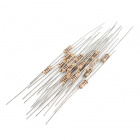
- 2x 100Ω Resistors
- 2x 10kΩ Resistors
- 12x Jumper Wires


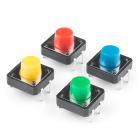
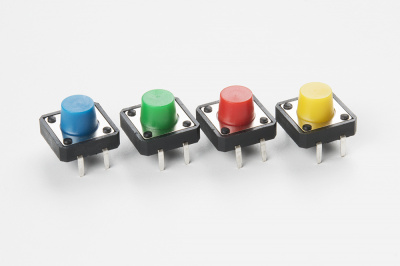
Introducing the Push Button
A momentary push button is a kind of switch, closing (completing) a circuit while it is being actively pressed. If you take a push button and look at it, you'll notice it has four pins, which might seem like a lot of pins. Let's walk through how the pins are connected to each other.
The four pins on a push button are split into two pairs. Each pin is adjacent to two other pins: the other half of its pair (on the opposite side of the button) and a pin not paired with it (located on the same side). A pin is always electrically connected to the other pin in its pair, but is only connected to the other adjacent pin when the button is actively being pressed. When you press down on the button and get a nice "click," the button bridges the two sets of pins and allows current to flow through the circuit.
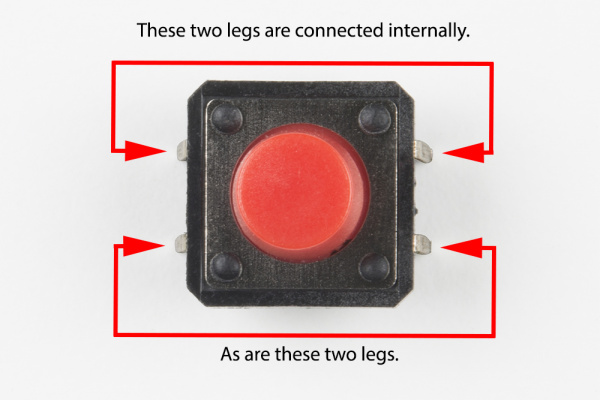
How do you know which pins are paired up? The buttons included in this kit will only fit across the breadboard ditch in one direction. Once you get the button pressed firmly into the breadboard (across the ditch), the pins are horizontally paired. The pins toward the top of the breadboard are connected, and the pins toward the button of the breadboard are connected.
All right, now we have a sense of how a button can complete a circuit, but we need the right kind of circuit for our button. Button presses need to cause a digital input on the Tessel to move between HIGH and LOW logic levels when the button is pressed. The circuits in the two wiring diagrams for this experiment use a 10kΩ pull-down resistor with the buttons to make sure that the Tessel will read the button circuit as LOW (off/false) when the button isn't pressed and HIGH (on/true) when it is.
Hardware Hookup
Your kit comes with four different colored push buttons. All push buttons behave the same, so go ahead and use your favorite color!
| Polarized Components | Pay special attention to the component’s markings indicating how to place it on the breadboard. Polarized components can only be connected to a circuit in one direction. |
Build the Button Circuit
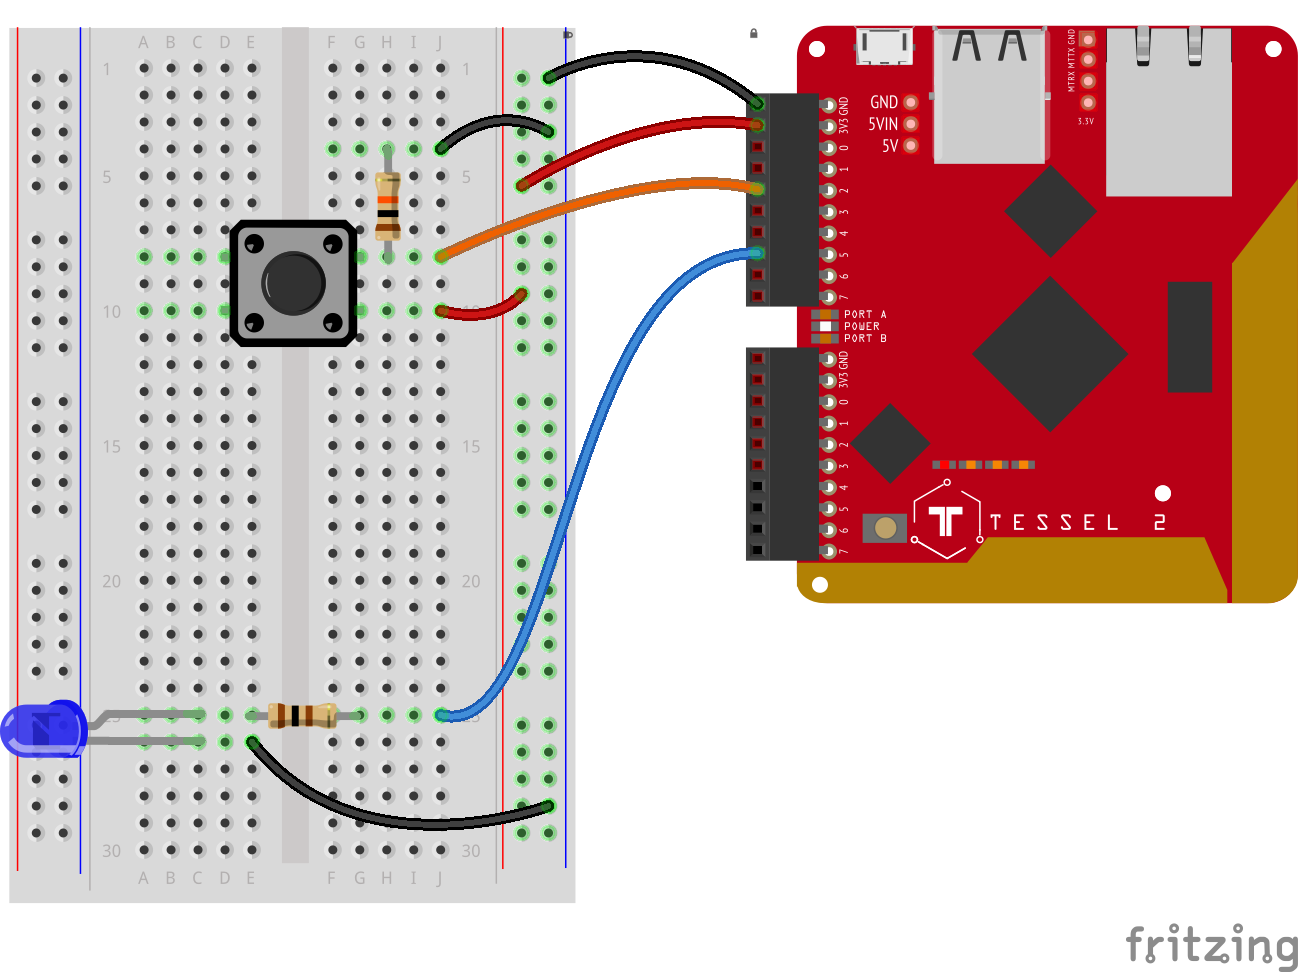
- Connect the pushbutton to the breadboard. It should only fit in one orientation spanning the center notch. Use jumper wires to connect one of the right-hand pins of the button to the ground power rail, through a 10kΩ resistor, as shown. Connect the other pin of the right side of the button to the supply power rail with another jumper wire.
- Starting from a socket on the same row as the 10kΩ resistor — but on the opposite side of it from the button — connect a jumper wire to the Tessel's Port A, Pin 2.
- Plug the LED into the breadboard as shown, making sure the anode (longer leg) is closer to the top of the breadboard. Connect the cathode (shorter leg) to the ground power rail using a jumper wire. Connect the anode, through a 100Ω resistor, to the Tessel 2's Port A, Pin 5.
- Connect the Tessel's +3.3V and GND pins to the breadboard's power rails, using jumper wires.
Observing a Button With Johnny-Five's Button Class
Open your favorite code editor, create a file called button.js and save it in the j5ik/ directory. Type — or copy and paste — the following JavaScript code into your button.js file:
language:javascript
var Tessel = require("tessel-io");
var five = require("johnny-five");

var board = new five.Board({
  io: new Tessel()
});

board.on("ready", () => {
  var button = new five.Button("a2");
  button.on("press", () => console.log("Button Pressed!"));
  button.on("release", () => console.log("Button Released!"));
});
Type — or copy and paste — the following into your terminal:
t2 run button.js
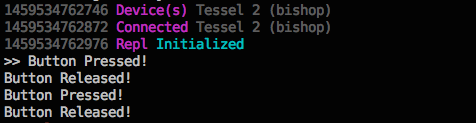
What You Should See
When you press the button, your terminal will display the appropriate message:
Exploring the Code
Using Input to Control Output With Johnny-Five
OK, let's make this do something a little more interesting before we dive in and look at how it works. Go back to your button.js and either type the changes or copy and paste the following code:
language:javascript
var Tessel = require("tessel-io");
var five = require("johnny-five");

var board = new five.Board({
  io: new Tessel()
});

board.on("ready", function() {
  var led = new five.Led("a5");
  var button = new five.Button("a2");
  button.on("press", () => led.on());
  button.on("release", () => led.off());
});
Type — or copy and paste — the following into your terminal:
t2 run button.js ‐‐single
The --single flag tells the T2 CLI to only deploy the single, specified file. This will preserve all other existing code on the Tessel 2 while still deploying your new program changes, which can make the deployment faster.
What You Should See
When you press the button, the LED should light up. When you release the button, the LED should turn off.
Exploring the Code
Once the board has emitted the ready event, we can initialize Led and Button instances to interact with our hardware on the specified pins:
language:javascript
var led = new five.Led("a5");
var button = new five.Button("a2");
The Johnny-Five Button class takes care of processing values from input in order to emit intuitive events for each state of the hardware. We've registered handlers for these events: press, hold and release.
When the button is pressed, turn the LED on:
language:javascript
button.on("press", () => led.on());
When the button is released, turn the LED off:
language:javascript
button.on("release", () => led.off());
Note: The minimum version of Node.js that runs on Tessel 2 supports many ES2015 features, including Arrow Functions, so we're using those here to simplify the program.
Variation: Using Complex Input to Control Output With Johnny-Five
Go back to your button.js and either type the changes or copy and paste the following code:
language:javascript
var Tessel = require("tessel-io");
var five = require("johnny-five");

var board = new five.Board({
  io: new Tessel()
});

board.on("ready", function() {
  var led = new five.Led("a5");
  var button = new five.Button("a2");
  button.on("press", () => led.on());
  button.on("hold", () => led.blink(500));
  button.on("release", () => led.stop().off());
});
What You Should See
When the button is pressed, the LED turns on. If the button is held (longer than half a second), the button will start blinking. When the button is released, the LED will turn off.
Exploring the Code
This variation adds a handler for the Button object instance's hold event.
When the button is held (defaults to 500ms hold time), change the output to blink in 500ms cycles:
language:javascript
button.on("hold", () => led.blink(500));
We need to make a small change to the release handler as well. When the button is released, we also need to stop any scheduled and running tasks (blink) before we turn the LED off:
language:javascript
button.on("release", () => led.stop().off());
Part II: Using Multiple Inputs to Control Multiple Outputs With Johnny-Five
Introduction
In Experiment 2, you saw how Johnny-Five's Leds class could be used to manage a collection of Led objects. Similarly, the Buttons class can be used to control multiple Button instances. Buttons and Leds are both "Collections" classes. Instances of these Collections classes are Array-like objects that take care of instantiating the individual objects (Button, Led, e.g.) in their collection on your behalf.
The Collections class constructors are flexible. They'll accept an Array that may contain pin numbers, configuration objects or existing instances of the component class they are initializing. Take a look at the following:
language:javascript
var a0 = new five.Led("a0");
var a1 = { pin: "a1", id: "some-custom-id" };
var a2 = "a2";
var leds = new five.Leds([a0, a1, a2]);
This would create an instance of the Leds class containing three Led instances, which each represent a single LED connected to a Tessel 2. These Collections classes do the busywork so you don't have to.
The next few examples will use Collections classes to manage multiple inputs and outputs.
Hardware Hookup
The second circuit in this experiment builds on the first. Go ahead and add the additional components to match the wiring diagram:

Multiple Inputs and Outputs With Buttons
Open your favorite code editor, create a file called buttons-leds.js and save it in the j5ik/ directory. Type — or copy and paste — the following JavaScript code into your buttons-leds.js file:
language:javascript
var Tessel = require("tessel-io");
var five = require("johnny-five");

var board = new five.Board({
  io: new Tessel()
});

board.on("ready", function() {
  var leds = new five.Leds(["b5", "b6"]);
  var buttons = new five.Buttons(["a5", "a6"]);

  buttons.on("press", (button) => {
    leds.off();
    leds[buttons.indexOf(button)].on();
  });
});
Type — or copy and paste — the following command into your terminal:
t2 run buttons-leds.js --single
The --single flag tells the T2 CLI to only deploy the single, specified file. This will preserve the existing code on the Tessel 2 while still deploying your new program changes, which can make the deployment faster.
What You Should See
Pressing the first button should cause the first LED to light up. Pressing the second button should cause the second button to light up. Either LED will stay lit until the other button is pressed.
Exploring the Code
As always, once the board object has emitted the ready event, we can initialize instances of the Leds and Buttons Collections classes to interact with our hardware:
language:javascript
var leds = new five.Leds(["b5", "b6"]);
var buttons = new five.Buttons(["a5", "a6"]);
Here's another cool thing about these Collections classes: instead of registering handlers on events for each of the objects in the collection's list individually (tedious and bug-prone), you can listen to them all with a single handler:
language:javascript
buttons.on("press", () => {
  // Yay! One of the buttons was pressed
});
OK, but which button?:
language:javascript
buttons.on("press", button => {
  // The first argument (`button`) passed to the callback handler function
  // is a reference to the `Button` instance that was pressed
  // So...turn on the corresponding LED somehow...
});
We've mentioned this before — Collections classes act like Arrays, so much so that they are referred to as "array-like" (seriously! That's a technical term nowadays). Some of the ways they act like Arrays: they have a length property, and you can access their constituent objects using numeric indices. We saw this in Experiment 2.
That means that the first Button object can be accessed as buttons[0] and the second as buttons[1]. Ditto for leds[0] and leds[1] for the Led objects.
| Collection Element | Object |
|---|---|
leds[0] |
Led object instance (Port B, Pin 5)
|
leds[1] |
Led object instance (Port B, Pin 6)
|
buttons[0] |
Led object instance (Port A, Pin 5)
|
buttons[1] |
Led object instance (Port A, Pin 6)
|
Now we could explicitly turn on a specific LED, accessing it by index:
language:javascript
buttons.on("press", button => {
  leds[0].on();
});
But we want to dynamically determine which LED to turn on. If the first button is pressed (buttons[0]), we should turn on the first LED (leds[0]). That means we need to know the index (0 or 1) of the button that is being pressed so we can turn on the corresponding LED.
Well, good news. Buttons is array-like enough that we can use the indexOf method like so:
language:javascript
buttons.on("press", button => {
  // Use indexOf method, just like a real Array
  // This will return the numeric index for the `button` object in `buttons`
  // (either 0 or 1)
  var index = buttons.indexOf(button);
  leds.off();  // Turn 'em all off first
  leds[index].on(); // Turn on the correct LED
});
Or more succinctly:
buttons.on("press", (button) => {
  leds.off();
  leds[buttons.indexOf(button)].on();
});
Building Further
- Create a game where an LED is lit after some random amount of time, and the player must turn it off before x amount of time has passed. The amount x may get shorter as the player progresses.
Reading Further
- JavaScript -- JavaScript is the programming language that you'll be using:
- Node.js -- Node.js is the JavaScript runtime where your programs will be executed.
- Johnny-Five -- Johnny-Five is a framework written in JavaScript for programming hardware interaction on devices that run Node.js.