Experiment Guide for the Johnny-Five Inventor's Kit
 rwaldron
 reconbot
 D___Run___
 lyzadanger
 Shawn Hymel
Experiment 8: Driving an RGB LED
Introduction
You know what's even more fun than a blinking LED? Changing colors with one LED. RGB (Red-Green-Blue) LEDs have three different color-emitting diodes that can be combined to create all sorts of colors. In this circuit, you'll learn how to use an RGB LED to create unique color combinations. Depending on how bright each diode is, nearly any color is possible!
Preflight Check
Whoa there, Turbo! If this is your first experiment with the Johnny-Five Inventor's Kit (J5IK) and the Tessel 2, there are a few things you gotta do first:Suggested Reading
The following tutorial provides in-depth background on some of the hardware concepts in this experiment:
- LEDs (Light-Emitting Diodes) — LEDs are found everywhere. Learn more about LEDs and why they are used in so many products all over the world.
Parts Needed
You will need the following parts for this experiment:
- 1x Tessel 2
- 1x Breadboard
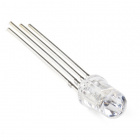
- 1x LED, RGB Common Cathode
- 3x 100Ω Resistors
- 5x Jumper Wires


Introducing the Red-Green-Blue (RGB) LED
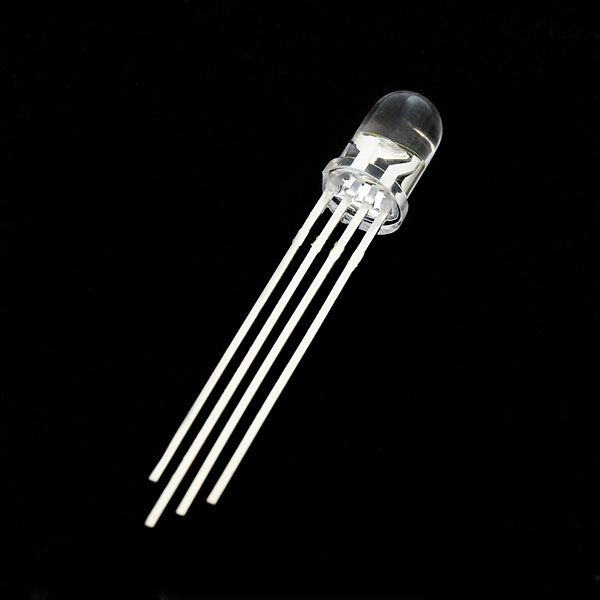
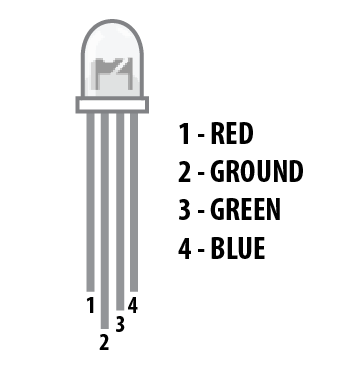
The Red-Green-Blue (RGB) is three LEDs in one. By controlling the intensities of each of the three component colors individually, you can create all of the colors of the rainbow. The RGB LED in your kit is a common-cathode RGB LED. Each of the three shorter legs controls an individual color (red, green or blue). The fourth, longer leg is a shared ground—-the common cathode. In contrast to standard individual LEDs, the cathode leg on a common-cathode RGB LED is longer than the other legs.
But which leg is which color? Pick up the RGB so that the longest leg (common ground) is aligned to the left as shown in the graphic below. From left to right, the pins are: red, ground (common cathode), green, blue.
Hardware Hookup
Ready to start hooking everything up? Check out the wiring diagram and hookup table below, to see how everything is connected.
| Polarized Components | Pay special attention to the component’s markings indicating how to place it on the breadboard. Polarized components can only be connected to a circuit in one direction. |
Build the RGB LED Circuit
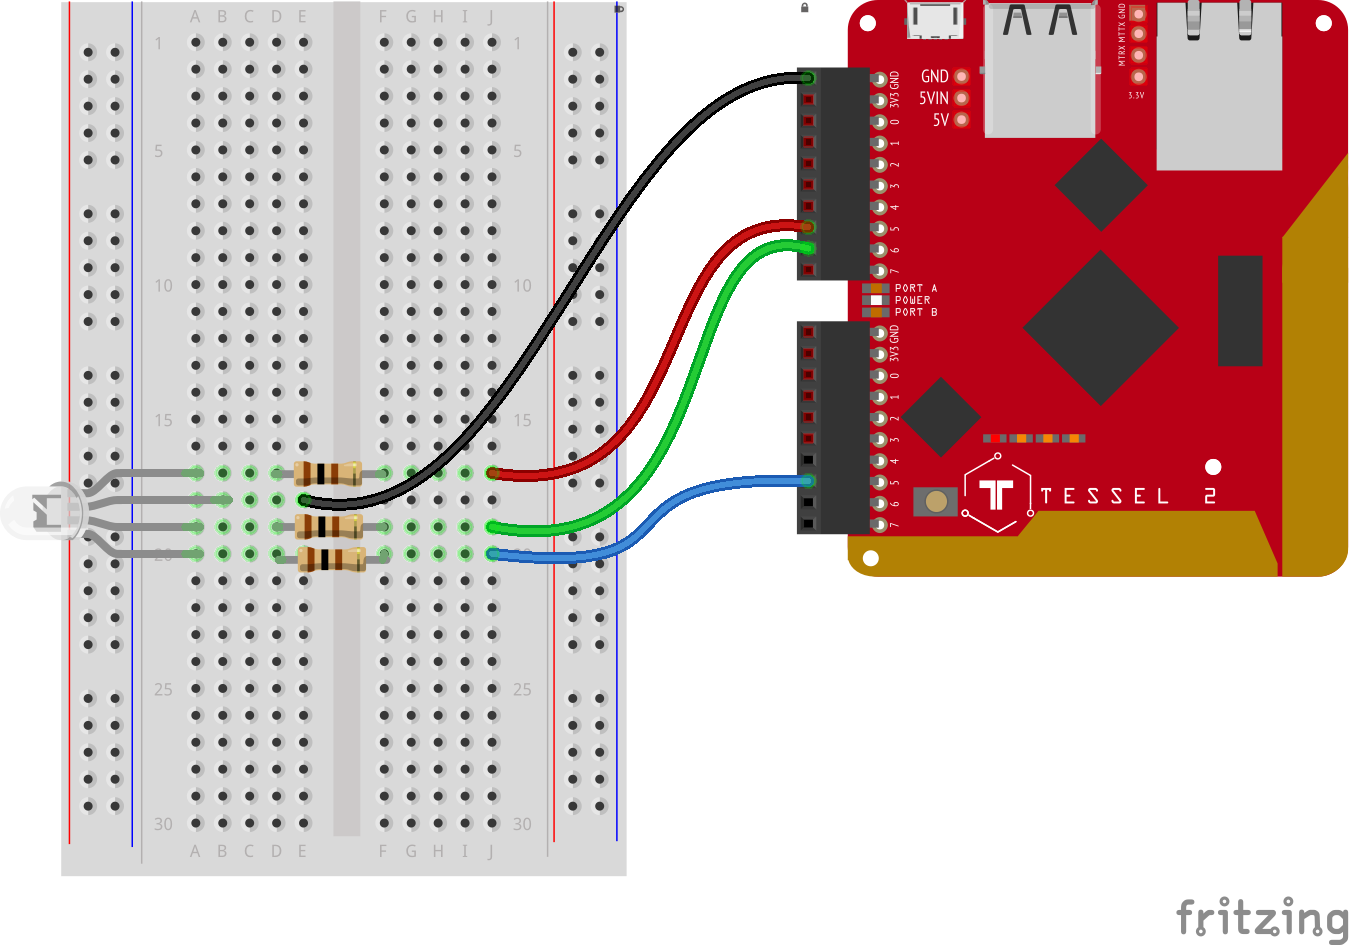
- Connect the RGB LED to the breadboard as shown. The legs, top to bottom, will be red, ground, green, blue -- with each leg in its own row on the breadboard. Remember: the cathode (ground) leg is the longest leg.
- Connect a 100Ω resistor across the center gap in each component color's row.
- On the far side of the resistor from each color leg, use jumper wires to connect each color to a pin on the Tessel 2. Red should connect to Port A, Pin 5. Green: Port A, Pin 6. Blue: Port B, Pin 5.
- Connect the ground (cathode) leg of the RBG LED to the Tessel's GND pin using a jumper wire.
Cycling Colors on Your RBG LED With Johnny-Five
Open your favorite code editor, create a file called rgb-led.js and save it in the j5ik/ directory. Type—or copy and paste—the following JavaScript code into your rgb-led.js file:
language:javascript
var Tessel = require("tessel-io");
var five = require("johnny-five");

var board = new five.Board({
  io: new Tessel()
});

board.on("ready", () => {
  var led = new five.Led.RGB({
    pins: {
      red: "a5",
      green: "a6",
      blue: "b5",
    }
  });

  var index = 0;
  var rainbow = ["white", "black", "red", "orange", "yellow", "green", "blue", "indigo", "violet"];

  board.loop(1000, () => {
    led.color(rainbow[index]);
    index = index + 1;
    if (index === rainbow.length) {
      index = 0;
    }
  });
});
Type—or copy and paste—the following into your terminal:
t2 run rgb-led.js
What You Should See
The RGB LED should loop through the colors in the rainbow Array.
Exploring the Code
After the board is ready, a new Led.RGB is instantiated. We need to tell Johnny-Five which pins each of the RGB LED's colors are connected to:
language:javascript
var led = new five.Led.RGB({
  pins: {
    red: "a5",
    green: "a6",
    blue: "b5",
  }
});
Next, a couple of variables are initialized: one to keep track of an Array index for looping, another an Array of colors to display with the RGB LED:
language:javascript
var index = 0;
var rainbow = ["white", "black", "red", "orange", "yellow", "green", "blue", "indigo", "violet"];
Then, similar to looping in Experiment 7 and other previous experiments:
language:javascript
board.loop(1000, () => {
  led.color(rainbow[index]);
  index = index + 1;
  if (index === rainbow.length) {
    index = 0;
  }
});
The loop (see Experiment 2 method will call our code every second. Inside the loop we take the next color name from the rainbow array and pass it to the led's color() method.
There are a number of ways you can tell the RGB Led object's color method what color to use. One of those ways is to use a string. You can pass any valid CSS color name. The strings in the rainbow Array are all valid CSS colors.
Setting Specific Colors With Johnny-Five
The following two lines do the same thing:
language:javascript
led.color("red");
led.color([255, 0, 0]);
In the second line, an 8-bit value (0--255) is passed for each of the three component colors (red, green, blue).
Go back to your rgb-led.js and either type or copy and paste the following:
language:javascript
var Tessel = require("tessel-io");
var five = require("johnny-five");

var board = new five.Board({
  io: new Tessel()
});

board.on("ready", function() {
  var led = new five.Led.RGB({
    pins: {
      red: "a5",
      green: "a6",
      blue: "b5",
    }
  });

  led.color(0, 255, 255);
});
Type—or copy and paste—the following into your terminal:
t2 run rgb-led.js --single
The --single flag tells the T2 CLI to only deploy the single, specified file. This will preserve the existing code on the Tessel 2, while still deploying your new program changes. This can make deployment faster.
What You Should See
The LED should be cyan.
Exploring the Code
language:javascript
led.color(0, 255, 255);
This line sets red to 0, green to 255 and blue to 255. The resulting color is cyan.
Animating an RGB LED With Keyframes
In Experiment 7 you learned about keyframe animations, so let's see what we can do with a basic set of keyframes and the RGB LED.
Open your favorite code editor, create a file called keyframes-rainbow.js and save it in the j5ik/ directory. Type—or copy and paste—the following JavaScript code into your keyframes-rainbow.js file:
language:javascript
var five = require("johnny-five");
var Tessel = require("tessel-io");
var board = new five.Board({
  io: new Tessel()
});

board.on("ready", function() {
  var rgb = new five.Led.RGB(["a5", "a6", "b5"]);

  var animation = new five.Animation(rgb);

  var rainbow = () => {
    animation.enqueue({
      loop: true,
      duration: 6000,
      cuePoints: [ 0, 0.16, 0.32, 0.5, 0.66, 0.83, 1 ],
      keyFrames: [
        // Any valid "color" argument can be used!
        {color: "red"},
        [255, 99, 0],
        {color: "ffff00"},
        {color: { red: 0x00, green: 0xFF, blue: 0x00 } },
        {color: "indigo"},
        "#4B0082",
      ],
      oncomplete: rainbow
    });
  };
  rainbow();
});
What You Should See
The RGB LED will cycle through the colors in the rainbow repeatedly, like the first rainbow example. However, instead of abruptly changing from color to color, the LED will display a cross-fading effect, smoothly moving from one color to the next.
Exploring the Code
In the first two examples, two different color values were used:
language:javascript
led.color("red");
led.color([255, 0 0]);
The keyframes in this example use yet more valid color values:
language:javascript
keyframes: [
  // Any valid "color" argument can be used!
  {color: "red"},
  [255, 99, 0],
  {color: "ffff00"},
  {color: { red: 0x00, green: 0xFF, blue: 0x00 } },
  {color: "indigo"},
  "#4B0082",
]
Explore the many ways to define color in Johnny-Five!
Troubleshooting
LED Remains Dark or Shows Incorrect Color?
When the code runs you should see your LED go through the colors of the rainbow. If any of the primary colors (red, green or blue) don't light up, check your wiring and try again. With the four pins of the LED so close together, it's sometimes easy to misplace one. Double check each pin is where it should be.
Building Further
The LED.RGB class has many interesting methods:
- Change the intensity with the
intensity()method. - Control with the
on()andoff()methods. - Build a visual thermometer using the BME280 with red representing "hot," green "room temperature" and blue "cold."
Reading Further
- JavaScript — JavaScript is the programming language that you'll be using.
- Node.js — Node.js is the JavaScript runtime where your programs will be executed.
- Johnny-Five — Johnny-Five is a framework written in JavaScript for programming hardware interaction on devices that run Node.js.