Force Sensitive Resistor Hookup Guide
 jimblom,
  bboyho
Example Arduino Sketch
Here is a simple Arduino example based on the circuit above. Copy and paste this into your Arduino IDE, then upload!
Note: This example assumes you are using the latest version of the Arduino IDE on your desktop. If this is your first time using Arduino, please review our tutorial on installing the Arduino IDE.
If you have not previously installed an Arduino library, please check out our installation guide.language:c
/******************************************************************************
Force_Sensitive_Resistor_Example.ino
Example sketch for SparkFun's force sensitive resistors
(https://www.sparkfun.com/products/9375)
Jim Lindblom @ SparkFun Electronics
April 28, 2016
Create a voltage divider circuit combining an FSR with a 3.3k resistor.
- The resistor should connect from A0 to GND.
- The FSR should connect from A0 to 3.3V
As the resistance of the FSR decreases (meaning an increase in pressure), the
voltage at A0 should increase.
Development environment specifics:
Arduino 1.6.7
******************************************************************************/
const int FSR_PIN = A0; // Pin connected to FSR/resistor divider
// Measure the voltage at 5V and resistance of your 3.3k resistor, and enter
// their value's below:
const float VCC = 4.98; // Measured voltage of Ardunio 5V line
const float R_DIV = 3230.0; // Measured resistance of 3.3k resistor
void setup()
{
Serial.begin(9600);
pinMode(FSR_PIN, INPUT);
}
void loop()
{
int fsrADC = analogRead(FSR_PIN);
// If the FSR has no pressure, the resistance will be
// near infinite. So the voltage should be near 0.
if (fsrADC != 0) // If the analog reading is non-zero
{
// Use ADC reading to calculate voltage:
float fsrV = fsrADC * VCC / 1023.0;
// Use voltage and static resistor value to
// calculate FSR resistance:
float fsrR = R_DIV * (VCC / fsrV - 1.0);
Serial.println("Resistance: " + String(fsrR) + " ohms");
// Guesstimate force based on slopes in figure 3 of
// FSR datasheet:
float force;
float fsrG = 1.0 / fsrR; // Calculate conductance
// Break parabolic curve down into two linear slopes:
if (fsrR <= 600)
force = (fsrG - 0.00075) / 0.00000032639;
else
force = fsrG / 0.000000642857;
Serial.println("Force: " + String(force) + " g");
Serial.println();
delay(500);
}
else
{
// No pressure detected
}
}
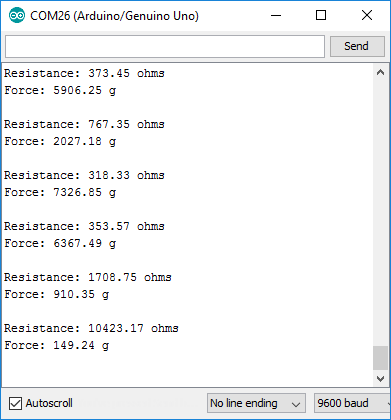
After uploading, open your serial monitor, and set the baud rate to 9600 bps.
If you apply pressure to the FSR, you should see resistance and estimated pressure calculations begin to appear:
Play with the circuit and see how high or low you can get the readings to be. If you have more resistors, try swapping larger or smaller values in for the 3.3kΩ to see if you can make the circuit more sensitive. Don't forget to change the value of R_DIV towards the top of the sketch if you do!