Getting Started with the Raspberry Pi Zero Wireless
 M-Short
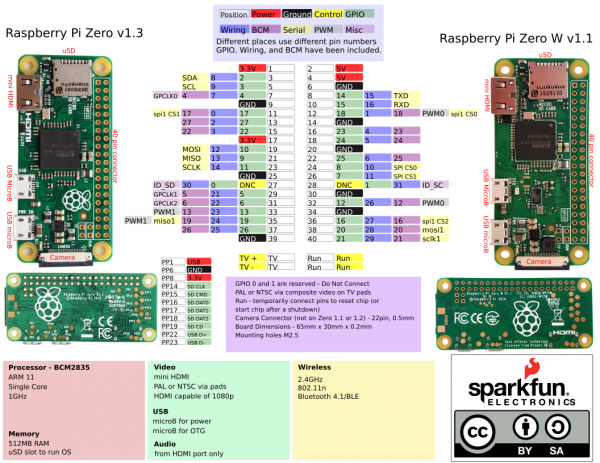
 Hardware Overview
Let's go over some of the most noticeable differences between the Raspberry Pi Zero (and Pi Zero W) and the Raspberry Pi 3.
Both boards are identical in features except that the W has built in Wifi and Bluethooth. Getting started with the Pi Zero board can be a little more cumbersome than with the Pi 3 because many of the connectors need adapters to connect to standard size connectors. Otherwise, to get started, all you need is a uSD card with a Raspberry Pi image on it and power.
Mini HDMI
Unlike the previous models of the Raspberry Pi which use a standard HDMI connector, the Zero uses a mini HDMI connector to save space. To connect the Zero to a monitor or television, you will need a mini HDMI to HDMI adapter or cable.
USB On-the-Go
The Raspberry Pi 3 and other models have traditionally had 2-4 standard size female USB connectors, which allowed for all variety of devices to connect including mice, keyboards, and WiFi dongles. Again to save space, the Zero has opted for a USB On-the-Go (OTG) connection. The Pi Zero uses the same Broadcom IC that powered the original Raspberry Pi A and A+ models. This IC connects directly to the USB port allowing for OTG functionality, unlike the Pi B, B+, 2 and 3 models, which use an onboard USB hub to allow for multiple USB connections.
To connect a device with a standard male USB connection, you will need a USB OTG cable. Plug the microUSB end into the Pi Zero, and plug your USB device into the standard female USB end.
For use with other standard USB devices, it is recommended that you use a powered USB hub. Wireless keyboard and mouse combos work best as they have one USB dongle for both devices.
Power
Like other Pis, power is provided through a microUSB connector. Voltage supplied to the power USB should be in the range of 5-5.25V.
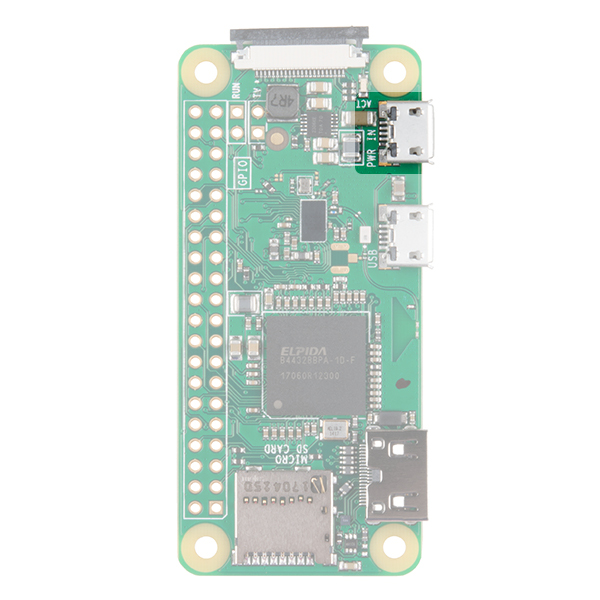
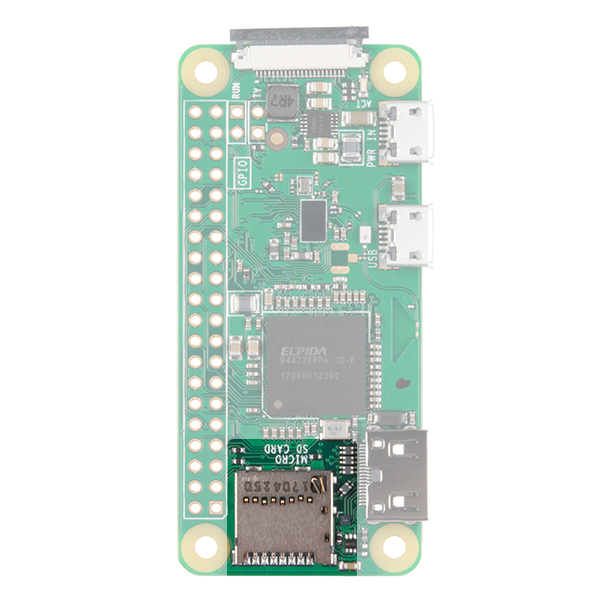
microSD Card Slot
Another familiar interface is the microSD card slot. Insert your microSD cards that contains your Raspberry Pi image file here.
WiFi and Bluetooth
As with the Raspberry PI 3, the Zero W offers both 802.11n wireless LAN and Bluetooth 4.0 connectivity. This frees up many of the connections that would have been made over USB, such as a WiFi dongle and a USB keyboard and mouse if substituting a Bluetooth keyboard/mouse.
Camera Connector
The Raspberry Pi Zero V1.3+ and all Zero Ws have an onboard camera connector. This can be used to attach the Raspberry Pi Camera module. However, the connector is a 22pin 0.5mm and different than the standard Pi. You will need a different cable to connect the camera to the Pi Zero W.

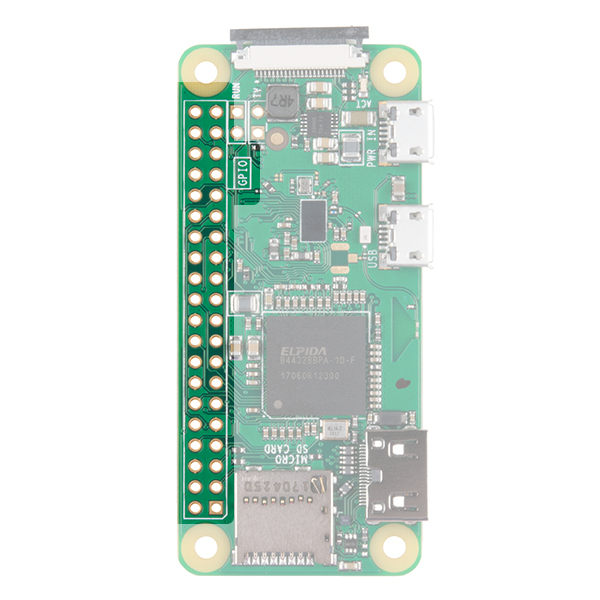
GPIO
As with all other models of the Raspberry Pi, there are a plethora of GPIO pins broken out, many of which other other functionality such as I2C. If you are using the GPIO header, you may want to consider soldering headers to it.
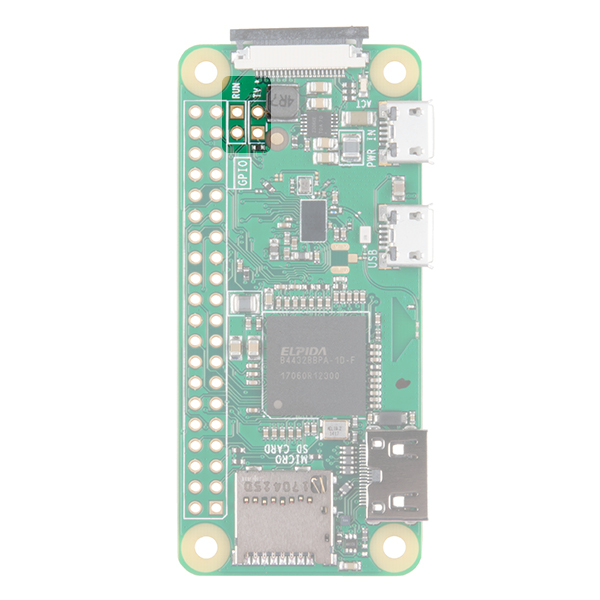
Additional Connections
Last, you may notice two sets of thruhole pads labeled TV and Run. The TV pads allow you to connect an RCA jack to the board instead of using the HDMI out. The Run pins connect to the chips reset pin and will either turn the board off or turn it back on once it has been shutdown. Connecting a button here is a good way to power cycle your board.
For a complete description of each pin on the GPIO header and all the connectors on the PI Zero, consult the graphical datasheet below.