Getting Started with u-blox Thingstream and PointPerfect
 bboyho
 Introduction
Interested in high precision GNSS without setting up a base station? Try the u-blox Thingstream and PointPerfect via Internet Protocol (IP)! This tutorial will go over how to use an ESP32 microcontroller to connect to u-blox Thingstream and PointPerfect over Internet to push correction data to a high precision GNSS.
Required Materials
To follow along with this tutorial, you will need the following materials at a minimum. You may not need everything though depending on what you have. Add it to your cart, read through the guide, and adjust the cart as necessary. Below is a wishlist of the parts that you need to get started.
Arduino Microcontroller
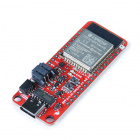
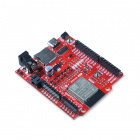
You will need a microcontroller capable of connecting to WiFi. We recommend the ESP32. The IoT RedBoard ESP32 is a good start. There is also the Thing Plus - ESP32 for users looking for a smaller development board. Both of built in Qwiic connectors to easily connect to breakout board. For users following the MicroMod route, you could use the MicroMod ESP32 Processor Board.

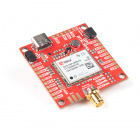
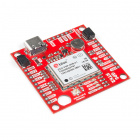
u-blox High Precision GNSS (HPG) Module
You will need a compatible u-blox High Precision GNSS (HPG) Module capable of using the service. The following have been tested to work with u-blox Thing Stream and PointPerfect.
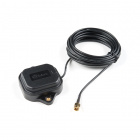
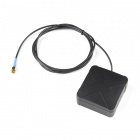
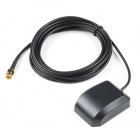
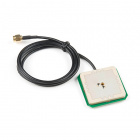
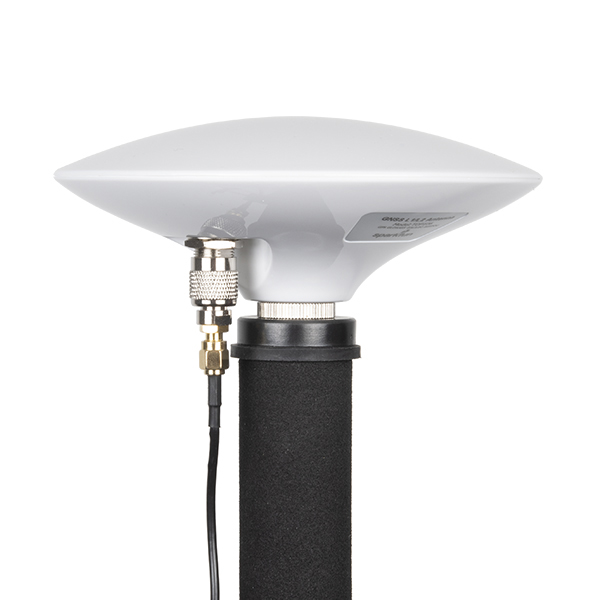
Multi-band Antenna
We recommend using a GNSS multi-band magnetic mount antenna for the full RF reception. The length of the antenna cable was also useful in mounting it.

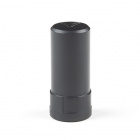
GPS Antenna Accessories
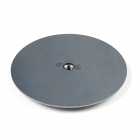
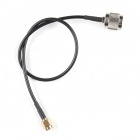
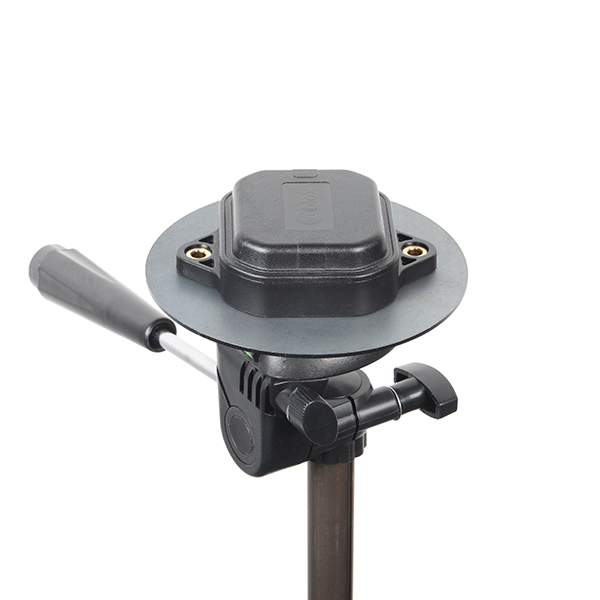
You can use the GPS antenna ground plate to improve your GPS antenna's performance. If you are using the GNSS Multi-Band L1/L2 Surveying Antenna (TNC) - TOP106, you'll need to grab the interface cable. You will also need an adapter depending on the connector that is populated on the GNSS board and the GNSS Antenna.
Accessories
At a minimum, you will need a USB C cable to power and program the boards. Depending on your application, you may want to grab a Qwiic cable to connect to the breakout boards.


Tools
For users using MicroMod, you will need a screw driver to tighten the screw between the processor/function board and carrier board.
You Will Also Need
You will also need Internet access and to purchase a pricing plan with the ThingStream PointPerfect Location-as-a-Service over Internet Protocol (IP).
 |
 |
| Graphic of card insert (top and bottom) included with compatible u-blox high precision GNSS modules. | |
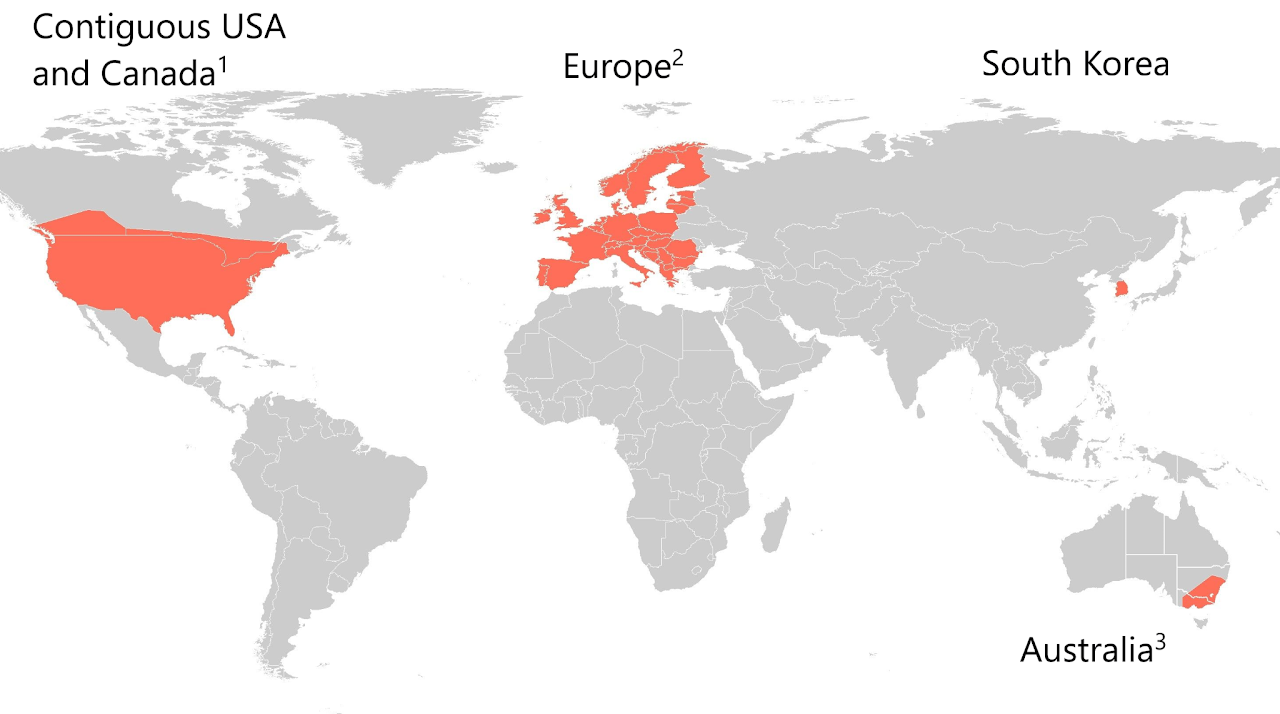
As stated on the coverage map from u-blox, the service includes homogeneous coverage in the contiguous USA and Europe This includes up to 12 nautical miles (roughly 22 kilometers) off coastlines. Make sure to check back on the u-blox's website to see if there is additional coverage in your region. There are additional regions under consideration for the future.
Suggested Reading
If you are using MicroMod, we recommend reading here for an overview. We recommend reading here for an overview if you decide to take advantage of the Qwiic connector.
 |
|
| MicroMod Ecosystem | Qwiic Connect System |
If you aren’t familiar with the following concepts, we recommend checking out these tutorials before continuing. We will be using the IoT RedBoard with the ESP32 to connect to the Internet in this tutorial. If you are using another ESP32 development board or WiFi module, make sure to check out its associated tutorial. You may need to install a board definition or a different driver.
Getting Started with U-Center for u-blox
IoT RedBoard ESP32 Development Board Hookup Guide
Be sure to checkout our What is GPS RTK? tutorial. Also, make sure to check out your respective breakout boards for more information.
What is GPS RTK?
GPS-RTK2 Hookup Guide
MicroMod GNSS Carrier Board (ZED-F9P) Hookup Guide
MicroMod GNSS Function Board - ZED-F9P Hookup Guide
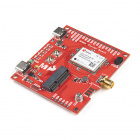
Hardware Hookup
To add GNSS correction data to your high precision GNSS receiver like the ZED-F9P, you can connect any of the serial ports between the two boards. If you are using SPI to connect, just make sure to enable the SPI port by adding a solder jumper to the SPI jumper pads. For an embedded application, we recommend adding an ESP32 to the setup. The ESP32 will allow you to use the Thingstream PointPerfect over Internet Protocol (IP) using MQTT.
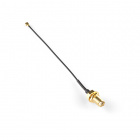
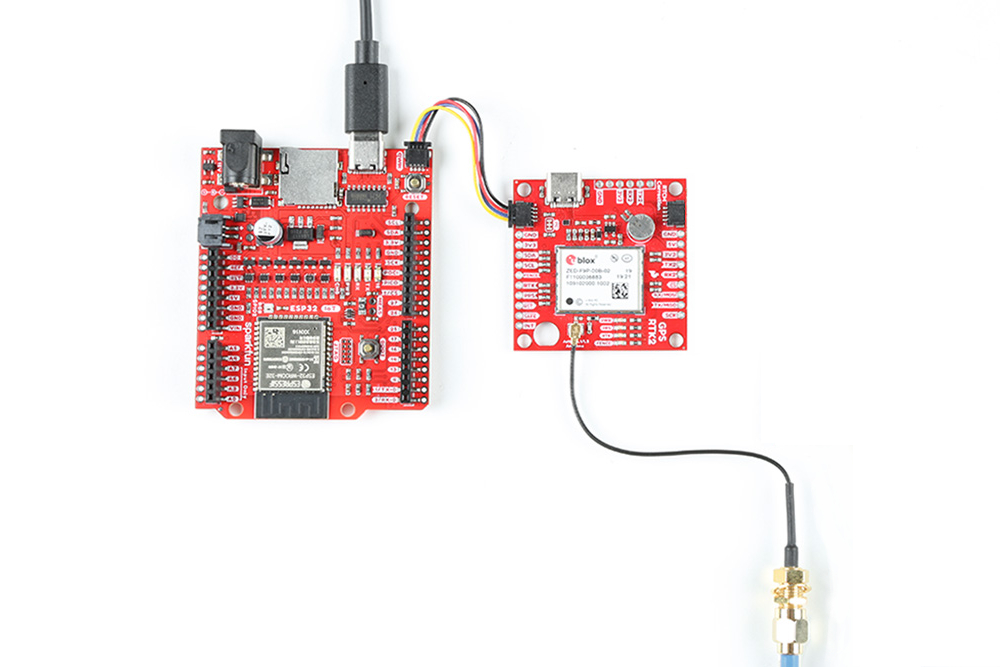
Below is one example to connect using the I2C port and Qwiic. Simply insert a Qwiic cable between the ZED-F9P and Arduino microcontroller's Qwiic connectors. Plug in a compatible antenna with SMA connector to the ZED-F9P. For the ZED-F9P, you will need the multiband antenna that is capable of receiving L1/L2 bands. For boards that have a u.FL connector, make sure use a u.FL to SMA adapter cable. Secure the connection on both antennas using the hex nut until it is finger-tight. For power, we will use a USB-C cable to power the ESP32 development board. You can also use this cable to connect each breakout to your computer when using the u-blox u-center software.
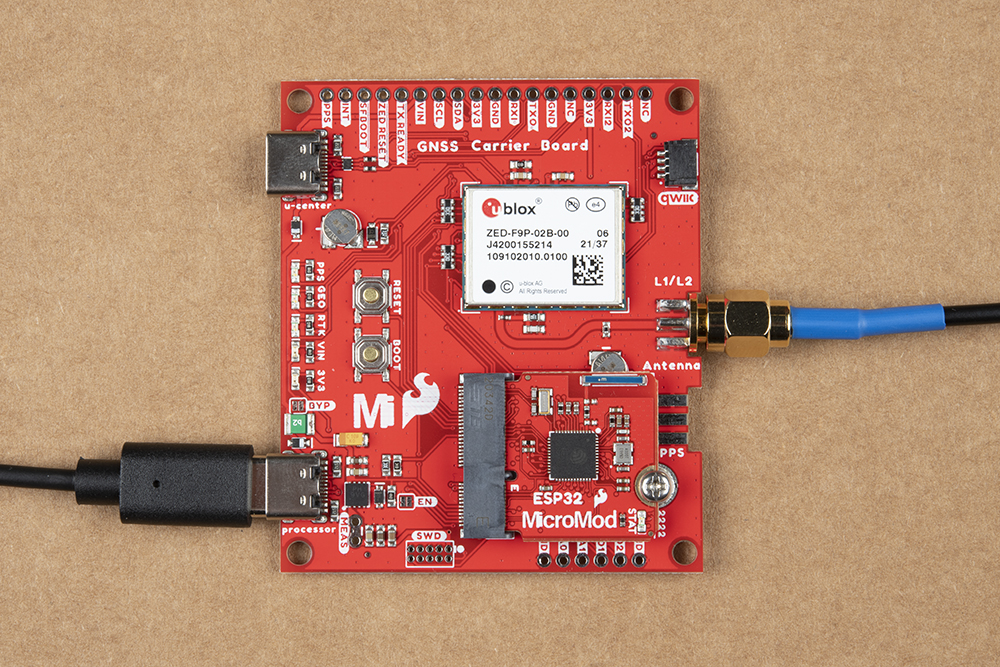
For users going the MicroMod route, you will just need to insert the board(s) into the M.2 socket and secure the boards with the screw. Then insert the USB cable and connect a multiband antenna into its respective connector. Note that you may need a second USB C cable to update the firmware on the ZED-F9P. For more information about connecting a MicroMod board to the M.2 connector, make sure to checkout their respective hookup guides.
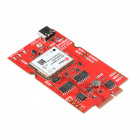
 |
 |
| MicroMod ESP32 Processor Board inserted into MicroMod GNSS Carrier Board. | MicroMod ESP32 Processor Board and MicroMod GNSS Function Board (ZED-F9P) inserted into MicroMod Main Board. |
For users with the GNSS Multi-Band Magnetic Mount Antenna - 5M (SMA) or the MagmaX2 Active Multiband GNSS Magnetic Mount Antenna - AA.200, we suggest placing the antenna on the antenna ground plane to improve the GNSS antenna's perfomance. Of course, if users received the GNSS Multi-Band L1/L2 Surveying Antenna (TNC) - TOP106, there is already a ground plane embedded in the antenna's design! Just make sure to secure the adapter cable on the GNSS Multi-Band Surveying Antenna to the SMA connector. When you are ready, mount the antenna to a monopod, tripod, or your preferred surface.
 |
 |
u-blox Firmware Update
UBX-RXM-COR). At the time of writing, the ZED-F9P supports the SPARTN formatted corrections sent with FW 1.00 HPG 1.30 and above. We tested using the latest FW 1.00 HPG 1.32+. Check your module's firmware release notes if you are unsure if the version number supports the SPARTN formatted corrections.
We recommend checking the firmware on your high precision GNSS (HPG) module (in this case, the ZED-F9P). If the firmware is old, you will need to upgrade the firmware on the HPG module.
How to Upgrade Firmware of a u-blox GNSS Receiver
March 26, 2021
You can download the latest firmware from u-blox. Below is a link to the ZED-F9P module's product page. Click the "Documentation & resources" tab and look for the latest firmware under the section Firmware Update. You may need to hit the Load more button a few times before you can see the firmware.
UBX-RXM-COR). Make sure to check the associated datasheets for your high precision GNSS module for more information.
u-blox Thingstream Services
There are two key steps to be able to achieve centimeter positioning accuracy using the ZED-F9P through u-blox thingstream and PointPerfect services.
- Register with u-blox Thingstream and sign up for a PointPerfect IP (Internet Provider) plan (data stream)
- Configure the ZED-F9P with encryption key(s) so it can decrypt and use the correction data
By default, the ZED-F9P is configured such that the correction data is passed from a correction source to the ZED using the UART2 interface. However, it is also possible to read the correction data and push (write) it to the ZED using I2C. We just need to configure the modules so that the I2C port is enabled and set the protocol.
Thingstream and PointPerfect Services
You will need to use u-blox Thingstream and PointPerfect service.
 |
Thingstream is u-blox service delivery platform for IoT Communication-as-a-Service, IoT Security-as-a-Service and IoT Location-as-a-Service.
 |
PointPerfect is u-blox GNSS augmentation service which is designed to provide high-precision GNSS corrections to suitable receivers with decimeter-level location accuracy. The following webinar from u-blox has an excellent explanation of the service and how the system works.
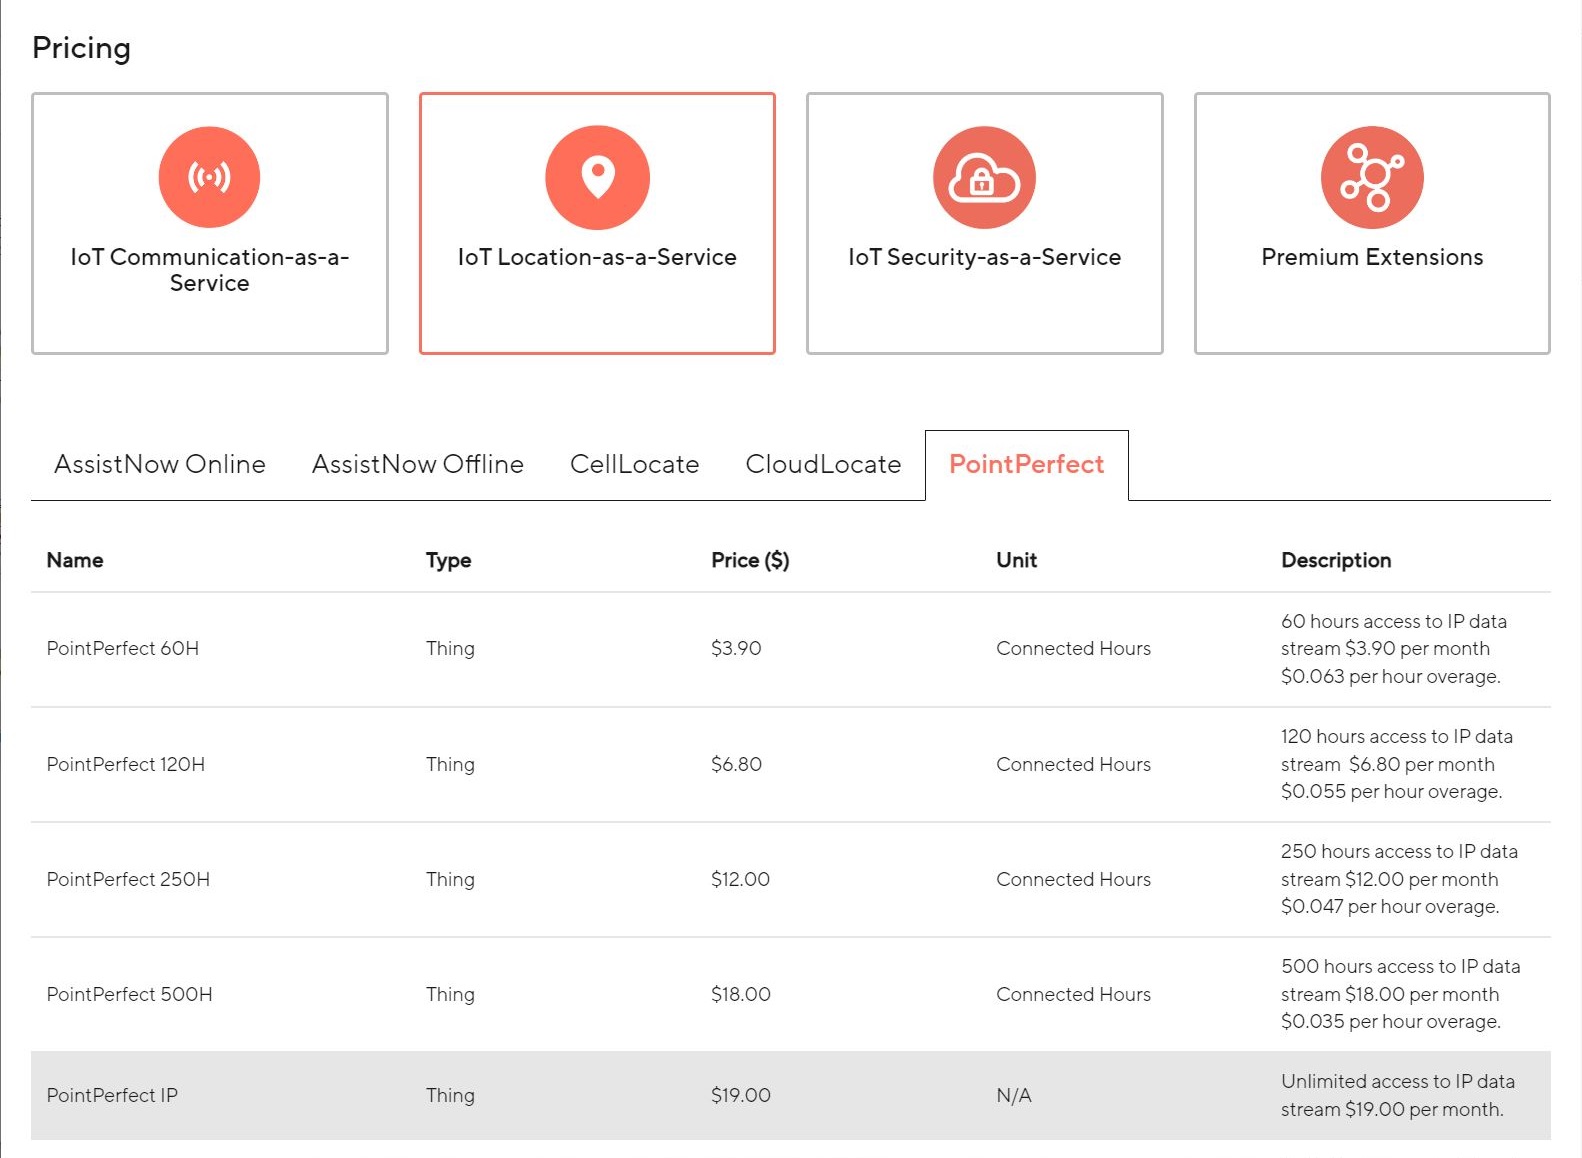
PointPerfect data is delivered through Thingstream. The first step is to register with Thingstream and then request an IP plan. You can find the current pricing on u-blox portal. Select IoT Location-as-a-Service and then PointPerfect.
You may need to contact u-blox first, to enable the option to purchase the plan through your Thingstream account.
The PointPerfect IP plan provides unlimited access to the correction data stream via Internet Protocol (MQTT).
Once IP permissions are enabled on your Thingstream account, you will be able to add a new IP Location Thing and view its credentials:
- Login to Thingstream
- Select Location Services and then Location Things
- The Add Location Thing button (top right) will allow you to select and activate an IP plan.
- Add PointPerfect Thing, enter a name for the thing, and hit the Create button.
- Once your IP plan is active, you will be able to monitor your Activity and view your Credentials via the appropriate tabs.
|
|
| Graphic of card insert (top and bottom) included with compatible u-blox high precision GNSS modules. | |
- Login to Thingstream
- Select Location Services and then Location Things
- The Add Location Thing button (top right) will allow you to select and activate an IP plan.
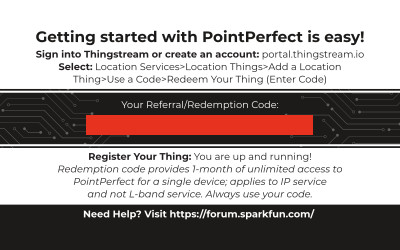
- Select the Use a code and then Redeem your Thing.
- Enter the code provided on the card (under "Your Referral/Redemption Code:") into the field and follow the prompts to activate the promotion code.
- Once your IP plan is active, you will be able to monitor your Activity and view your Credentials via the appropriate tabs.
Software Installation
- Installing the Arduino IDE
- Installing an Arduino Library
- Installing Board Definitions in the Arduino IDE
If you've never connected an CH340 device to your computer before, you may need to install drivers for the USB-to-serial converter. Check out our section on How to Install CH340 Drivers" for help with the installation.
The SparkFun u-blox Arduino library enables the reading of all positional datums as well as sending binary UBX configuration commands over I2C. This is helpful for configuring advanced modules like the ZED-F9P but also the NEO-M8P-2, SAM-M8Q and any other u-blox module that use the u-blox binary protocol.
The SparkFun u-blox Arduino library can be downloaded with the Arduino library manager by searching 'SparkFun u-blox GNSS v3' or you can grab the zip here from the GitHub repository to manually install. Once the library is installed, you can take advantage of the examples for the ZED-F9P. For the scope of this tutorial, we will be using the PointPerfect Client example.
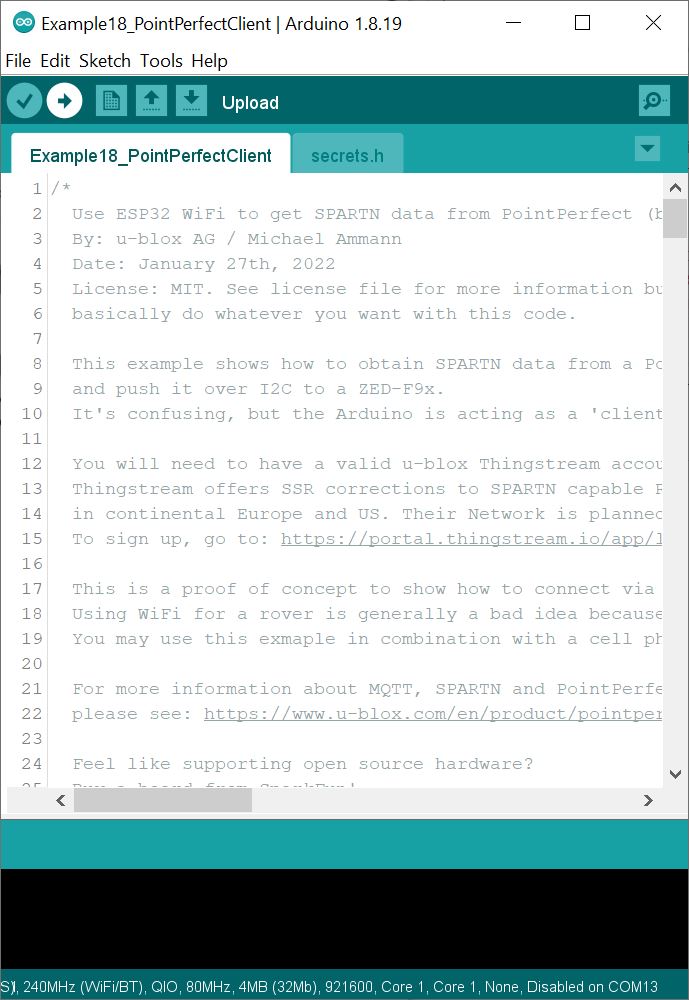
Arduino Example 18: PointPerfect Client
From the menu, select the following: File > Examples > SparkFun u-blox GNSS v3 > ZED-F9P > Example18_PointPerfectClient.
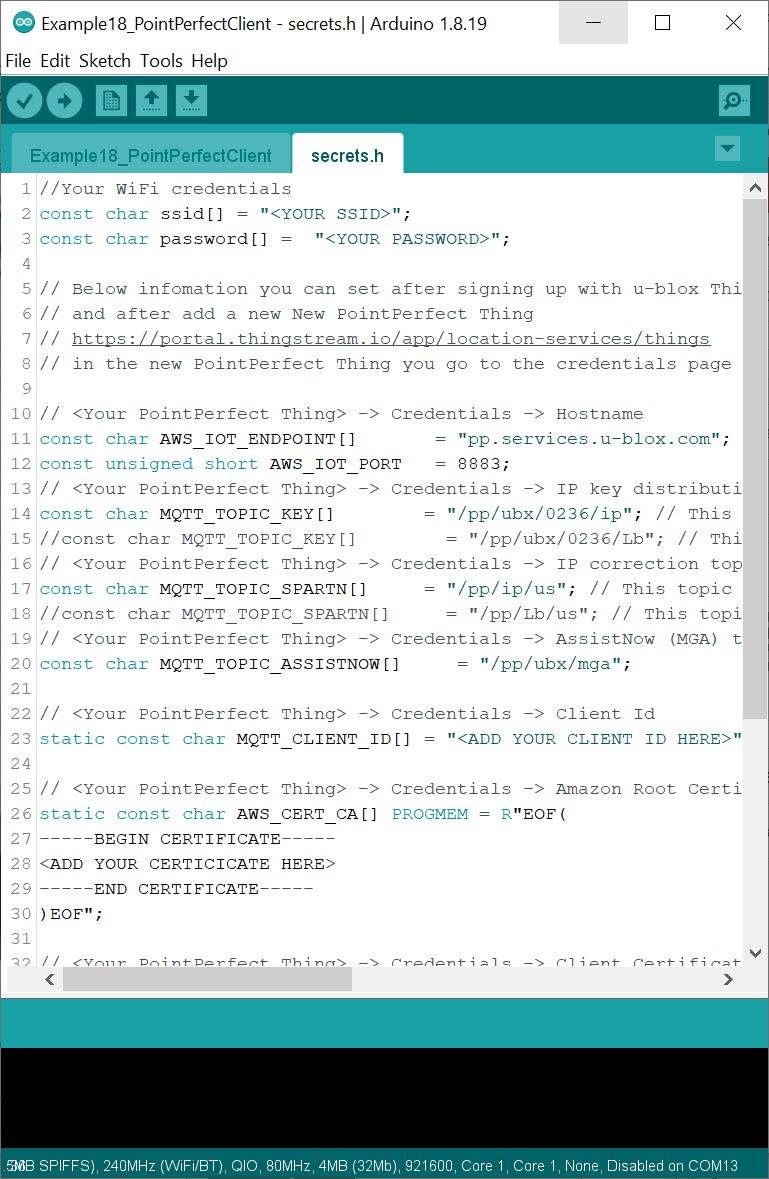
Once open, you will need to adjust the code based on your region, WiFi credentials, and decryption keys. Click on the secrets.h tab.
Adjust for Region
By default the example is set up for the US SPARTN 1.8 service. To adjust for Europe, simply adjust the topic provided for the MQTT_TOPIC_SPARTN[] array.
language:c
const char MQTT_TOPIC_SPARTN[]     = "/pp/ip/eu"; // This topic provides the SPARTN corrections for IP only: choice of {eu, us}
At the time of writing, there were only three options for corrections. To view the available topics, head back to Location Services > Location Things and select your Thing. Select the Topics tab. There will be a few topics available. Look for your region listed under "IP correction topic for _____ region" where "_____" is abbreviation for your region. You can also check out the available MQTT topics from u-blox PointPerfect documentation.
Add WiFi Credentials Decryption Keys
Enter your WiFi network name and password into the by replacing <YOUR SSID> and <YOUR PASSWORD>, respectively.
language:c
const char ssid[] = "<YOUR SSID>";
const char password[] =  "<YOUR PASSWORD>";
Add Decryption Keys
Under Location Services > Location Things and select your Thing. Select the Credentials tab. There are four arrays that need to be configured. Replace the following values listed below. Note that the values below are listed with respect to thingstream.
- Client ID (e.g.
MQTT_CLIENT_ID[]) - Client Key (e.g.
AWS_CERT_PRIVATE[]) - Client Certificate (e.g.
AWS_CERT_CRT[]) - Root Certificate (e.g.
AWS_CERT_CA[])
The Arduino example code lists the Amazon Root Certificate first and the Client Key arrays last. Make sure that you are copying and pasting the values exactly as provided and not missing any characters within the quotes or parentheses.
language:c
// <Your PointPerfect Thing> -> Credentials -> Client Id
static const char MQTT_CLIENT_ID[] = "<ADD YOUR CLIENT ID HERE>";

// <Your PointPerfect Thing> -> Credentials -> Amazon Root Certificate
static const char AWS_CERT_CA[] PROGMEM = R"EOF(
-----BEGIN CERTIFICATE-----
<ADD YOUR CERTICICATE HERE>
-----END CERTIFICATE-----
)EOF";

// <Your PointPerfect Thing> -> Credentials -> Client Certificate
static const char AWS_CERT_CRT[] PROGMEM = R"KEY(
-----BEGIN CERTIFICATE-----
<ADD YOUR CERTICICATE HERE>
-----END CERTIFICATE-----
)KEY";

// Get this from Thingstream Portal
// <Your PointPerfect Thing> -> Credentials -> Client Key
static const char AWS_CERT_PRIVATE[] PROGMEM = R"KEY(
-----BEGIN RSA PRIVATE KEY-----
<ADD YOUR KEY HERE>
-----END RSA PRIVATE KEY-----
)KEY";
Upload Code
When ready, select the correct board definition from the menu (in this case, Tools > Boards > SparkFun ESP32 IoT RedBoard). The board definition will depend on the ESP32 development board that you purchased. Then select the correct COM port that the board enumerated to (in this case, it was COM13). Hit the upload button.
What You Should See
Open the Arduino Serial Monitor at 115200 baud. The ESP32 will attempt to connect to your WiFi network. You will notice a period every second indicating that it is trying to connect to your WiFi network.
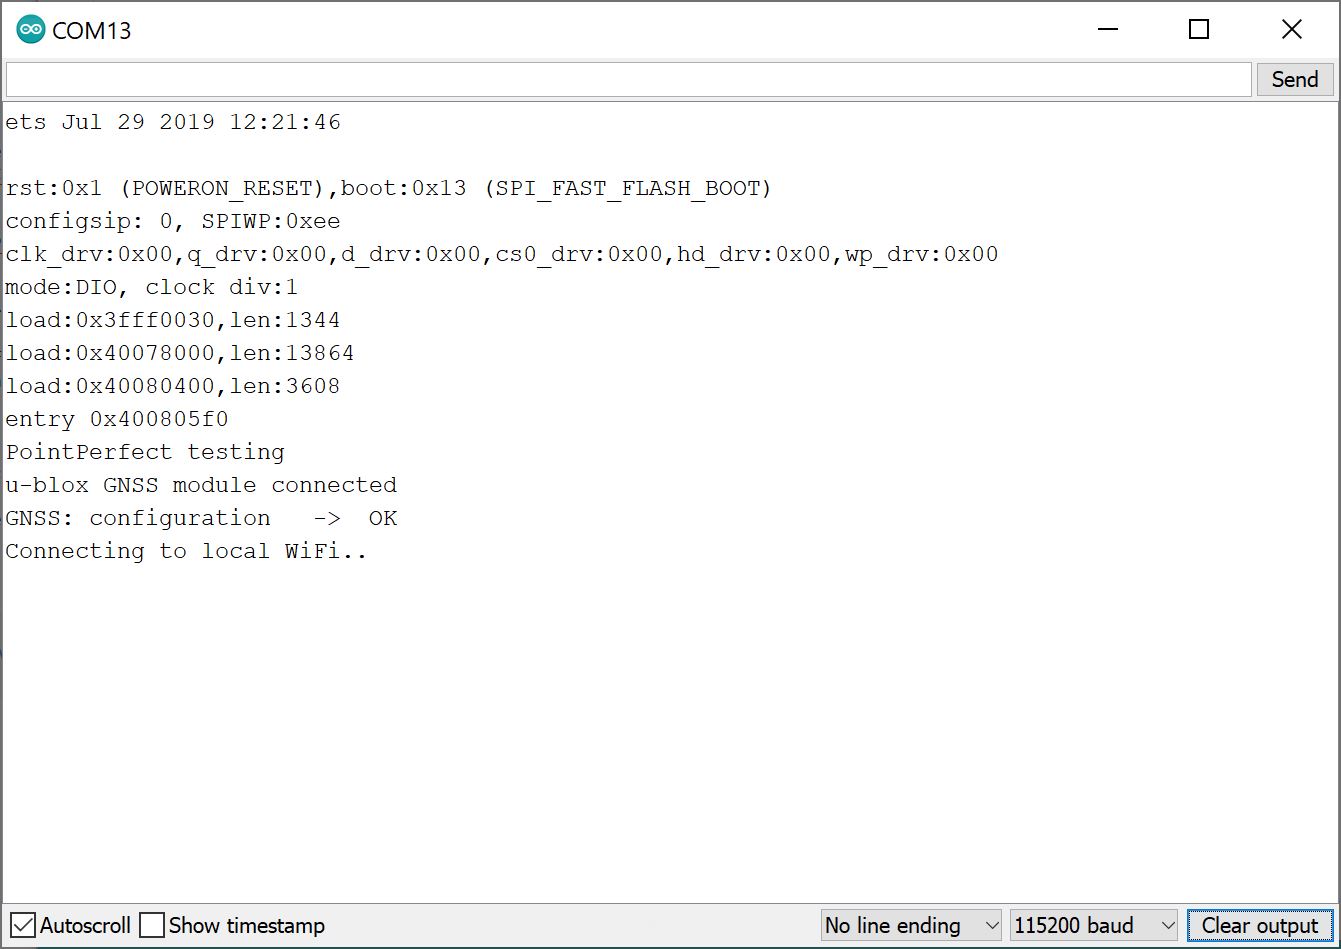
Type a character to send a character to your Arduino and hit the Send button.

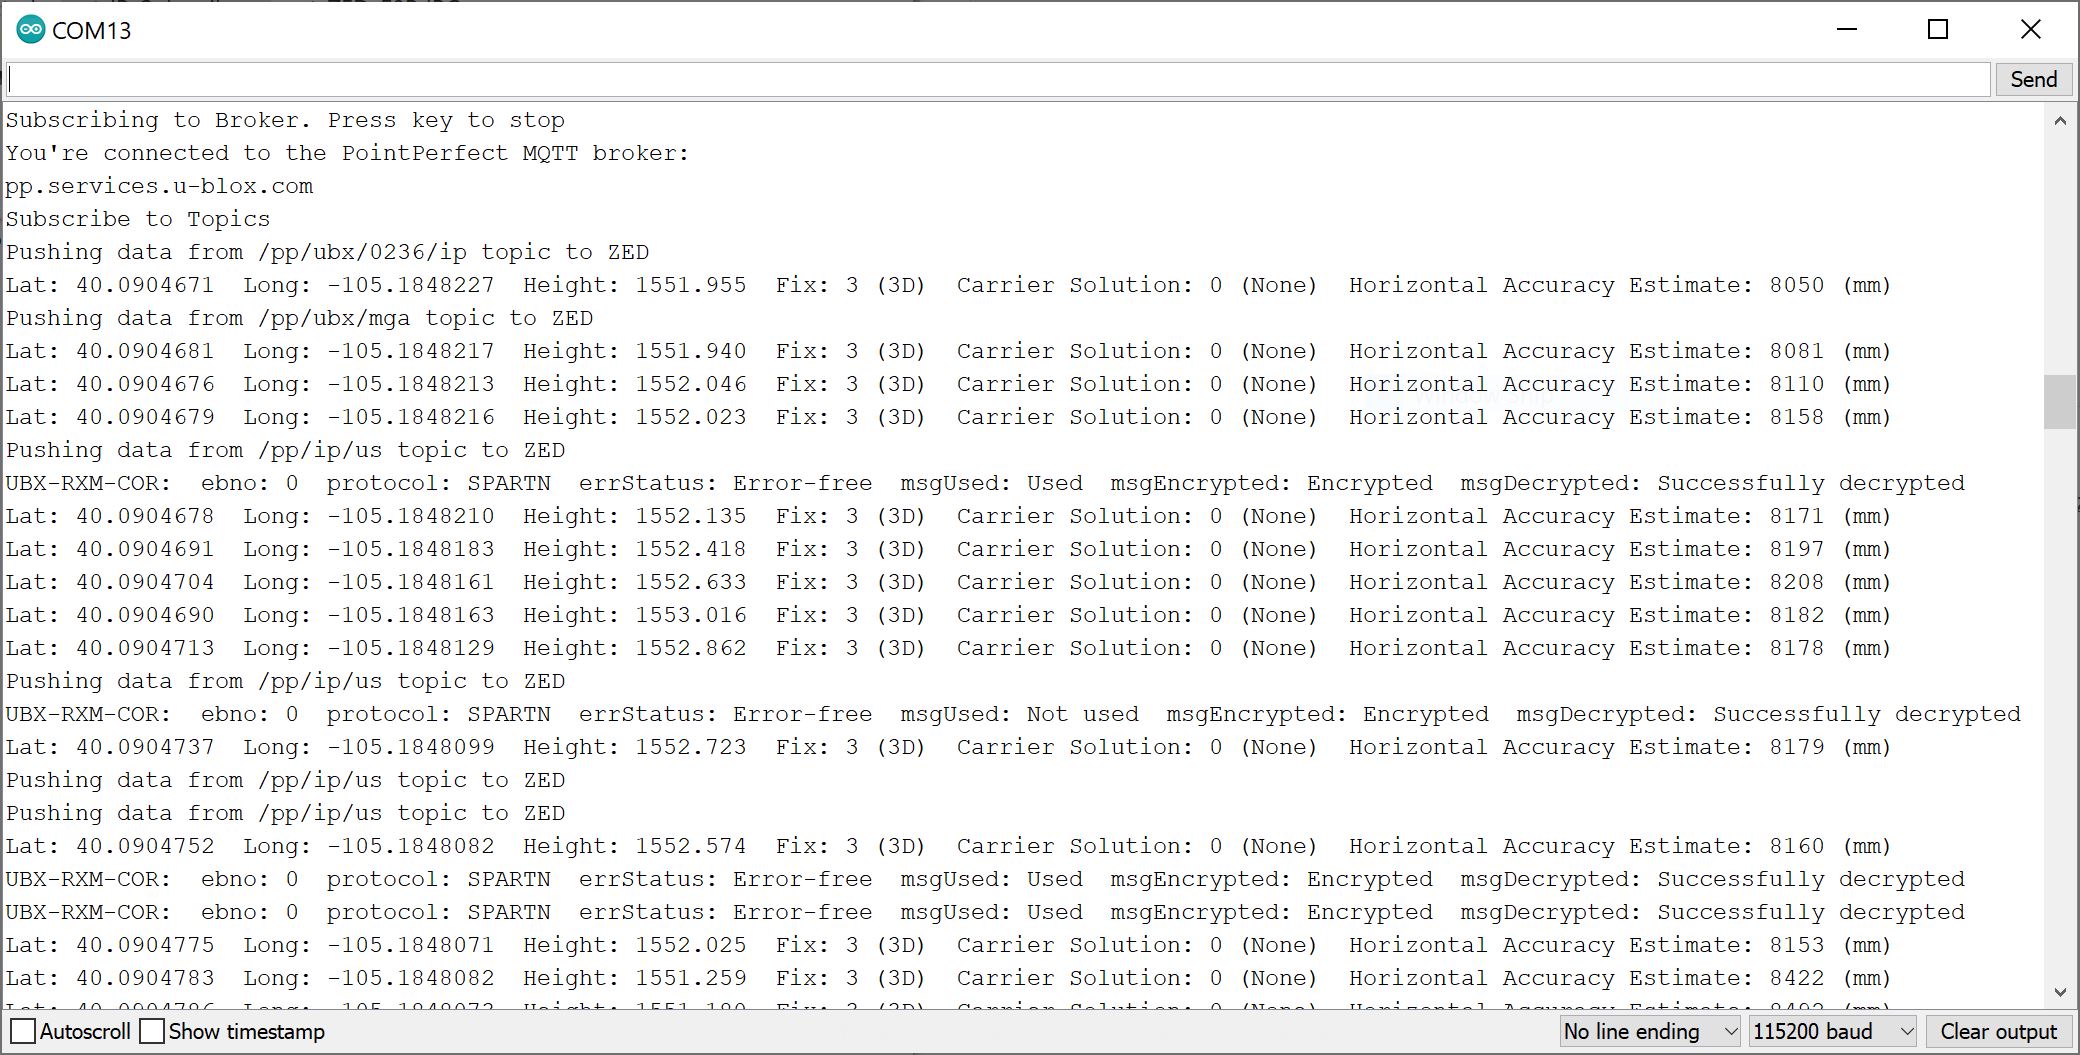
If all is well, you should see the following output indicating that the correction data is being received! Data from the subscribed topic will be pushed to the ZED. The output will indicate if the correction data is successfully decrypted for the ZED. Watch the accuracy converge and decrease to a smaller number. Depending on what satellites are in view, it may take a little time before you reach the RTK floating or fixed solution.
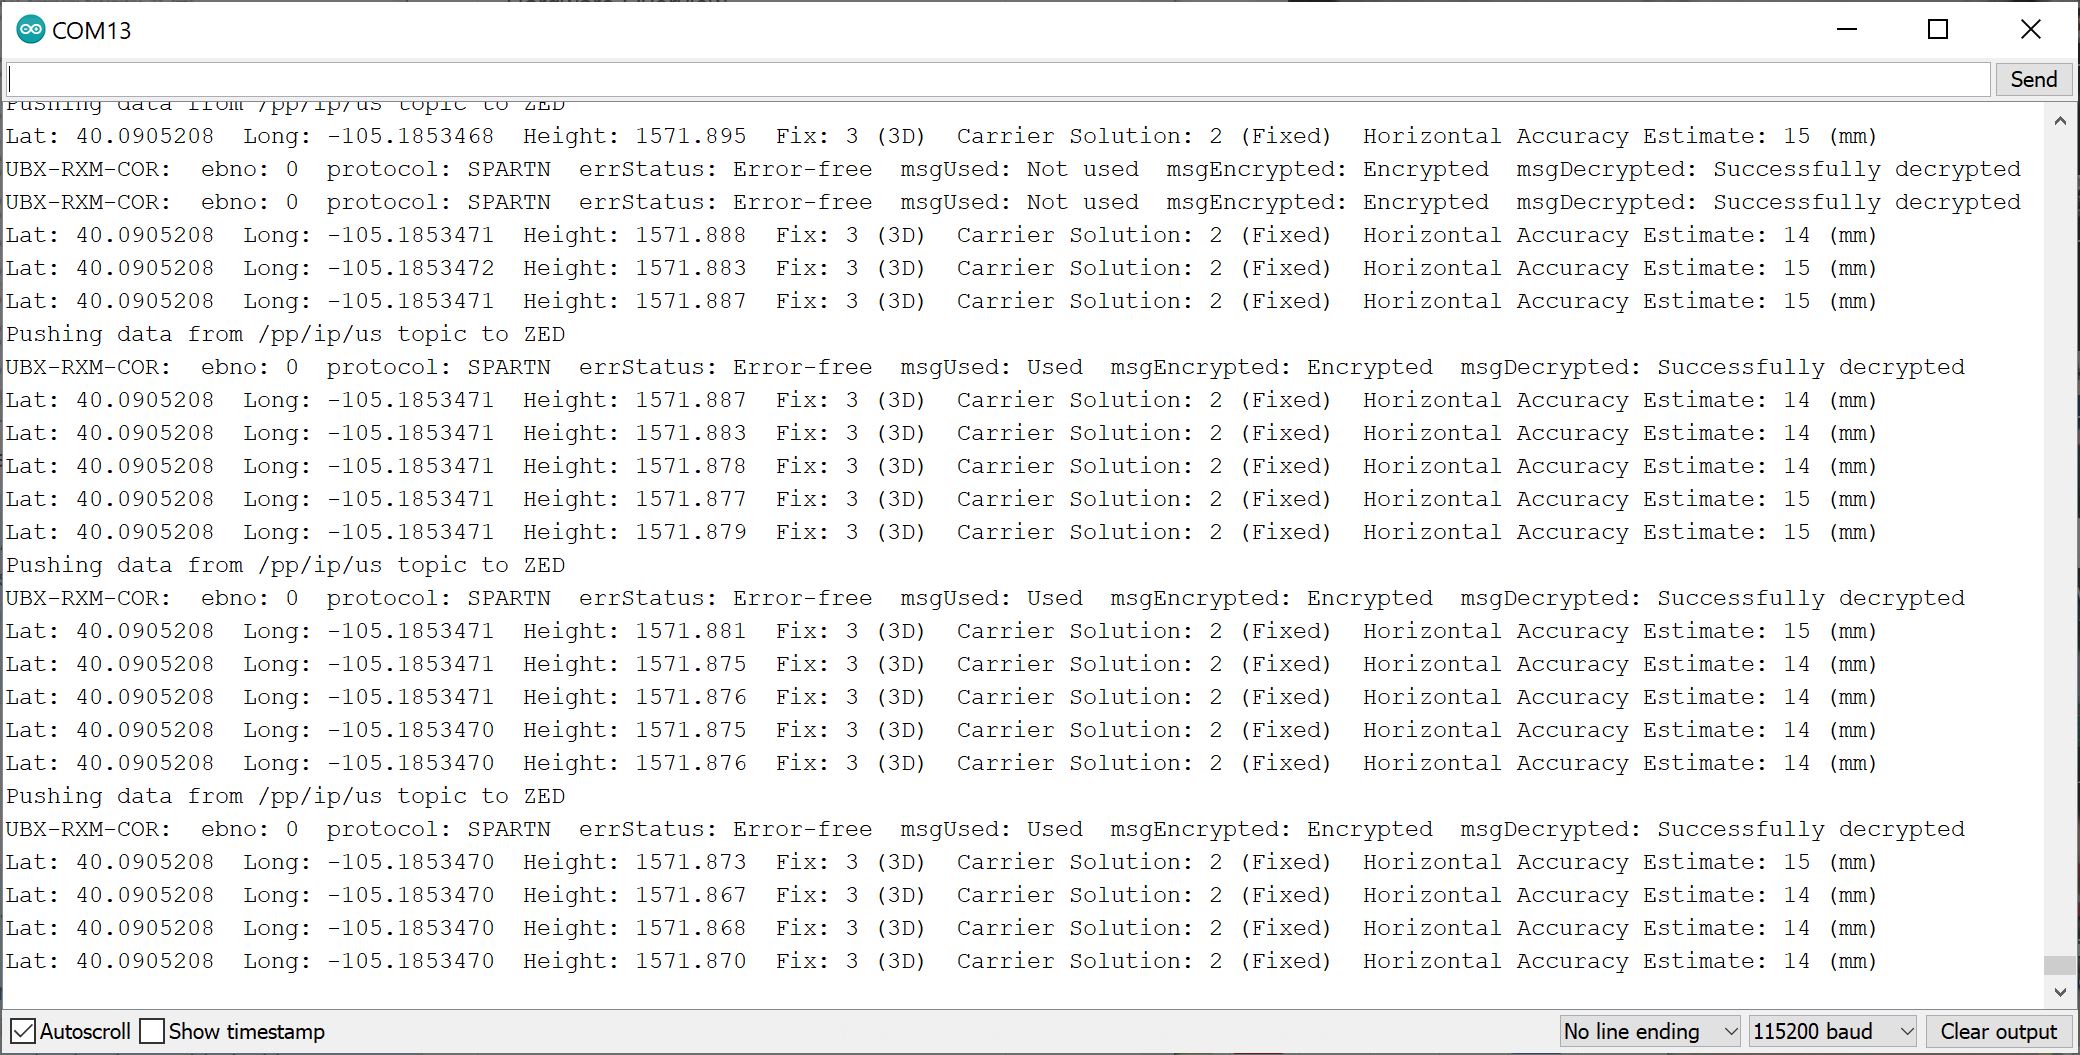
Below is the output once the RTK Fixed Solution was achieved. You will notice that the values converged to a point with a horizontal accuracy of about 14mm! Your accuracy may vary depending on the satellites in view and Internet connection.
Troubleshooting
If you need technical assistance and more information on a product that is not working as you expected, we recommend heading on over to the SparkFun Technical Assistance page for some initial troubleshooting.
If you don't find what you need there, the SparkFun Forums and u-blox Forums are great places to find and ask for help. For specific questions about the u-blox service, we recommend heading over more to the u-blox Forums.
Thingstream PointPerfect Coverage
The PointPerfect GNSS augmentation service is available on a continental scale with seamless coverage in the "contiguous USA, Canada, Europe, South Korea, and Australia New South Wales and Victoria regions." U-blox is continuously expanding their coverage according to market demand.
As stated earlier, make sure to check back on u-blox's website to see if there is additional coverage in your region. Note that while they recently updated the coverage to support South Korea, Canada, and Australia (New South Wales and Victoria regions), it seems to be available over IP only. There are additional regions under consideration for the future but they have not been included yet.
Resources and Going Further
Ready to get hands-on with GPS?
We've got a page just for you! We'll walk you through the basics of how GPS works, the hardware needed, and project tutorials to get you started.
Now that you've successfully got your ZED-F9P with PointPerfect over IP up and running, it's time to incorporate it into your own project! Need more information? Check out some of the links below:
u-blox Resources
- ZED-F9P
- u-blox Service Terms for B2B Customers (PDF)
- u-blox u-center - GNSS evaluation software for Windows
- PointPerfect
- Thingstream
Need some inspiration for your next project? Check out some of these related tutorials related to GNSS.