Hookup Guide for the SparkFun RedBoard Artemis ATP
Contributors:
 Nate, Ell C
Nate, Ell C Introduction
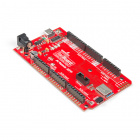
We affectionately refer to the RedBoard Artemis ATP as the "All The Pins!" board, since it breaks out every single one of the Artemis Module's 48 GPIO pins into a familiar Mega-like form factor. On top of the RedBoard's improved power conditioning and USB to serial, we've added a slew of features to help you take full advantage of the Artemis module's unique features. Let's have a look!!

Required Materials
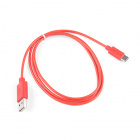
You'll need the RedBoard Artemis ATP and a USB C cable. Any USB C cable should work, including the one that probably came with your phone charger.
Suggested Reading
If you aren't familiar with the Qwiic system, we recommend reading here for an overview.
| Qwiic Connect System |
We also recommend checking out these tutorials before continuing:
RedBoard Qwiic Hookup Guide
This tutorial covers the basic functionality of the RedBoard Qwiic. This tutorial also covers how to get started blinking an LED and using the Qwiic system.
Using SparkFun Edge Board with Ambiq Apollo3 SDK
We will demonstrate how to get started with your SparkFun Edge Board by setting up the toolchain on your computer, examining an example program, and using the serial uploader tool to flash the chip.
Designing with the SparkFun Artemis
Let's chat about layout and design considerations when using the Artemis module.
Artemis Development with Arduino
Get our powerful Artemis based boards (Artemis Nano, BlackBoard Artemis, and BlackBoard Artemis ATP) blinking in less than 5 minutes using the SparkFun Artemis Arduino Core!