How to Build a DIY GNSS Reference Station
 Nate
Nate 
Mini-Computer Setup (Option 1)
You’ve got your antenna setup. You’ve got the ZED-F9P outputting RTCM. Nice work! Now how do we get this data out to the world and into rovers everywhere?
Correction data is good up to 10km from a given base location. That said, for every 10km you add beyond it will add 1.5cm worth of inaccuracy to the location (I need to find the source of this statement, but I’m pretty sure it’s true). 10km is a long way to transmit over a wireless link so let’s use the internet instead!
Do you have an ESP32 laying around? You may want to skip this section and checkout the ESP32 Setup.
You will need an internet connected, dedicated computer to connect to the ZED-F9P, receive the serial data, and then forward that data on to the internet. We recommend using a PC for casting. Yes, Windows is painful and not as stable as Linux but because u-center is Windows only it's really the only option. It is extremely handy to be able to remote desktop into the dedicated machine, twiddle a few receiver settings using u-center, and continue broadcasting. I’m not sure how to get this same flexibility in Linux. Additionally, I am far from being a sysadmin. The following can be a helpful method for configuring your dedicated computer but really it’s just me, recording my notes, so that I can recreate the system when I need it.
- Procure a derelict machine with Windows. We spent ~$100 for a mini-PC. Any old PC should do, you certainly don’t need hefty processing power. If possible, get a mini PC that includes mounting hardware. This will make it easier to attach to a wall or outdoor enclosure.
- Within the mini-PC’s BIOS, enable auto-power on after power loss. Enable remote desktop. There are plenty of tutorials showing how to do this. The goal is to get the mini-PC to a point where you can configure and control the PC from the comfort of your desk, not the roof.
- Consider making the IP address of the mini-PC static either from the mini-PC or your router via the mini-PC’s MAC address. This will make accessing the mini-PC over RDP (remote desktop protocol) a bit easier.
- If you plan to access the mini-PC from an external network you will need to enable port forwarding on port 3389 (for RDP) to the static IP address of the mini-PC.
- If you plan to use u-center as a caster you’ll need to enable port forwarding on port 2101 (for NTRIP) to the static IP address of the mini-PC (more in the following sections).
- Disable windows power saving. The mini-PC should never turn off. If you’re worried about energy costs, it’s not zero, but we measured approximately 4.4W while the unit was tethered to the GNSS receiver and broadcasting. This is $5.07 a year at $0.13 per kWh (the US average in 2020).
At this point, be sure you can access the PC via remote desktop. If successful, install the mini-PC into the field. We should be able to configure everything else remotely.
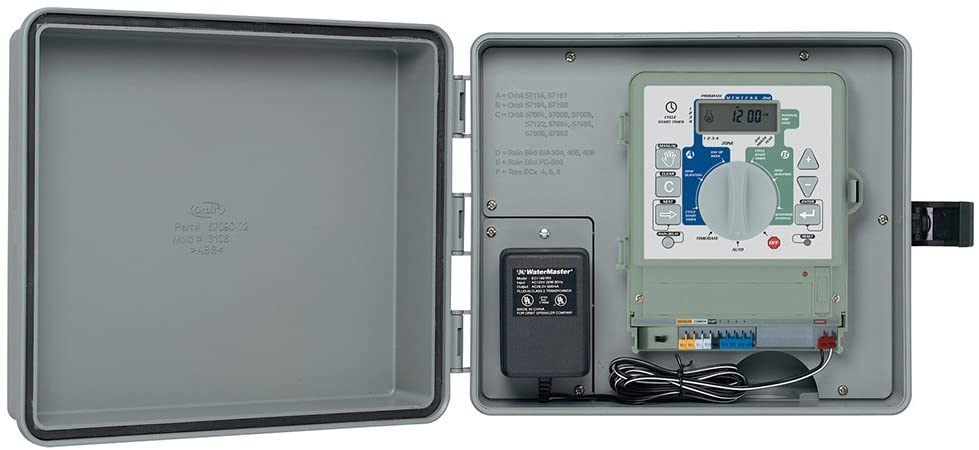
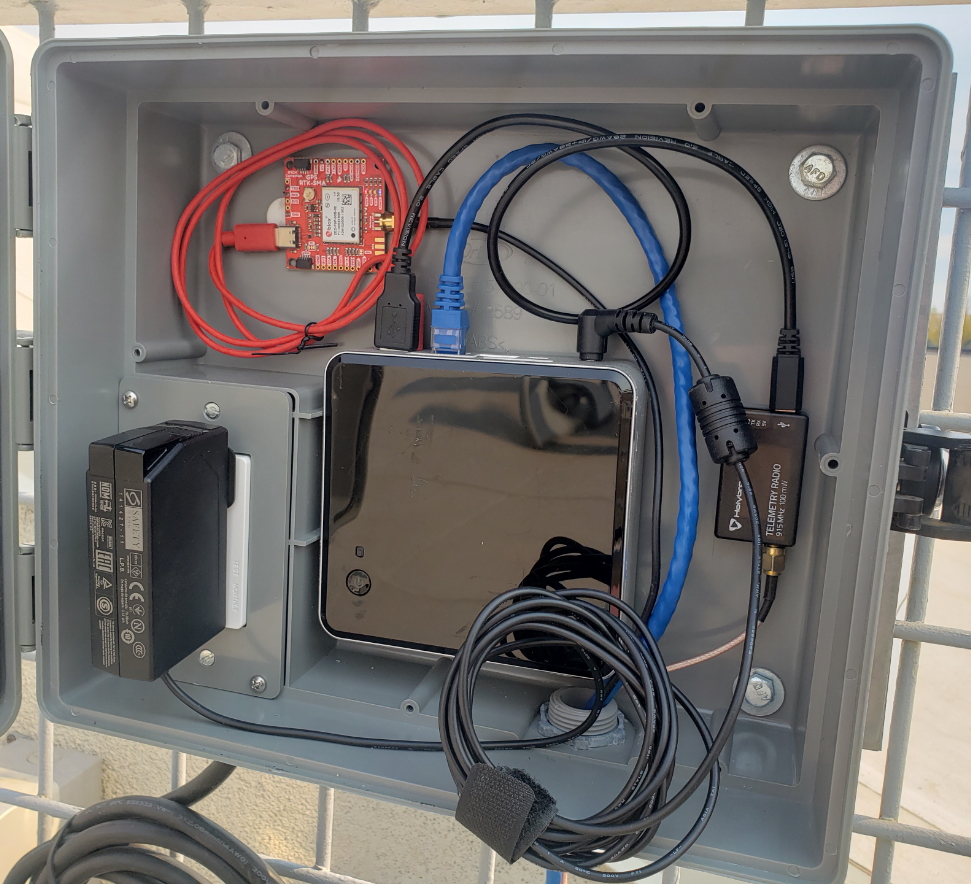
- If the computer will be outside consider one with a built-in GFCI outlet. This Orbit enclosure is very nice.
- Turn off all Windows notifications (use the Notifications and Actions sub menu).
- For security reasons disable Bluetooth and if you’re using wired ethernet, consider disabling WiFi.
- Install u-center.
- Install a local copy of rtkexplorer’s version of RTKLIB.
- Install a serial terminal of your choice.
- Connect the ZED-F9P over USB C.
- Connect the antenna (fixed or semi-fixed).
- Consider connecting a 915MHz radio over USB microB (not soldered to the ZED-F9P breakout). More on this later.
The hardware installation is unique to each site. At my home, I have the mini-PC indoors with the antenna cable coming through a gap in a window jam. At SparkFun, the mini-PC is housed in an Orbit External Enclosure with Power (really handy!). Picture hanging strips make it easy to install electronics to an enclosure; the velcro backing holds the device in place while allowing a user to pull apart a system when needed. Once everything is installed, RDC into the machine and confirm that you can configure the GNSS receiver using u-center.
If you haven’t already, or if your antenna has moved at all, consider re-running the PPP survey of your antenna as described in the previous section.