HTU21D Humidity Sensor Hookup Guide
This Tutorial is Retired!
The HTU21D has been retired from the SparkFun catalog. We recommend looking at the Si7021 which is a drop in replacement for the HTU21D.
View the updated tutorial: Si7021 Humidity and Temperature Sensor Hookup Guide
 Nate
Nate 
HTU21D Library and Functions
To get your humidity sensor up and running, you will now install an example sketch and library.
Note: This example assumes you are using the latest version of the Arduino IDE on your desktop. If this is your first time using Arduino, please review our tutorial on installing the Arduino IDE.
If you have not previously installed an Arduino library, please check out our installation guide.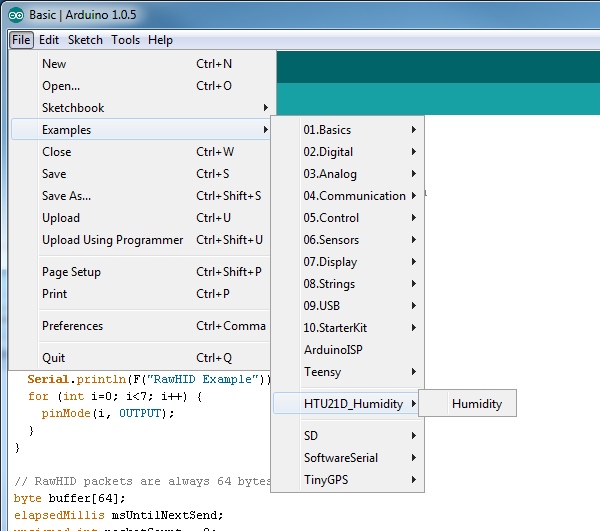
Once the library is installed, open the Arduino IDE, and expand the examples menu. You should see the HTU21D_Humidity submenu.
Load this example onto the Arduino, or copy from below.
language:c
/*
 HTU21D Humidity Sensor Example Code
 By: Nathan Seidle
 SparkFun Electronics
 Date: September 15th, 2013
 License: This code is public domain but you buy me a beer if you use this and we meet someday (Beerware license).

 Uses the HTU21D library to display the current humidity and temperature

 Open serial monitor at 9600 baud to see readings. Errors 998 if not sensor is detected. Error 999 if CRC is bad.

 Hardware Connections (Breakoutboard to Arduino):
 -VCC = 3.3V
 -GND = GND
 -SDA = A4 (use inline 10k resistor if your board is 5V)
 -SCL = A5 (use inline 10k resistor if your board is 5V)

 */

#include <Wire.h>
#include "HTU21D.h"

//Create an instance of the object
HTU21D myHumidity;

void setup()
{
  Serial.begin(9600);
  Serial.println("HTU21D Example!");

  myHumidity.begin();
}

void loop()
{
  float humd = myHumidity.readHumidity();
  float temp = myHumidity.readTemperature();

  Serial.print("Time:");
  Serial.print(millis());
  Serial.print(" Temperature:");
  Serial.print(temp, 1);
  Serial.print("C");
  Serial.print(" Humidity:");
  Serial.print(humd, 1);
  Serial.print("%");

  Serial.println();
  delay(1000);
}
Once your code is uploaded, open the serial terminal at 9600bps. You will see the current humidity and temperature in the room!
Explanation of Functions:
The library and example code demonstrate some of the smaller functions supported by the HTU21D. These are generally not used by regular users but are documented here in case you need them:
myHumidity.readHumidity()will return a float containing the humidity. Ex: 54.7myHumidity.readTemperature()will return a float containing the temperature in Celsius. Ex: 24.1myHumidity.setResolution(byte: 0b.76543210)sets the resolution of the readings.myHumidity.check_crc(message, check_value)verifies the 8-bit CRC generated by the sensor.myHumidity.read_user_register()returns the user register. Used to set resolution.
When you call the ReadHumidity or ReadTemperature functions you will get a float with the sensor reading or an error code:
- 57.8 is an example of a valid reading. 0.0 to 100.0 for humidity and -40.0 to 125.0 for temperature.
- 998 indicates that I2C timed out (100ms max). Check your connections.
- 999 CRC was wrong. The HTU21D calculates an internal CRC and transmits it along with the temperature and humidity readings. It’s highly unlikely that you will ever see a bad CRC, but the library supports CRC checking.
SetResolution() allows the user to change the humidity and temperature resolution. The vast majority of users do not need to change the resolution. By default the sensor will be in its highest resolution settings. This function is useful if you need to decrease the amount of time between readings or to save power. See page 12 of the datasheet. As an example, to change the resolution to 11 bit RH and 11 bit temperature, you would call myHumidity.SetResolution(0b10000001); to set bit 7 and bit 0.
check_crc() inputs the message and check_value from the HTU21D and then does a 8-bit polynomial CRC to verify that the message the sensor sent was valid. It’s extremely rare that you will see a bad CRC but if you’re looking into how to decipher a 8-bit CRC, this is a good example. The HTU21D uses the same CRC as 1-wire products.