Interactive 3D Printed LED Diamond Prop
 bboyho
Understanding Your Circuit
Circuit Diagram
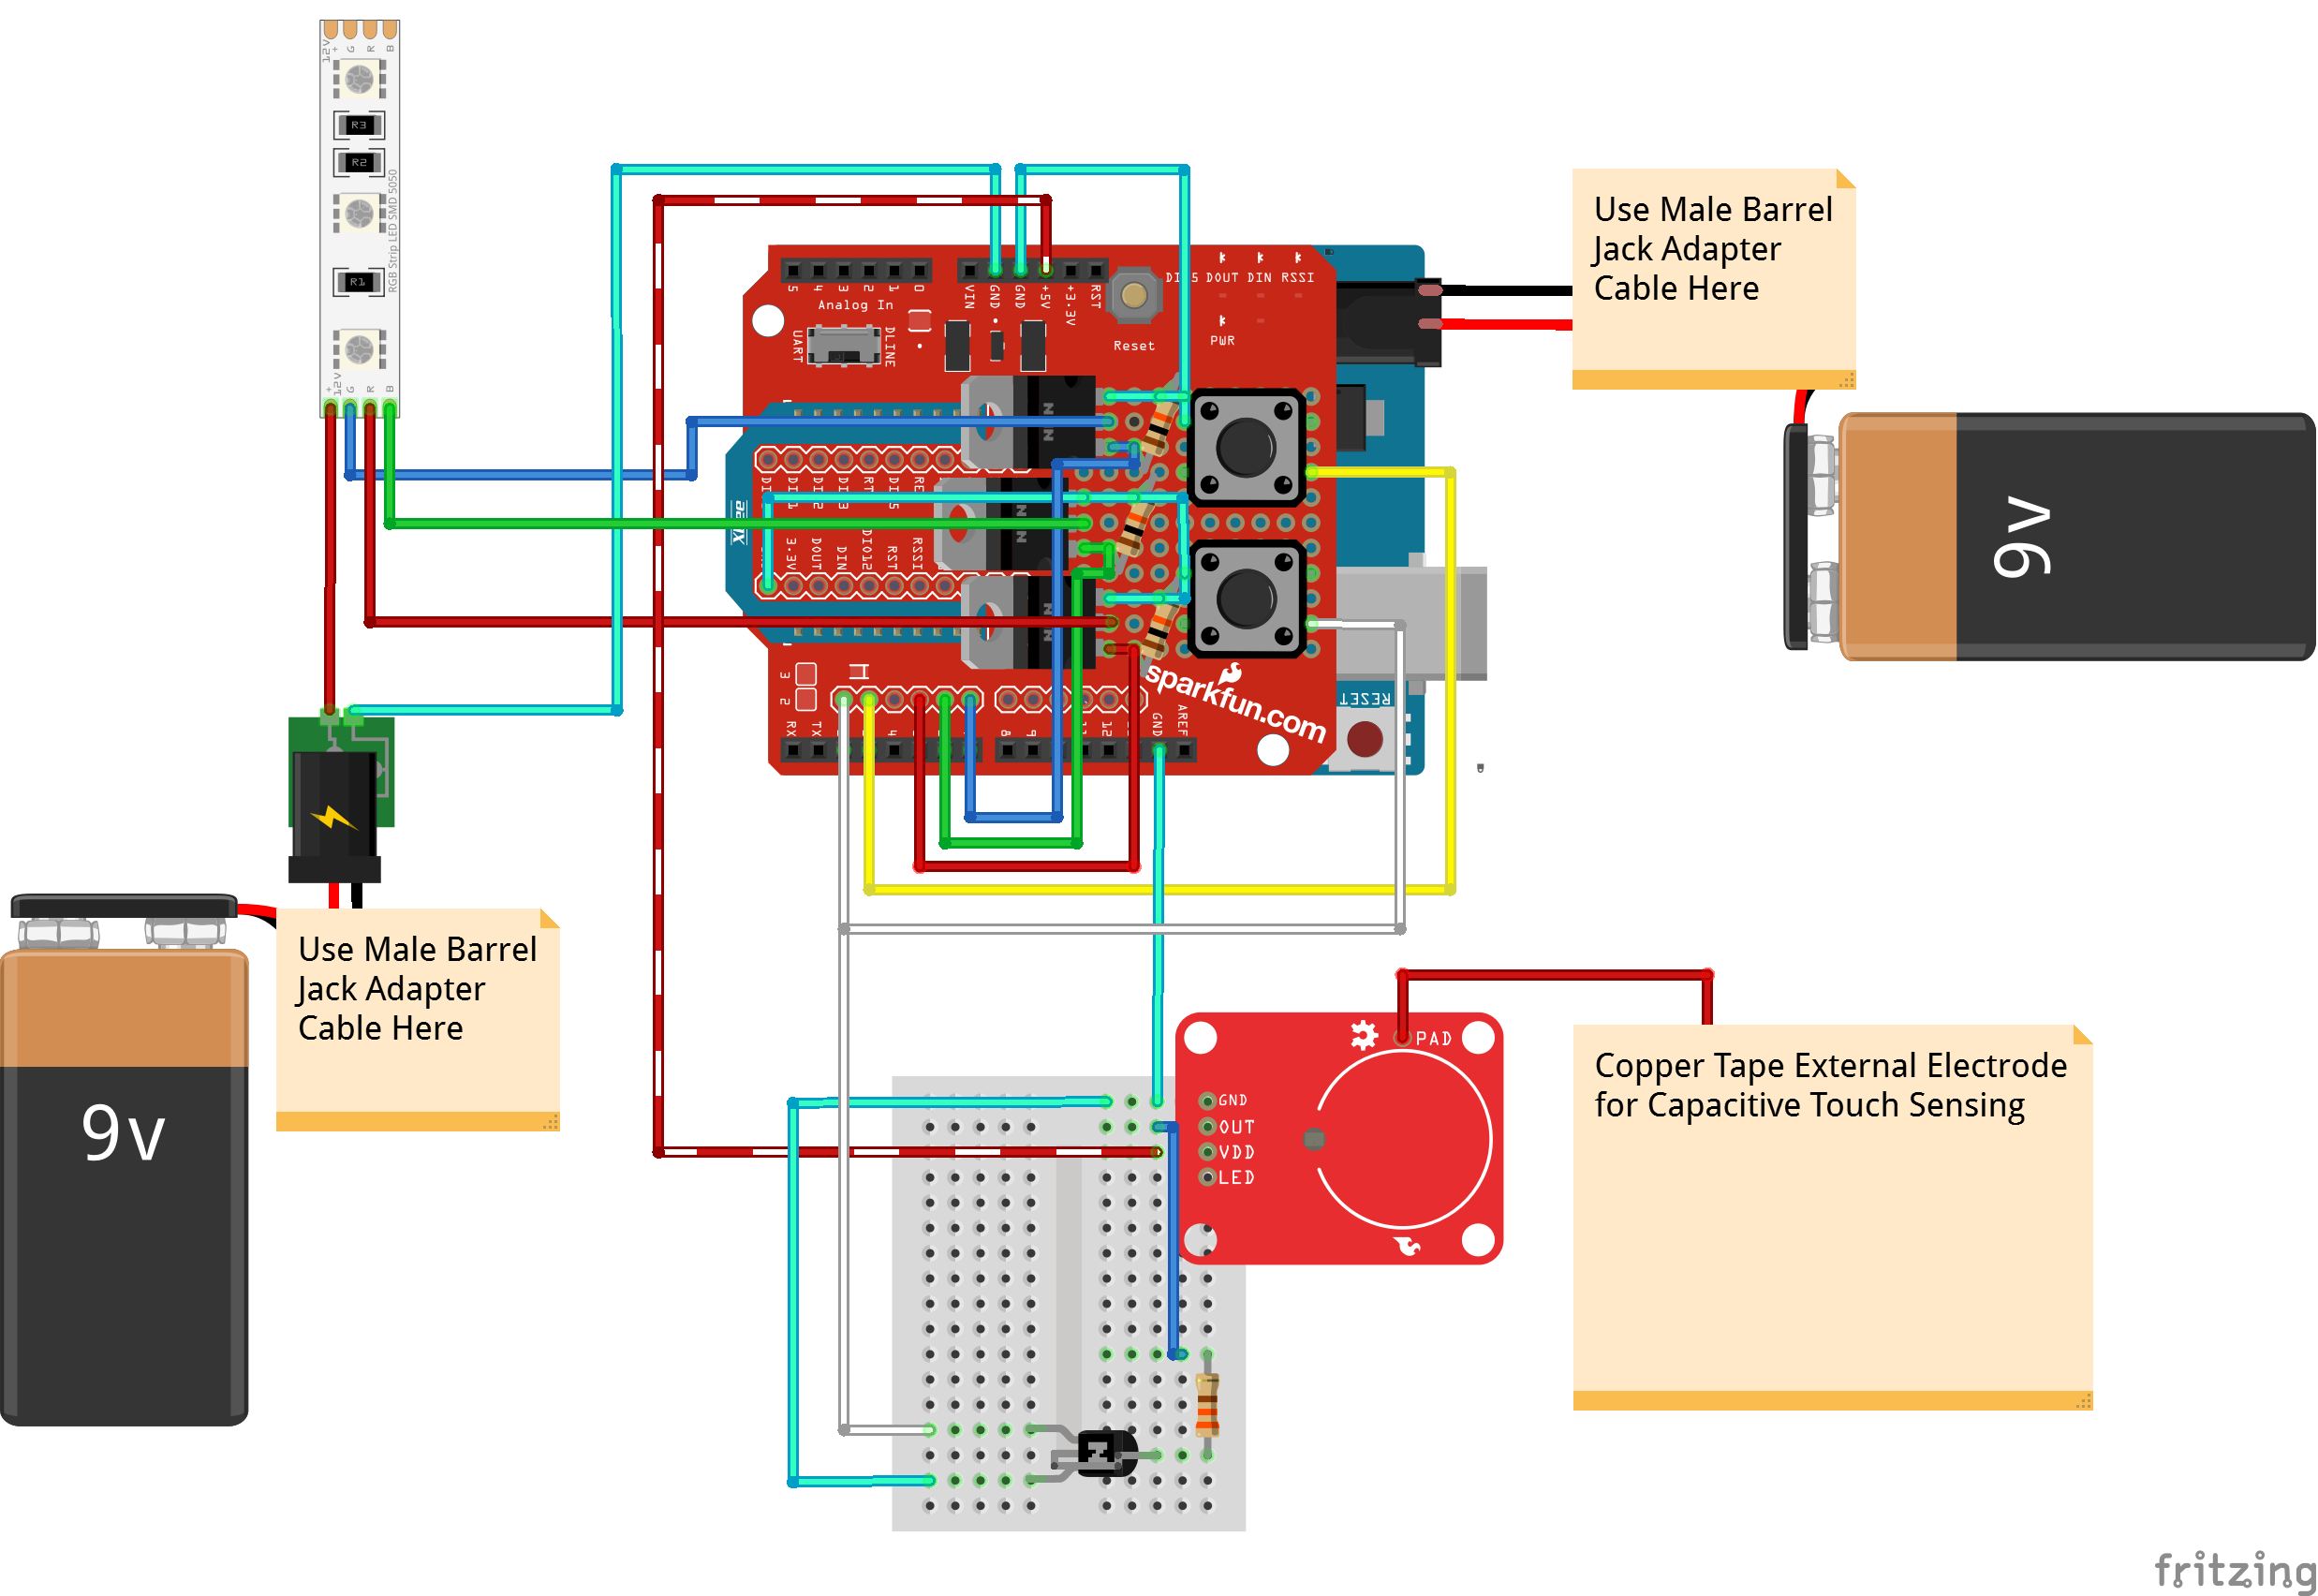
Check out the circuit diagram below to see how everything is connected.
Remote Power
During rehearsals, the prop was initially powered by a 12V wall adapter. It was bulky and not ideal for quick set changes between pieces. Therefore, I decided make it portable using a 9V battery to power the LED strip and controller.
After testing, I noticed that the 9V battery connected to the Arduino's microcontroller not sufficient enough for the LED strip. The LED strip was not bright enough or would display the wrong color.To remedy this, a second 9V battery was attached to the LED strip. Ground was connected to both batteries for reference.
Controlling the LEDs
Since the non-addressable RGB LED strip operate at a higher voltage, a transistor was needed to prevent damage to the microcontroller. A pull-down resistor was also needed so that the Arduino would not have a floating pin. Each color required one n-channel mosfet and one 10kΩ resistor.
Momentary Button to Capacitive Touch Sensing
Initial testing included momentary push buttons with code utilizing the pull-up resistors on the digital pins. One button (connected to pin 2 with a white wire) was used to adjust the color while the other (connected to pin 3 with a yellow wire) was used to change the pattern. The buttons were left on the board to troubleshoot connections.
Eventually, the button to trigger the color was replaced with a capacitive touch sensor and external electrodes. The Arduino had issues reading the capacitive touch sensor's "OUT" pin by itself so a small npn transistor was added to trigger the button press. A resistor was used as current limiting resistor to the BJT's base pin.