IOIO-OTG Hookup Guide
 Joel_E_B, Ytai
Running Your First Android App
We will transition from using the PC to using an Android device or emulator to run apps created for the IOIO.
Download Android Studio
If you have not done so already, you will need to download and install Android Studio.
Once downloaded, follow the appropriate instructions for your OS, and install it as you would with other applications. Remember its location for later use.
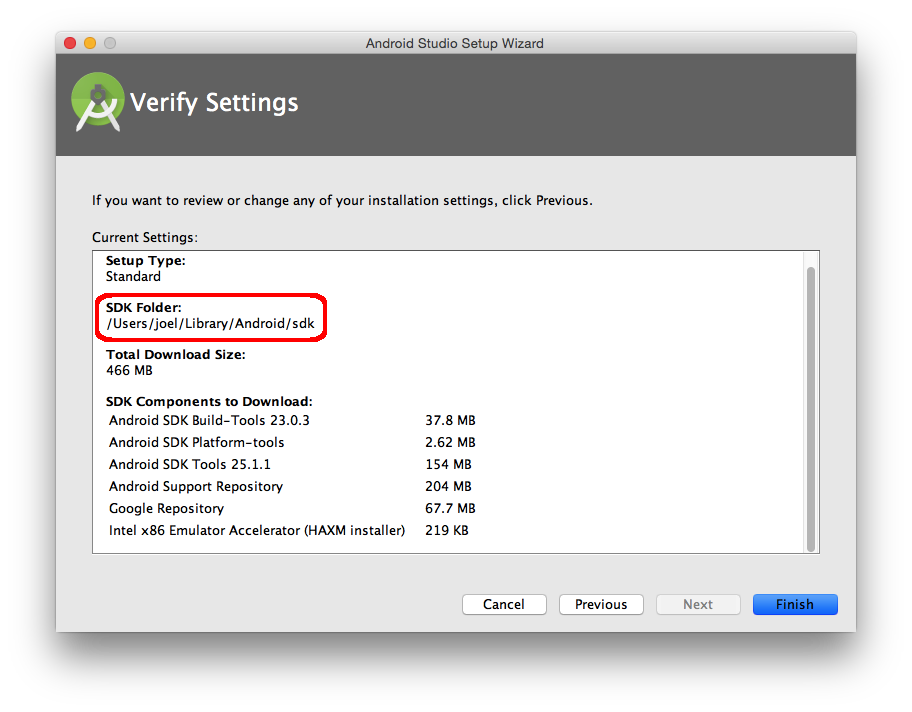
Follow the setup wizard. You will eventually reach a page verifying all the installation settings to be installed. Take note of where the SDK Folder is, as it will be needed following installation.
We will need to use the Command line in conjunction with Android Studio. You will most likely need to add the Android SDK platform-tools folder to your $PATH, which can be found in the SDK Folder mentioned previously.
Windows users can find GUI $PATH instructions here. Command line instructions can be found here. The command should look something like this:
PATH %PATH%;~/Android/sdk/platform-tools/
Mac user can find $PATH instructions here. The command should look something like this:
export PATH=$PATH:~/Library/Android/sdk/platform-tools/
In the command line, type adb, which stands for Android Debug Bridge. If you see a list of adb commands print out, the installation was a success!
Plug in Your Android Device to Your PC
Before plugging your Android device into your PC, you'll need to first turn on USB Debugging. To do so, navigate to your device's Settings and under the System heading click on Developer options. Then, under Debugging, make sure the USB Debugging check box is checked.
With USB Debugging enabled, you can now plug your Android device into your PC. Once plugged in, you can check to see if your device is showing up in the command line with the following command:
adb devices
You should see your device's info print out after the List of devices attached line.
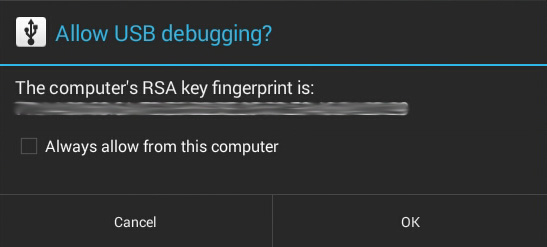
adb devices command.Check for any prompts on your Android device before continuing. Your device may ask to allow USB Debugging for this computer. Click OK, and check the 'Always allow from this computer' check box, if you desire.
Upload App to Android Device
With your device connected to your PC, navigate to the bin folder in the App-IOIOxxxx folder via the Command line. In this folder is a pre-compiled app (.apk file) titled HelloIOIO-debug-unaligned.apk. Upload this app to your device using the following command:
adb install HelloIOIO-debug-unaligned.apk
You should see the following success message print out:

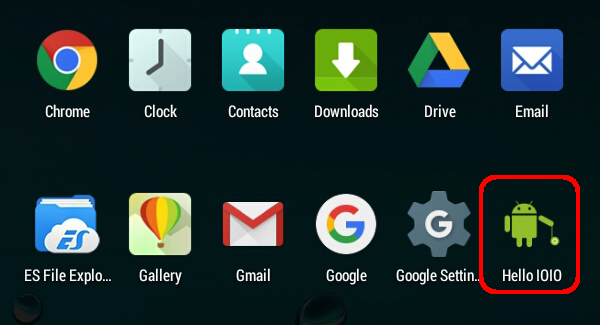
On your Android device, navigate to your applications. You should now see a HelloIOIO app on your device.
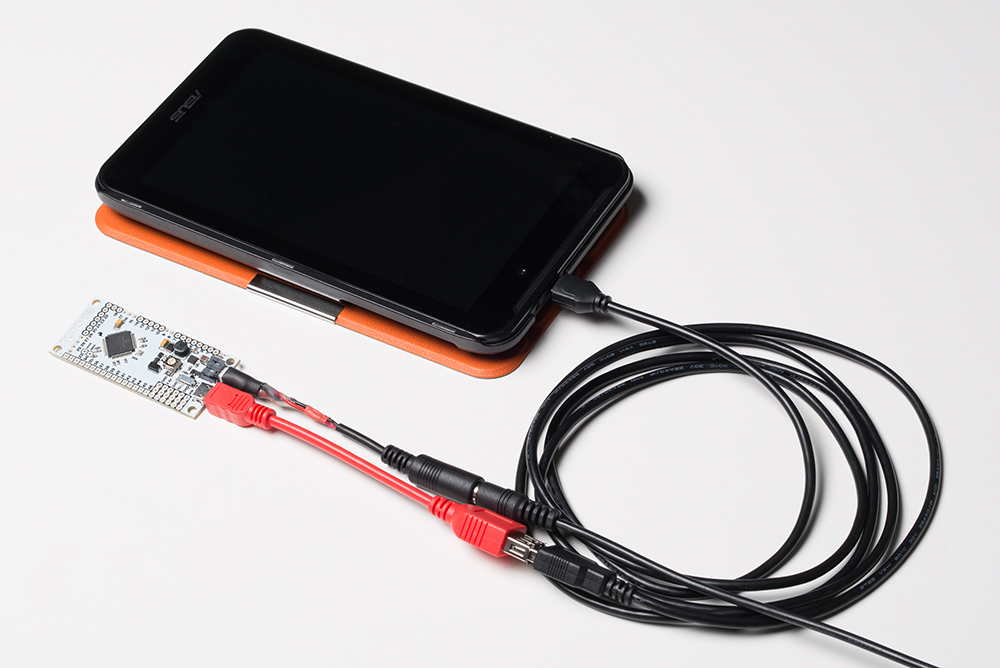
Plug in the IOIO to your Android Device
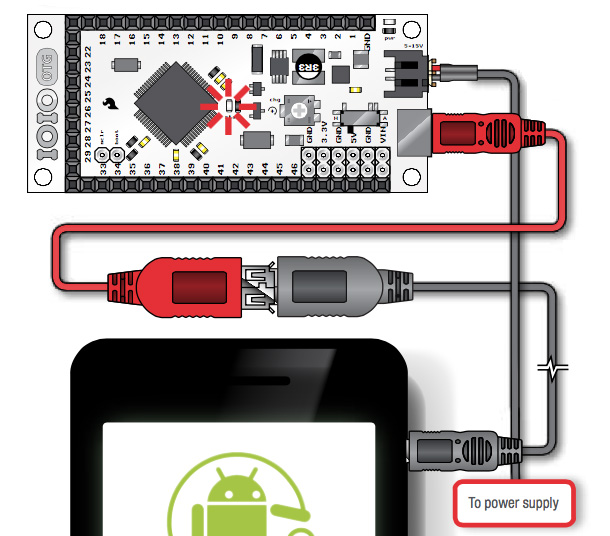
Unplug your device from the PC, keeping the micro USB cable attached to your Android device. Attach the red USB Female A to micro-A OTG Cable to the end of the micro USB cable. Then attach the micro-A end of the OTG cable to the micro-AB connector on the IOIO-OTG.
Provide power to your IOIO using the Barrel Jack-to-JST Adapter. The red power LED should illuminate.
Open the HelloIOIO app. Your device may ask you if you want to automatically open that app when the IOIO is plugged in. You will be presented with this screen:
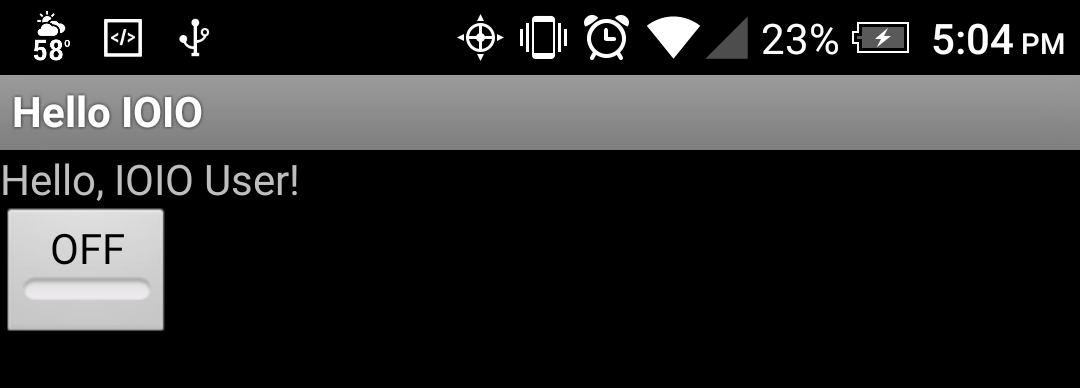
Press the button on the touchscreen to turn the Stat LED on and off. You've just uploaded and successfully used your first IOIO Android application!
If you are having trouble getting the app to work, please visit the Troubleshooting section.