IOIO-OTG Hookup Guide
 Joel_E_B, Ytai
Software Downloads and Installation
This section will cover the installation of all the software necessary to get started with the IOIO-OTG. All of these pieces of software will be used throughout the tutorial, though not all of them will be used in each example. If you only wish to use your PC to develop on the IOIO or, alternatively, only want to develop on an Android device/emulator, you may only need to install the software for those specific applications.
Client Software and IOIO Application Firmware
Head over to the Downloads section of the IOIO wiki on GitHub. Scroll down until you see the section titled Client Software and IOIO Application Firmware Images. Under the Client-side Software column, download the latest version, which will be delivered as a .zip file (App-IOIOxxxx, where xxxx is the software/library version number). Unzip it, and place that folder in a location of your choosing (we recommend your home directory). Remember the location, as it will be used frequently throughout this tutorial. You can also download it directly from the link below.
This folder contains all the Client-side software for the IOIO, including the IOIO Library and the examples we will be using both on a PC and on an Android device/emulator. These files will be necessary to get started with the IOIO no matter which method you choose for development.
No further action is needed after downloading and unzipping this folder.
IOIO Bridge
Another piece of software we'll need from the IOIO GitHub wiki is IOIO Bridge, which can be found under the Tools section. Or, you can download it directly using the link below.
This tool allows you to have your Android device and your IOIO plugged into your computer at the same time, allowing for faster development.
No further action is needed after downloading and unzipping this folder.
IOIO Device Driver
To use the IOIO-OTG with your personal computer, download and install the device driver for the IOIO. You may need to plug the IOIO-OTG into your computer to complete the driver installation.
Windows
Provide this file (right-click, and choose Save Link As...) to the "Add Hardware" wizard on your Windows machine.
Linux
Copy this udev rules file to the udev rules directory. More information can be found here.
OSX
No driver installation is necessary if using the Mac OS.
You can find more information about interfacing your IOIO with your PC over on the IOIO wiki.
Java Development Kit (JDK)
Whether you're developing with the PC, an Android device or both, it's necessary to have Java installed. If it's not installed already, you can find it on Oracle's website. Choose the correct file for your OS.
While it's only necessary to have the Java Runtime Environment (JRE) installed, you may find it easier to just install the entire Java Development Kit (JDK). The version of Java pointed to by your command line may be an outdated version. Installing the latest version of the JDK will update all references to Java your system may need.
Note that your OS may come with Java already installed. You can check by typing java -version into your command line window on any OS. This command will also let you know if the installation from above was successful.
Android Studio and Android SDK
To create your own Android apps or to use existing Android app examples, you will need to have Android Studio installed. If you wish to work exclusively on your PC, you do not need to install Android Studio. If needed, download it from the link below.
Once downloaded, follow the appropriate instructions for your OS, and install it as you would with other applications. Remember its location for later use.
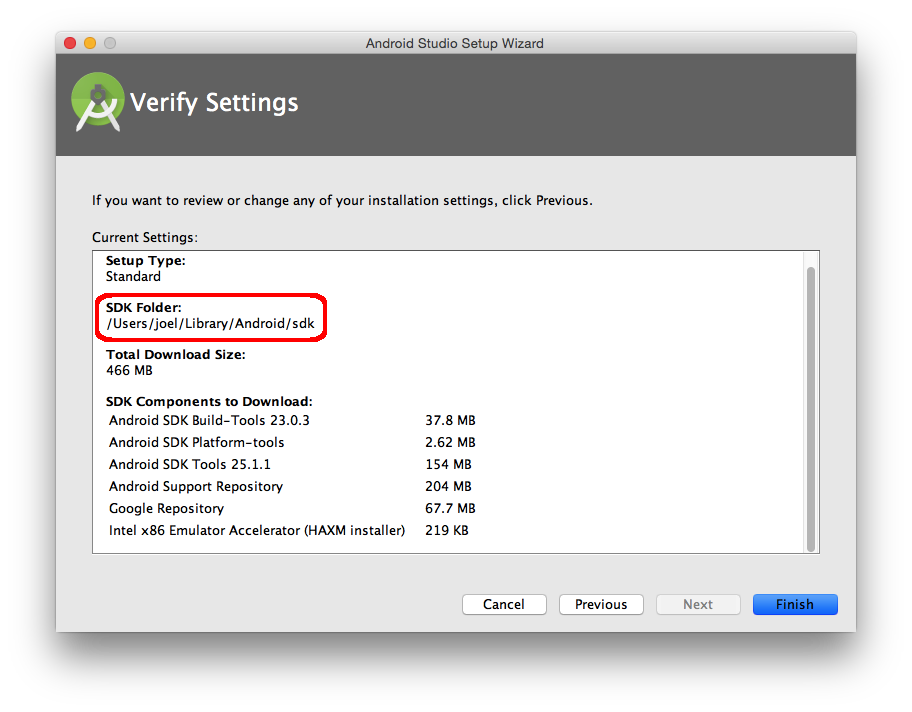
Follow the setup wizard. You will eventually reach a page verifying all the installation settings to be installed. Take note of where the SDK Folder is, as it will be needed following installation.
We will need to use the Command line in conjunction with Android Studio. You will most likely need to add the Android SDK platform-tools folder to your $PATH, which can be found in the SDK Folder mentioned previously.
Windows users can find GUI $PATH instructions here. Command line instructions can be found here. The command should look something like this:
PATH %PATH%;~/Android/sdk/platform-tools/
Mac and Linux users can find $PATH instructions here. The command should look something like this:
export PATH=$PATH:~/Library/Android/sdk/platform-tools/
In the Command line, type adb, which stands for Android Debug Bridge. If you see a list of adb commands print out, the installation and $PATH update was a success!
Gradle
Gradle is an open source build automation system used to compile Java code. We will be using this to build our own PC application for the IOIO. Android Studio comes with a copy of Gradle, so, if you wish to skip the PC app sections and move straight to the Android app sections, you do not need to install this separately.
Download Gradle here. You can grab the Binary only distribution.
Extract the .zip file, and place it somewhere you’ll remember. It’s recommended you place it in your home directory.
You will most likely need to add the Gradle bin folder to your $PATH.
Windows users can find GUI $PATH instructions here. Command line instructions can be found here. The command should look something like this:
PATH %PATH%;~/gradle-2.12/bin/
Mac users can find $PATH instructions here. The command should look something like this:
export PATH=$PATH:~/gradle-2.12/bin/
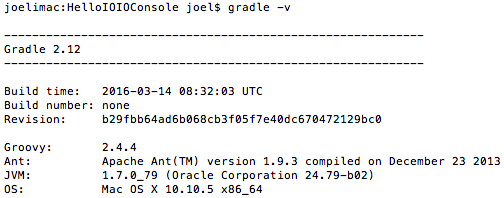
You can check to see if it worked by typing gradle -v. You should see some version info print out.
More information on Gradle can be found on the IOIO Wiki.