IoT Industrial Scale
 jenfoxbot
 Introduction
What does a baby elephant weigh?* How much impact force does a jump have?? How can you tell if a rain barrel is full without looking inside??? Answer all these questions and more by building your very own Internet of Things ("IoT") industrial scale using the SparkFun OpenScale board!
This project is intended for folks with a lil' bit of background using Arduino or other microcontrollers. But, whether this is your first or 137th project, check out the links in the Suggested Reading section below (and throughout the tutorial) or leave a comment if you have any questions!
Read time: ~ 15 min.
Build time: Approx. 2 - 3 hours
**To weigh a baby elephant, you might need to be a zookeeper or otherwise have an elephant friend.. but you could always weigh Fido and/or kitty!*
For all you visual learners, check out a video of the project below:
Required Materials
To follow along and build your own scale, all the parts used have been listed for your convenience.
Electronics
- Open Scale (+ mini USB to USB cable)
- Four (4) Load Cells (or strain gauges depending on needs and budget)
- Particle Photon microcontroller or other data logger (+ micro USB to USB cable)
- Breadboard (or PCB board)
- 22 gauge stranded wire (breadboard wires also work)
To make the system wireless:
- SparkFun Sunny buddy and/or SparkFun Photon Battery Shield
- One 2000 mAh Polymer Lithium Ion Battery
All these parts can be found in the wish list below.
Scale and Casing
- Terminal blocks (5)
- Three (3) M3 screws per load cell (total of 12)
- One (1) project case (to protect the electronics)
- One (1) base board, and one (1) top board (for the scale platform)
- My base board was ~ 16" x 16" and my top board was ~ 12" x 14".
- Both boards should be sturdy and not flex or dent.
- Wood slats to frame the sides of the top board to hold it in place.
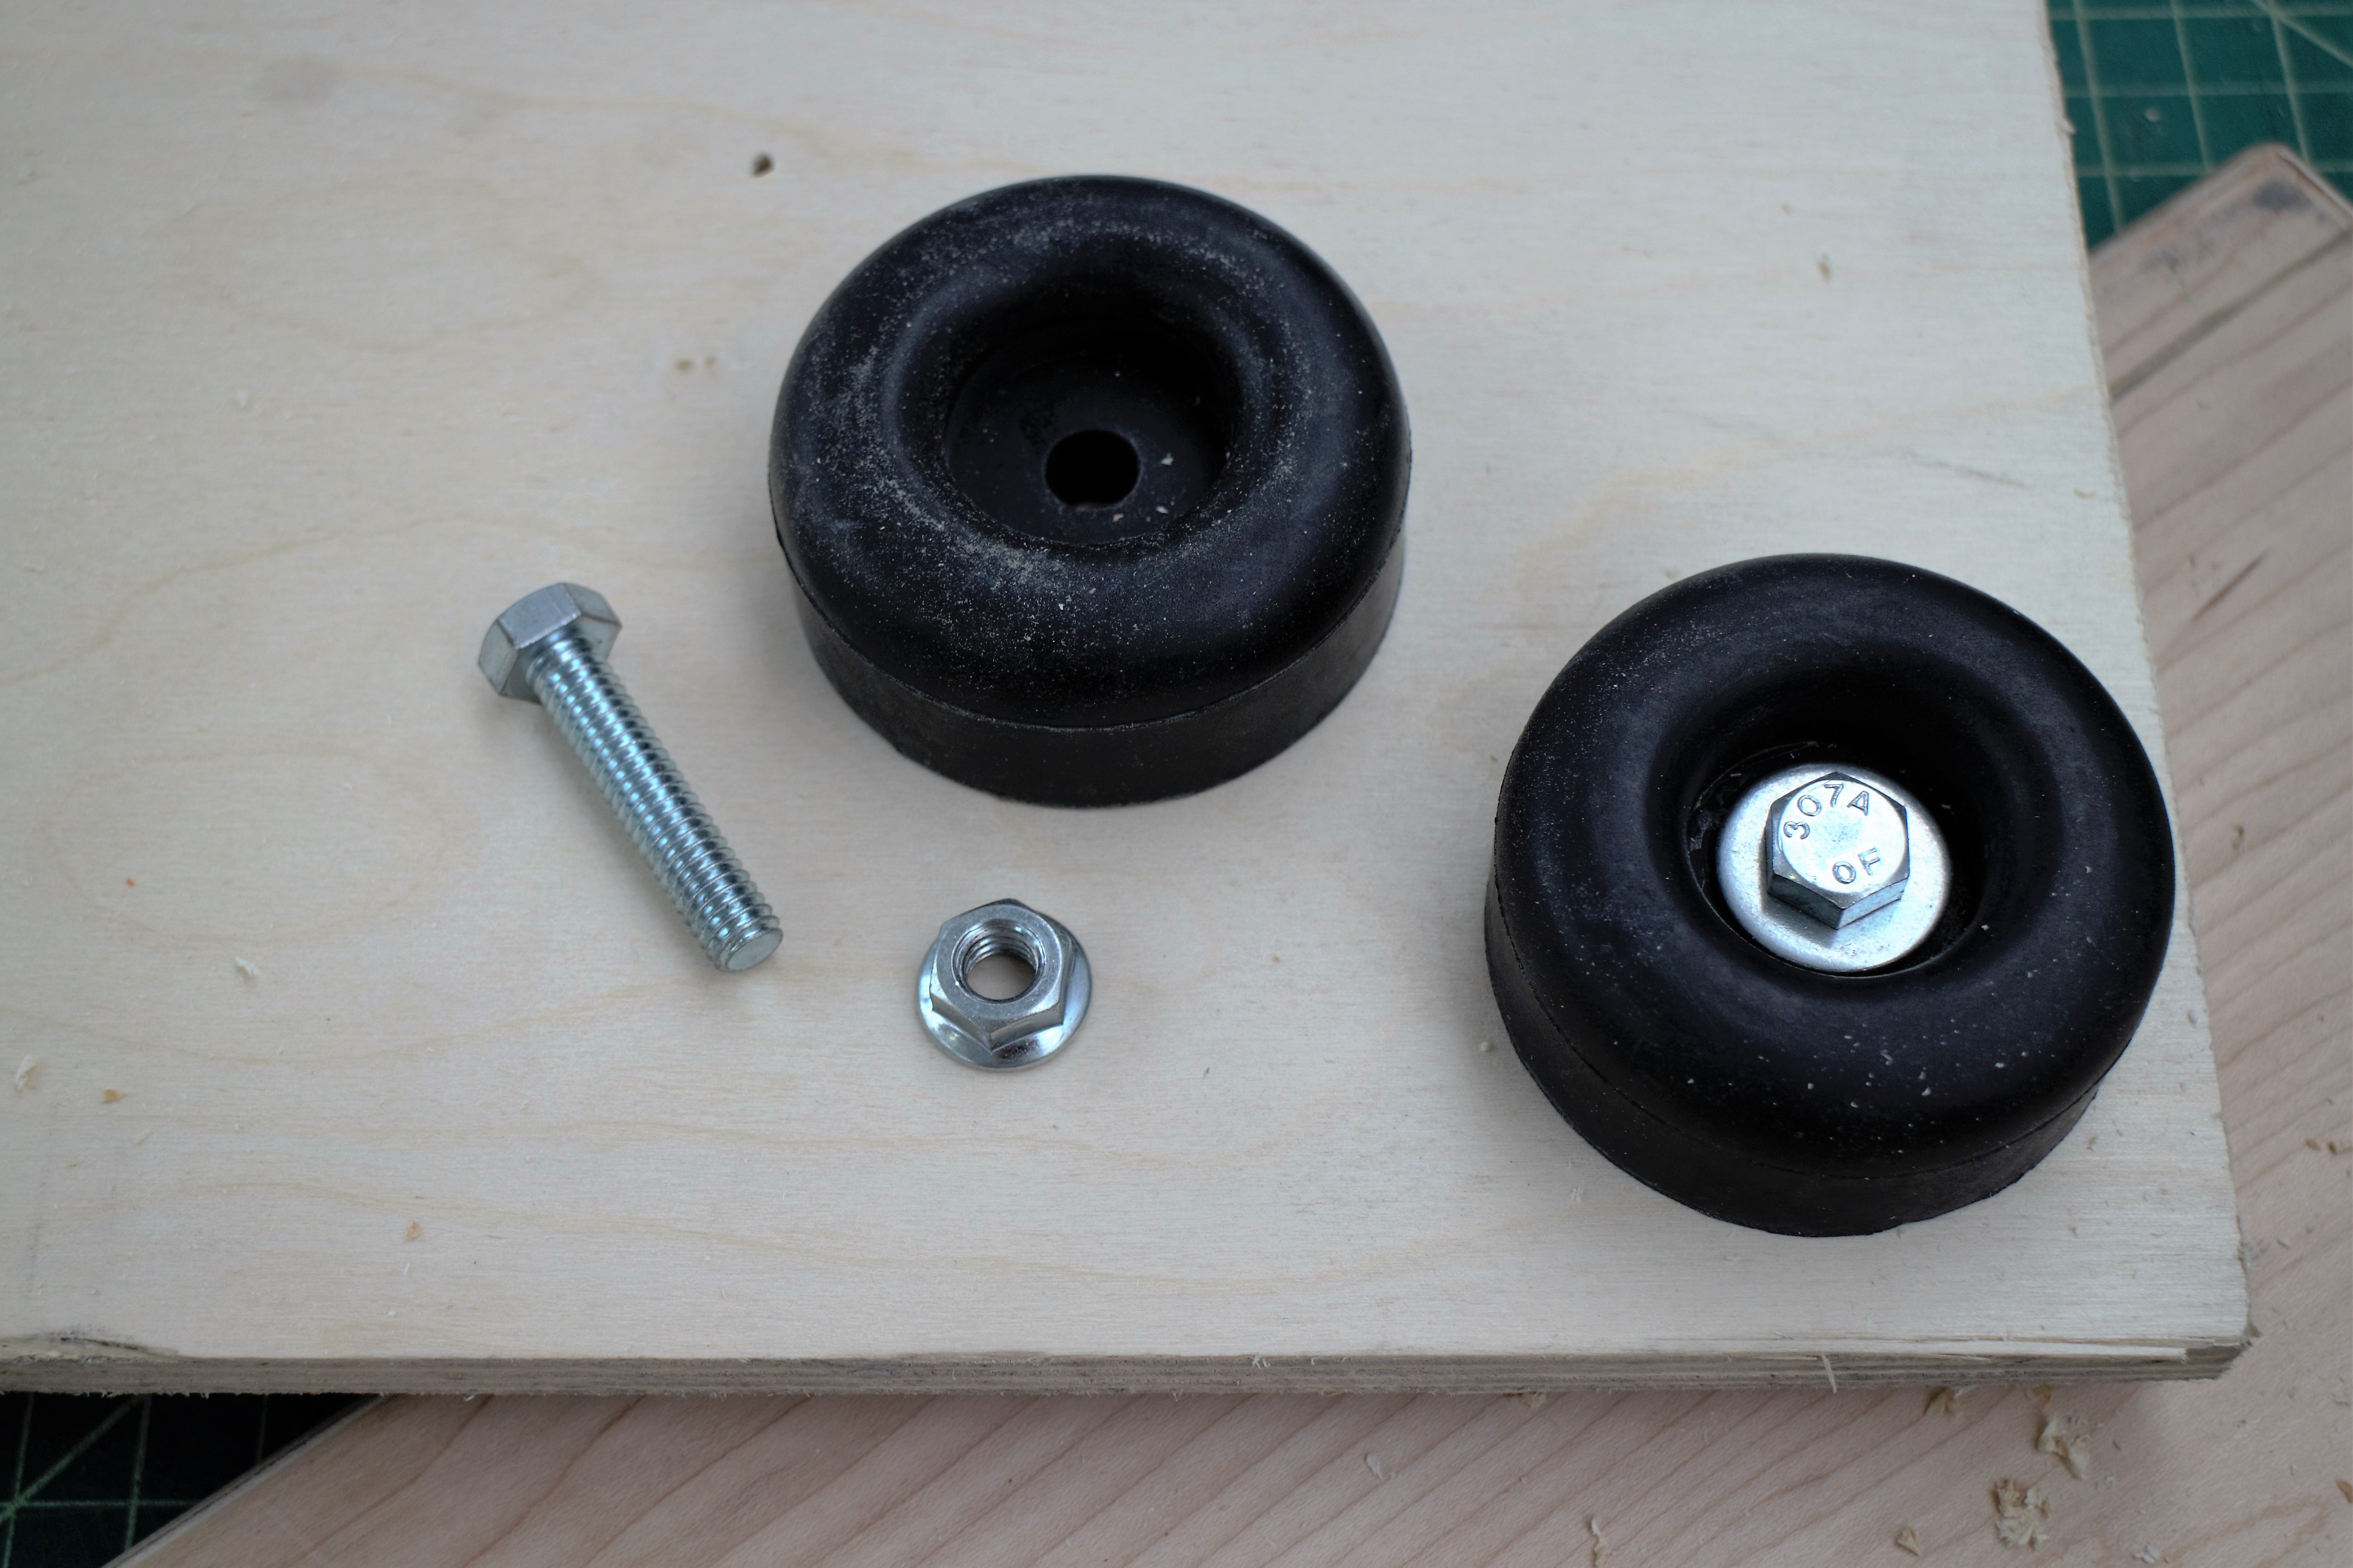
- Four (4) feet for base
Suggested Reading
Before getting started with this project, you may want to read up on some of the components and tools used throughout.
Serial Terminal Basics
OpenScale Applications and Hookup Guide
Photon Development Guide
As usual, don't forget to read the Datasheet for the Load Cells and any other components you with to use in your project.
Measuring Weight
How Do We Measure Weight??
Strain gauges! Also called load sensors, strain gauges measure electrical resistance changes in response (and proportional) to, well, strain! Strain is how much an object deforms under an applied force, or pressure (force per area). Check out this super awesome tutorial for more info on how strain gauges work.
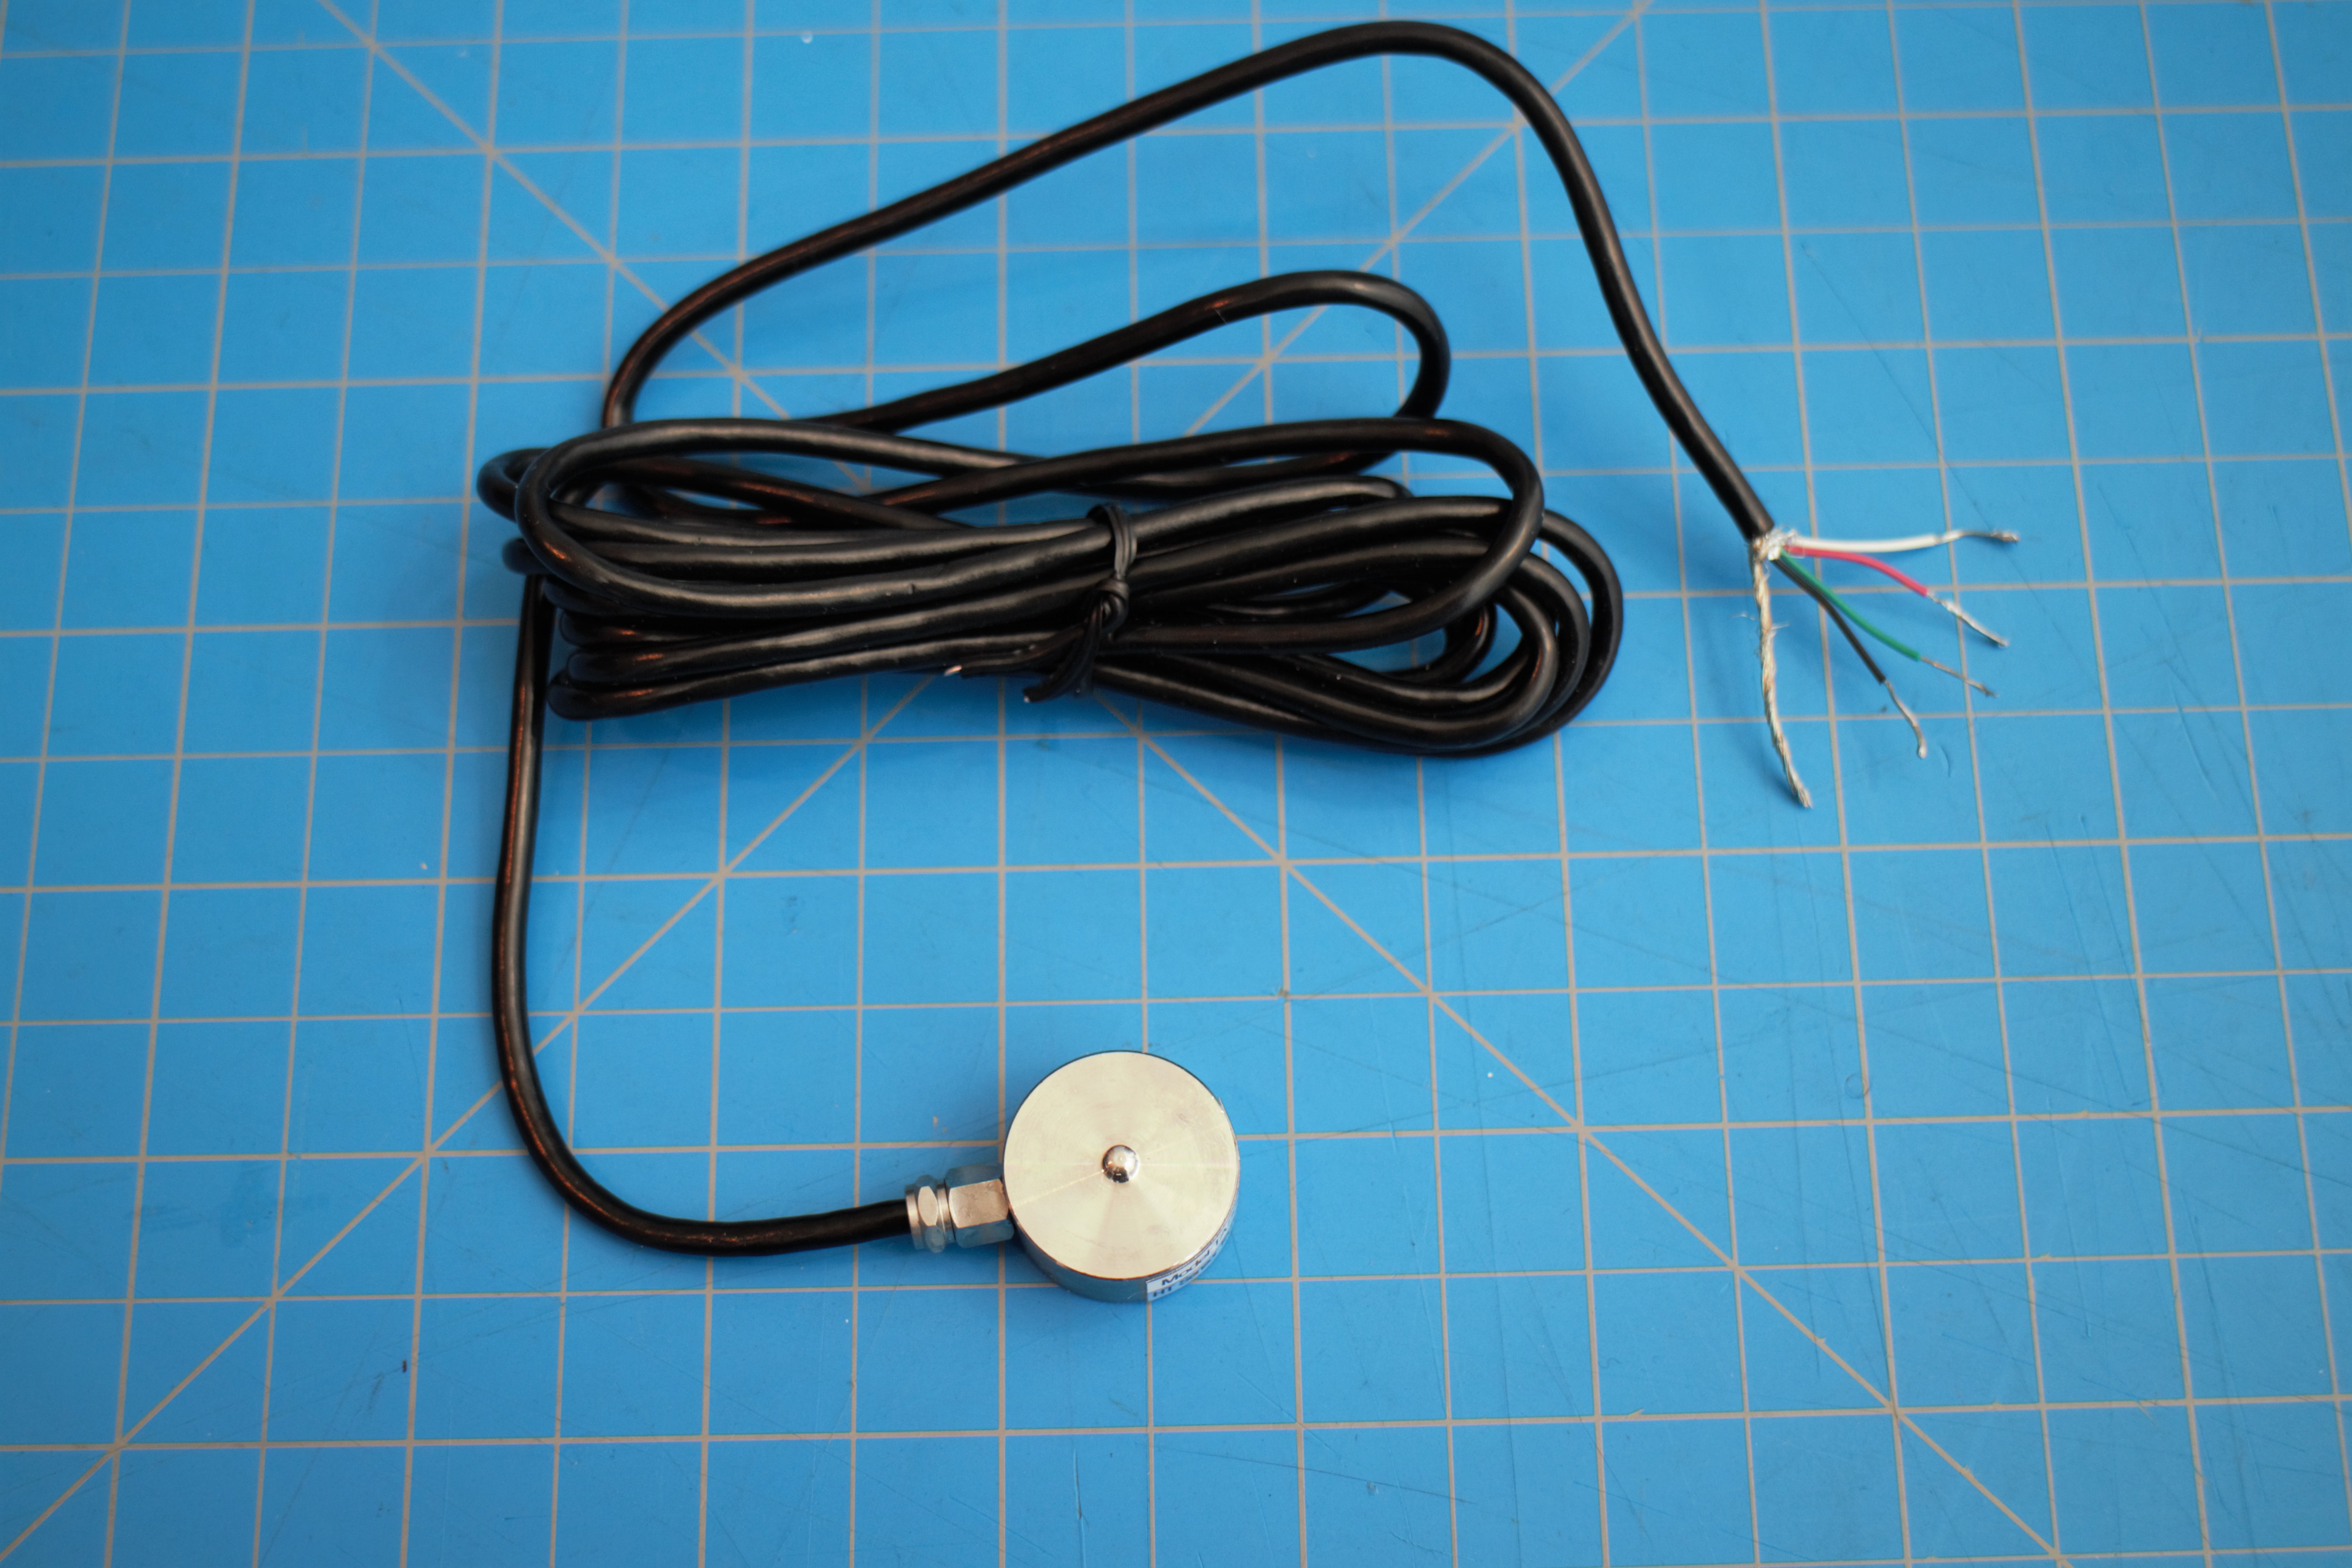
Usually what you'll find in a bathroom scale is a load cell, which combines four strain gauges in a wheatstone bridge. This project uses four disc compression load cells rated at 200 kg, like the one pictured above.
OpenScale Overview
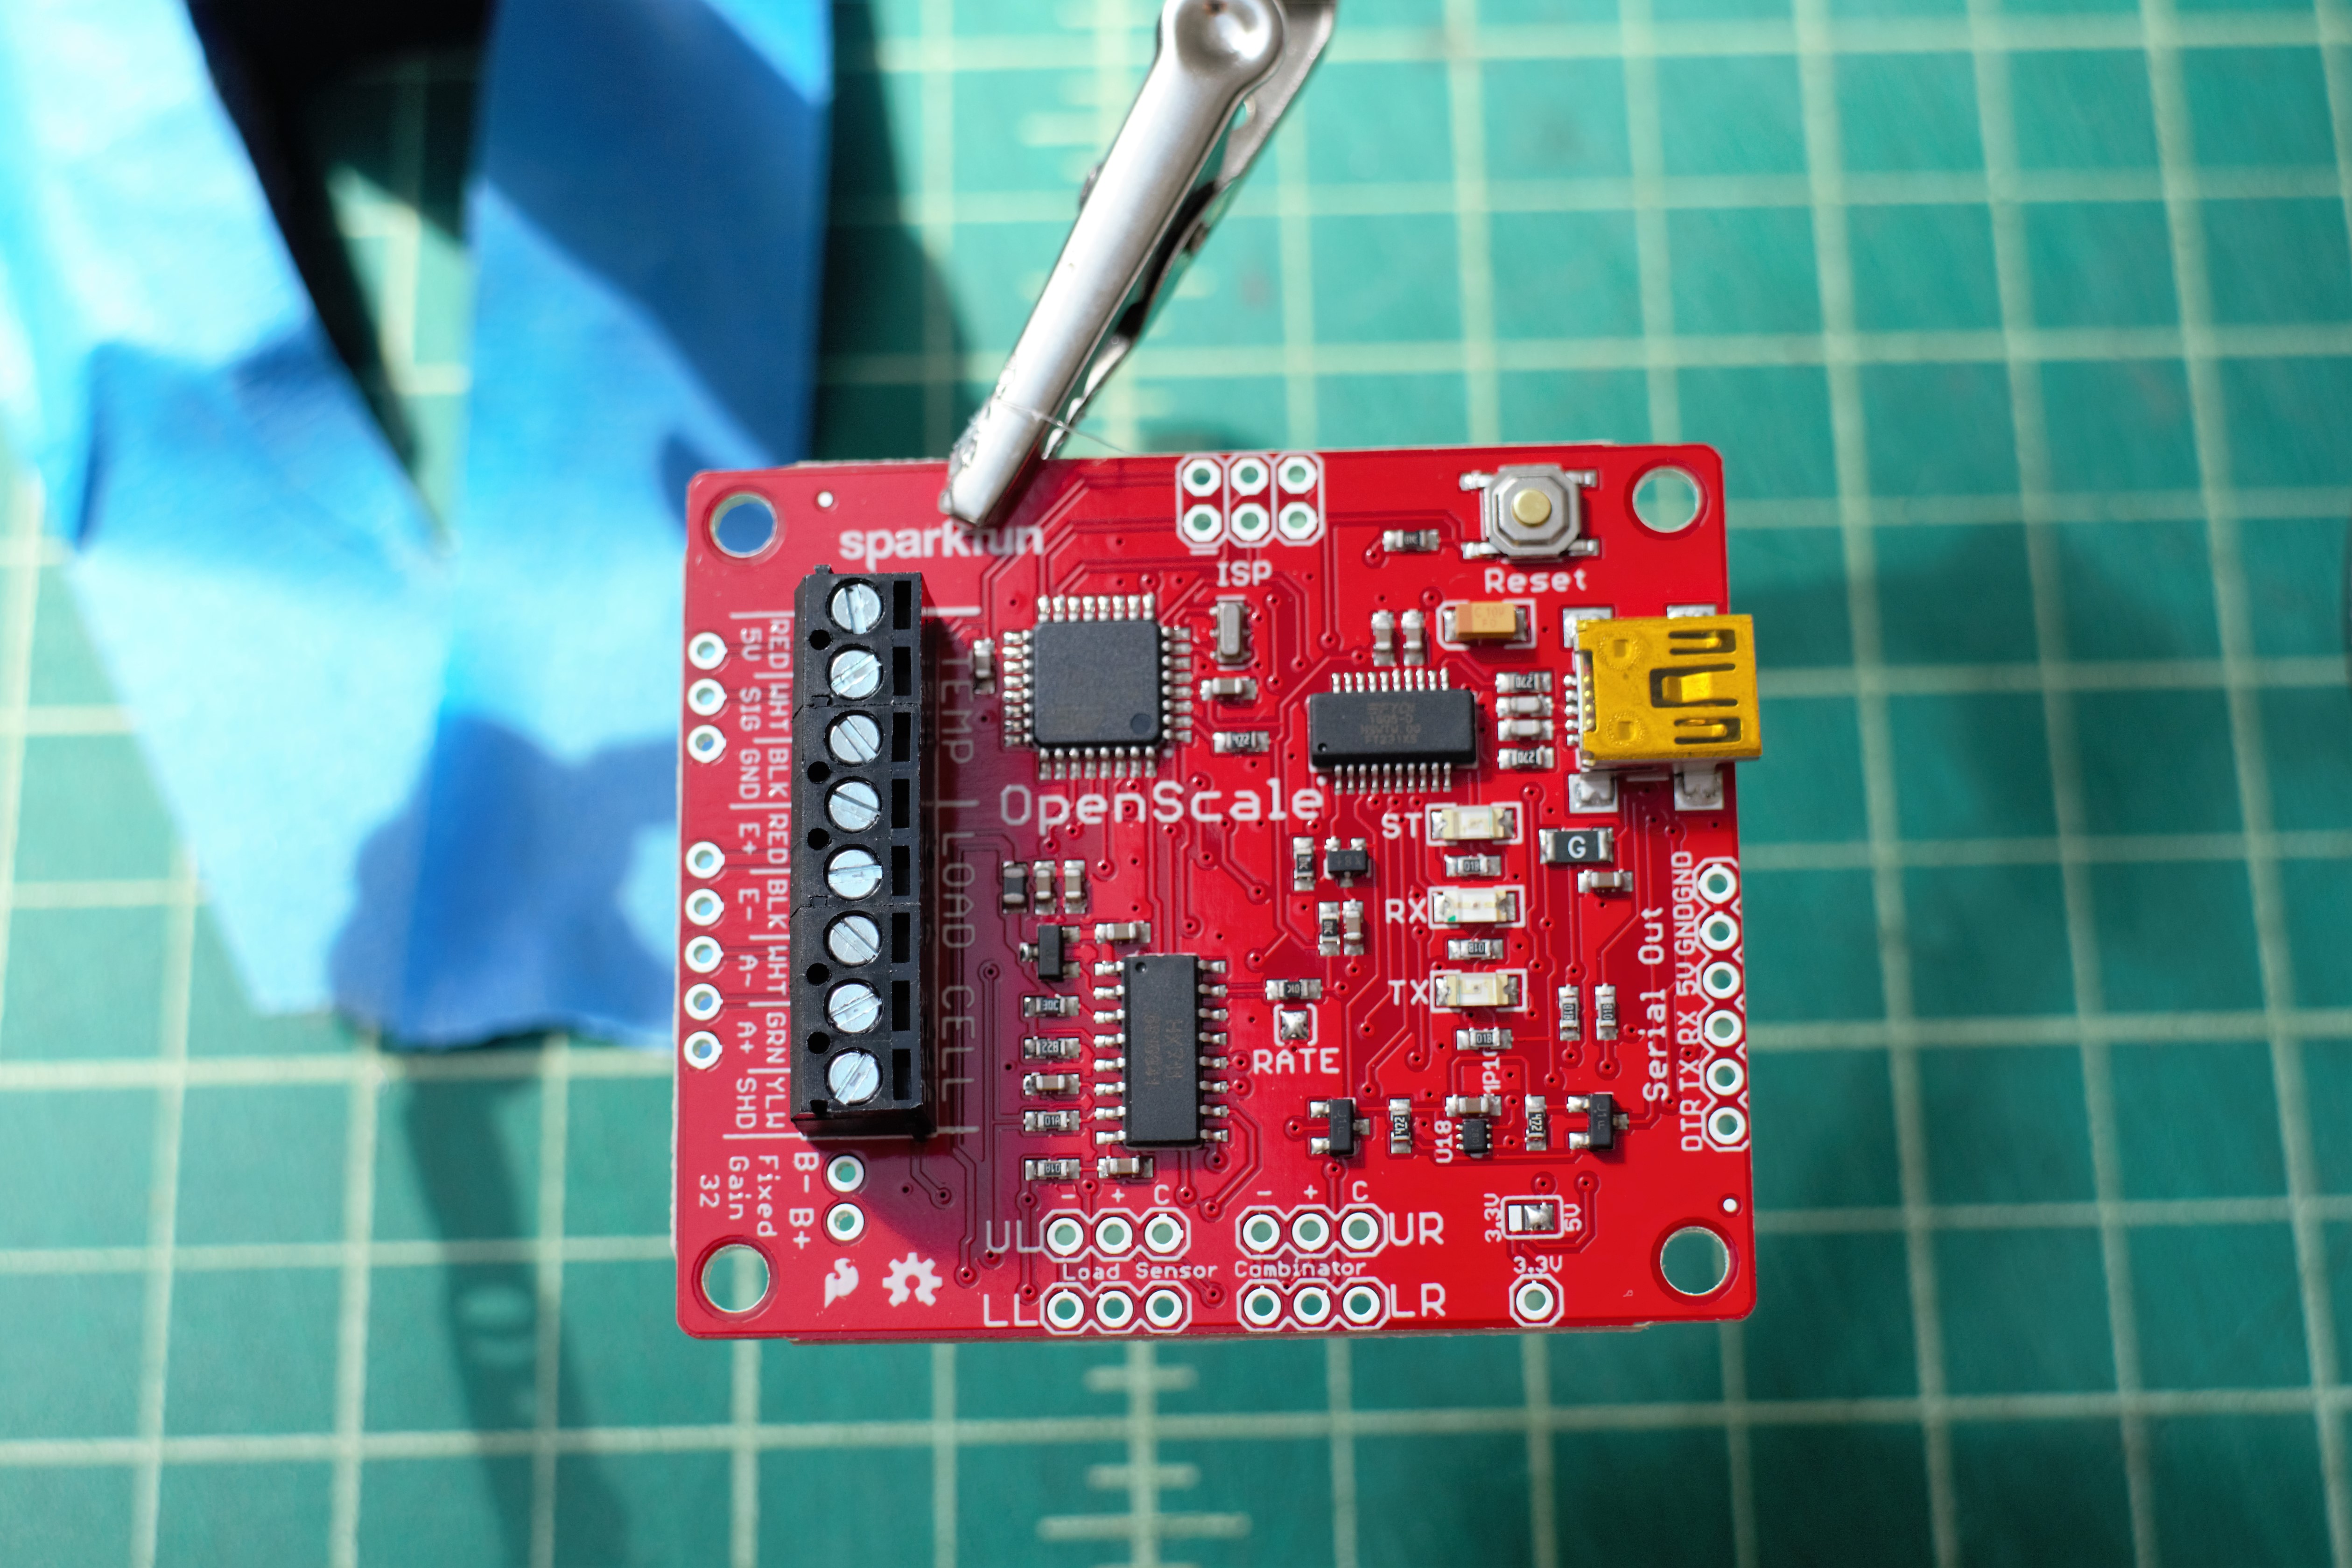
The OpenScale is a specialized board that allows a user to easily read and configure all types of load cells and strain gauges. It's designed for constant loads, includes an on-board temperature sensor, and is particularly helpful for places that are tricky to get to (e.g. under a beehive or conveyor belt).
The OpenScale combines an HX711 load cell amplifier with an ATmega328P, so you can program it just like an Arduino (Arduino Uno, specifically). The OpenScale uses TTL serial communication at 9600bps 8-N-1 to transmit and receive data. It comes with software that allows it to be controlled in, and print data to, the Arduino IDE serial monitor.
Here's the GitHub page for the OpenScale, which includes the Eagle schematic files.
Build the Electronics
Schematic:
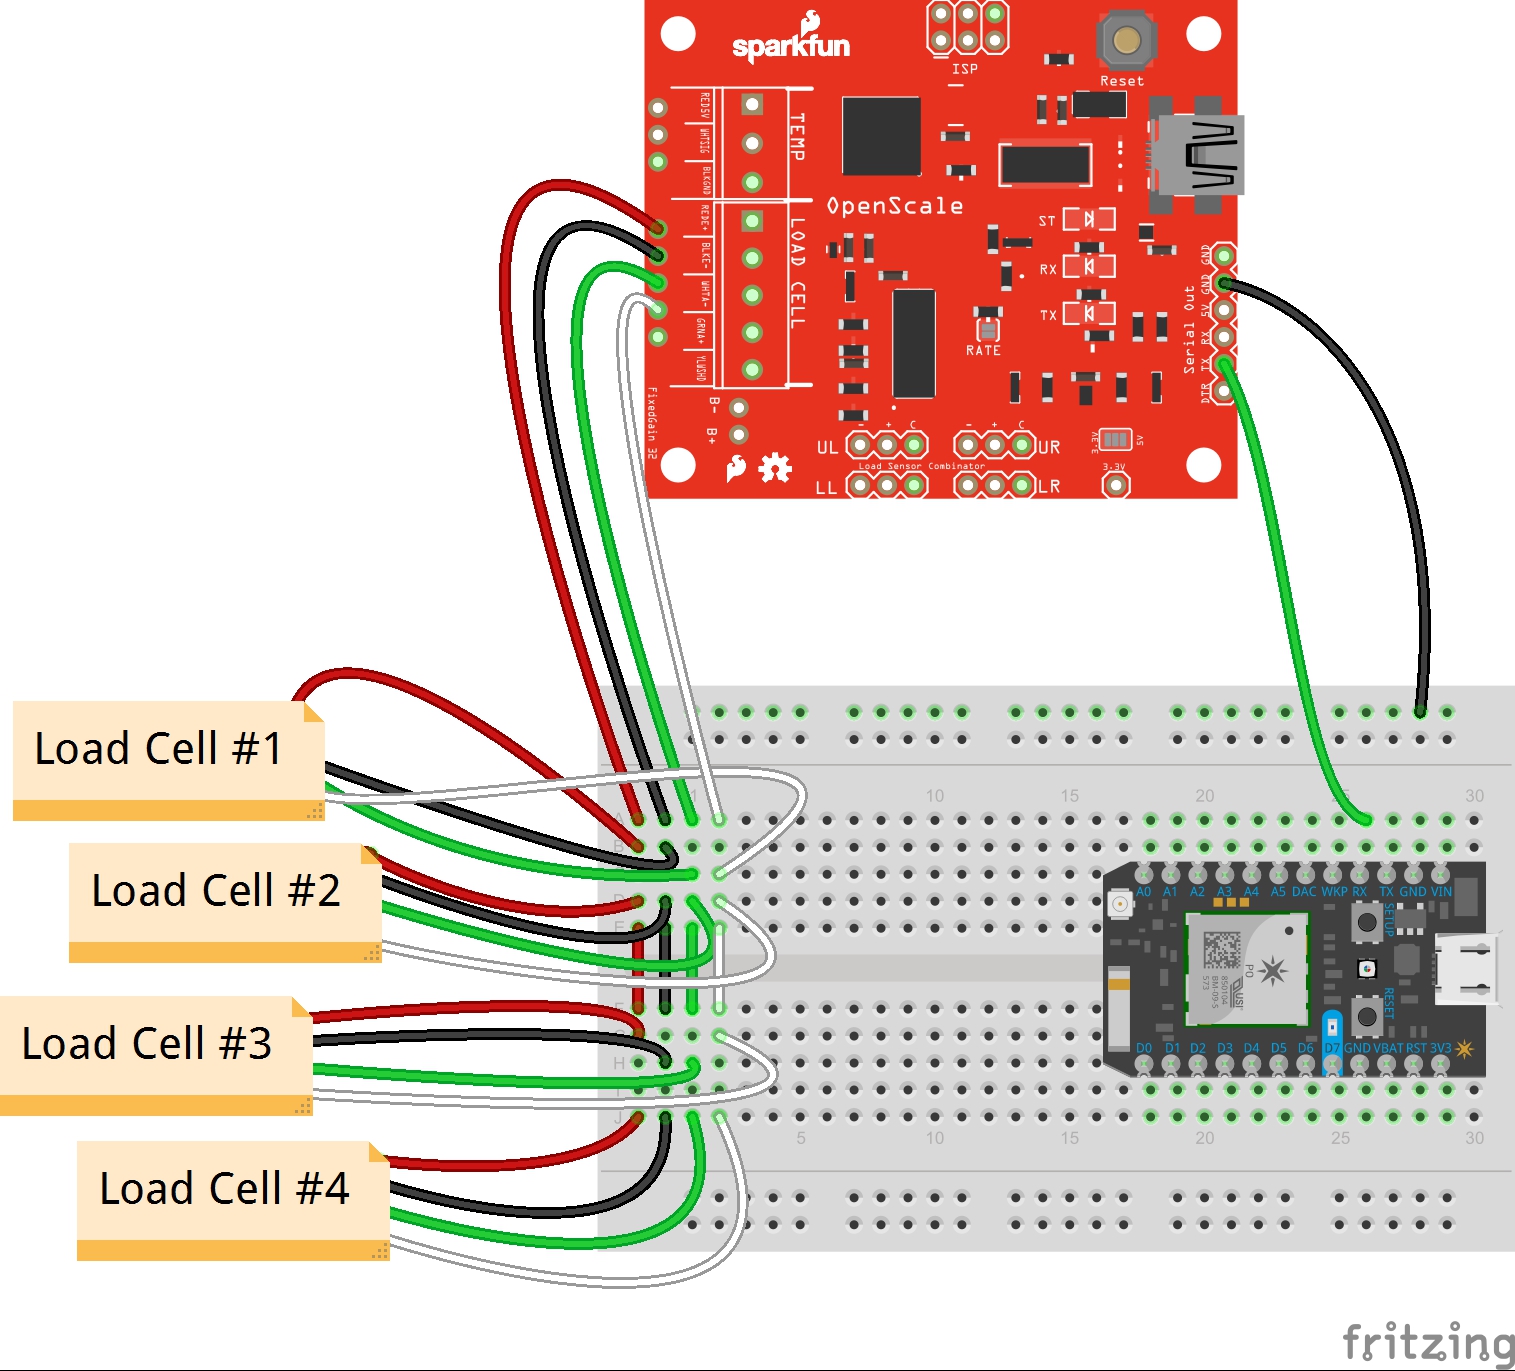
Part 1: Connect the Load Cells!
Load cells have four signal wires:
- Red: Excitation+ (E+) or VCC
- Black: Excitation- (E-) or ground
- White: Output+ (O+), Signal+ (S+)+ or Amplifier+ (A+)
- Green (or blue): Output- (O-), Signal- (S-), or Amplifier (A-)
They also have bare (or yellow) grounding wires to block outside (electromagnetic) noise.
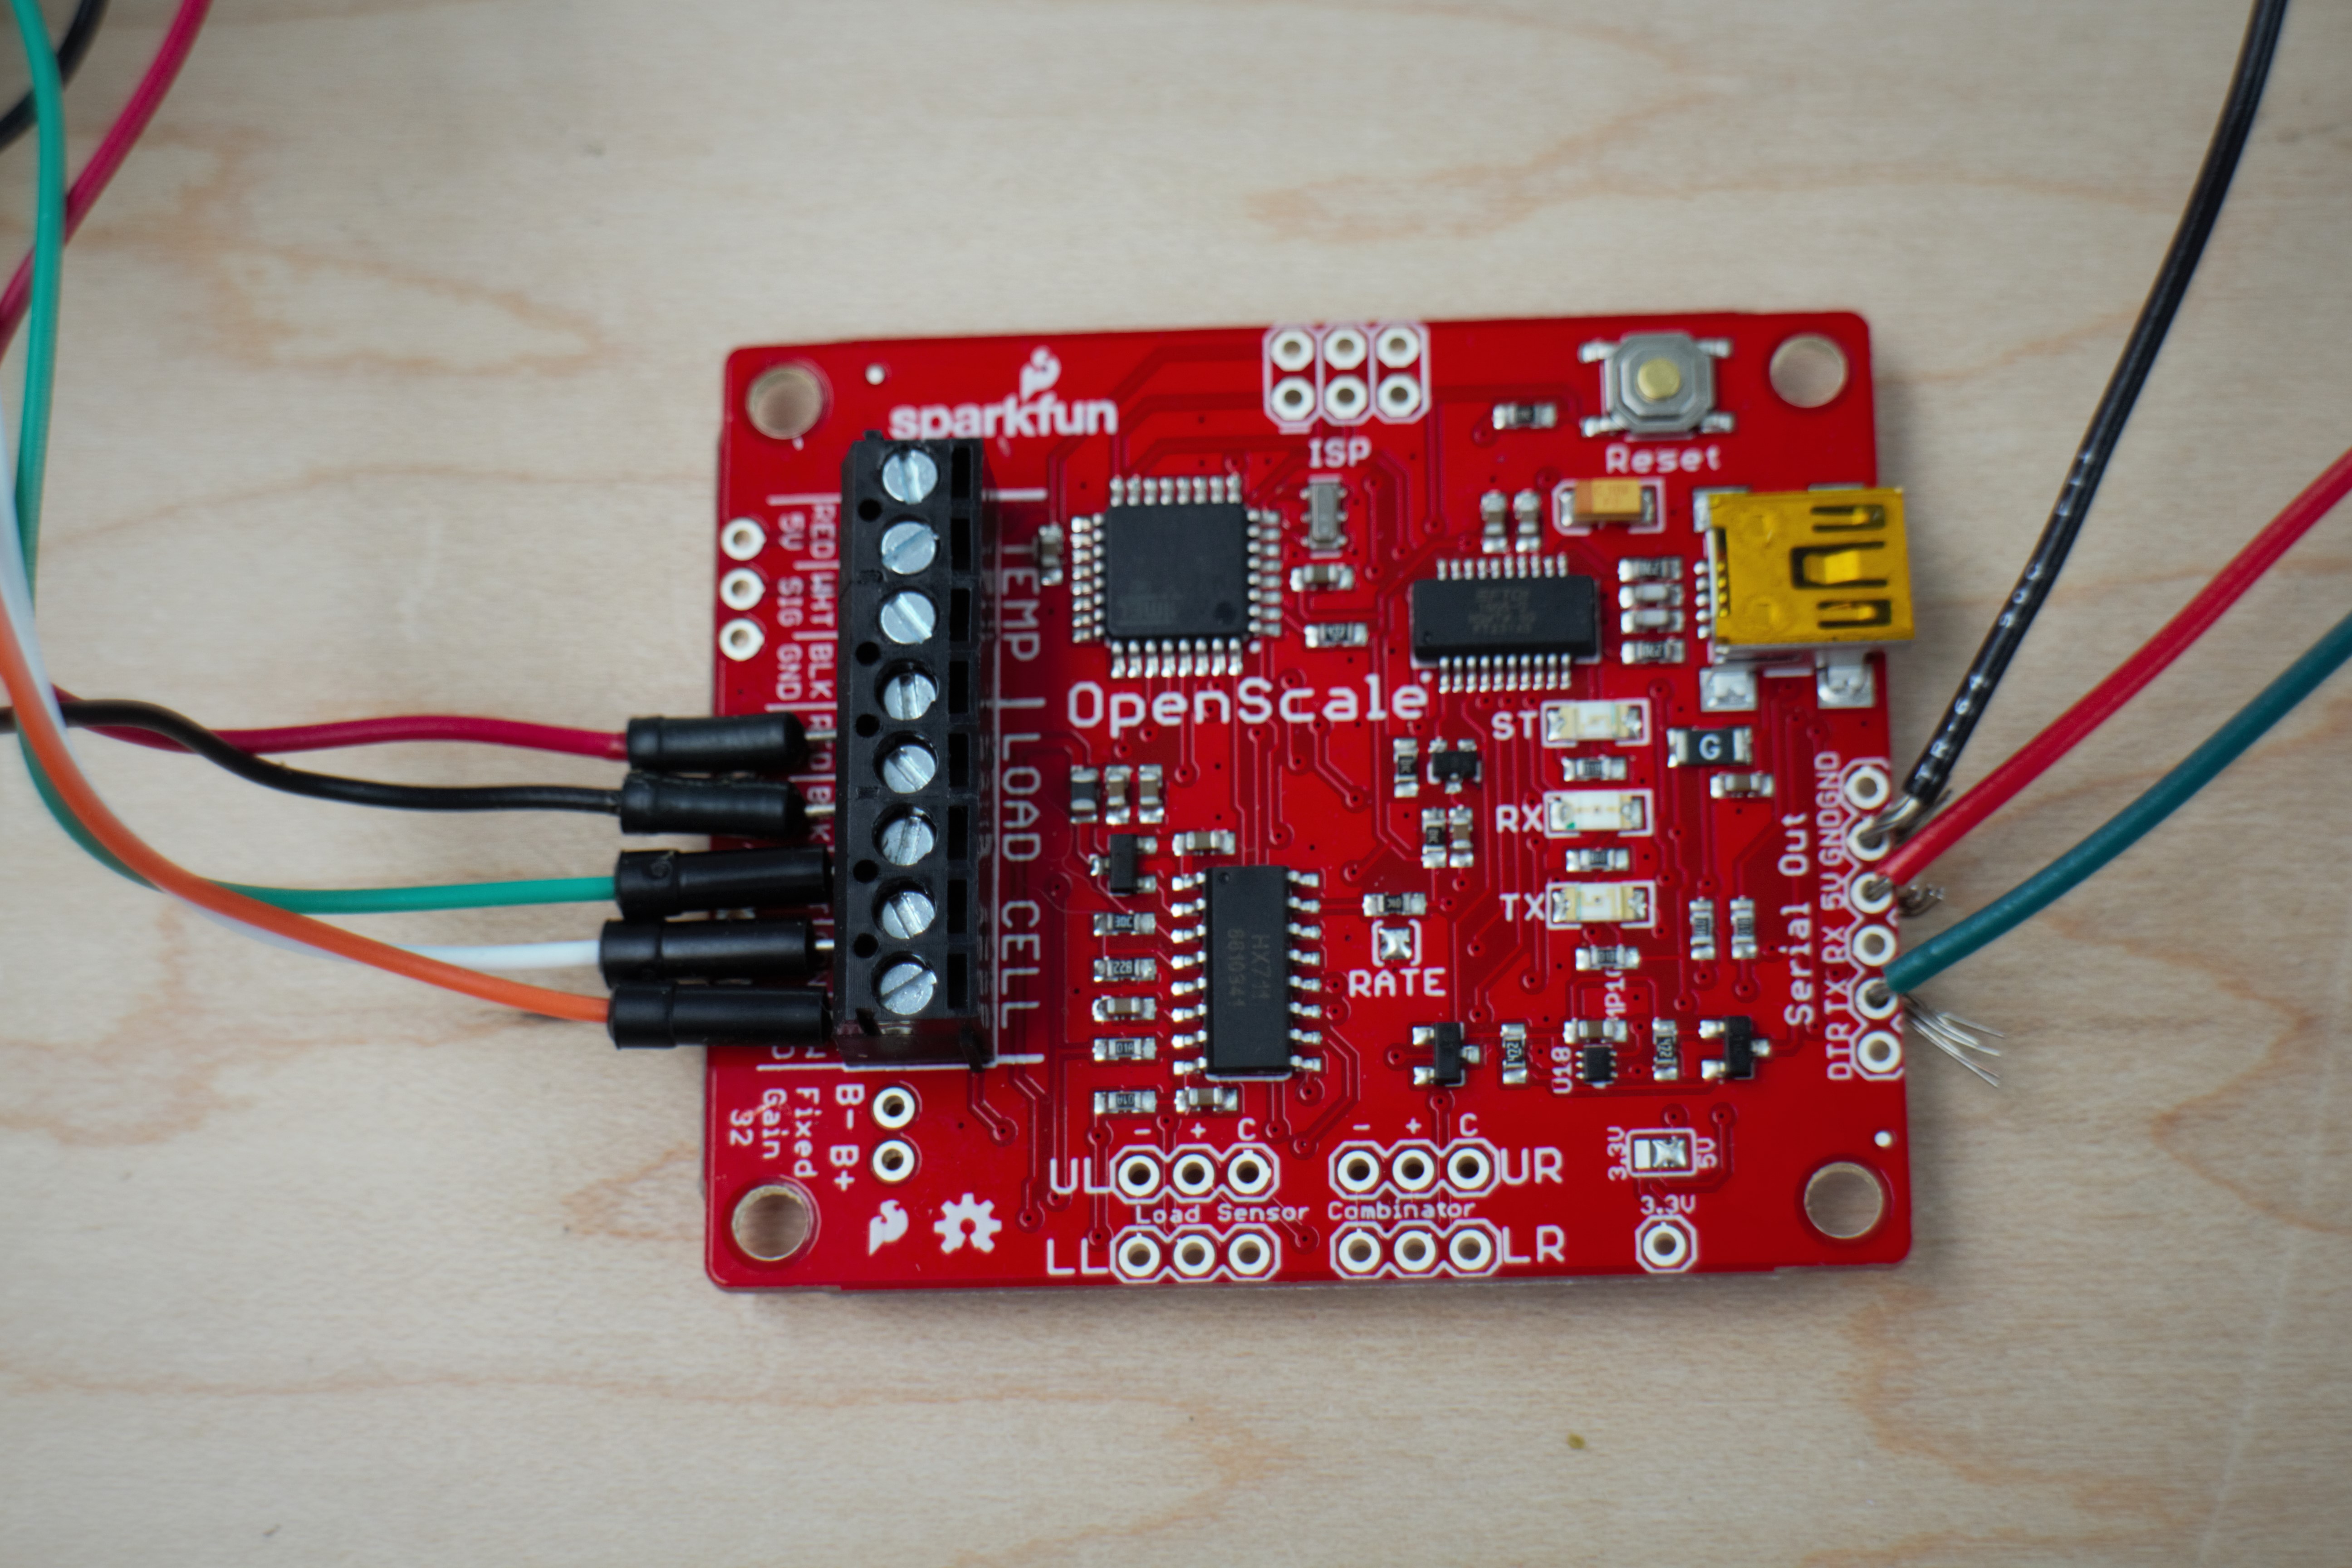
Connect all five load cell wires in parallel to the OpenScale terminal blocks with the corresponding labels. You might need to switch the green and white load cell wires -- check this by adding weight to the load cells. If the weight is decreasing, switch the wire orientation.
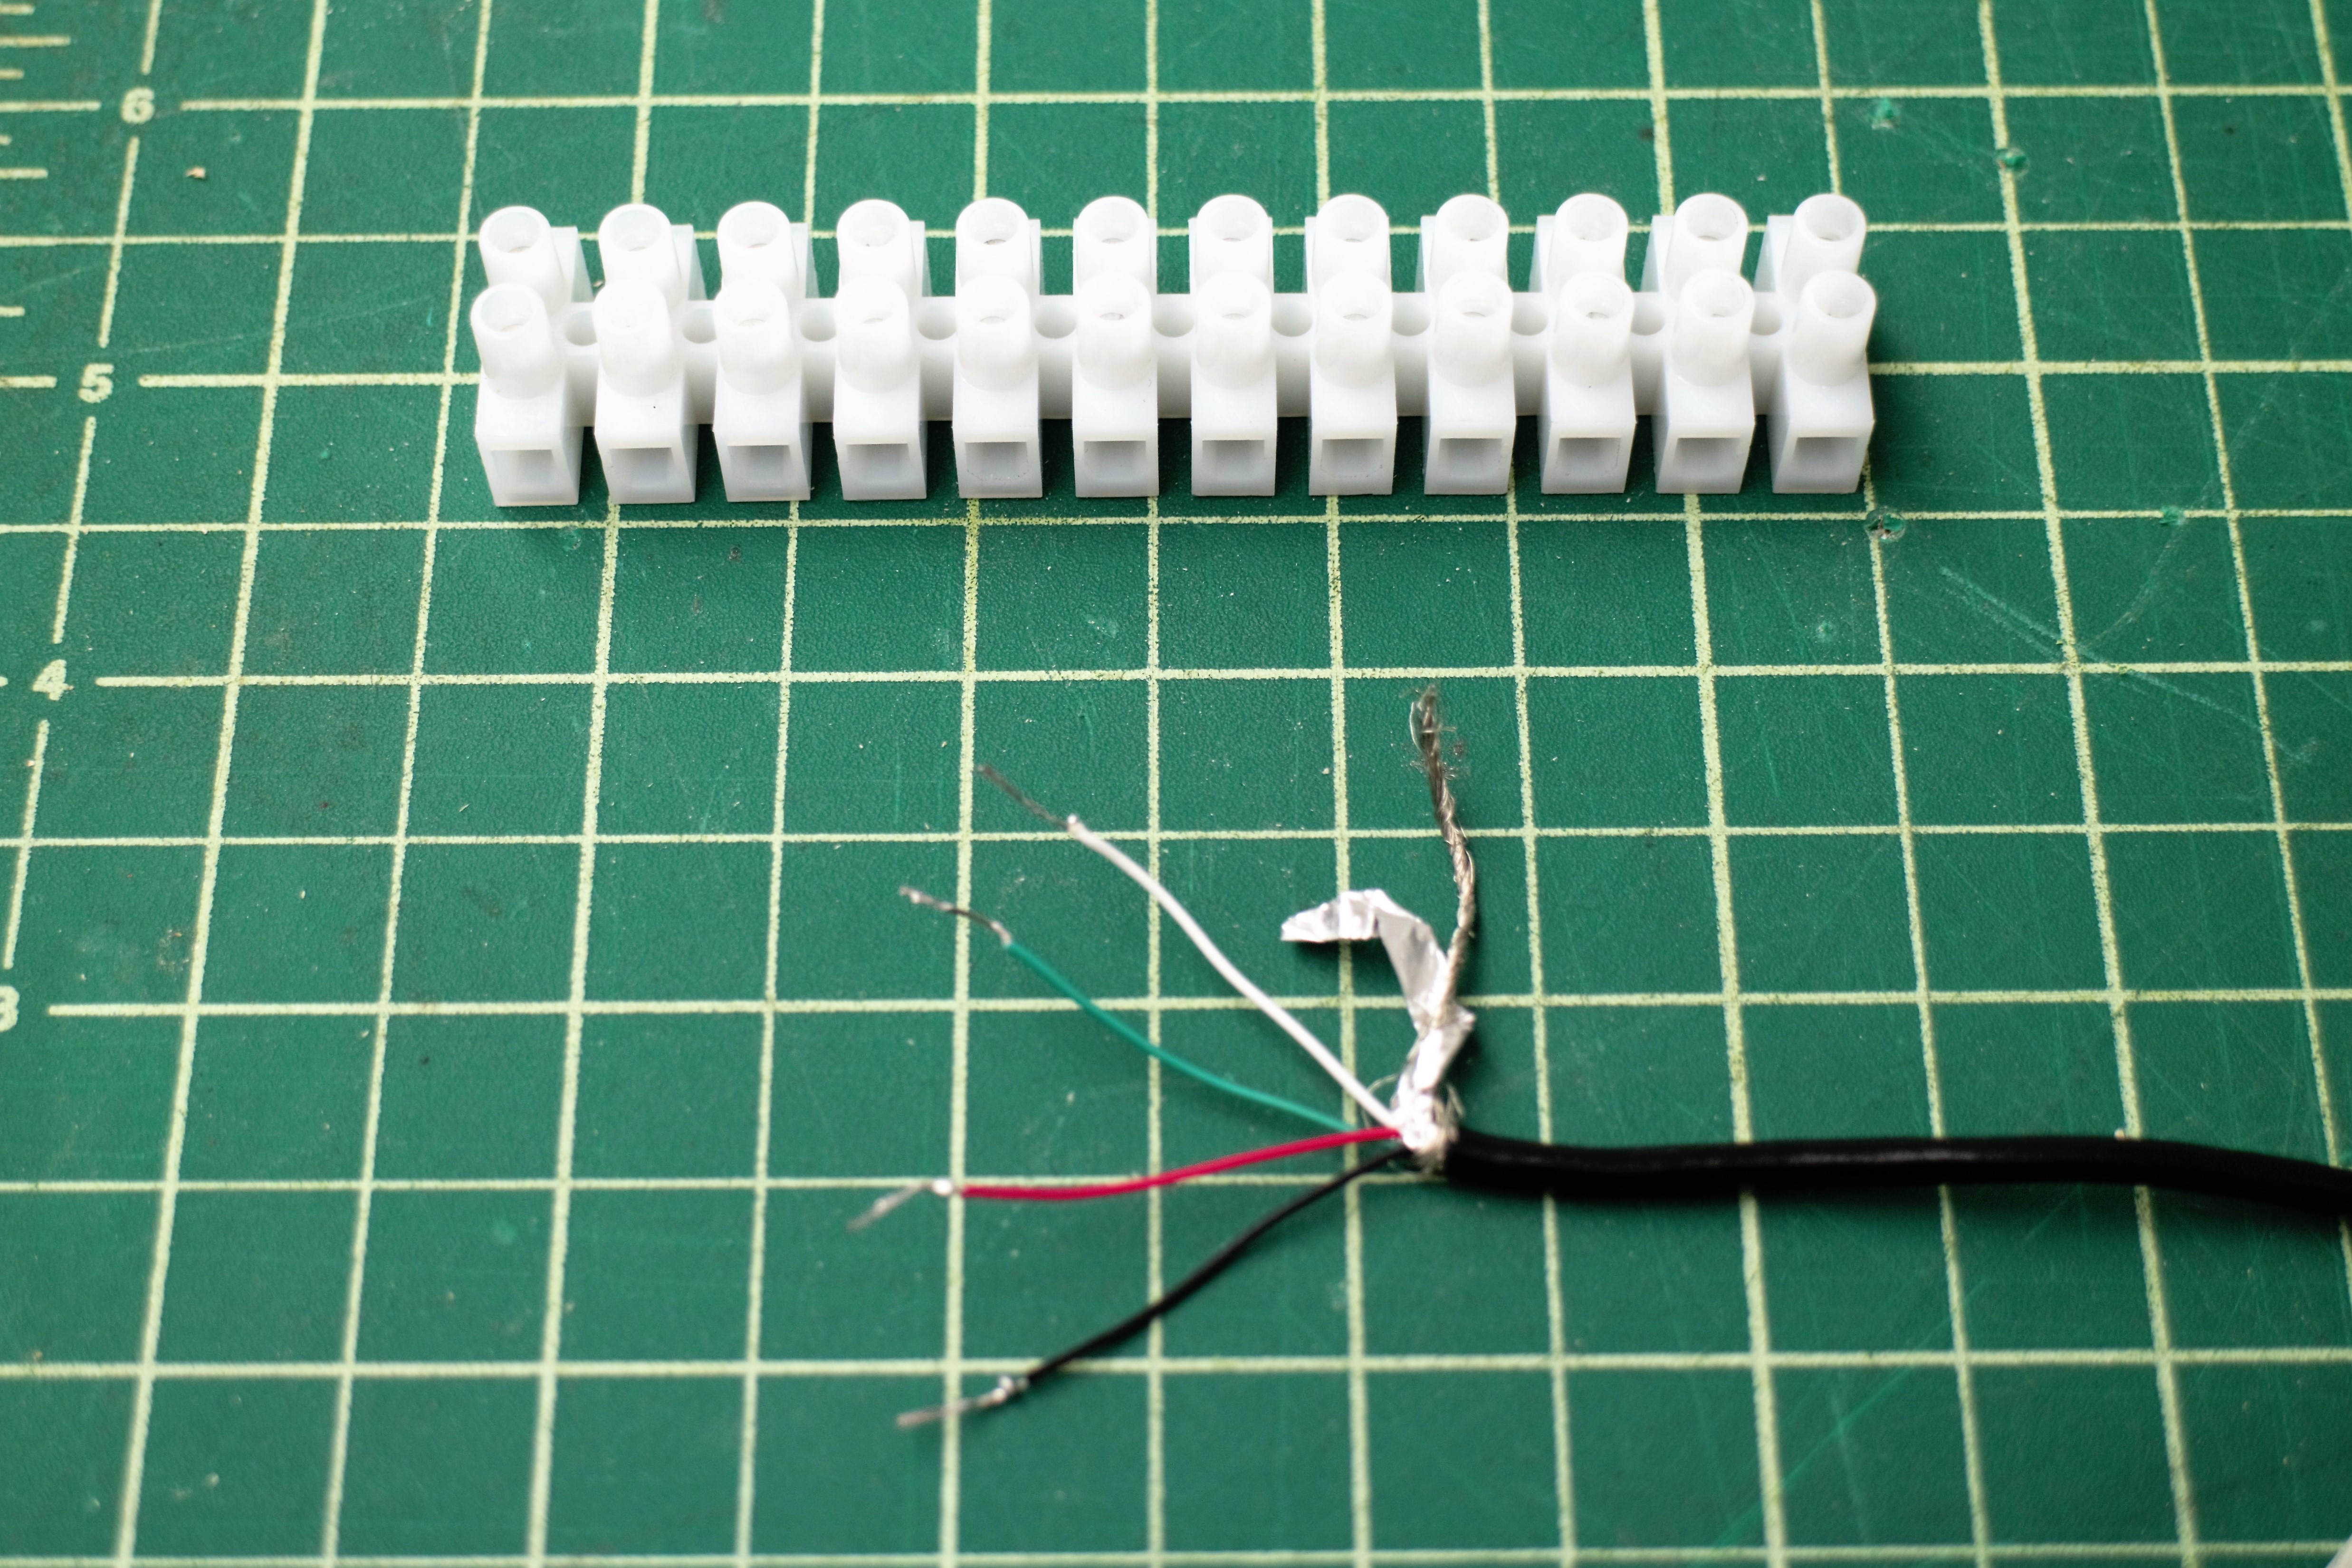
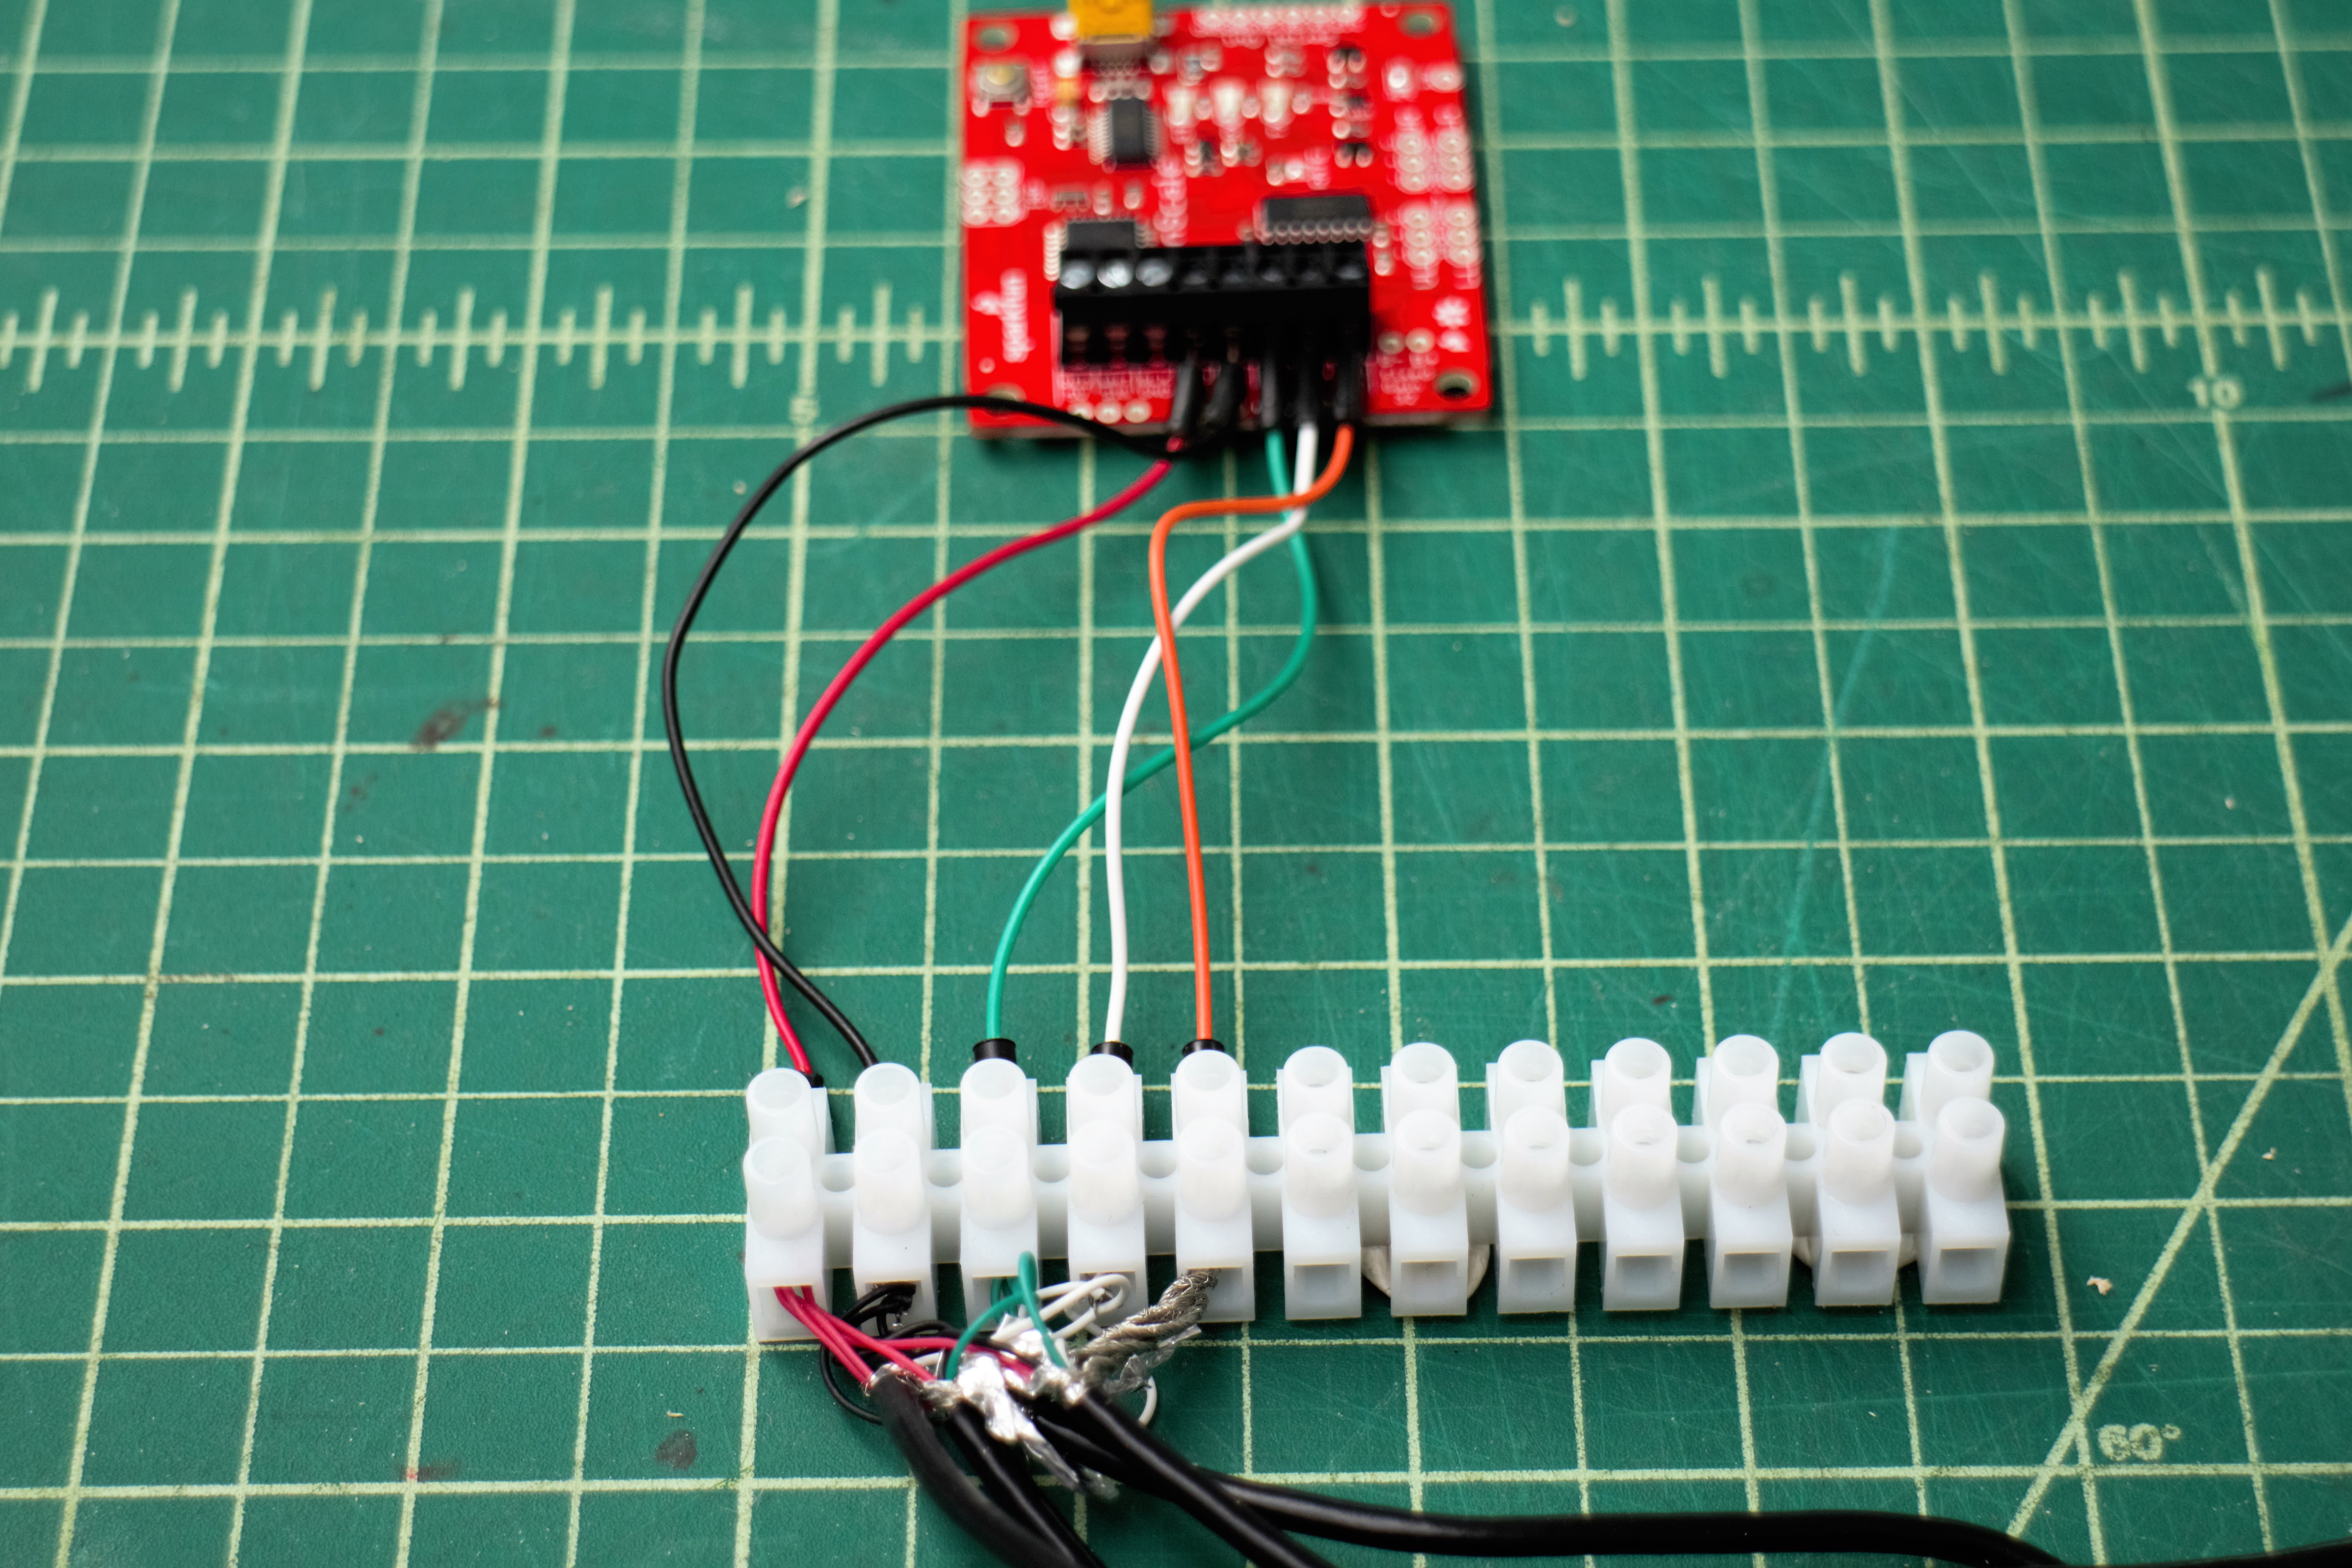
Since the OpenScale terminal blocks are somewhat cramped with four load cells, external connectors are recommended. I used the terminal blocks pictured above. If you have a case for the electronics, remember to put the connectors INSIDE the case before connecting them to the load cells (not speaking from experience or anything..).
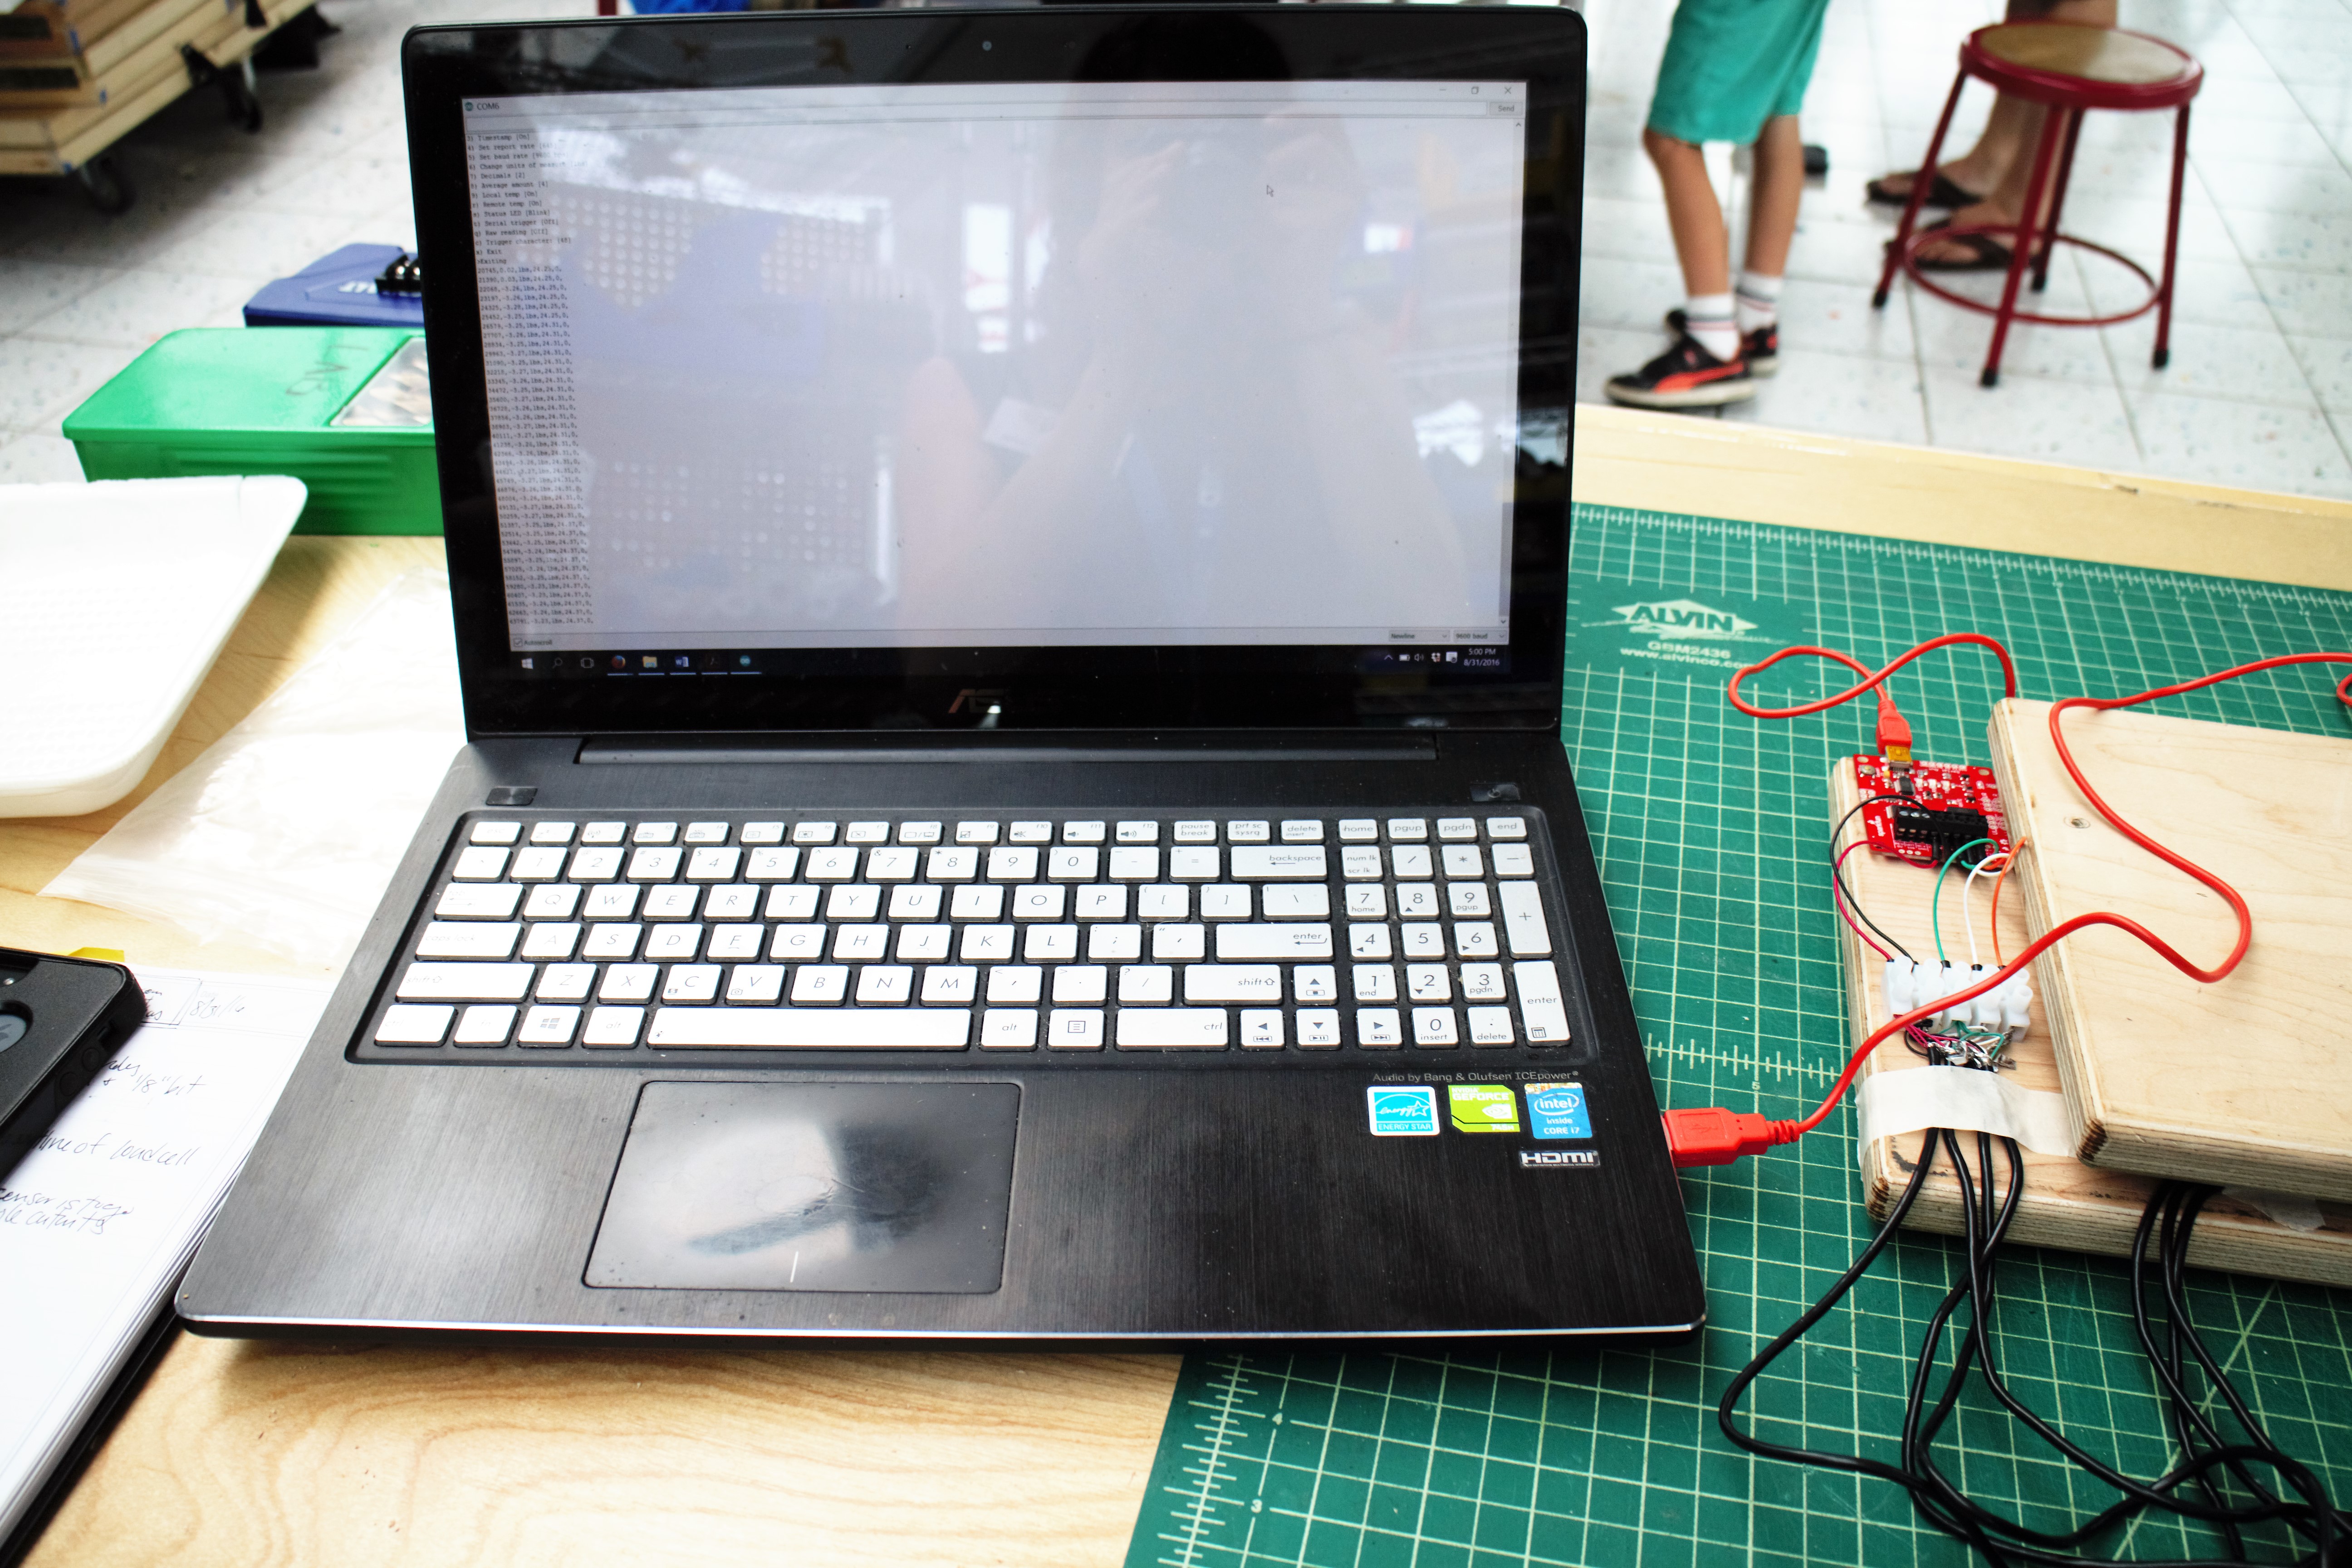
Part 2: Connect the OpenScale to a Data Logger!
In addition to printing, reading, and gathering data from the Arduino serial monitor (see "Reading Load Cells!"), we can add a Photon microcontroller to connect to WiFi and upload the measurements to the Internet!
Connect the OpenScale "Serial Out" ground ("GND") port to the Photon GND, and the OpenScale "TX" port to the Photon "RX" port. If your data logger needs power, connect the OpenScale 5V port to the data logger Vin port. That's it!
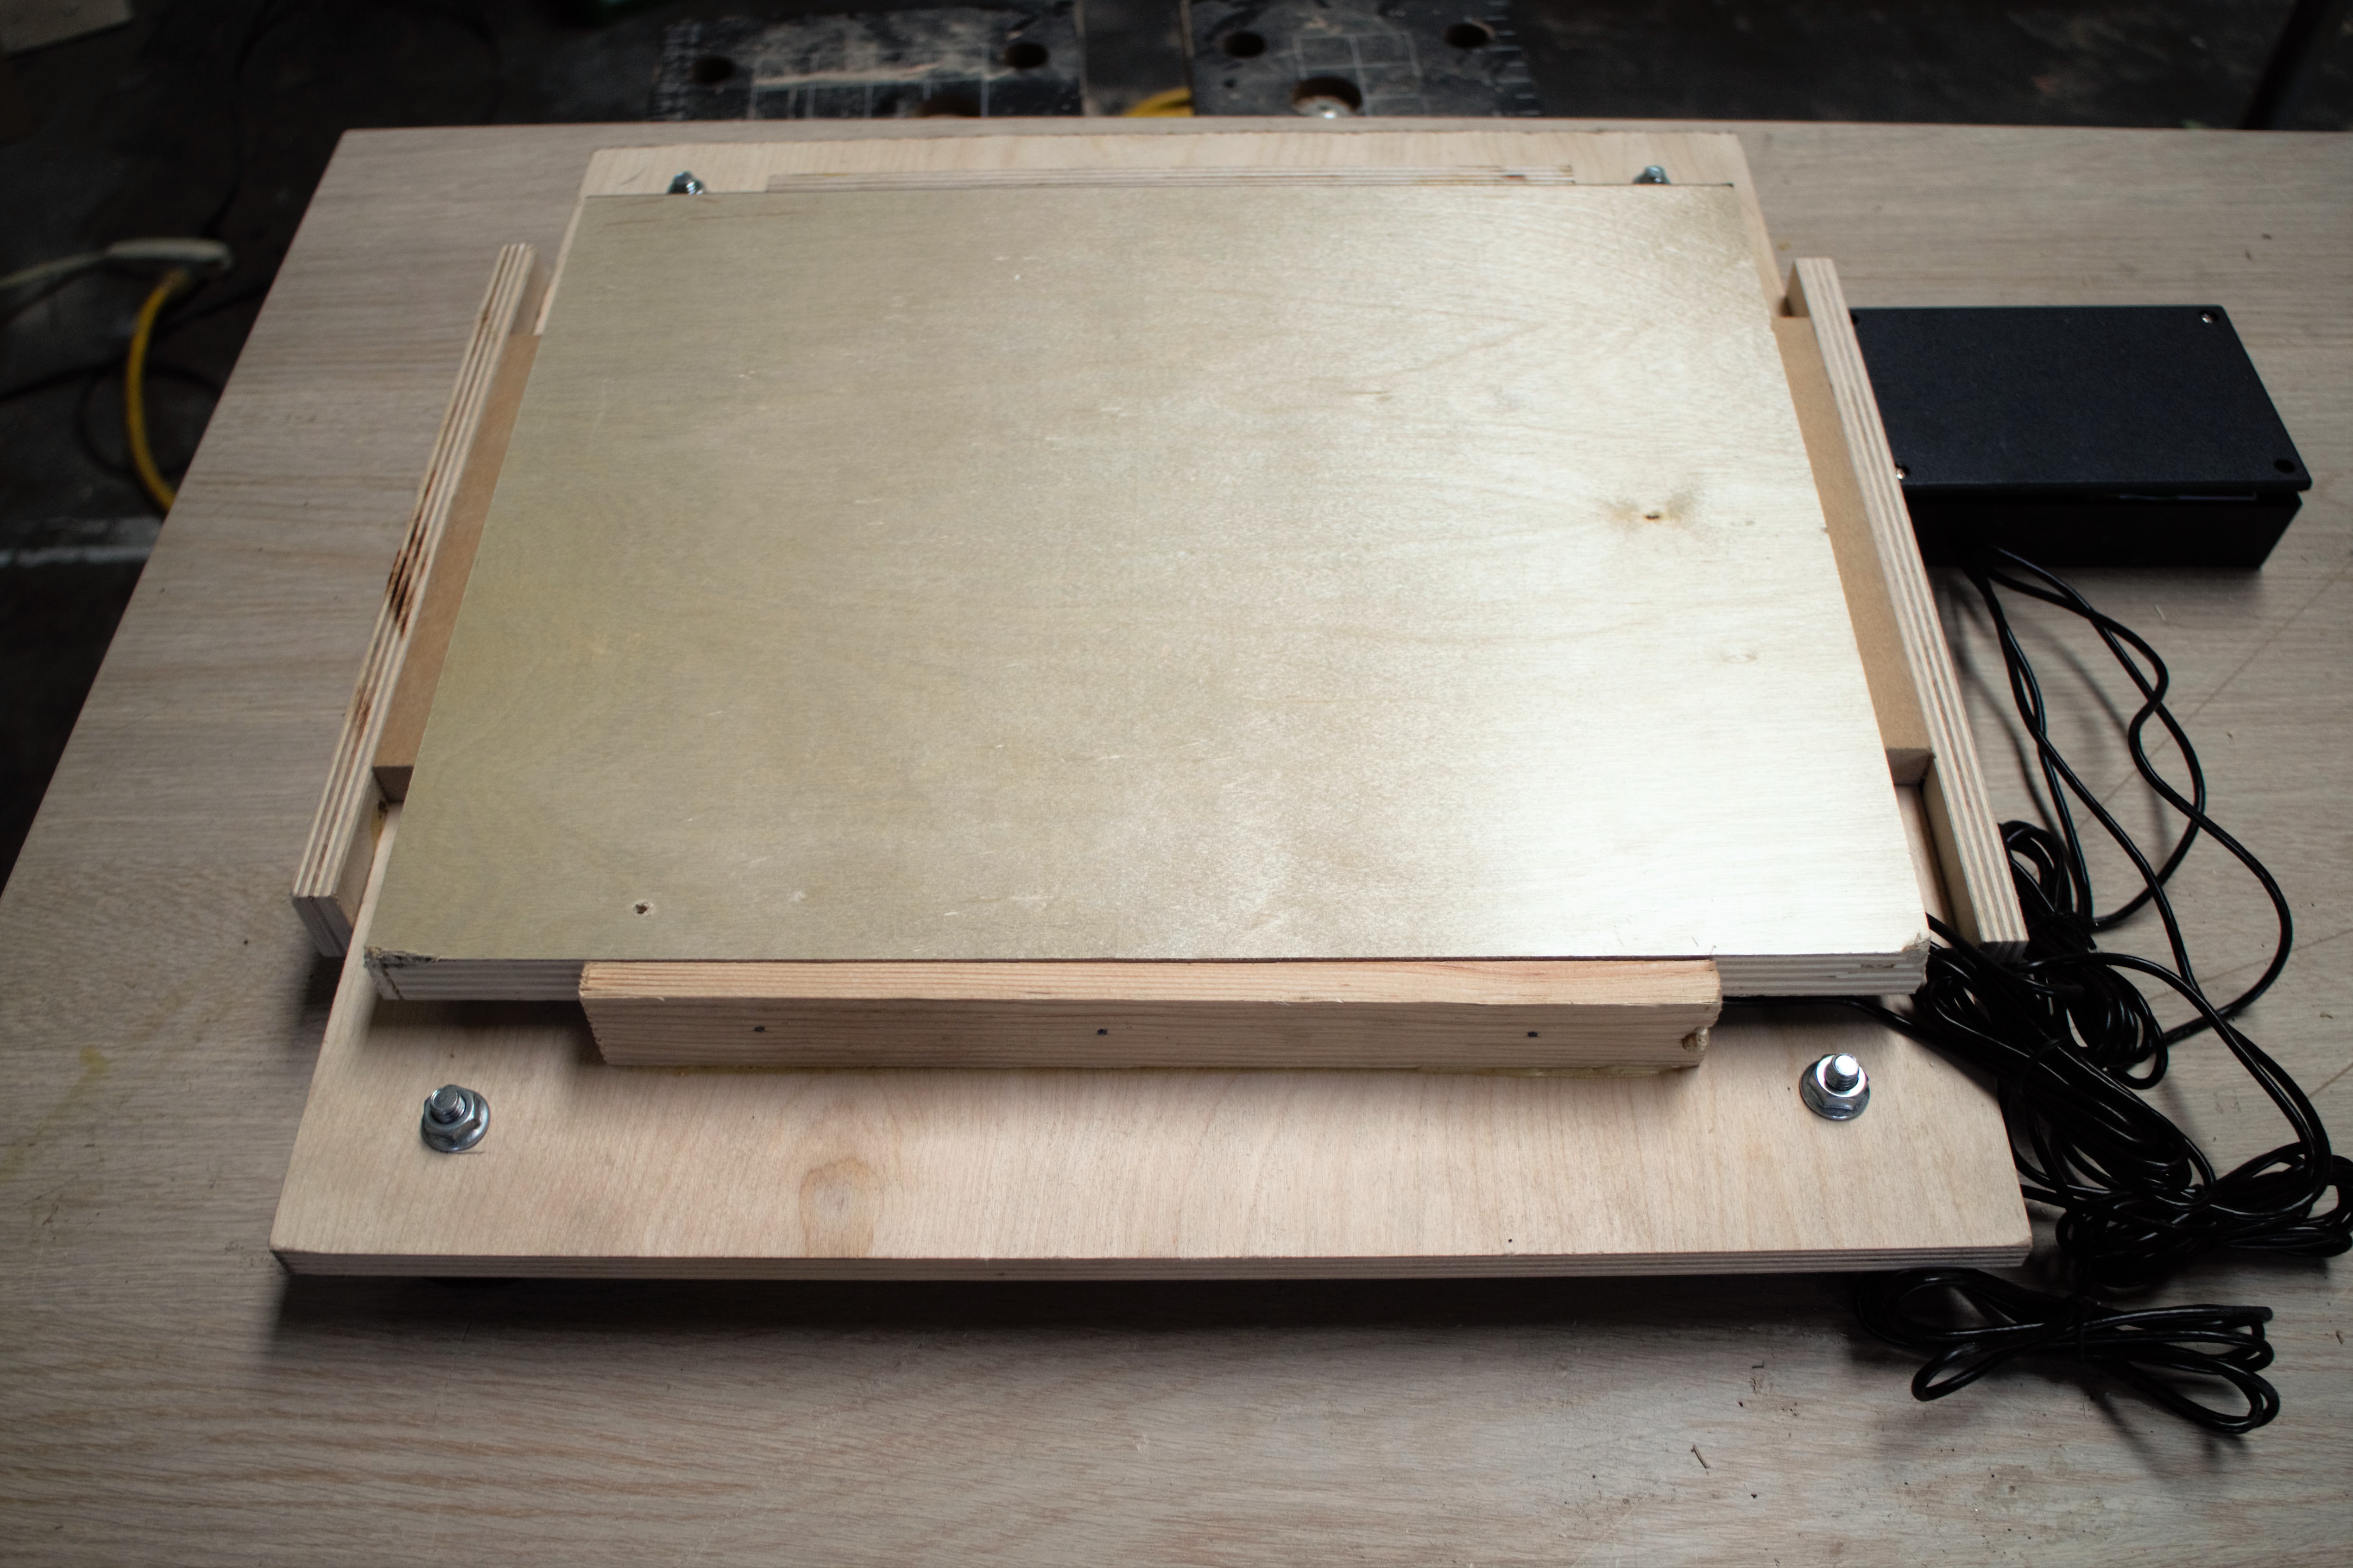
Build the Base and Case
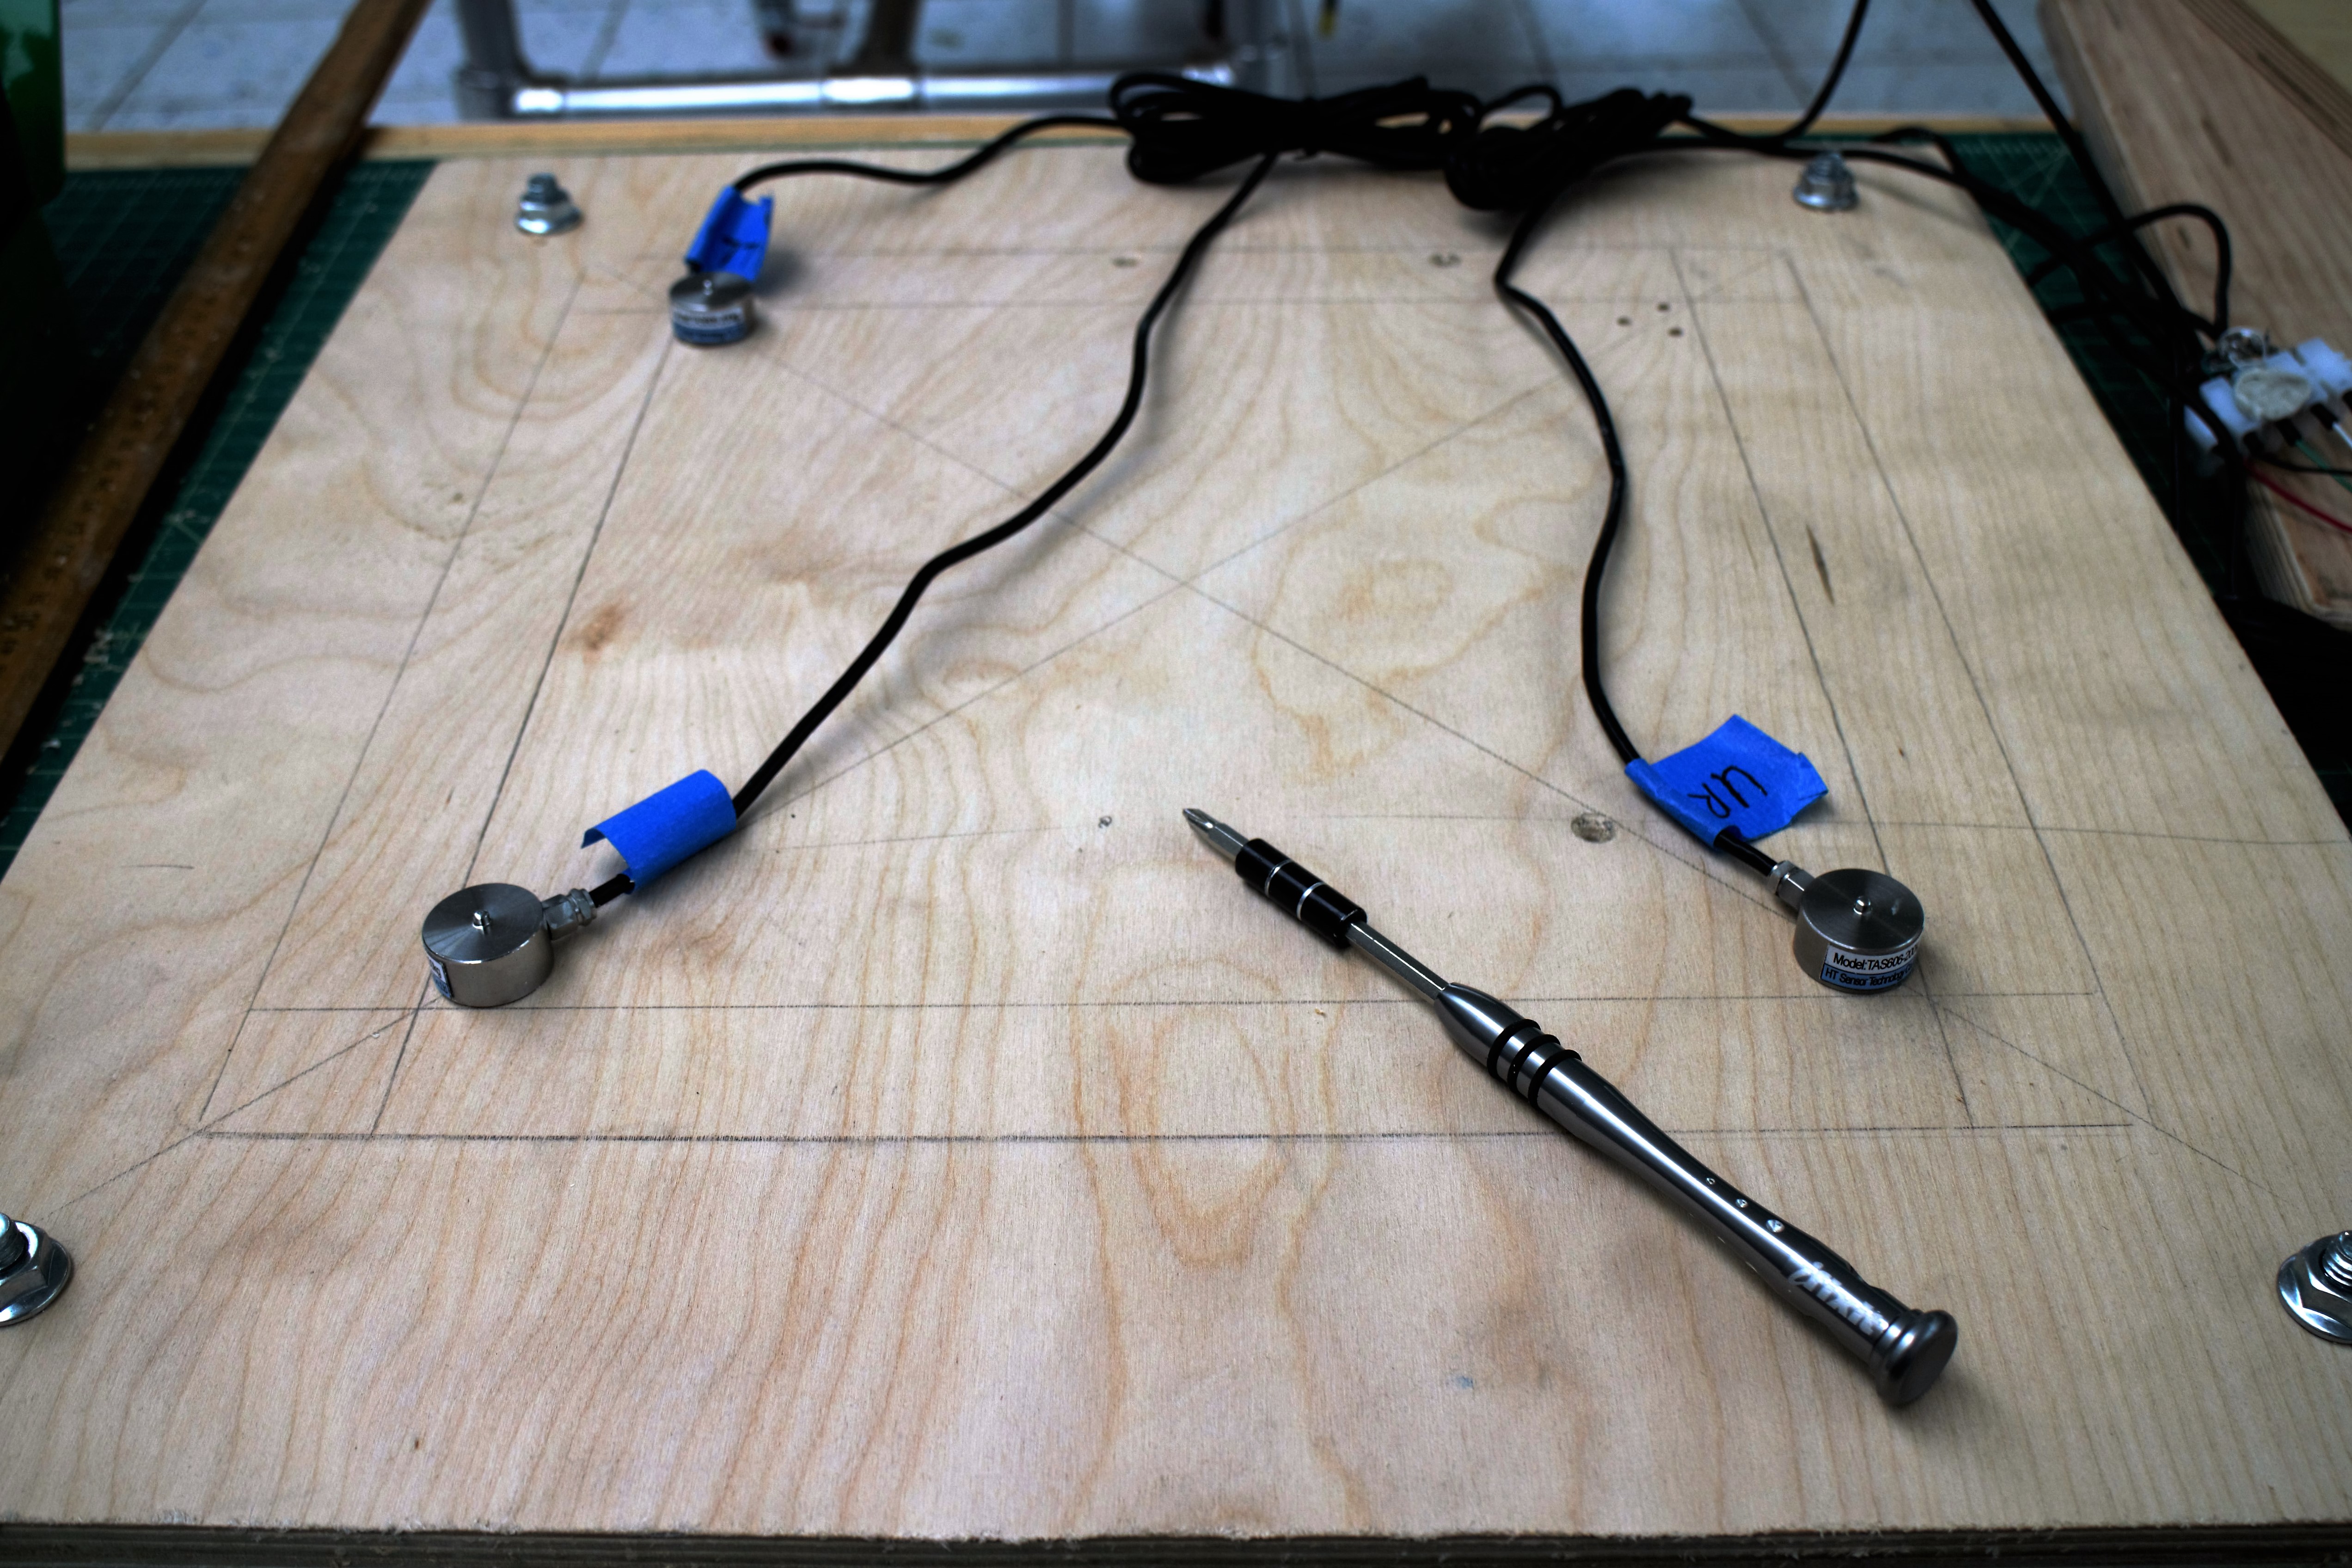
Plan out, measure, and mark location of load cells.
Load cells should be at least 1" in from the top platform board sides and installed equidistant and on the same plane (aka same height) with each other.
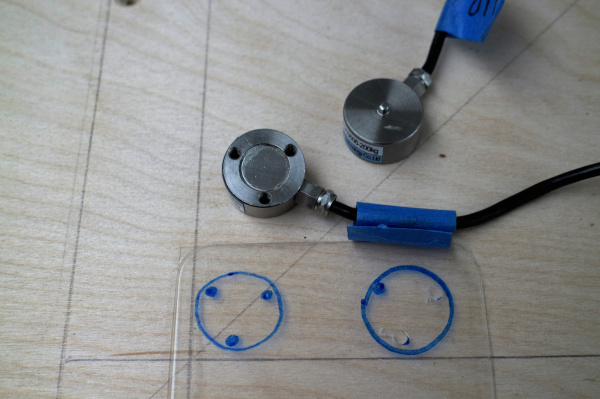
Each load cell needs three M3 type screws, which requires fairly precise measurements. I opted for a quick & easy solution: make a plastic stencil that marks the load cell outline and the location of the screw holes. The plastic I used was cut from a discarded strawberry container (yay, free and upcycled!).
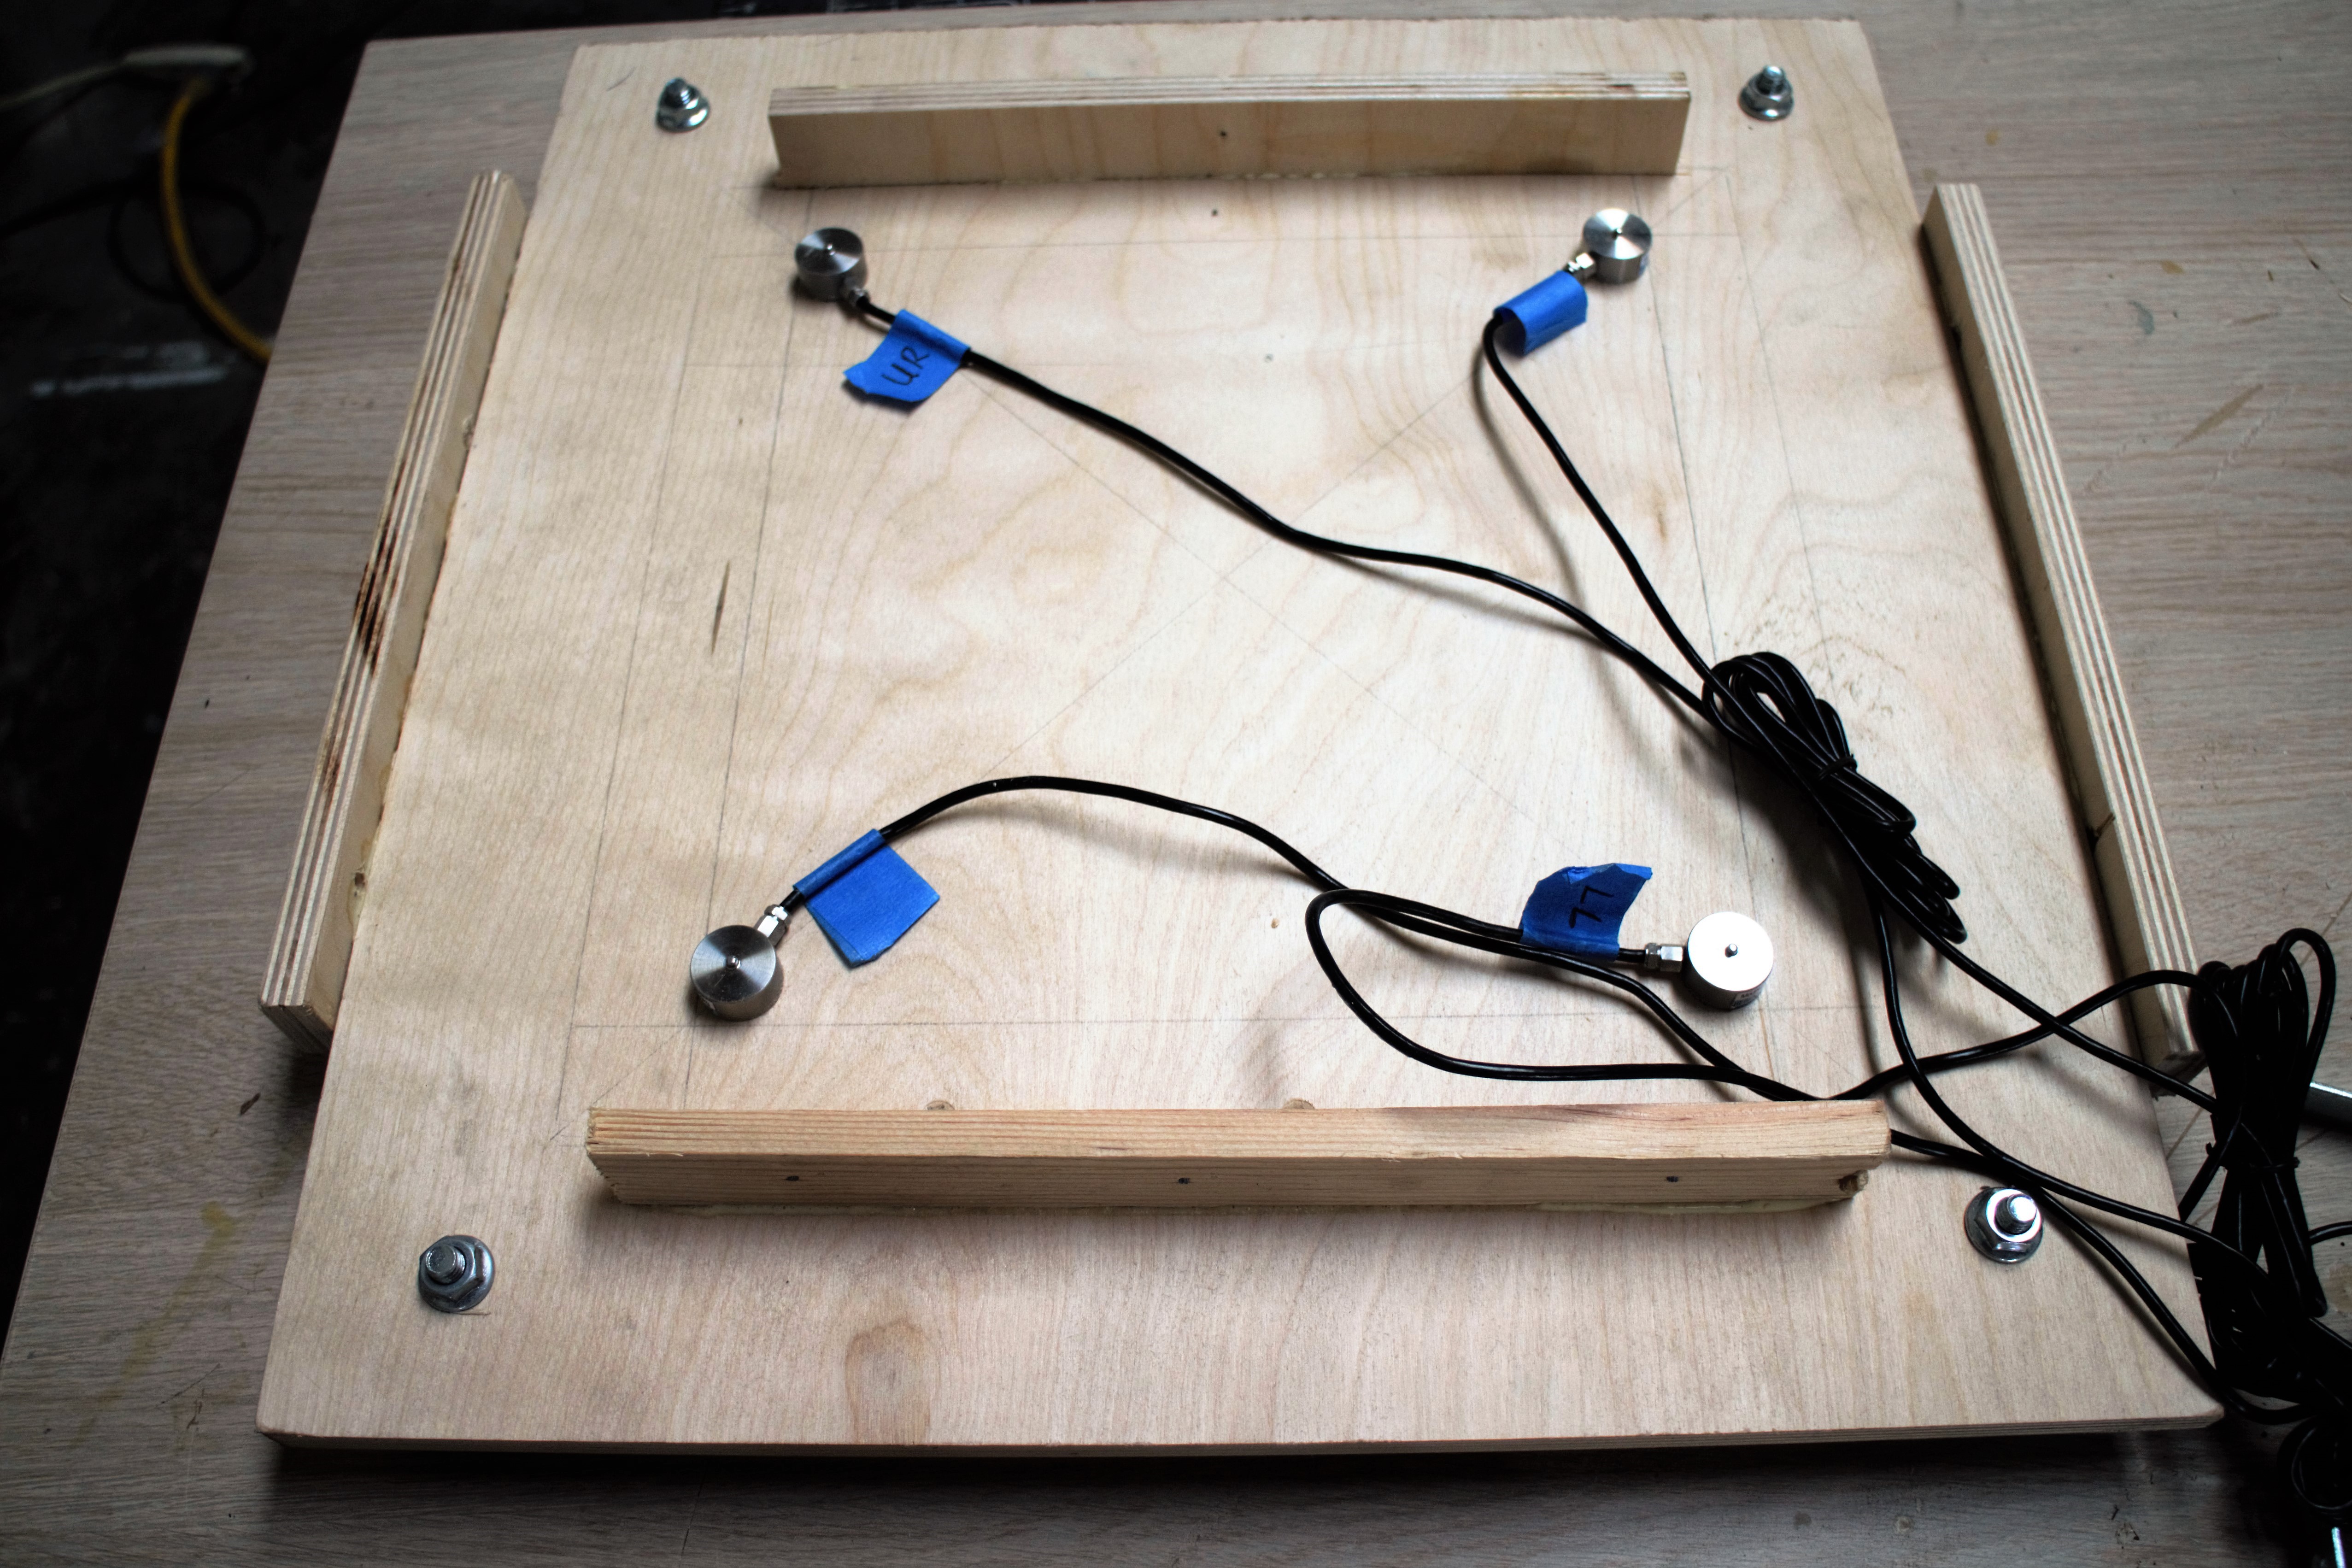
Drill holes for load cell screws and attach load cells to base board.

Attach feet to base.

Secure the scale platform.
Place platform on top of the load cells. Attach wood slats to sides of base with wood glue and/or screws to secure the platform in place laterally, but not vertically. AKA, be sure that there is no resistance to the board pushing downward.
Add brackets on opposite sides for a more secure hold.
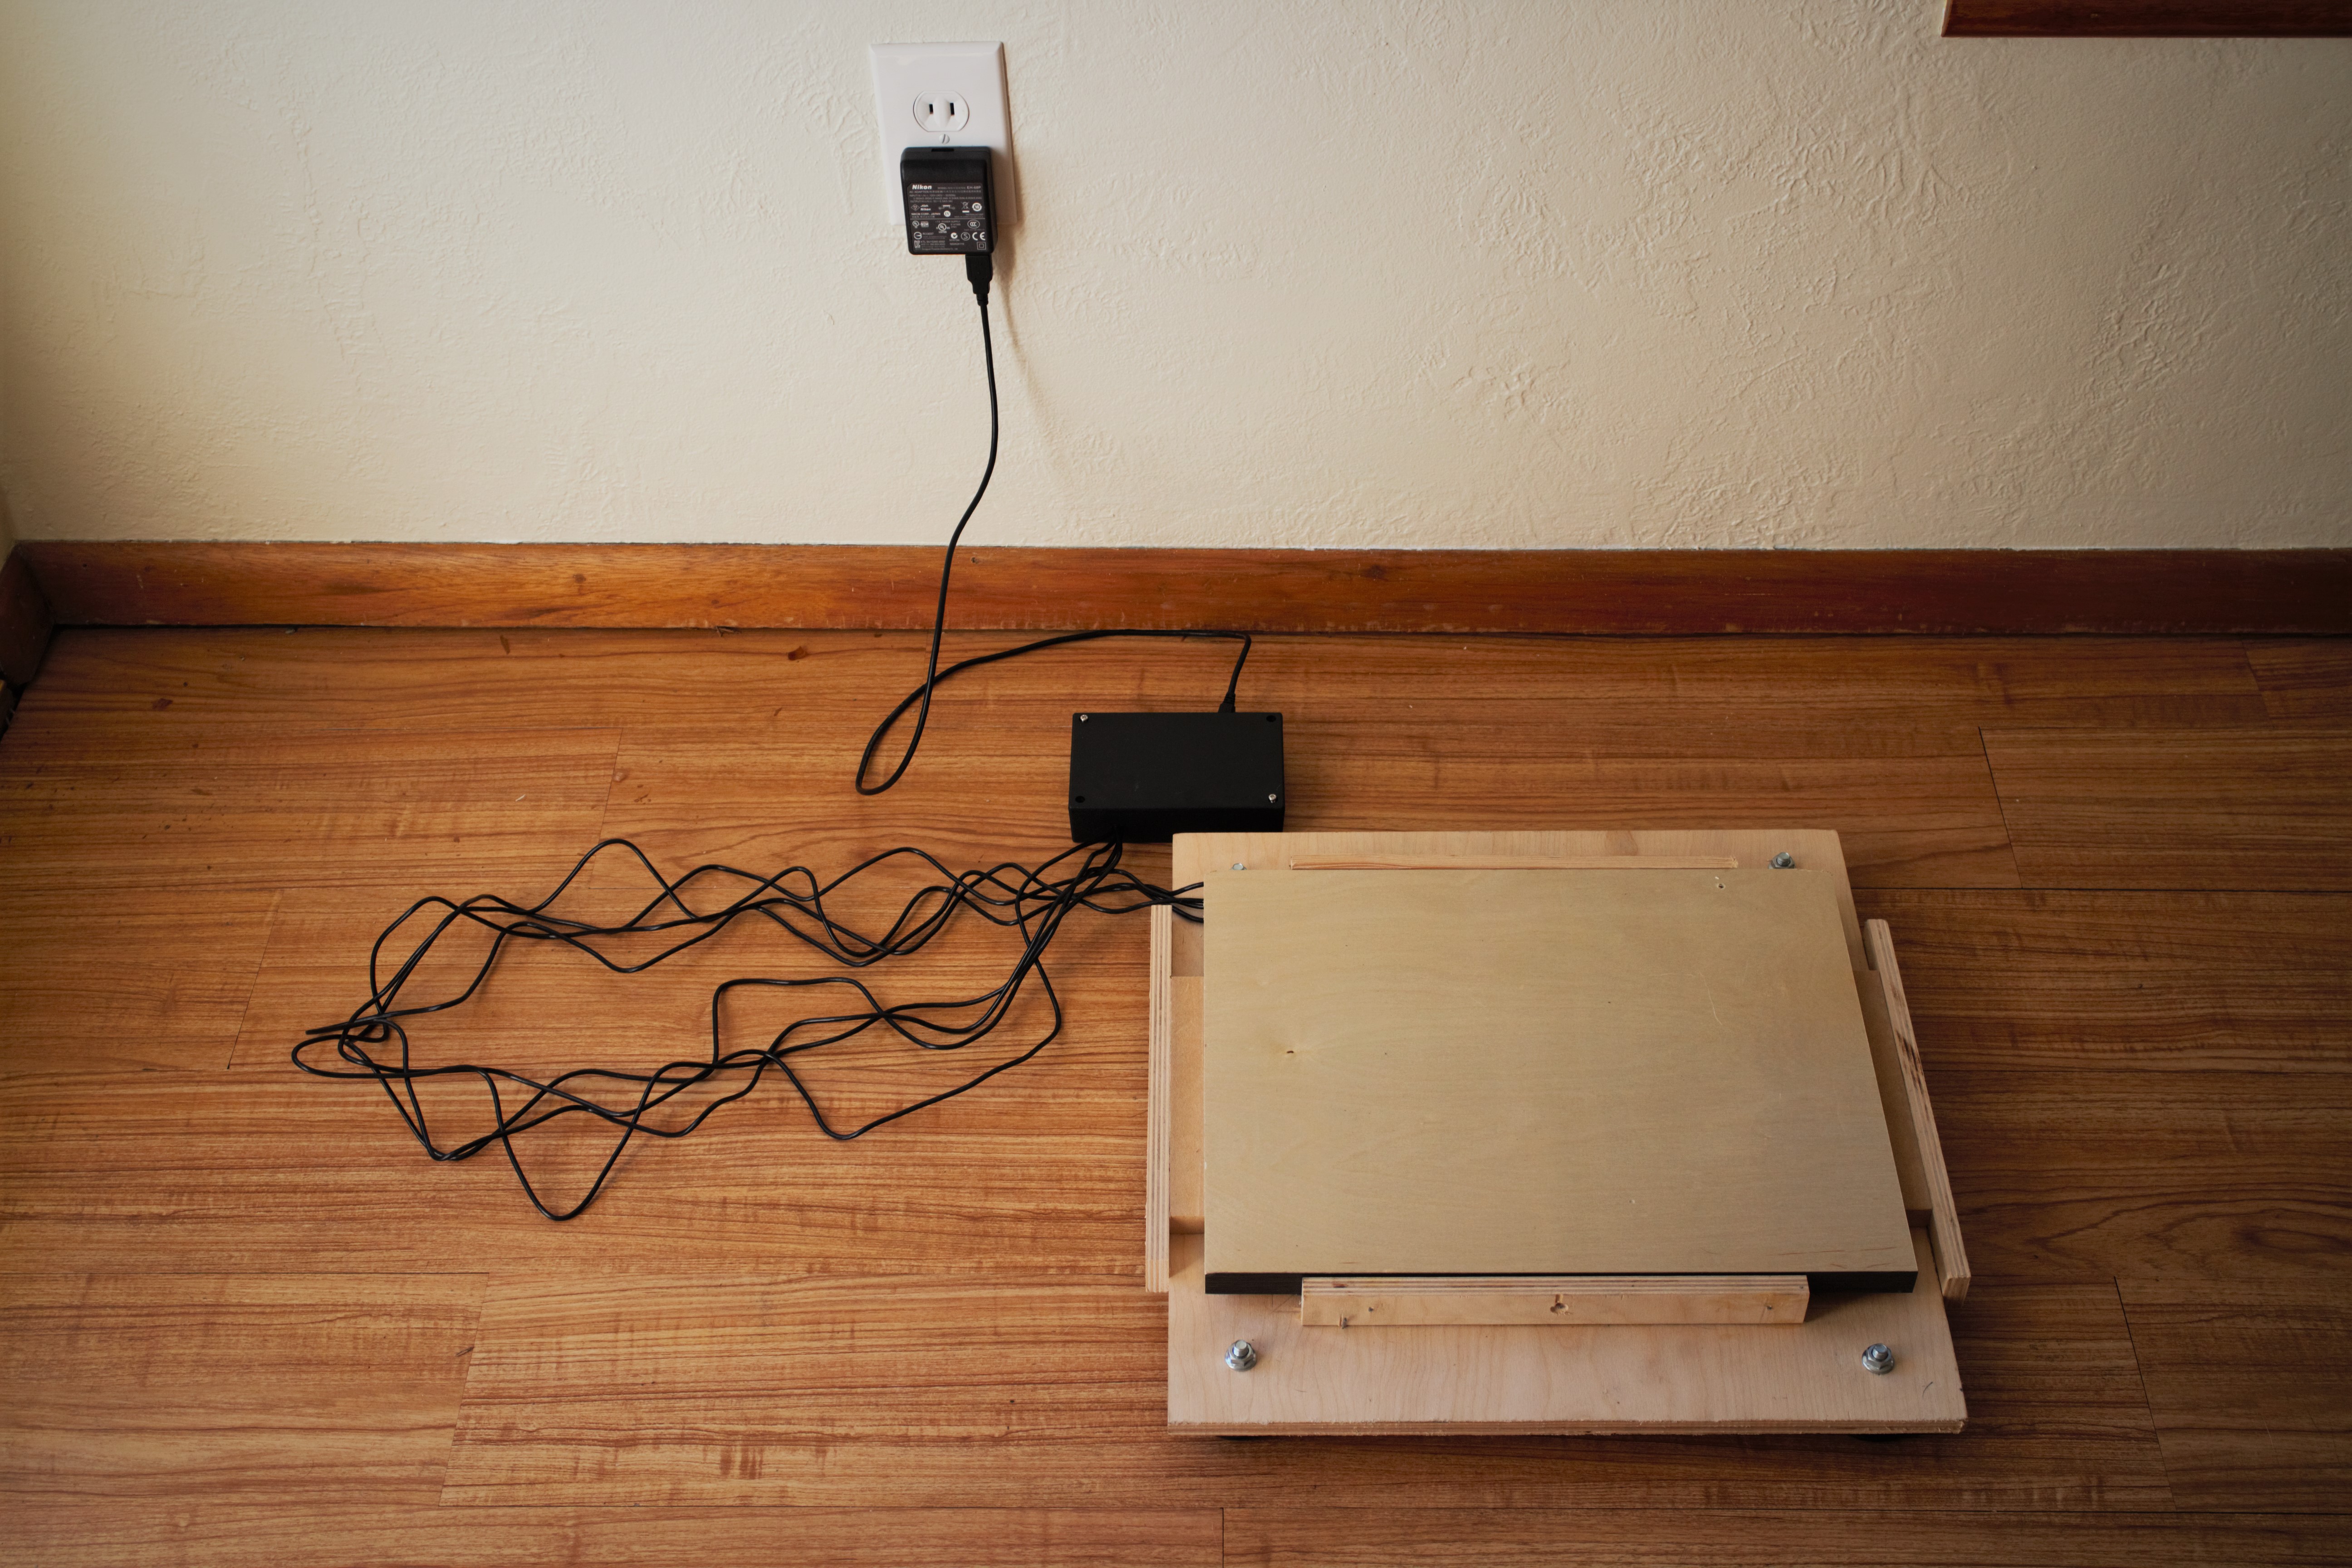
Place electronics into project box container (or tupperware) and drill holes for cables.

Admire your handiwork!

Reading the Load Cells
Connect the OpenScale
One of the awesome features of the OpenScale program is that it outputs data to the Arduino IDE serial monitor (9600bps). That means all you need to do is plug in your OpenScale via USB, select the appropriate board (Arduino Uno) and port, and you can read the load cell data directly from the Arduino Serial Monitor or another preferred terminal program. More info on how to do this here.
Enter 'x' to bring up the OpenScale settings menu. Entering 'x' again leaves the menu and the OpenScale will start printing data!
Note: If you are connected to another microcontroller, the OpenScale does not send data when in the menu mode.
Calibrate
Before we gather any data, we need to calibrate the OpenScale to get accurate measurements. It's also recommended to re-calibrate the system every few weeks (or days) to avoid creep (slow change in reading over time).
To calibrate the scale:
- Remove all weights (except the platform).
- Open the OpenScale menu and select '2' to open the calibration setting.
- Place a (known) weight on the scale and adjust the calibration factor using '+' and '-' until the scale reads out the calibration weight within a reasonable margin in error.*
Also, the load cell output varies with temperature ('cause heat causes expansion), so we need to keep the system at a constant temperature. If you wanna get fancy, you can also use different calibration factors at different temperatures (or temperature ranges)..
**My experimental uncertainty was about +/- 5 lbs.*
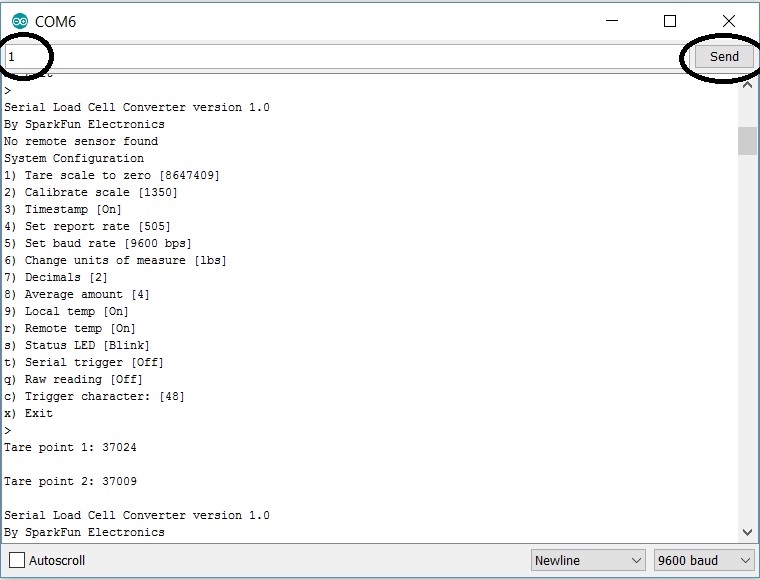
Tare
Each time you power up the OpenScale, you'll need to tare it. This is an easy process, but it means you need to connect the OpenScale directly to a laptop and open the settings menu.
To tare the scale, remove all weights. Input '1' in the OpenScale menu, wait for it to finish taring, then exit the menu and check that the output is close to zero (+/- 5 lbs). If the reading is still off, taring again should fix the problem -- if not, check that the load cell grounding wires are properly connected to ground.
Remove Trigger
We also need to remove the serial trigger from the OpenScale. Do this by going to the menu, inputting 't', and turning the serial trigger to OFF.
Customizing the OpenScale
You can change various other settings on the OpenScale using the serial monitor, including units (lbs/kg), print rate, decimal places, etc. You can adjust, or peruse, the entire OpenScale program by downloading it from GitHub!
Program the Photon
Write a program for the Photon that will read in the serial output data from the OpenScale and push it to the IoT platform of your choice.
Or you can use/modify my code :) Here's the GitHub repository for the IoT scale, or just copy and paste the code from here:
This program reads data from the OpenScale and pushes it to ThingSpeak (also prints it to the Photon serial monitor). ThingSpeak is super easy (and free!) to set up, the only downside is that it only allows data to be posted every 15s.
What you need to do to make the program work for your setup:
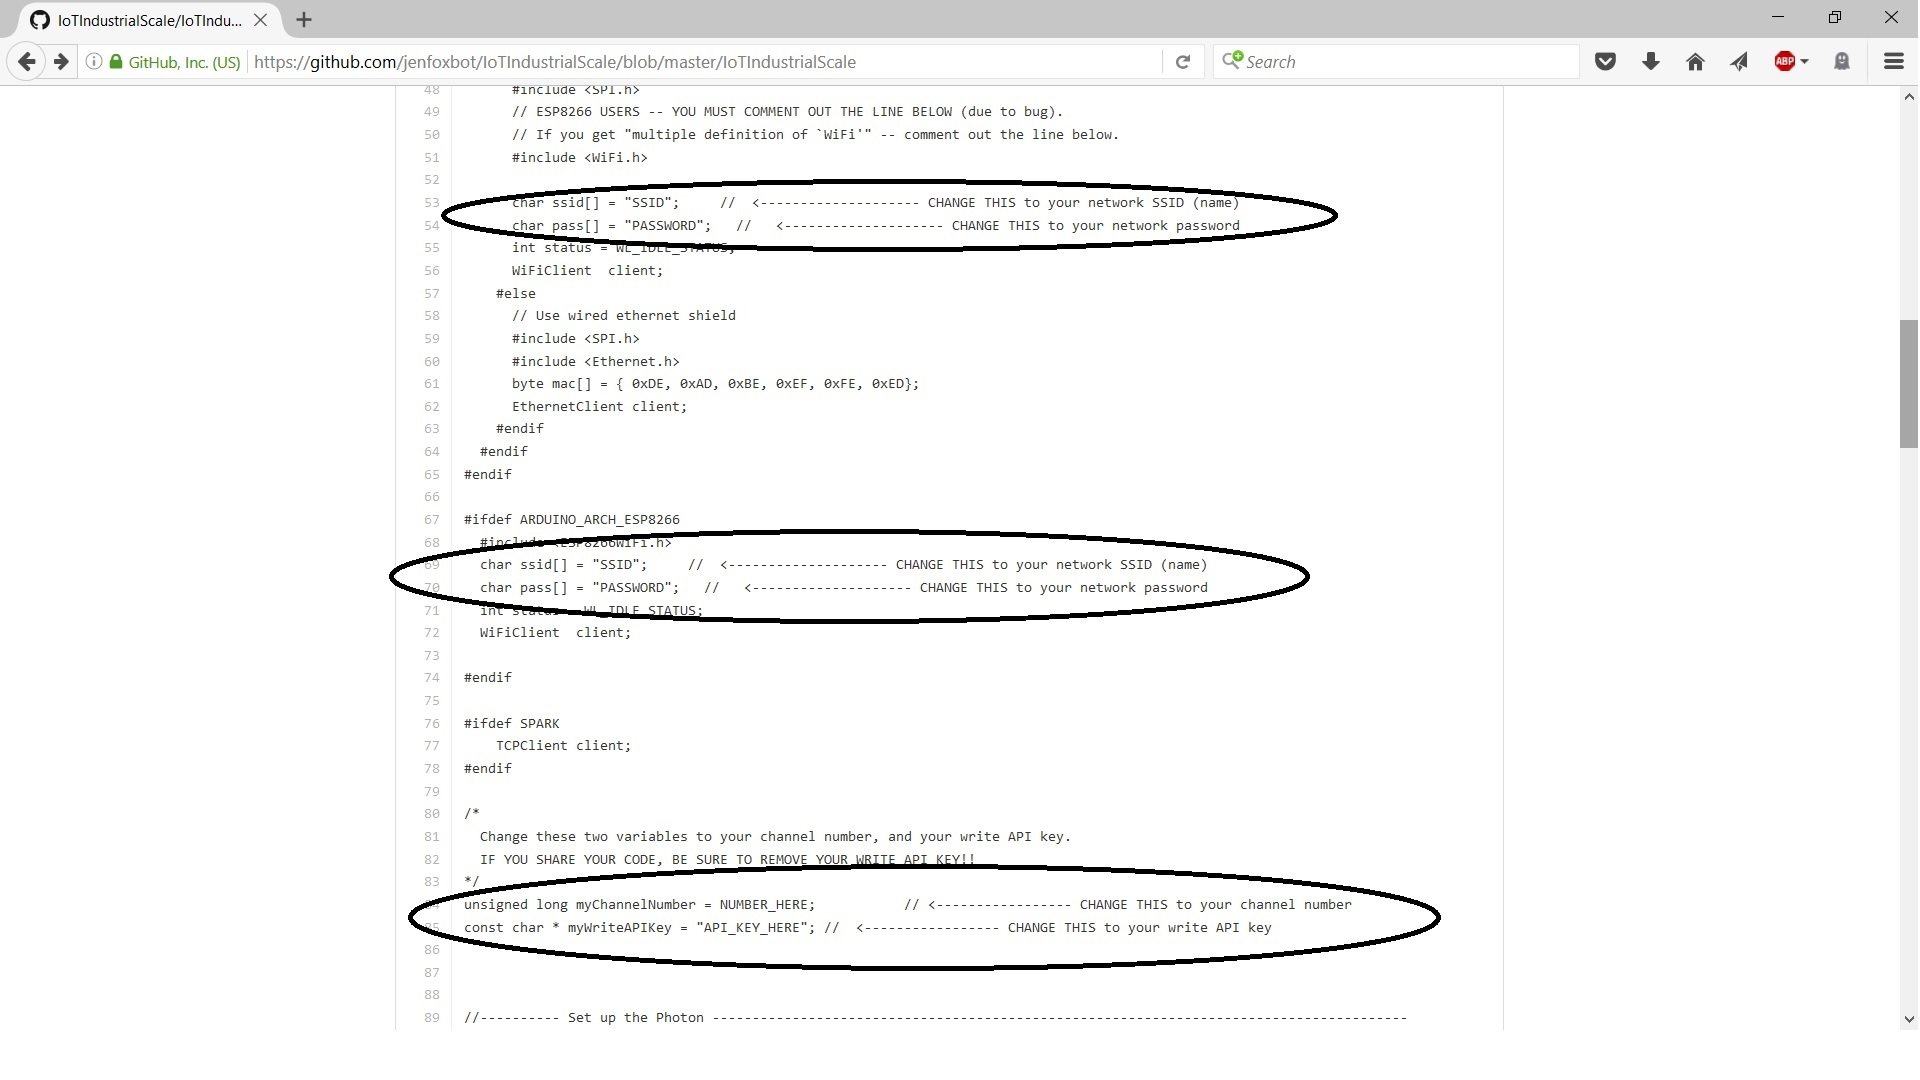
Include your WiFi SSID (network name) and your WiFi password in lines 53 & 54, and lines 69 & 70.
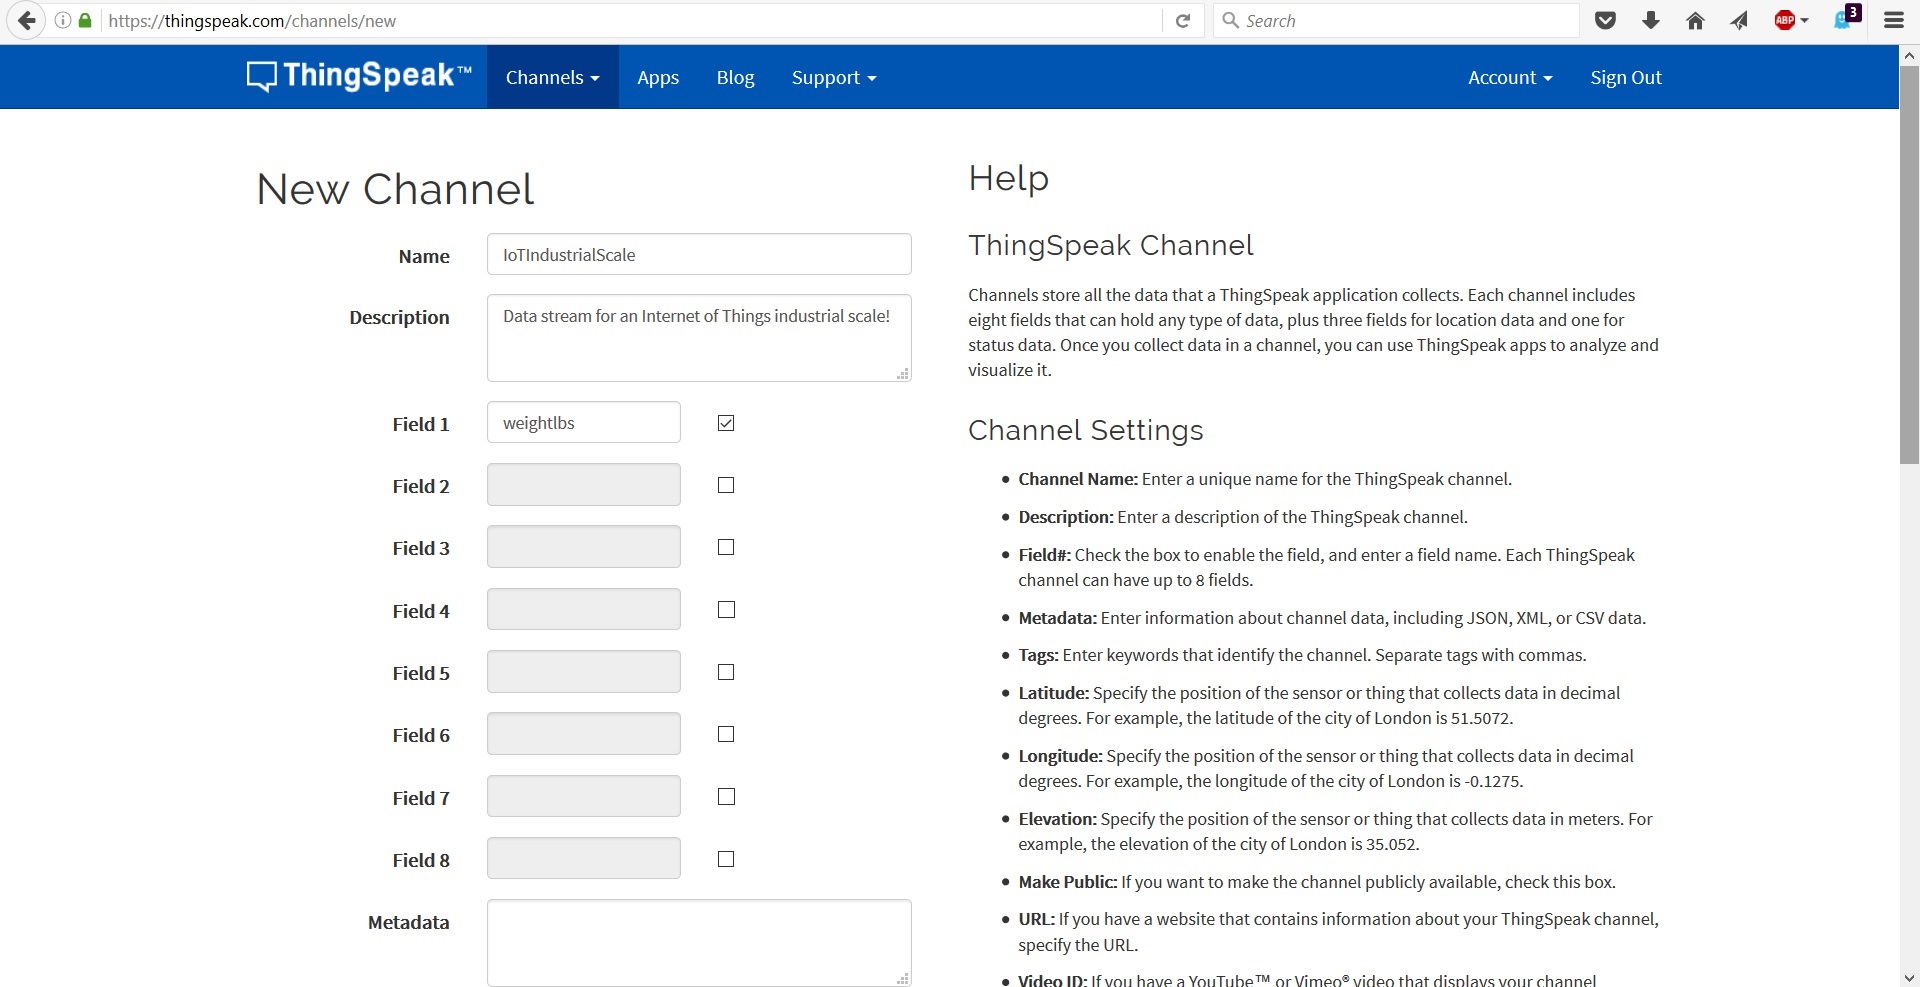
Set up a ThingSpeak channel!.
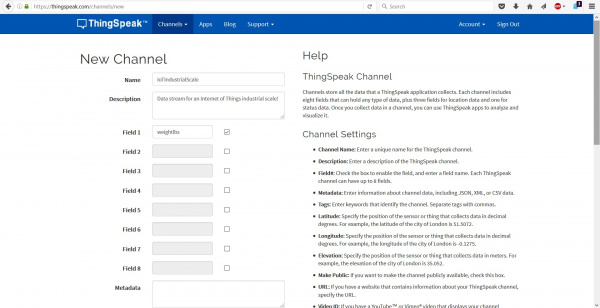
- Name the channel and write a brief description.
- Include at least one field name. If you want to push more data, like temperature or a timestamp, include those corresponding fields.
- Save the channel!
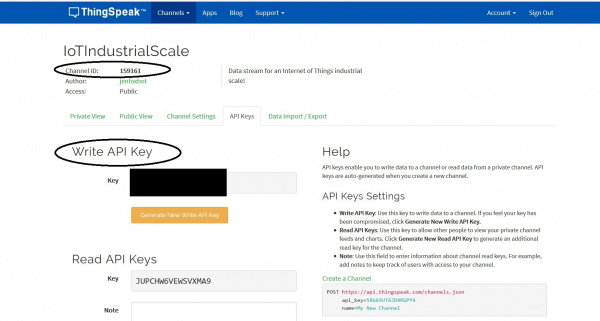
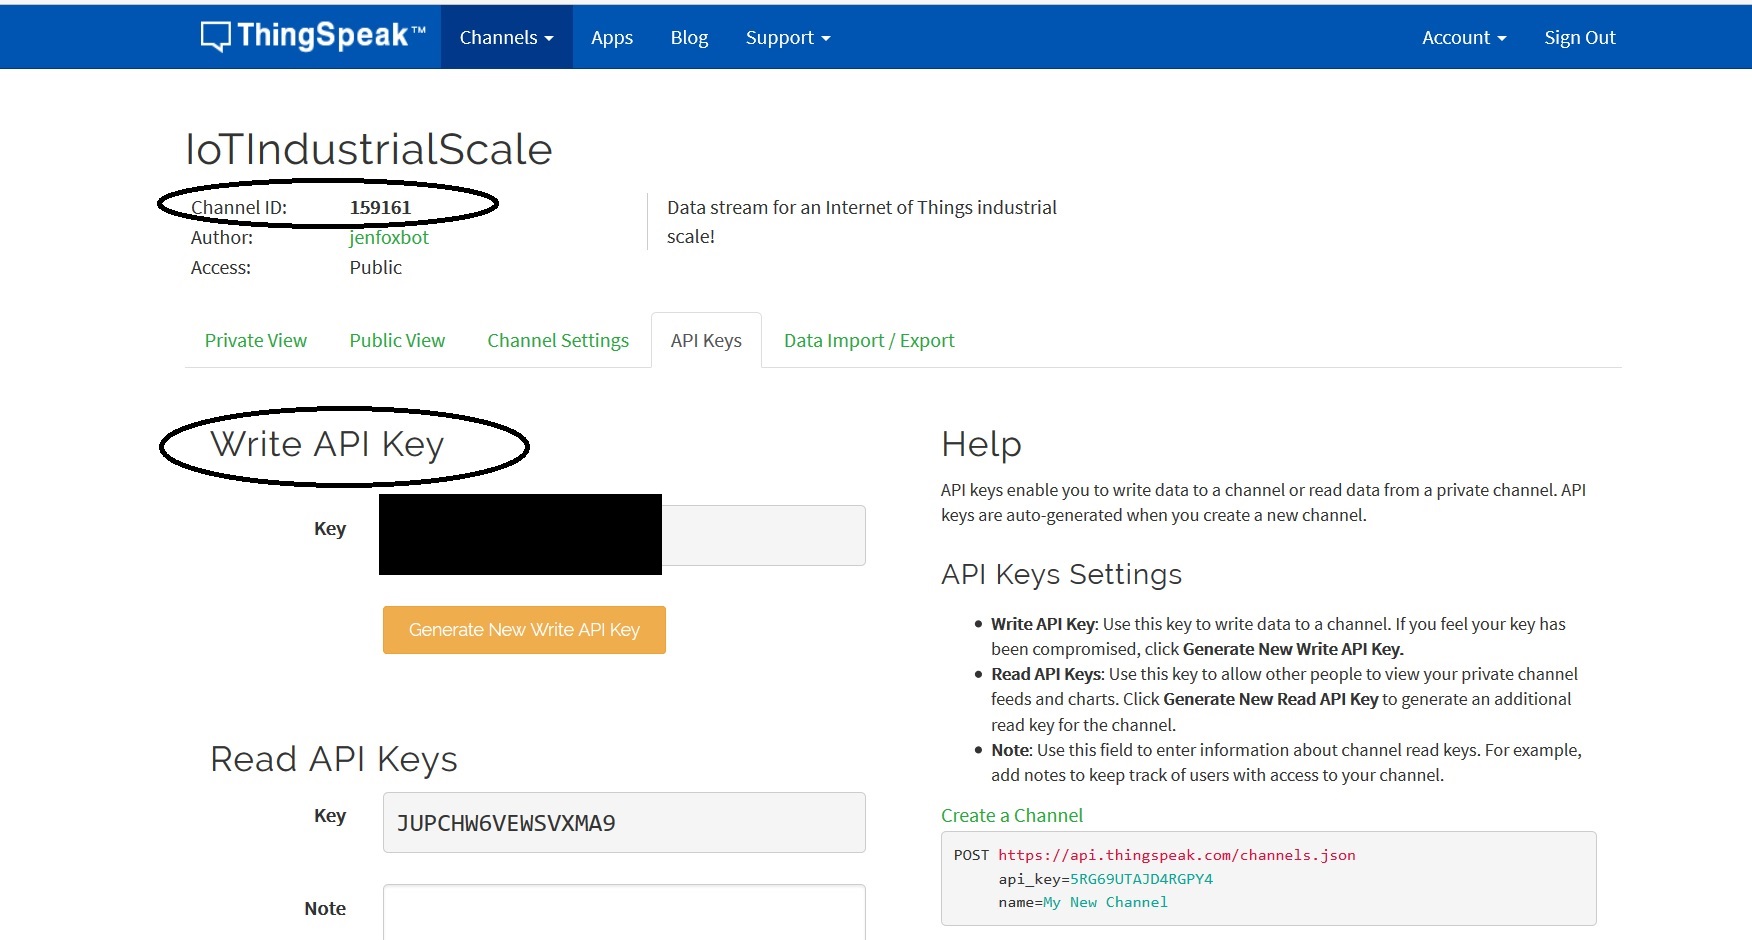
Copy the "Channel ID" number and the "Write API Key" and input them into lines 84 & 85.
Read through the comments in the program code for more information on how the program works.
Test and Refine
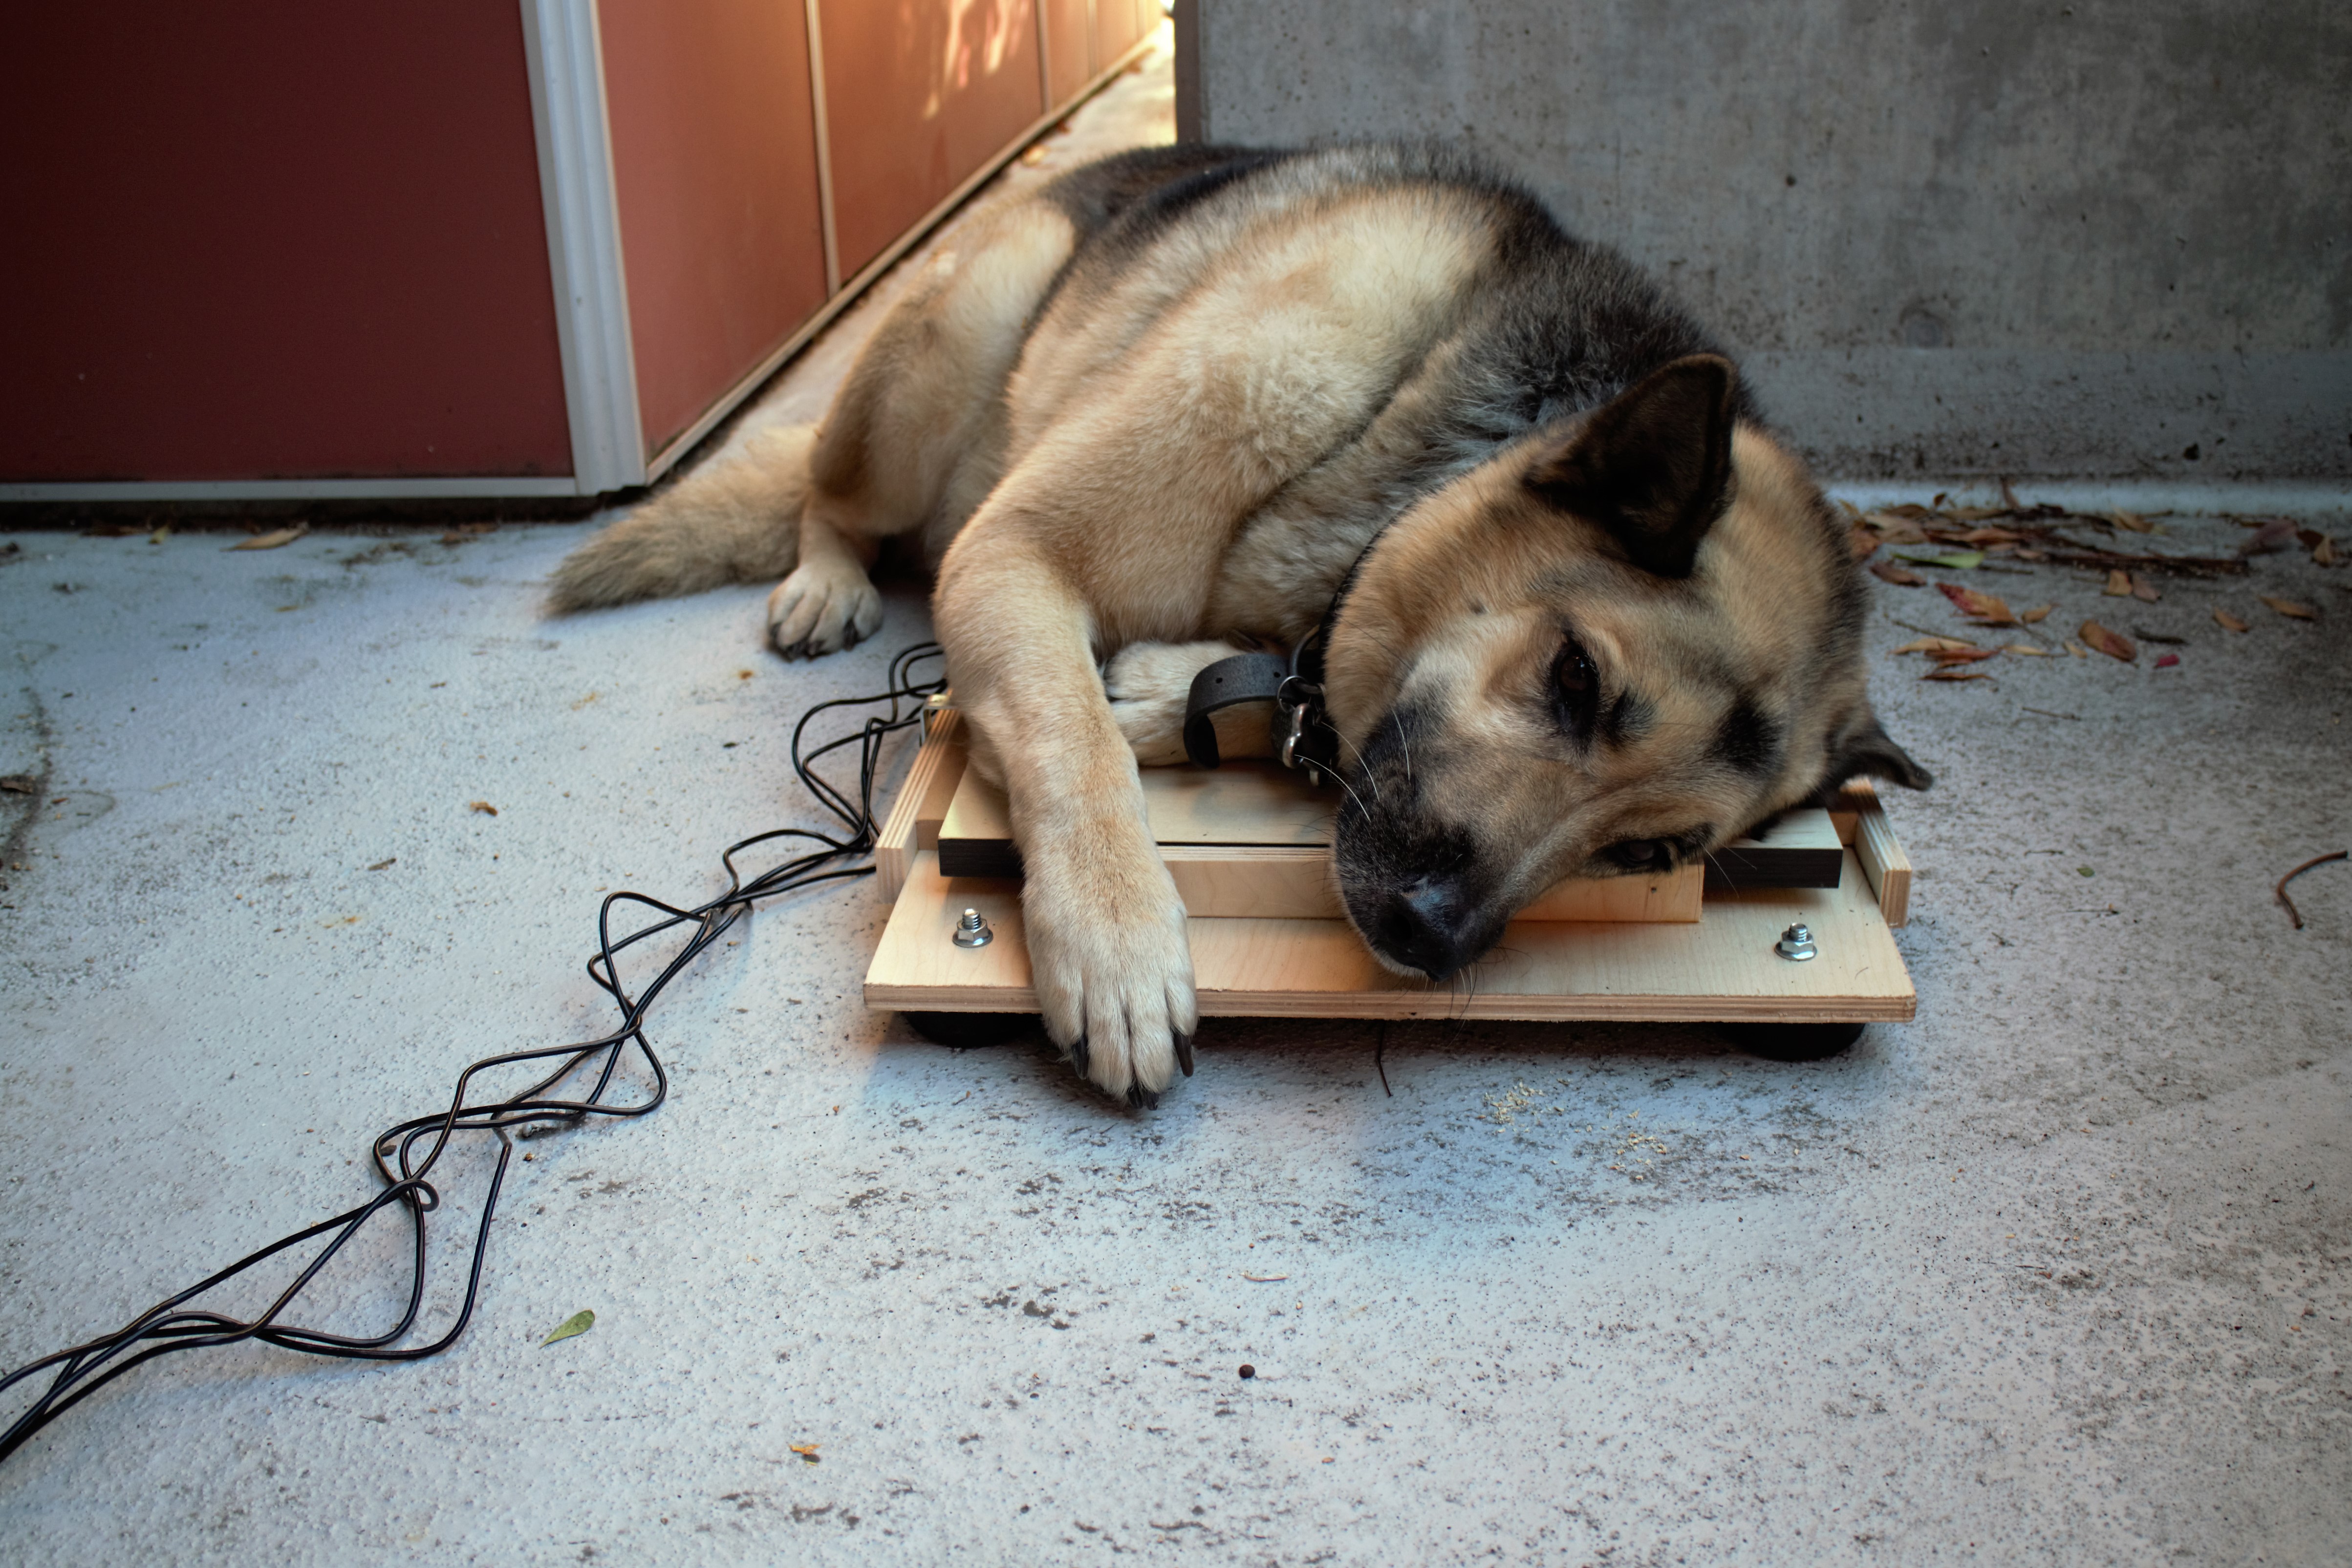
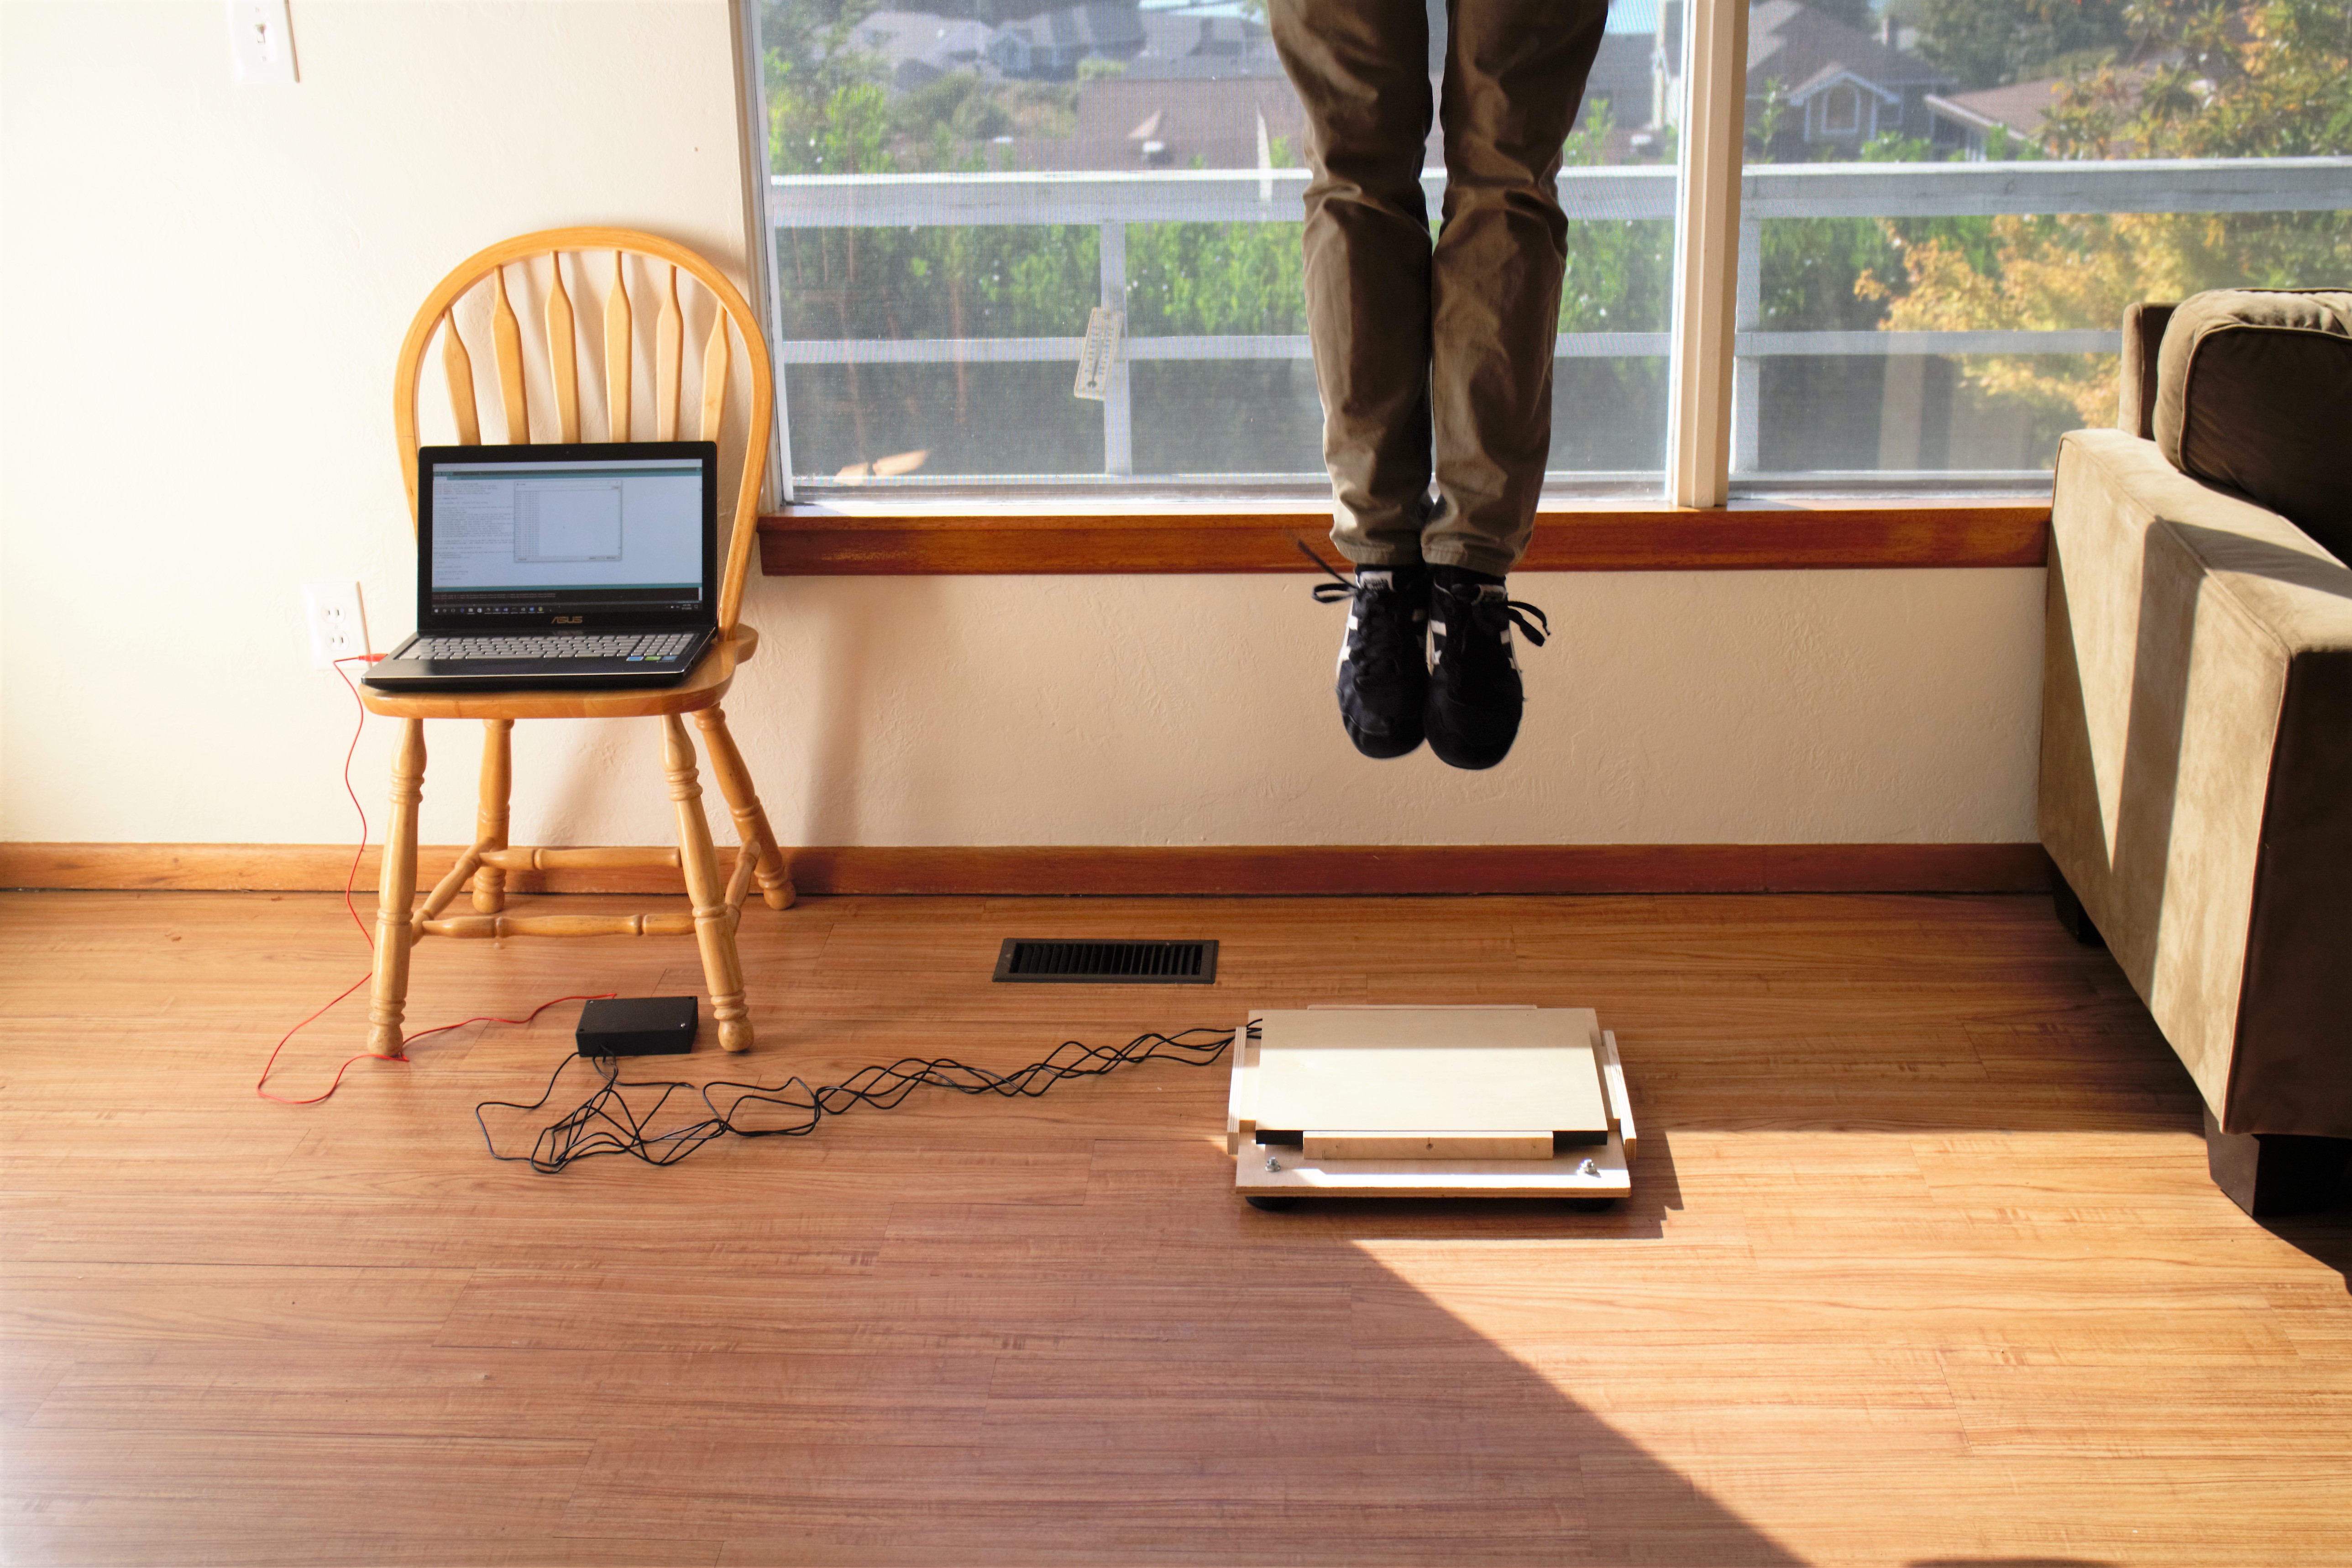
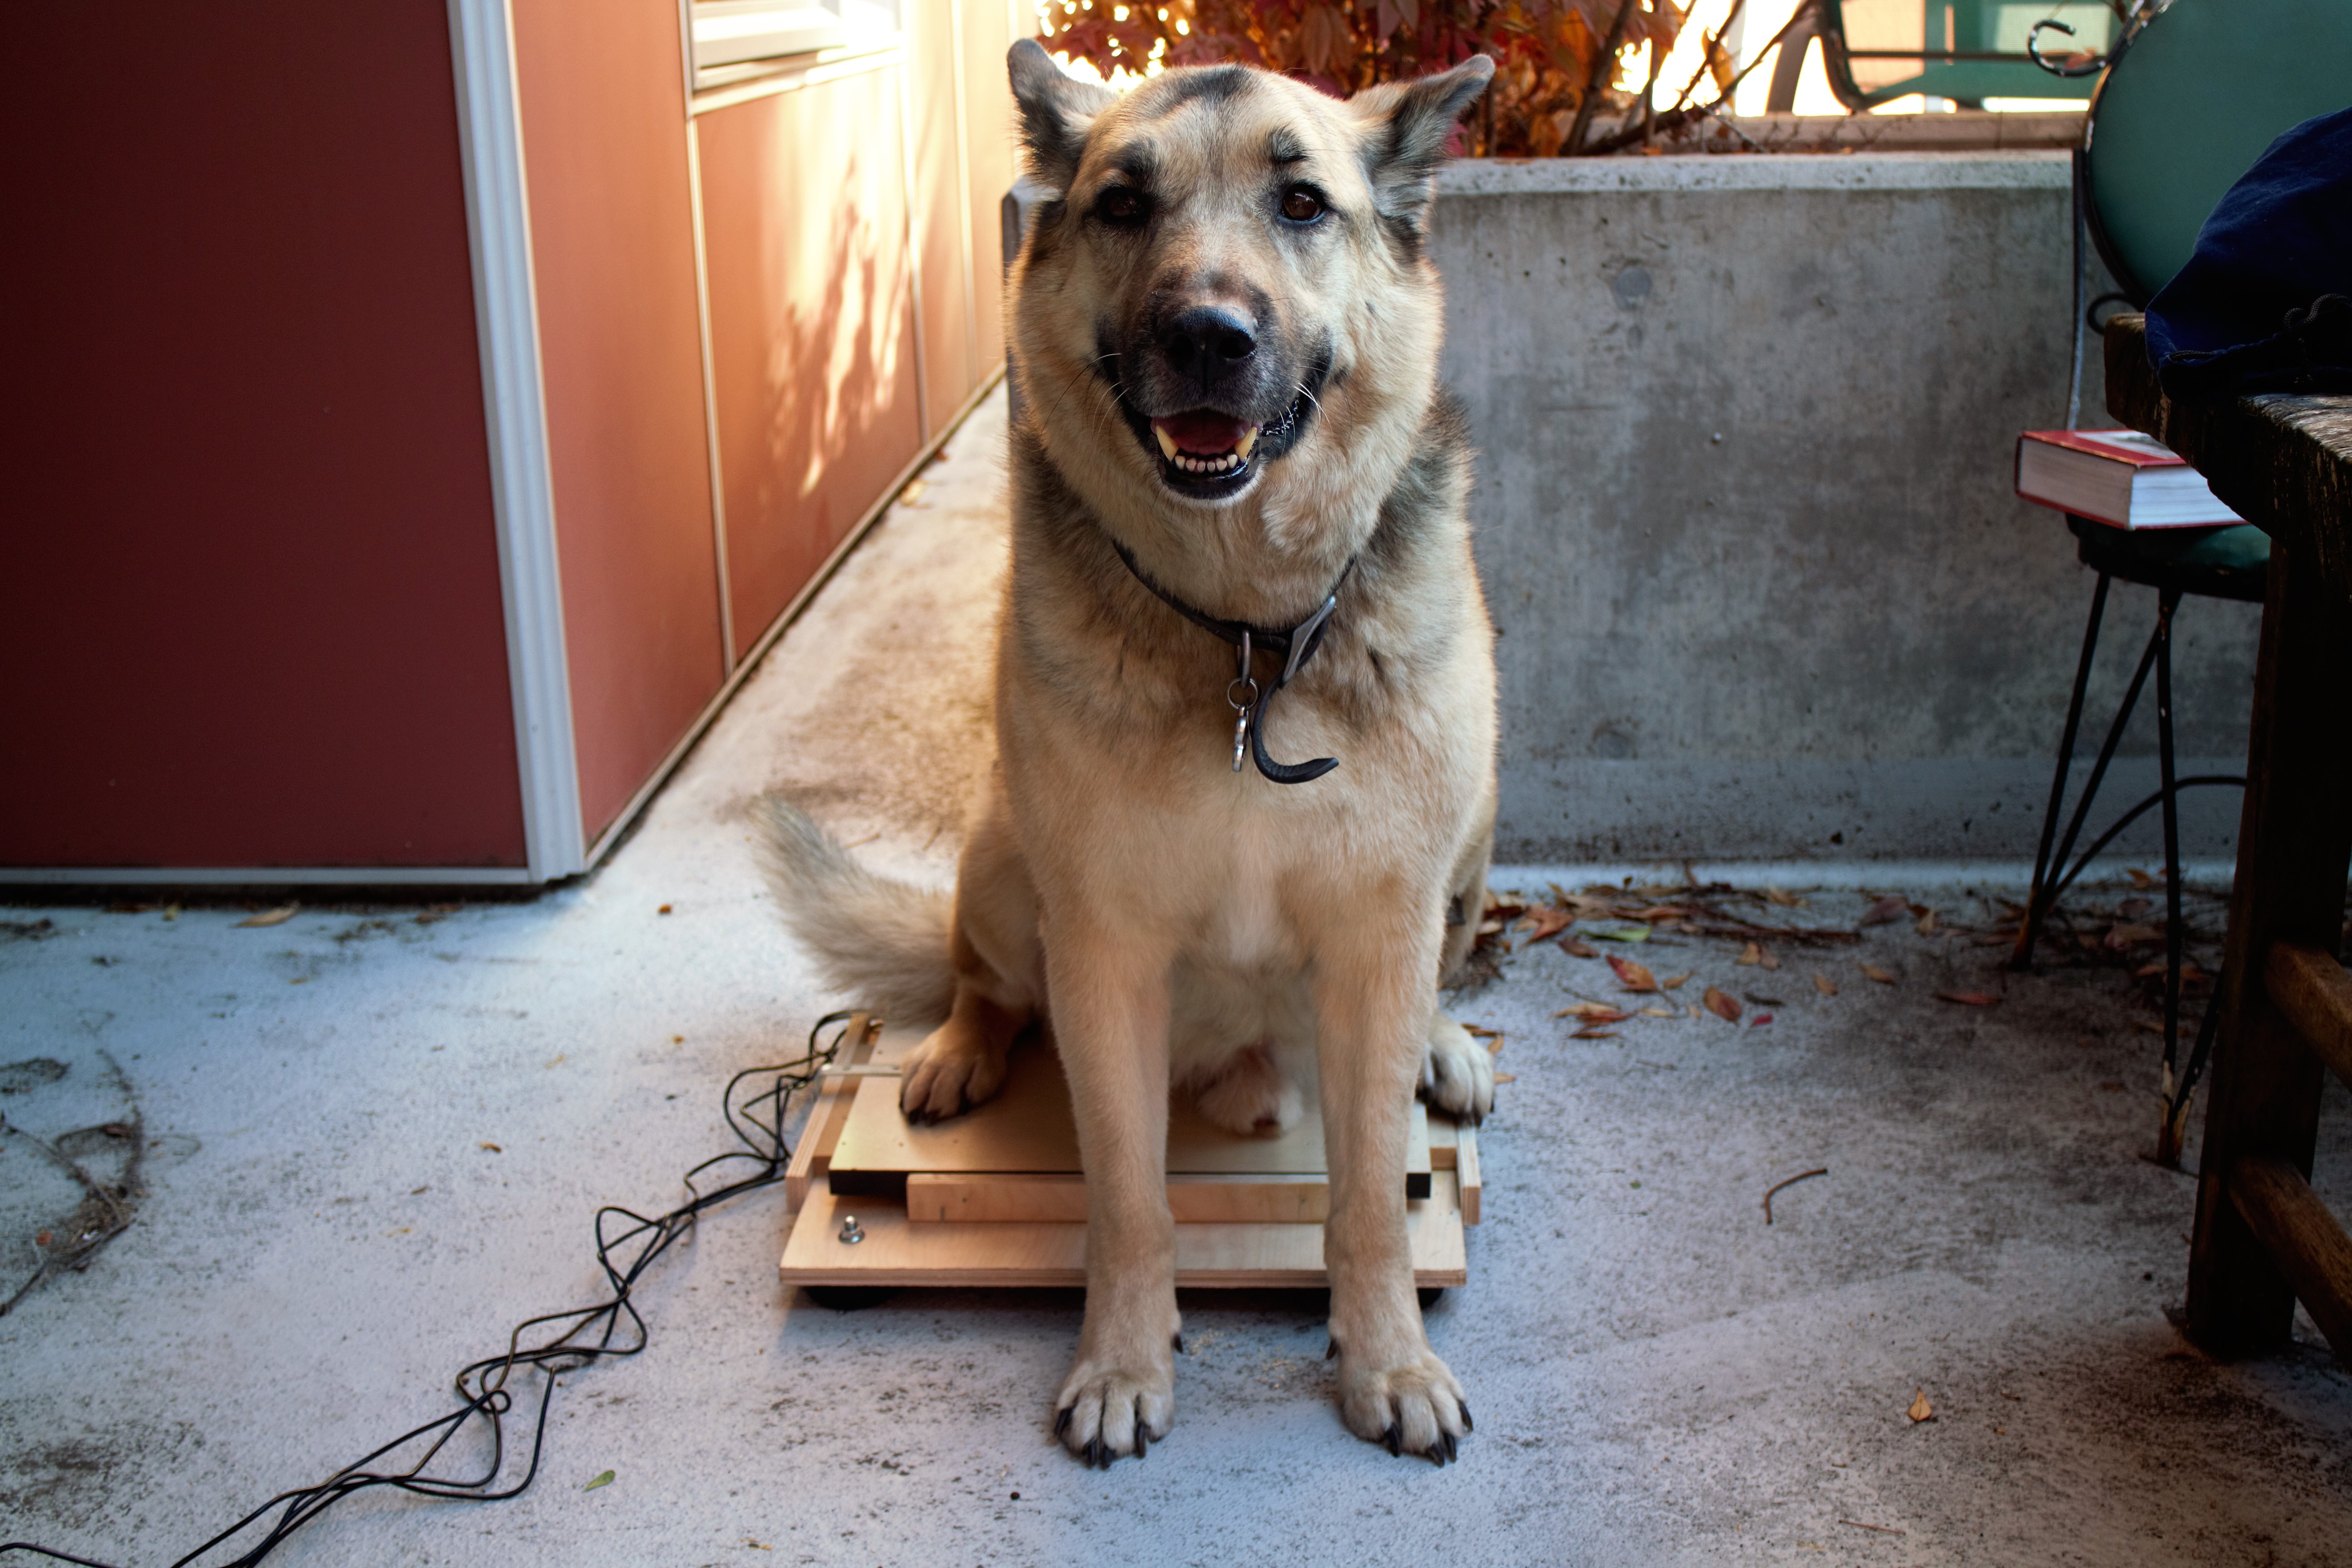
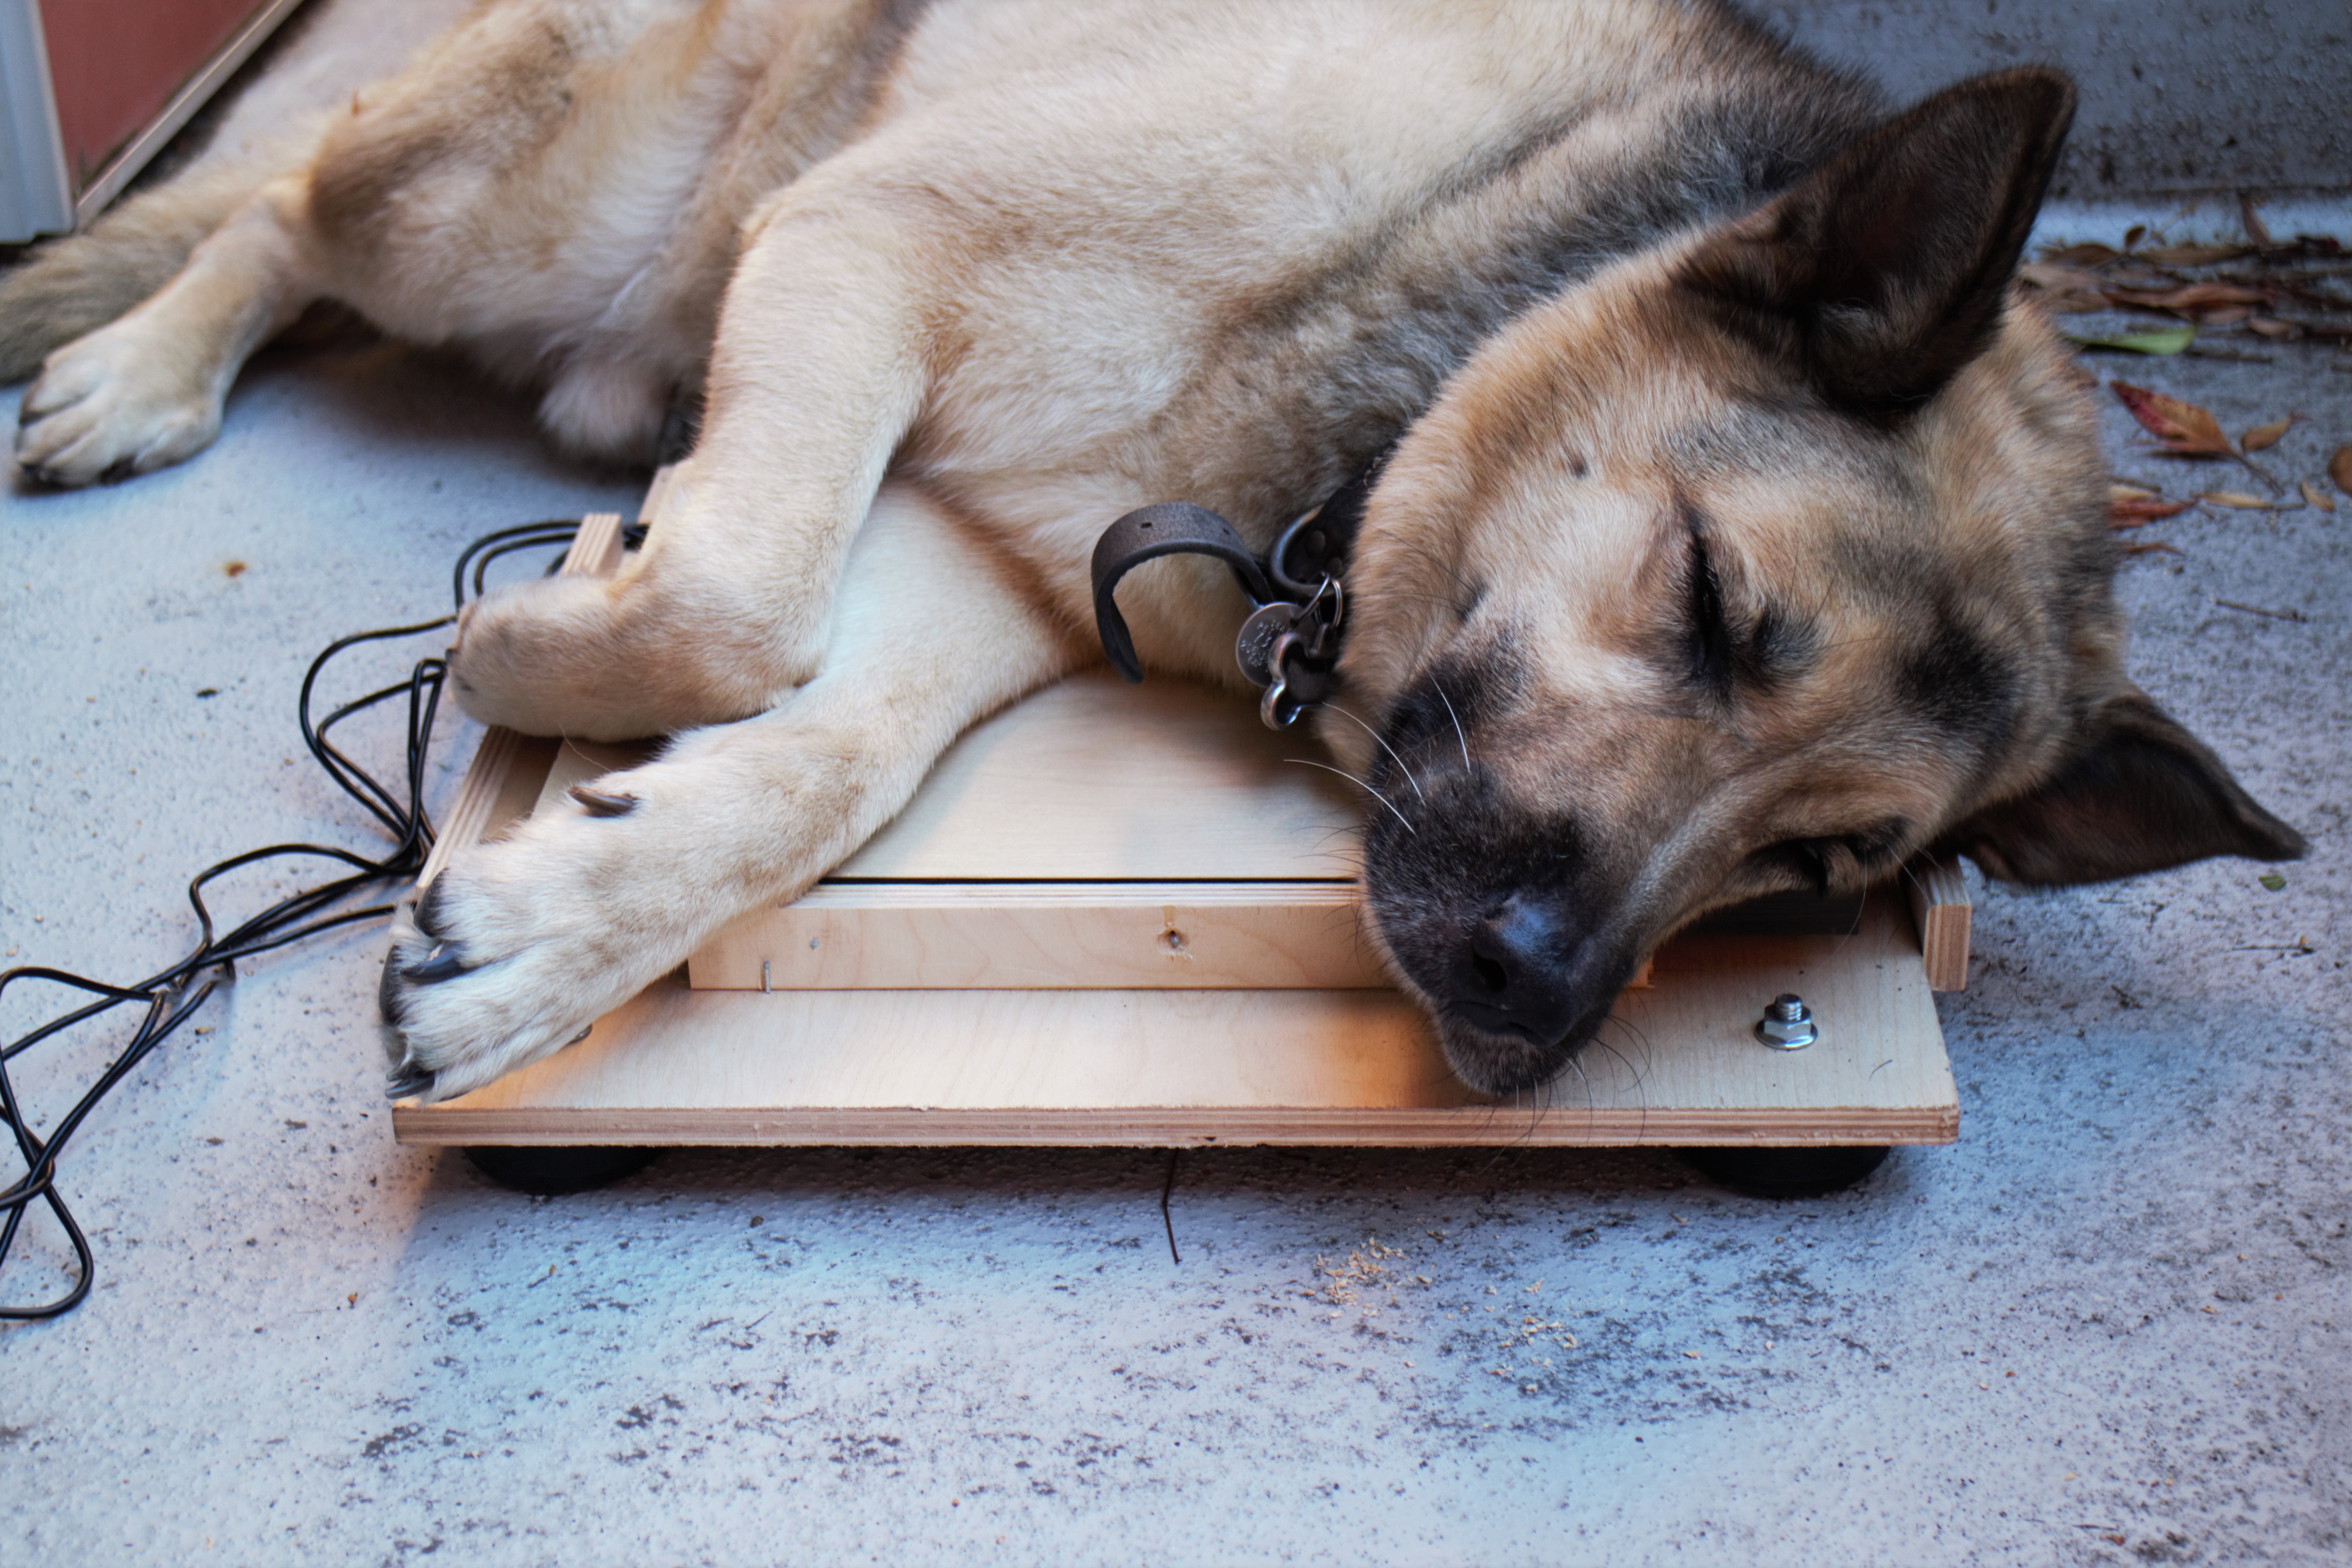
Prototype complete! Have your favorite human or animal stand (or awkwardly lay..) on the scale to check that it works as expected.
Check thoroughly to see if there is anything that needs to be fixed, secured, and/or improved. During my build process I noticed that a lot of the wood I was using to test would get dented by the load cells, resulting in inaccurate readings.
Lessons Learned and Next Steps

The original goal of my scale was to use it as an impact force plate to gather data on the forces due to jumping (specifically in parkour). Alas, the OpenScale is intended for constant loads and the fastest print rate is 505 ms, which is too slow to get accurate readings on impact force.
Fortunately, we can still use the scale to gather very general data and use this design as a foundation for future versions. Some quick and well-timed preliminary testing by a professional jumper (~165 lbs) resulted in the following readings:
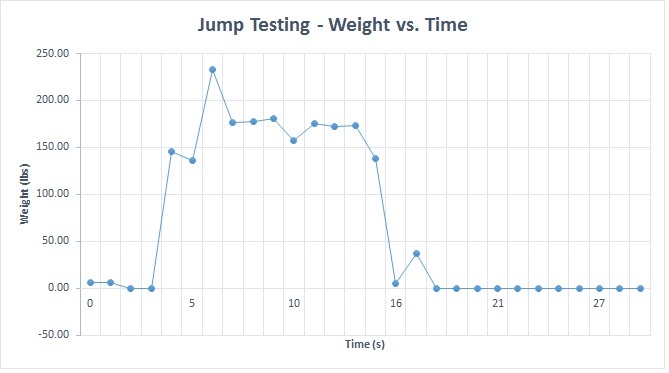
This shows a single jump, where the landing corresponds to the highest reading (~ 230 lbs), and the point just before that (~ 135 lbs) is when his feet were in the air. (The weight decrease + little blip after the the peak is when he was stepping off the scale.)
In addition to an updated program to print data faster, I'll need waaay more data and a consistent, controlled procedure to actually determine any kind of reasonable relationship between impact force, jump height, and weight. Also, the top platform was a bit dented after these tests, so I'll need a sturdier wood, or metal, scale platform.
Overall, this was a cool proof-of-concept and an informative preliminary test! Plus, there are tons of other practical uses for this simple Internet-connected scale!
Educator Extension
Beyond being a great hands-on project for computer science, engineering, and electronics courses, this is a handy experimentation tool for physics classrooms! Use it to illustrate the difference between weight and mass, demonstrate how acceleration relates to force, or use the on-board temperature sensor to estimate the mathematical relationship between thermal expansion and load cell output.
More Applications:
- Use the system to measure the weight of a rain barrel and notify you when it is full.
- Make a bathroom scale that keeps track of your weight (or your animal's weight).
- Monitor the weight of your Halloween candy to be sure that no one is sneaking some from under your nose.
Happy building!
For more IoT SparkFun tutorial fun, check out the links below: