LDK Experiment 1: Lighting Up a Basic Circuit
 Dia
Dia 
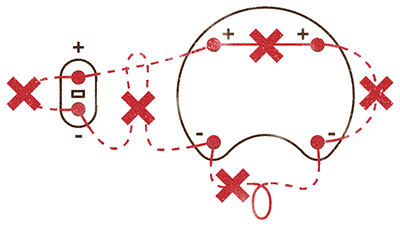
Negative Trace
The negative trace will return current from the LED to the negative side of the battery pack. This way the current travels in a circle (hence ‘circuit’!), which passes through the LED, lighting it up.
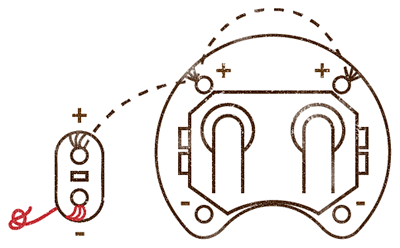
Re-knot your thread and start at the negative pin of the LED, sewing it down with three stitches. As you did on the battery pack, make sure that the knot in your thread is flush against the back of the fabric, and draw all of the stitches tight.
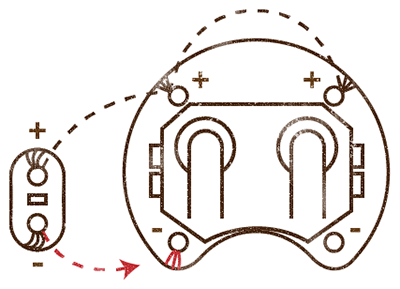
Sew a line of small stitches from the negative pin of the LED to the closest negative pin of your battery pack, and sew it down with three stitches.
Almost done! Sew a few small stitches to the second negative pin (this should be the last open pin on your battery pack), and sew it down with three stitches. Tie off again, and cut your thread.
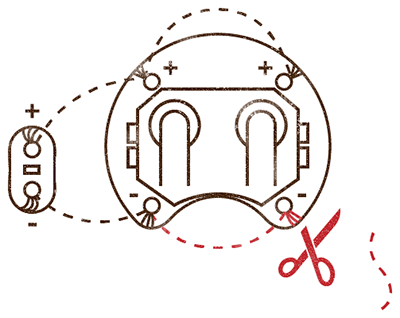
Take one last look at your circuit. You’re checking for loose or dangling threads or places where the positive and negative traces touch at all. If you find any, you’ll need to correct them. Cutting thread ends short and close to the knot will help.
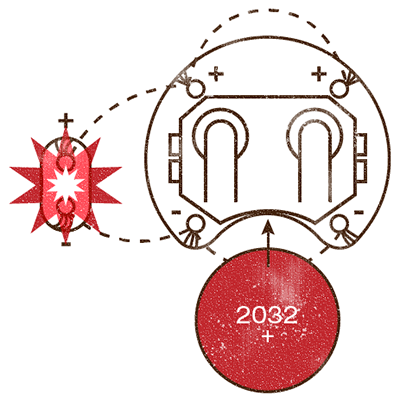
This is the moment of truth! Your battery has a smooth side with a + on it and a textured side. Slide it into the battery holder, + side up, textured side down. Your LED should immediately light up! There’s no switch or button on this circuit, so you’ll have to put the battery in to turn it on and take it out to turn it off. Congratulations on your first e-textiles circuit!