Light-Up Plush
 Gella
Gella 
Stitching It Together
If you need help sewing with conductive thread this tutorial covers the basics.
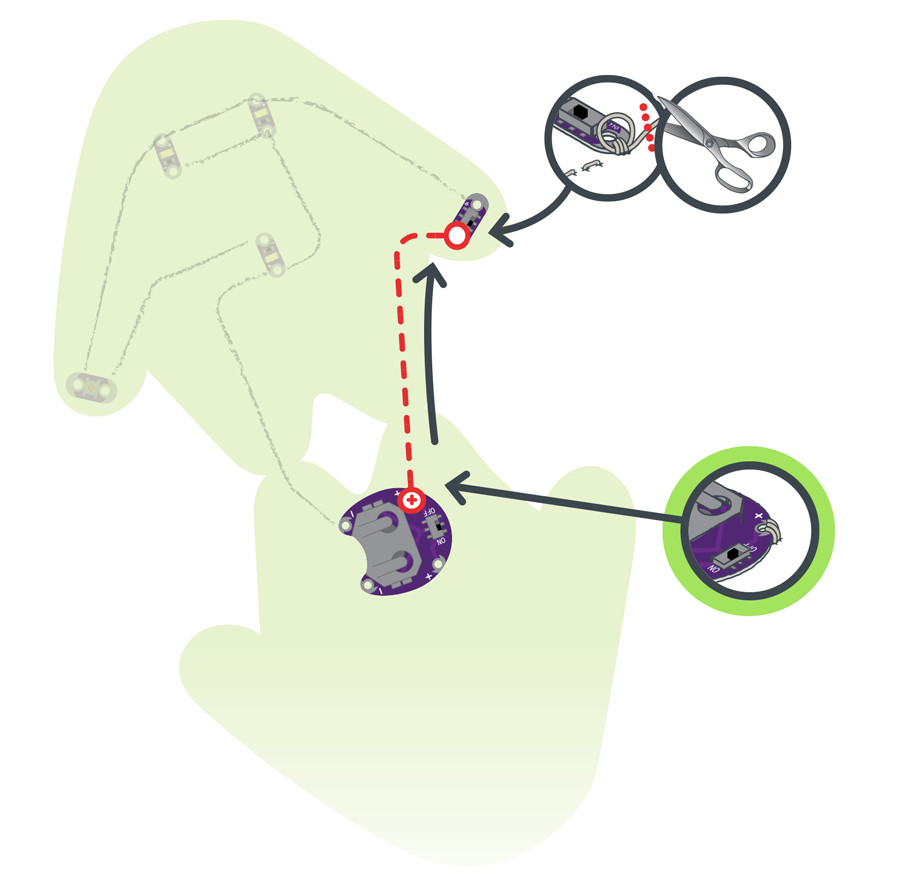
STEP 1:
Cut a long piece of conductive thread, thread the needle, and tie a knot at the end. Begin sewing at the positive sew tab on the battery holder closest to the fold or “feet” on the felt cutout. Remember to use three to four loops around each tab as you sew.
Use a running stitch or hidden stitch (see E-Sewing Basics for these techniques) to connect the positive sew tab on the battery board to the closest sew tab on the switch. Sew three to four loops around the switch’s sew tab to secure, then tie a knot and cut.
STEP 2:
With a new piece of thread, connect the other side of the switch to the positive sew tabs of the top two LEDs and end with three to four loops on the closest tab of the button. Tie and cut.
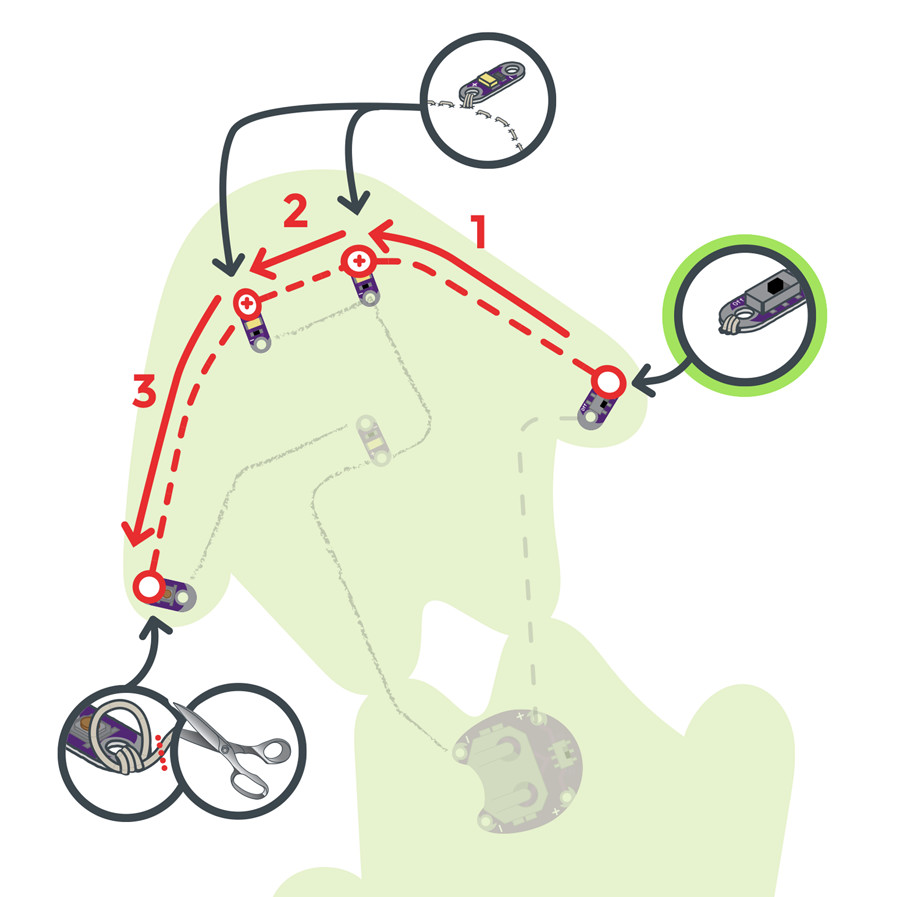
STEP 3:
With a new piece of thread, begin at the other side of the button and stitch three to four loops around the sew tab. Continue stitching to the positive side of the last LED, ending with three to four loops.
Tie and cut.

STEP 4:
Finally, we’ll stitch all the negative connections. With a new piece of thread, stitch three to four loops on the negative (–) sew tab of the first LED and connect to the negative tabs on the other LEDs, ending at the negative tab of the battery holder as shown. Make sure to loop three to four times on each connection.
