LilyPad Basics: Powering Your Project
 Gella
Gella Introduction
In this guide, we will discuss options for powering your LilyPad projects (both e-sewing and Arduino-based), battery safety and care, and how to calculate and consider power constraints on your projects. Creating wearable and fabric projects have their own considerations and we'll also cover when it makes sense to switch from conductive thread connections to wired connections.
LilyPad projects are often wearable or portable, which means using a battery to take the final project on the go. However, there are a few options for powering your projects beyond just plugging in a battery. Read on for sections detailing different power sources and options available for working with the system.
We've compiled some tips for you, to help decide what power source to use, how long it will last on battery power, and other considerations. Knowing how much voltage your project needs, the total current draw of the LilyPad boards you are using in your project, and battery capacity will help you choose the best option for optimal operation.
Suggested Reading
If you aren’t familiar with the following concepts, we recommend checking out these tutorials before continuing.
Voltage, Current, Resistance, and Ohm's Law
Battery Technologies
Electric Power
Calculating Power Needs: Operating Voltage
Most LilyPad projects can operate easily on a 3.7V rechargeable Lithium Polymer battery. The microcontroller or main sensor or component that each LilyPad board is built around has its particular operating voltage needs documented in its datasheet. You can find the datasheet for a product in the Documents tab of the catalog page on SparkFun.com.
When reading the datasheet, look for Operating Voltages - the document will typically provide a minimum and maximum voltage range. If there is no datasheet attached to the product, you can also check the schematic.
If you don't give a board a large enough voltage, it may not operate correctly (you could see strange behavior in how code runs on a LilyPad Arduino, odd readings from sensors in the Serial Port, or dim LEDs). If you project is receiving voltage above its recommended range, you could potentially damage the board or reduce the operating time significantly. Make sure the power source you choose for your project is within the board's recommended range.
Here is a list of common LilyPad Boards and their needs. The middle column displays the regulated voltage on the board from the input voltage. If you choose a board that does not include a built-in regulator, you will need to pay close attention to your power source to make sure it is compatible with your project. The last column shows the input voltage that each board can take, notice that this can be above 3.3V, the suggested operating voltage of a LilyPad project.
| Board | Voltage Regulation | Input Voltage |
|---|---|---|
| LilyTiny | No | 1.8V - 5.5V |
| LilyTwinkle / LilyTwinkle ProtoSnap | No | 1.8V - 5.5V |
| LilyMini ProtoSnap | 3.3V | 1.62V - 3.63V, 5.0V through USB |
| LilyPad Arduino Simple | No | 2.7V - 5.5V |
| LilyPad Arduino SimpleSnap | 3.3V | 2.7V - 5.5V |
| LilyPad Arduino USB - ATmega32U4 Board | 3.3V | 2.7V - 5.5V |
| Lilypad USB Plus | 3.3V | 1.8V - 5.5V |
| LilyPad Arduino 328 Main Board | No | 2.7V - 5.5V |
| LilyPad XBee | 3.3V | 1.8V - 9V |
| LilyPad Simblee BLE Board - RFD77101 | 3.3V | 1.8V – 3.6V |
| LilyPad MP3 | 3.3V | 3.7V - 6V |
Most boards in the LilyPad system are designed to operate at the system voltage (3.3V), but if you are mixing and matching from other sewable or non-sewable product lines you may encounter a sensor or board that needs 5V. In this case, first try to find a 3.3V version of the board. If needed, you can hook up a Bi-Directional Logic Level Converter.
Calculating Power Needs: Current Draw
In addition to checking the operating voltage of the LilyPad boards in your project, you'll also want to take a look at the current your project will draw compared to the current your microcontroller or battery source can provide.
The current draw of your project depends on the total number of LilyPad boards you have chosen to use in your project and applies to both LilyPad Arduino-controlled circuits and e-sewing projects. If your power supply or battery does not provide the current your project needs, the circuit may start acting in strange or unpredictable ways.
As with voltage, you can check the datasheets of the individual LilyPad boards to estimate what your project will use.
For projects using a LilyPad Arduino, check how much current each individual I/O (input/output) sew tab can provide - the amount of LilyPad boards, such as LEDs, will be limited by this number. For most LilyPad Arduinos this is 40mA per I/O sew tab.
It's also better practice to round up and assume your circuit will need more current than to not provide enough current.
If your project uses components that require a lot of current, like motors or large amounts of LEDs, you may need to readjust your power supply choice or even use a separate supply for the LilyPad Arduino and the current-hungry boards.
As you gain experience working with LilyPad boards, it will be easy to estimate the amount of current your project requires by looking at the boards' datasheets and doing some math. You can also find out exactly how much current your project uses by measuring it with a digital multimeter or variable DC power supply that has a readout for current.
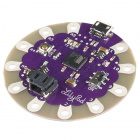
Read World Example: LilyPad LEDs and LilyTiny
Let's explore an example of a frequently asked question about LilyPad projects: How many LEDs can I connect to a LilyTiny (or LilyTwinkle) board?
A typical LilyPad LED uses 20mA of current at full brightness. Multiply that by the number of LEDs you’re using, add 10mA for the LilyPad that’s running everything, and you’ll have an estimate of your average current draw.
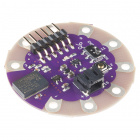
A project with 10 LilyPad LEDs connected to a LilyTiny Board
20mA * 10 + 10mA = 210mA
For more detailed information on working with LilyPad LEDs, take a look at our Powering LilyPad LED Projects.
Powering LilyPad LED Projects
December 17, 2016
Considering Conductive Thread Resistance
Now that you've done your calculations, there is another factor to consider: conductive thread resistance. Unlike copper wire, which has very little resistance, conductive thread's resistance will vary depending on the metal used to make the thread and the thickness of the thread. Many conductive threads list resistance in Ohms/Ft. The lower this number is, the better, because less resistance means more electricity can get through to the components used in your project.
You may expect your project to work perfectly, but the resistance of your connections over distance may cause some additional complications in your circuit.
The basic electrical property Ohm’s Law states that running an electrical current through a material high in resistance causes the voltage to drop. The higher the current, the greater the voltage drop. This means that even though a LiPo battery powering your LilyPad may put out 3.7 volts, by the time it gets through the thread to your components, it may drop to 3.0 volts or less. Many electrical components, such as LEDs, need a certain voltage to function properly. To minimize voltage drop, we'll need to decrease the resistance of the power connections. There are a few ways to do this:
Keep the length of the power connections as short as possible. Because the resistance increases with length, if you reduce the length, you’ll reduce the resistance.
Reduce the resistance of the thread itself. Thicker thread has a lower resistance than thinner thread, and using multiple strands at a time reduces the resistance even further.
Use a non conductive thread to stitch bundled thread (either placed together or braided) to your base fabric. Leave enough open spaces in the stitching so you are able to stitch conductive thread to the larger thread bundle when connecting components. This video from e-textile expert Lynne Bruning shows this technique at around the 4:10 mark:
Conductive Thread Alternatives
For large projects that require thread to travel long distances, projects with a lot of power-hungry pieces such as a large amount of LilyPad Pixel Boards, or in spots where thread may break under stress, here are some alternatives that work well for wearables:
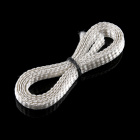
Conductive Ribbon
Specialty nylon ribbon with flexible stranded wire woven into it is a great alternative to conductive thread with low resistance. You will need to solder to the tinsel within the ribbon in order to use in a project.
Conductive Fabric Traces
You can create your own lower resistance traces using thin strips of conductive fabric. We recommend using iron-on adhesive to attach to fabric or ribbon, then using conductive thread to hand stitch components to the traces.
Don't forget to insulate the fabric traces as you would conductive thread.
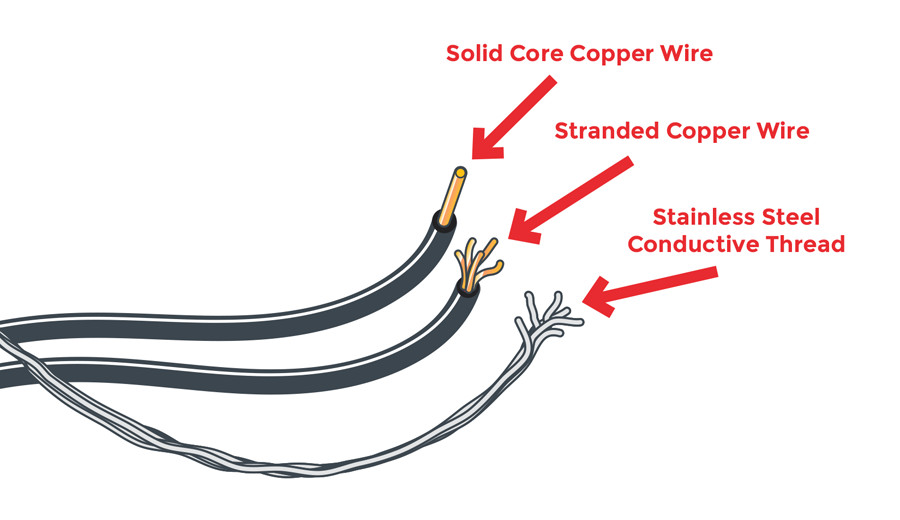
Stranded Wire
Another alternative is to switch from conductive thread to traditional wire. Wire has a much lower resistance than thread, allowing you to use more LEDs than a conductive thread circuit. You’ll have to switch from sewing to soldering, but it’s easy to solder wires to the same sew tabs to which you would normally connect thread.
Wire is prone to breaking if it is flexed repeatedly. For wearable projects that require maximum flexibility, use stranded wire (not solid), and look for special silicone-jacketed wire that is extremely flexible. For projects that will be washed, water may wick into exposed stranded wire, becoming trapped and potentially corroding it over time. Apply a small dab of silicone sealant to the cut ends of the wire to prevent this from happening.
If you have never soldered before or worked with wire, we recommend visiting the following tutorials.
How to Solder: Through-Hole Soldering
Once you've identified your project's power needs and considerations, it's time to move on to choosing a power source for your project.
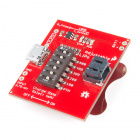
Power Options: Using a Built-In USB Connector
While working on programming a LilyPad Arduino project, you can use the power supplied by the USB cable connecting your LilyPad Arduino to your computer. Make sure the slide switch on the LilyPad Arduino is set to the ON position to upload code and power up your board while prototyping.

This method works for LilyPad Arduinos with a built-in micro USB port and those with programming headers and LilyPad FTDI Basic Breakout.
LilyPad boards with a micro USB connector can be powered by 5V Lithium Ion battery packs such as the ones used in the Spectacle line or for backups for cell phone charging.
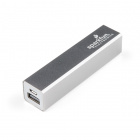
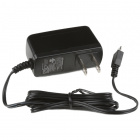
If your project is not portable or wearable (such as a wall hanging or permanent installation) you may choose to utilize a 5V wall adapter power supply for your project. Plugging into a dedicated power source will eliminate the need to constantly swap out or recharge batteries in your project.

Micro USB does not necessarily mean the battery pack is right for your project. When sourcing battery packs outside the SparkFun catalog make sure to double check the labeling on the packaging and the product to verify it is a 5V supply.
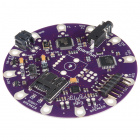
The LilyPad Simple Power is a board that offers you some flexibility - it can accommodate a rechargeable battery or a micro USB cable attached to a wall adapter for LilyPad projects that do not have a built-in battery connector.
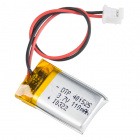
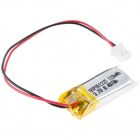
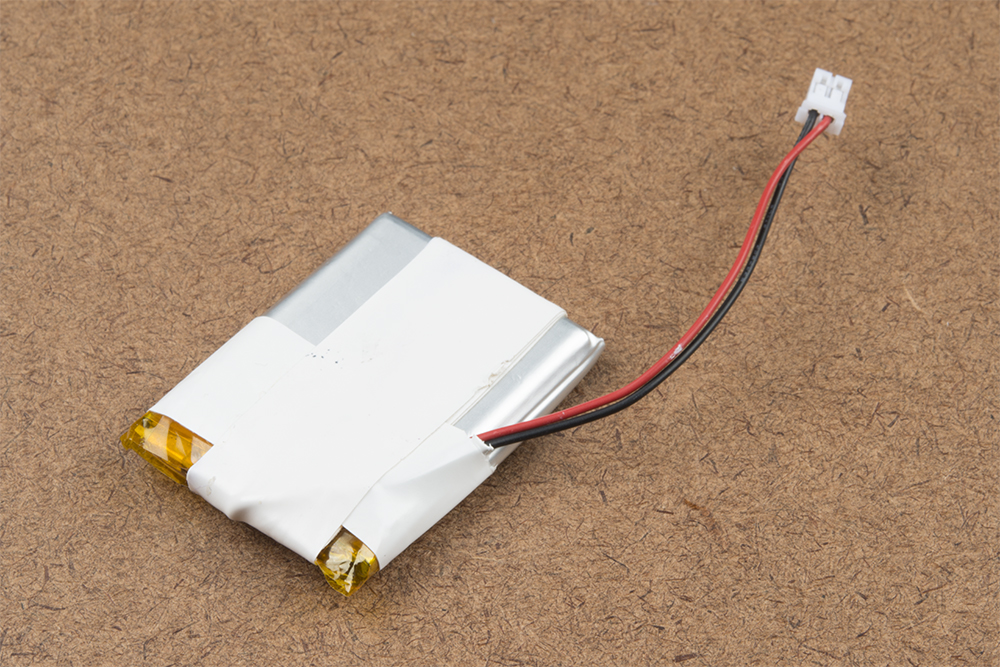
Power Options: Rechargeable Lithium Polymer Batteries
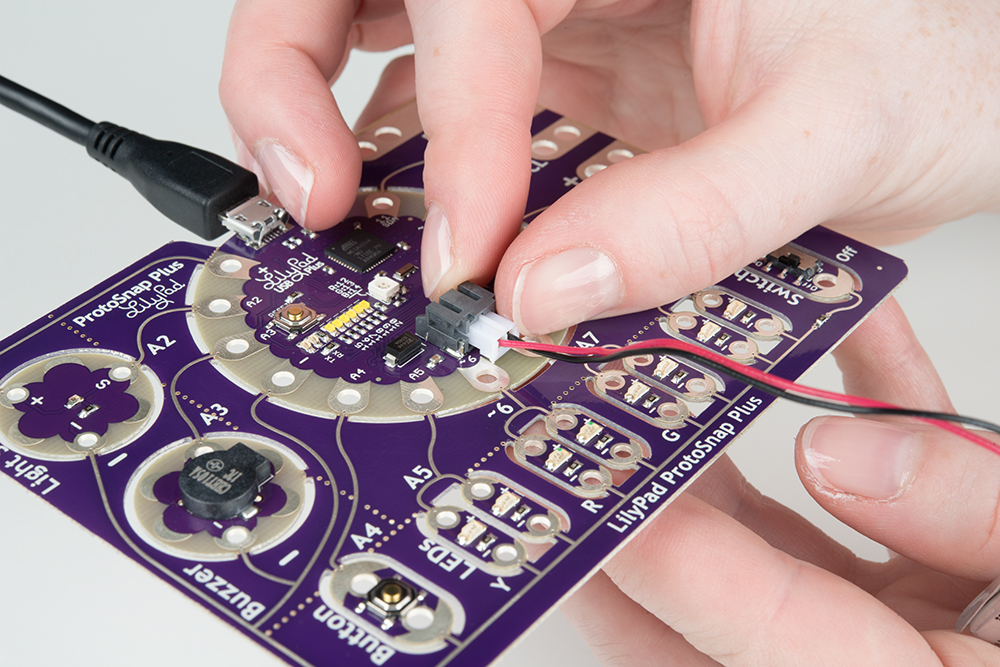
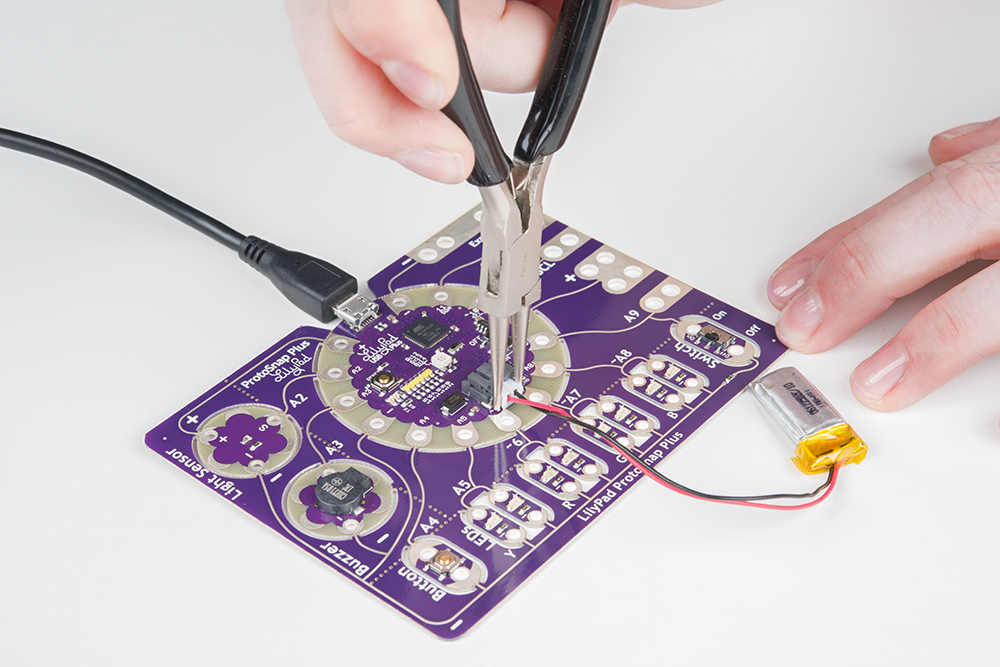
Many LilyPad products come equipped with a JST connector designed attach a 3.7V Lithium Polymer (LiPo) battery. These boards include a built-in battery charging circuit to recharge the LiPo when connected to a computer or wall wart via a USB connection.
SparkFun carries a variety of 3.7V Lithium Polymer batteries that are compatible with the LilyPad system. The capacity of the battery will depend on the intended run time of your project, size constraints, and other factors.


Using a LiPo Battery and Battery Charging
Each LilyPad board with charging capabilities has a default charge rate. If this default charge current is set to 100mA, so a 100mAh battery will recharge in one hour, a 1000mAh battery in 10 hours, etc. Since the board is set to charge at a rate of 100mA, we do not recommend connecting a lower capacity LiPo battery (i.e. 40mAh LiPo battery) to charge.
To recharge an attached battery, plug the board into a USB power source. While the battery is charging, the "CHG" LED will illuminate. When the battery is fully charged the LED will turn off.
It is safe to leave a LiPo battery attached to the board permanently, even with USB power applied. The battery will not be overcharged. We recommend you do not leave a charging battery unattended.
The battery connector can be a tight fit and difficult to remove; when disconnecting a battery never pull on the wires. Use a pair of needle nose pliers or cutters along the plastic to gently pull the plug out of the connector.
JST connectors are a common type of connector, just because a product has it does not mean it is LilyPad-compatible.When sourcing batteries outside the SparkFun catalog make sure to double check:
Is it 3.7V?
Is it a rechargeable Lithium Polymer/Lithium Ion battery?
LiPo Battery Safety and Care
While LiPo batteries are a great option for providing rechargeable power to your project, they do have some safety considerations. This section will cover tips for safe handling and use of LiPos for your projects.
Storage
Always store your batteries in and enclosure free of sharp objects. When installing a battery in your project, take care to keep it away from parts of your project that could pinch, poke, or strain the battery.
Do not transport or store a LiPo battery with metal objects, such as hairpins, necklaces, or any other conductive object or material.
Keep or store the battery in a cool and dry place/environment while installed in a project or in storage. If you are not planning to use your project for a long time, remove the battery and store it separately.
Keep Away from Heat and Moisture
Keep your LiPo battery away from environments that will damage it. Do not immerse a LiPo battery in liquids. Remove the battery from your project if it needs to be washed.
Do not use or store the battery near any source of heat. To secure a battery to your project, velcro is a temporary option or sew into a pouch or place in a plastic enclosure. Never iron or hot glue directly on or around a LiPo battery.
Strain Relief
One of the down sides to using these LiPo batteries is their fragile power connections. These type of batteries are manufactured for a permanent install in devices, and not being removed often as can sometimes happen with wearables. It can be easy to accidentally pull or break the power wires from the terminals on the safety circuit built into the battery.
You can provide strain relief to the wires by placing them to the side and securing with electrical tape - this will help with strain on the connection to the battery when pulling on them to remove.
Inspect Battery Before Each Use
Short circuits or damage to LiPo batteries may not always be noticeable - check the battery for puffiness, heat, or other changes. If the battery looks damaged, remove immediately.
If the battery gives off an odor, generates heat, becomes discolored or deformed, or in any way appears abnormal during use, recharging, or storage, immediately remove it from your project or battery charger and stop using it. Make sure to dispose of your batteries properly - do not throw them in the trash! Contact your local e-waste disposal organization for details on how to discard batteries in your area.
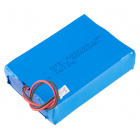
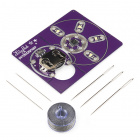
Power Options: Coin Cell Batteries
The LilyPad system includes boards that hold a single 3V CR2032 coin cell battery. These batteries are typically single use, but some rechargeable coin cell batteries may work in the holders.
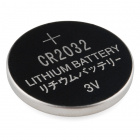
- C designates a lithium battery type
- R designates a ROUND (cylindrical) battery shape
- 20 specifies the package size (diameter) in mm
- 32 specifies the height in mm. Note this is 3.2 mm NOT 32mm
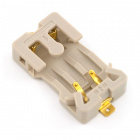
The LilyPad product line includes a standalone battery holder with a switch that can be connected to a customized project, as well as built into the LilyMini board, and available in some ProtoSnap products. SparkFun also carries a non-LilyPad coin cell battery holder without sew tabs for projects that need a small footprint or for users who want to solder.
This depends on the LilyPad board you are powering. Two 3V batteries in series will supply 6V - some LilyPad boards do not have onboard regulation circuits and can be damaged by supplying them with more than 3V. For example, the LilyTiny and LilyTwinkle boards operate best between 2.4 and 5.5V. In these cases, a Lithium Ion/Lithium Polymer battery may be a better choice for your project.
Check out the Calculating Power Needs section for more tips on selecting the right battery for your project's unique needs.
Battery Safety and Care
This section will cover tips for safe handling and use of coin cell batteries for your projects.
Storage
Do not transport or store a coin cell battery with metal objects, such as hairpins, necklaces, or any other conductive object or material. Do not store loose coin cell batteries together - they can make contact with each other and short circuit and discharge.
Keep or store the battery in a cool and dry place/environment while installed in a project or in storage. If you are not planning to use your project for a long time, remove the battery and store it separately.
Keep Away from Heat and Moisture
Keep your coin cell battery away from environments that will damage it. Do not immerse a coin cell battery in liquids. Remove the battery from your project if it needs to be washed.
Do not use or store the battery near any source of heat. To secure a battery to your project, use a specialty battery holder, sewn pouch, or place in a plastic enclosure. Never solder directly to a coin cell battery; if you need to solder one into a project, use a special battery holder or purchase a battery with solder tabs created for this purpose.
Inspect Battery Before Each Use
Short circuits or damage to coin cell batteries may not always be noticeable - check the battery for puffiness, heat, or other changes. If the battery looks damaged, remove immediately.
If the battery gives off an odor, generates heat, becomes discolored or deformed, or in any way appears abnormal during use, recharging, or storage, immediately remove it from your project or battery charger and stop using it. Make sure to dispose of your batteries properly - do not throw them in the trash! Contact your local e-waste disposal organization for details on how to discard batteries in your area.
How Long Will My Project Run on Battery Power?
To figure out how long your project will run on battery power, you need to know two things:
- how much current your project uses
- the capacity of your battery
Battery capacity is given in milliamp-hours (mAh). This number tells you how many milli-amps (mA) a full battery can provide for one hour before it’s empty. The e-Textiles Battery that comes with most LilyPad Arduino kits has a 110mAh capacity. For many projects, especially ones with a large number of components such as LEDs, you will probably want to use a higher capacity battery for a longer run time.
Thus, an e-Textile battery will only power the project for approximately half an hour. Here's an instance where a larger capacity battery would make sense, if the project needs to operate for a long time, such as during an event or showcase. The trade-off is that a higher capacity battery is also physically larger -- make sure to plan accordingly for proper battery storage/attachment on your project to reduce strain on the wires and fabric.
Here are some typical runtimes for various SparkFun batteries and numbers of LilyPad LEDs/LilyPixels:
| Number of LEDs | 1 | 2 | 5 | 10 | 20 | ||
| Battery Name | Battery mAh | Hours of Operation | |||||
|---|---|---|---|---|---|---|---|
| Polymer Lithium Ion Battery - 40mAh | 40 | 1.3 | 0.8 | 0.4 | 0.2 | 0.1 | |
| E-Textiles Battery - 110mAh (2C Discharge) | 110 | 3.7 | 2.2 | 1.0 | 0.5 | 0.3 | |
| Coin Cell Battery - 20mm (CR2032) * | 250 | 8.3 | 5.0 | 2.3 | 1.2 | .61 | |
| Polymer Lithium Ion Battery - 400mAh | 400 | 13.3 | 8.0 | 3.6 | 1.9 | 1.0 | |
| Polymer Lithium Ion Battery - 850mAh | 850 | 28.3 | 17.0 | 7.7 | 4.0 | 2.1 | |
| Polymer Lithium Ion Battery - 1000mAh | 1000 | 33.3 | 20.0 | 9.1 | 4.8 | 2.4 | |
| Polymer Lithium Ion Battery - 2000mAh | 2000 | 66.7 | 40.0 | 18.2 | 9.5 | 4.9 | |
| Polymer Lithium Ion Battery - 6Ah | 6000 | 200.0 | 120.0 | 54.5 | 28.6 | 14.6 | |
* Note: the Coin Cell Battery is non-rechargeable.
Resources and Going Further
Need more information related to LiPo batteries and wearable projects? Check out some of these related tutorials: