LilyPad E-Sewing ProtoSnap Hookup Guide
 Gella
Gella 
Exploring the Sample Circuit
Let's try out the circuit!
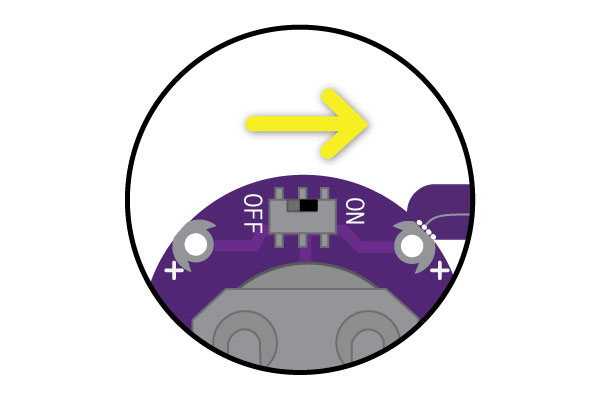
The LilyPad Battery Holder at the corner of the ProtoSnap holds a 20mm CR2032 Coin Cell Battery. With the battery installed, slide switch on the battery holder to the ON position.
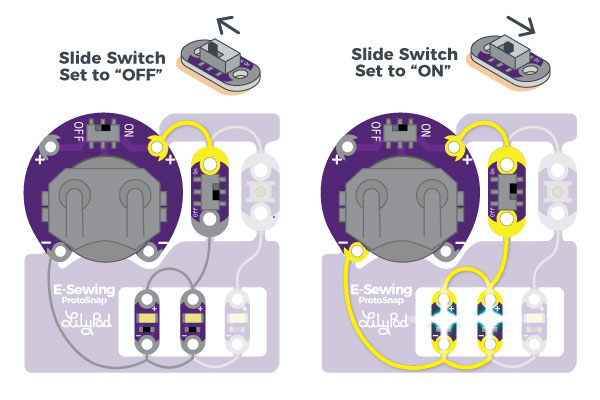
Using the LilyPad Slide Switch
The LilyPad Slide Switch has a small switch labeled ON/OFF. When moved to the OFF position, parts inside the switch move away from each other and open the circuit (disconnecting it). The LEDs will not light up. When the toggle switch is moved to the ON position, the two sew tabs on the switch are connected, allowing current to flow through and close the circuit. You should see the two LEDs below the switch light up.
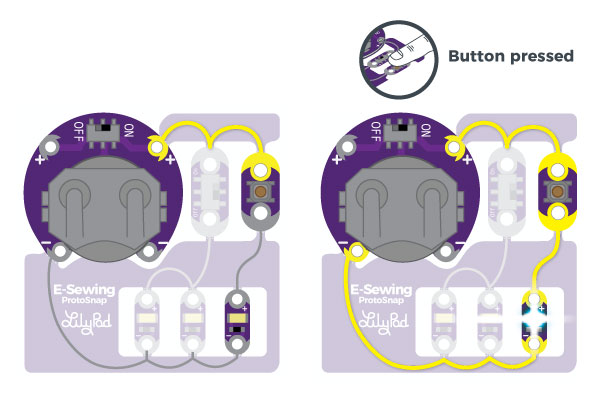
Using the LilyPad Button
The LilyPad Button Board is also a type of switch. The circuit that is connected to the far right LED is open when the button is left by itself. When you press the button in the middle of the board, it connects the two sew tabs and allows current to flow through. When you let go of the button, the connection is opened again, and the button springs back into place. This button is an example of a momentary switch – it is only active when an action is applied.
This is slightly different from the slide switch, which is an example of a maintained switch, meaning its state remains the same until changed.