LTE Cat M1/NB-IoT Shield Hookup Guide
 jimblom
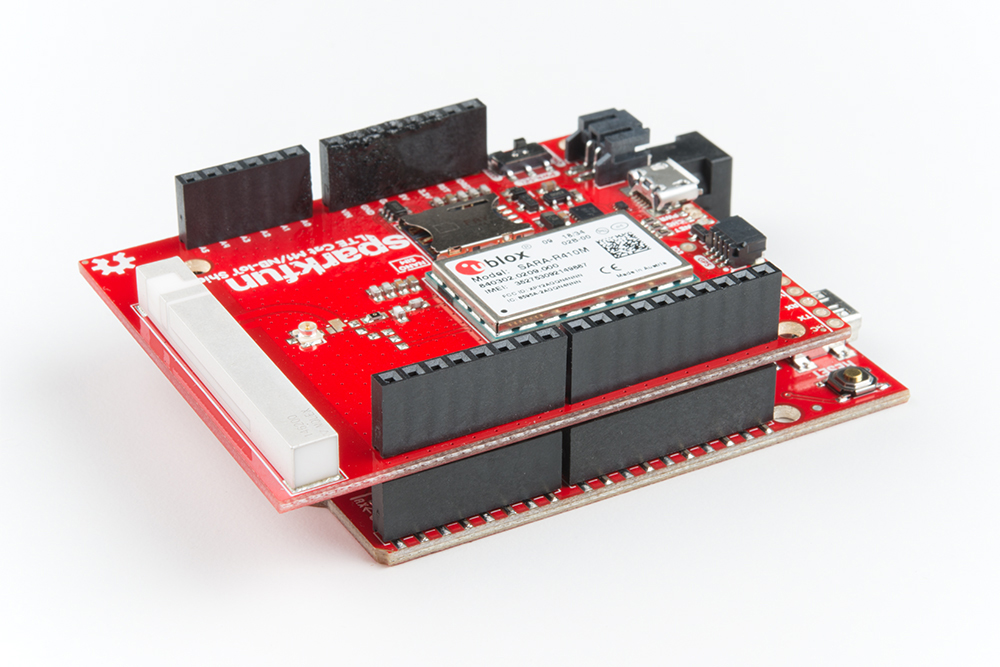
Hardware Hookup
To assemble the LTE Shield, you'll need basic soldering tools and skills. New to soldering? No worries! Check out our through-hole soldering tutorial.
How to Solder: Through-Hole Soldering
September 19, 2013
Solder on Headers
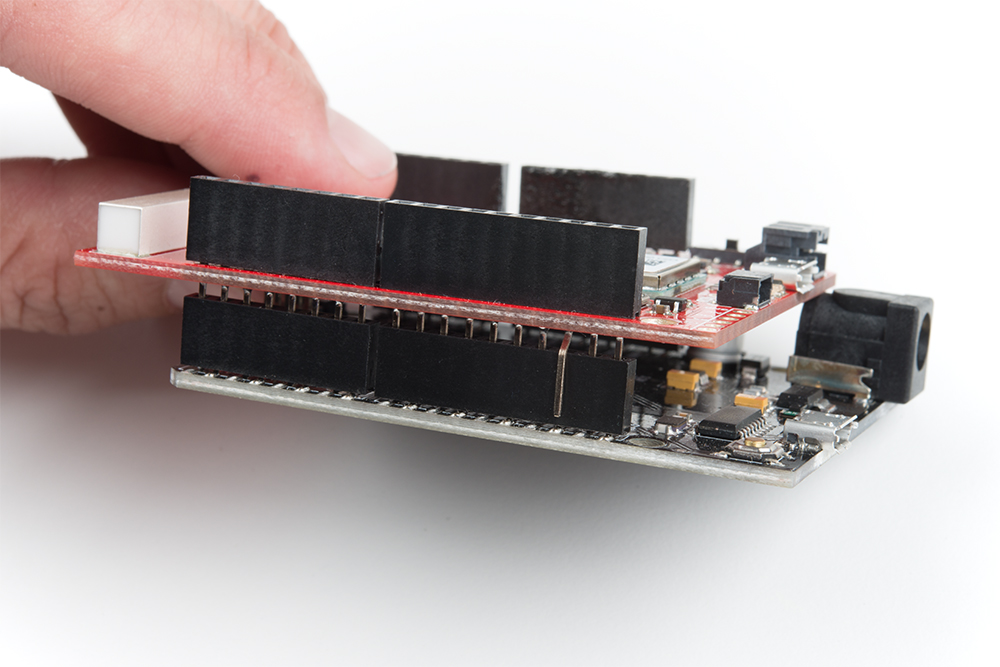
To connect the SparkFun LTE Shield to your Arduino, you'll need to solder headers into the through-hole Arduino pins. We recommend either Stackable headers -- if you want to stack more shields on top -- or male headers.
Soldering into the two 8-pin, one 6-pin, and one 10-pin header should be enough to get your shield snugly fitting and electrically connected.
Plug in a SIM Card
You'll also need to slide an activated SIM card into your shield. As you insert the SIM card, its "notch" should match the pattern on the board's silkscreen as well as that on the SIM card holder itself.
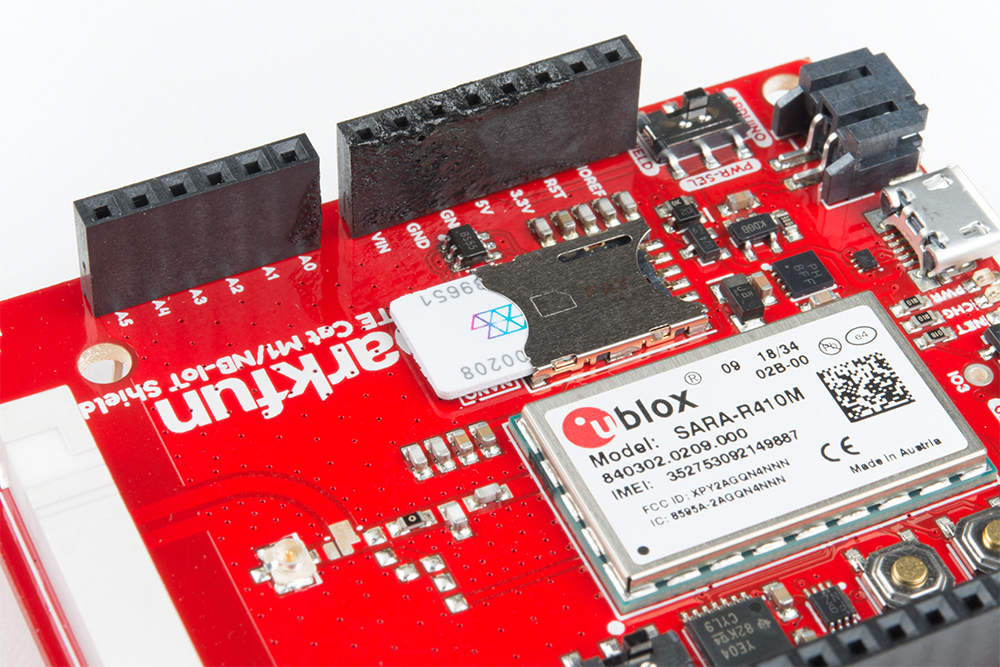
Don't forget to activate your SIM if that's required by your network provider!
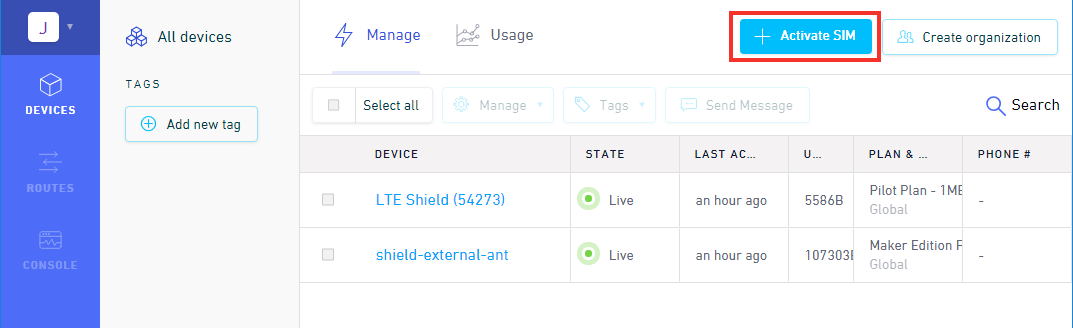
Activate Your Hologram SIM
If you're using a SIM card from Hologram, you'll need to follow a few quick steps to activate your SIM card.
- Log in to your Hologram account, or create one
- Click the blue + Activate SIM button in the upper-right-corner of your Dashboard.
- Select your plan – in most cases “Maker Flexible” is the way to go, but you can upgrade.
- Enter your SIM card’s CCID. This number can be found printed on both your nano-SIM card and in the larger digits below the bar code. Then select continue.
- Next you can decide whether to enable auto-refill or not and continue. Finally, you’ll be greeted with a summary page – hit “Activate” and you’re ready to go!
For more help activating your Hologram SIM card, check out their Connect Your Device documentation.
Supply Power
Once you've soldered on the headers, and plugged in at least a SIM card. It's time to supply power and start LTE'ing!
The shield can be powered via either an Arduino or the on-board USB or LiPo battery connectors. For the purposes of this tutorial, we'd recommend powering via Arduino.
Set the PWR_SEL switch to ARDUINO. Plug the shield into your Arduino, then plug your Arduino into your computer via USB.
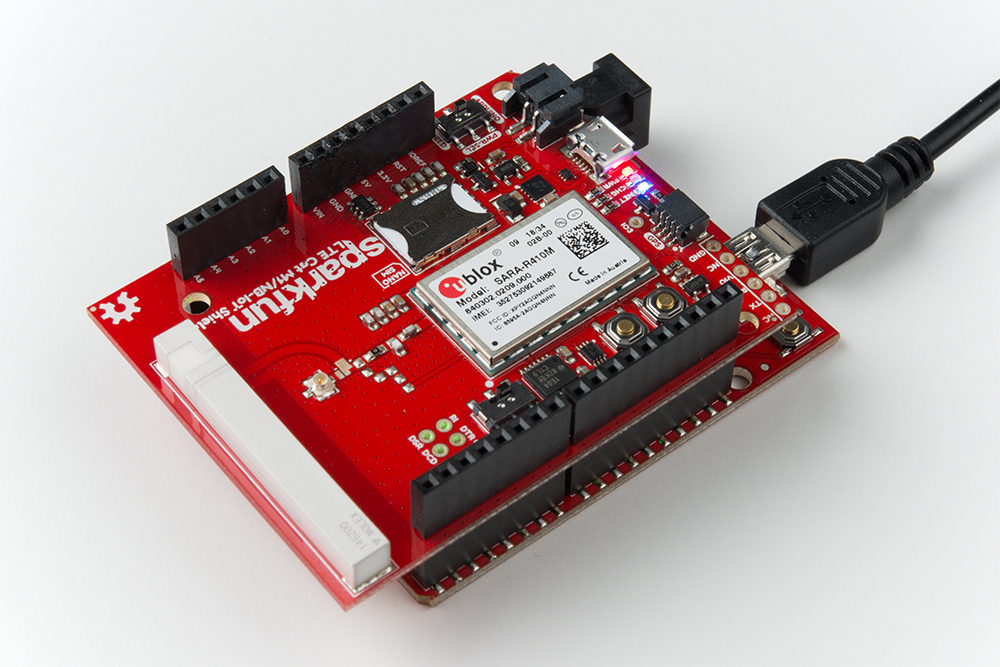
Once plugged in, you should see the shield's red PWR LED illuminate (you may also see the yellow CHG LED turn on as well -- even without a battery plugged in -- no worries.) The blue NET LED will probably not turn on yet. For that, we need to configure the shield. And for that, we need the SparkFun LTE Shield Arduino Library. Read on!