LumiDrive Hookup Guide
 Elias The Sparkiest
Python Example Code
Your LumiDrive should already come with the following Python code but in case something happens to it, than you can re-download the example code here:
If you do want to go the Arduino route, you'll need to install the FastLED library. See our LuMini Ring Hookup Guide for installation details and example code.
Before we begin, let's talk about the options for loading and updating this code on your LumiDrive. One option is to move the file main.py onto your desktop and edit it with a text editor. When you're done with it, you can simply drag and drop it back into the CIRCUITPY drive. Circuit Python will recognize the change and automatically load the new code. The other option is to edit the file directly in the CIRCUITPY drive. This option is much more convenient and efficient, but requires a text editor that writes the file completely when it's saved. On Windows not all text editors exhibit the necessary behavior. Below is a list of good, not great, and not recommended text editors for editing files directly on LumiDrive (or any Circuit Python board). If you're using a Mac then you won't be running into any of these issues.
| GOOD | GOOD only with ADD-ONS | NOT Recommended |
|---|---|---|
| MU | PYCharm IDE | Notepad/Notepad++ |
| VIM | Atom | IDLE |
| EMACS | Slick Edit | Nano |
| Sublime Text | ||
| Visual Studio Code |
My suggestion would be to use MU or Sublime Text. The first is more beginner friendly while the second is more light weight with some really nice features. If you're already familiar with VIM, EMACS, or Visual Studio Code then use those instead.
If you're attached to one of the not recommended editors then there is a way to get it to work. After you've made changes to the main.py, if you eject the CIRCUITPY drive then it will force Windows to write the saves that you made.
Let's quickly talk about which files Circuit Python monitors for saves. Circuit Python looks for the following four files in this order and runs the first one it finds: code.txt, code.py, main.txt, and main.py. That's all of it, now onto the code.
At the top of the code we have a number of libraries that are necessary for our code.
language:python
import adafruit_dotstar # Our LED library
import digitalio
import board
import math
import time
Here's where you can start to modify the code to your particular LED strip. The num_pixels variable should reflect how many LEDs you have and brightness controls the brightness. We have 60 pixels in the example because it reflects the number of LEDs of our 1m length of APA102s. Keep in mind as you set these that if you're powering through your computer, don't add too many too quickly. Otherwise you could potentially harm your computer. Below our two variables we create an instance of our library called pixels, and just below that we have some pre-defined colors.
language:python
# These two variables should be adjusted to reflect the number of LEDs you have
# and how bright you want them.
num_pixels = 60
brightness = 0.25

# This creates the instance of the DoTStar library.
pixels = adafruit_dotstar.DotStar(board.SCK, board.MOSI,
    num_pixels, brightness=brightness, auto_write=False)

# Some standard colors.
BLACK = (0, 0, 0)
RED = (255, 0, 0)
YELLOW = (255, 150, 0)
ORANGE = (255, 40, 0)
GREEN = (0, 255, 0)
TEAL = (0, 255, 120)
CYAN = (0, 255, 255)
BLUE = (0, 0, 255)
PURPLE = (180, 0, 255)
MAGENTA = (255, 0, 20)
WHITE = (255, 255, 255)

# A list of the ten colors. Use this if you want to cycle through the colors.
colorList = [RED, YELLOW, ORANGE, GREEN, TEAL, CYAN, BLUE, PURPLE, MAGENTA,
                    WHITE]
We have a number of functions to handle different LED behaviors. Each function has a little explanation commented just above it's definition.
language:python
# The travel function takes a color and the time between updating the color. It
# will start at LED one on the strand and fill it with the give color until it
# reaches the maximum number of pixels that are defined as "num_pixels".
def travel(color, wait):
    num_pixels = len(pixels)
    for pos in range(num_pixels):
        pixels[pos] = color
        pixels.show()
        time.sleep(wait)

# The travel_back function like the travel function takes a color and the time between
# updating the color. However it unlike the travel function, it will start at
# the last LED and works its way to LED. Fill the LED with the given color.
def travel_back(color, wait):
    num_pixels = len(pixels)
    for pos in range(num_pixels, 0, -1):
        pixels[pos] = color
        pixels.show()
        time.sleep(wait)

# This function may give you an idea of other functions to create. Here we're
# starting with green LEDs and then slowing filling the red color until we have
# a yellow color.
def green_yellow_wheel(wait):
    for redColor in range(255):
        color = (redColor, 150, 0)
        pixels.fill(color)
        pixels.show()
        time.sleep(wait)

# You can use this function to get a custom color value.
# value much in the form of a tuple, like the colors above.
def wheel(pos):
    # Input a value 0 to 255 to get a color value.
    # The colours are a transition r - g - b - back to r.
    if pos < 0 or pos > 255:
        return (0, 0, 0)
    if pos < 85:
        return (255 - pos * 3, pos * 3, 0)
    if pos < 170:
        pos -= 85
        return (0, 255 - pos * 3, pos * 3)
    pos -= 170
    return (pos * 3, 0, 255 - pos * 3)

# This function takes a color and a dely and fills the entire strand with that color.
# The delay is given in the case you use multiple color fills in a row.
def color_fill(color, wait):
    pixels.fill(color)
    pixels.show()
    time.sleep(wait)

# Fills the strand with two alternating colors and cycles through the 10 colors
def slice_alternating(wait):

    num_pixels = len(pixels)

    pixels[::2] = [RED] * (num_pixels // 2)
    pixels.show()
    time.sleep(wait)
    pixels[1::2] = [ORANGE] * (num_pixels // 2)
    pixels.show()
    time.sleep(wait)
    pixels[::2] = [YELLOW] * (num_pixels // 2)
    pixels.show()
    time.sleep(wait)
    pixels[1::2] = [GREEN] * (num_pixels // 2)
    pixels.show()
    time.sleep(wait)
    pixels[::2] = [TEAL] * (num_pixels // 2)
    pixels.show()
    time.sleep(wait)
    pixels[1::2] = [CYAN] * (num_pixels // 2)
    pixels.show()
    time.sleep(wait)
    pixels[::2] = [BLUE] * (num_pixels // 2)
    pixels.show()
    time.sleep(wait)
    pixels[1::2] = [PURPLE] * (num_pixels // 2)
    pixels.show()
    time.sleep(wait)
    pixels[::2] = [MAGENTA] * (num_pixels // 2)
    pixels.show()
    time.sleep(wait)
    pixels[1::2] = [WHITE] * (num_pixels // 2)
    pixels.show()
    time.sleep(wait)


# This function divides the given number of pixels and fills them as evenly as
# possible with a rainbow pattern (RED, ORANGE, YELLOW, GREEN, BLUE, PURPLE)
# which repeats every 6 LEDs.
def slice_rainbow(wait):

    num_pixels = len(pixels)

    pixels[::6] = [RED] * math.ceil(num_pixels / 6)
    pixels.show()
    time.sleep(wait)
    pixels[1::6] = [ORANGE] * math.ceil((num_pixels - 1) / 6)
    pixels.show()
    time.sleep(wait)
    pixels[2::6] = [YELLOW] * math.ceil((num_pixels -2) / 6)
    pixels.show()
    time.sleep(wait)
    pixels[3::6] = [GREEN] * math.ceil((num_pixels-3) / 6)
    pixels.show()
    time.sleep(wait)
    pixels[4::6] = [BLUE] * math.ceil((num_pixels-4) / 6)
    pixels.show()
    time.sleep(wait)
    pixels[5::6] = [PURPLE] * math.ceil((num_pixels-5) / 6)
    pixels.show()
    time.sleep(wait)


# This function makes a strand of LEDs look like a rainbow flag that travels
# along the length of the strand. It is not infinitely contniuous and will stop
# after any single LED has cycled through every color.
def rainbow_cycle(wait):
    num_pixels = len(pixels)
    for j in range(255):
        for i in range(num_pixels):
            rc_index = (i * 256 // num_pixels) + j
            pixels[i] = wheel(rc_index & 255)
        pixels.show()
        time.sleep(wait)

print("Clearing LEDs.")
color_fill(BLACK,0)
Finally we have a while loop that is akin to void loop in Arduino. Right now we have the loop blinking our blue D13 stat LED.
language:python
#Ah trusty ol' blink.
while True:
    led.value = True
    time.sleep(.5)
    led.value = False
    time.sleep(.5)
Instead, let's pick some functions from the functions above and type them in. I chose the following and gave the function its' necessary parameter: a delay time.
language:python
while True:
    rainbow_cycle(0)
After you've modified the code, just hit save (assuming you have the correct text editor for saving directly on LumiDrive) and the code will automatically run. If all is well you should see the following:
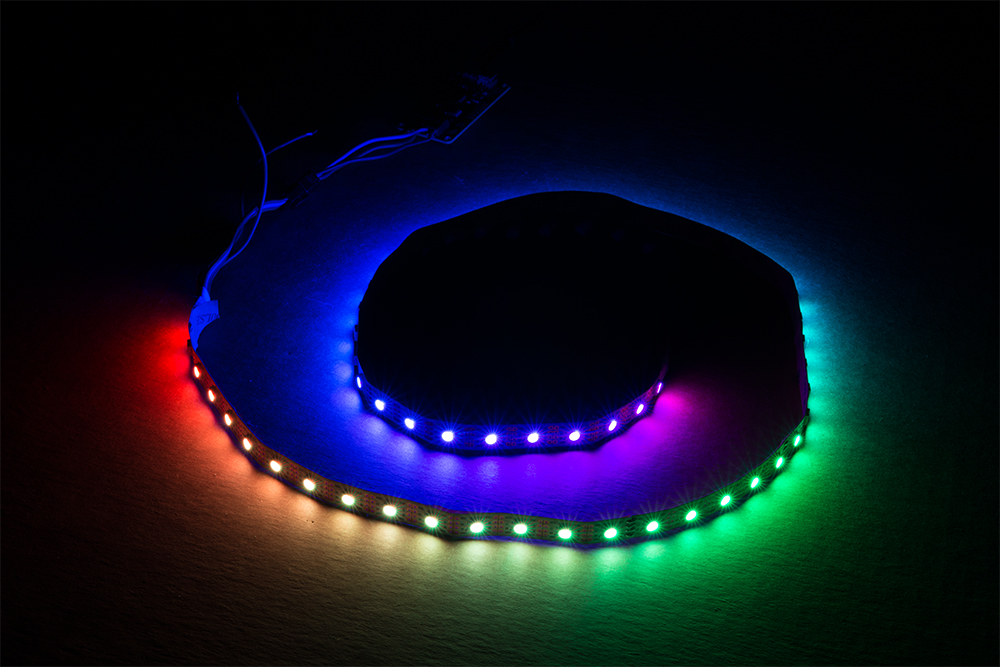
Algebraic!
Using the 3 inch LuMini ring, and a couple other functions.