mbed Starter Kit Experiment Guide
This Tutorial is Retired!
This tutorial covers concepts or technologies that are no longer current. It's still here for you to read and enjoy, but may not be as useful as our newest tutorials.
 Shawn Hymel
Experiment 10: Hardware Soundboard
In the final tutorial of our 10-part series, we will make a hardware soundboard using our mbed. We will store some .wav files on an SD card and play one whenever a button is pressed. You could use it to interject hilarious comments into any conversation!

Suggested Reading
The Circuit
This circuit can be made with parts in the SparkFun mbed Starter Kit. Also, keep in mind that the LPC1768 box contains a USB mini-B cable for programming and power.
Parts List
To follow this experiment, you would will need the following materials if you did not order the SparkFun mbed starter kit. You may not need everything though depending on what you have. Add it to your cart, read through the guide, and adjust the cart as necessary. The experiment will be using 1x 330Ohm resistor.
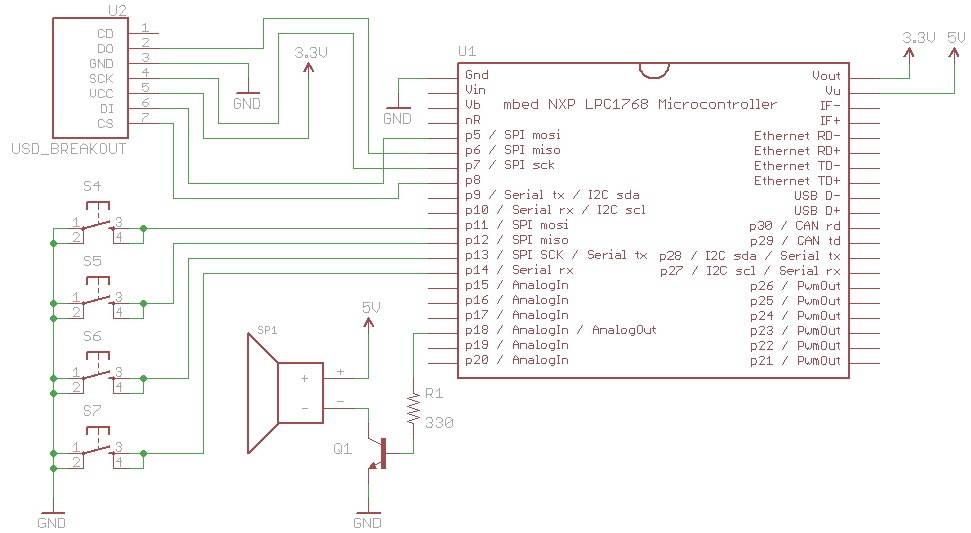
Schematic
Connections
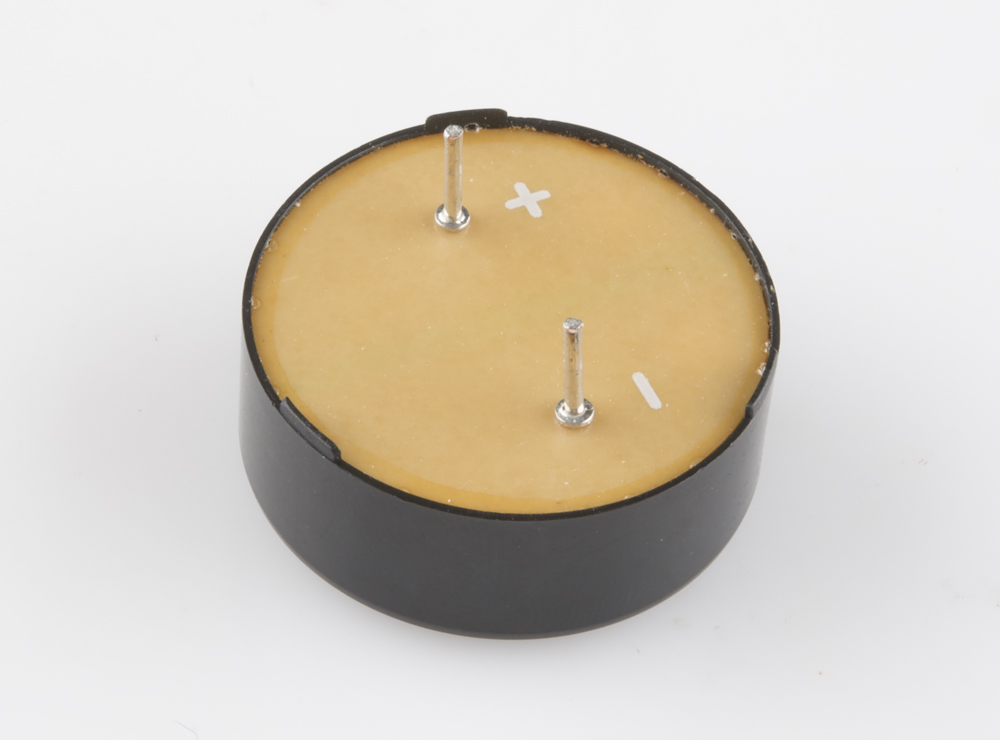
Connect a digital-to-analog (DAC) pin of the mbed (pin 18, in this case) to a 330 Ω resistor and connect that resistor to the base of an NPN transistor (2N3904). Connect the emitter of the transistor to ground and the collector to the negative (-) side of the speaker. The positive side of the speaker should be attached to +5V (the VU pin on the mbed). Note that the +/- markings can be found on the underside of the speaker (there are no wires on the speaker like in the Fritzing diagram).
To hook up the buttons, connect one side of each pushbutton to ground and the other to pins 11, 12, 13, and 14 of the mbed.
| Polarized Components | Pay special attention to the component’s markings indicating how to place it on the breadboard. Polarized components can only be connected to a circuit in one direction. Polarized components are highlighted with a yellow warning triangle in the table below. |
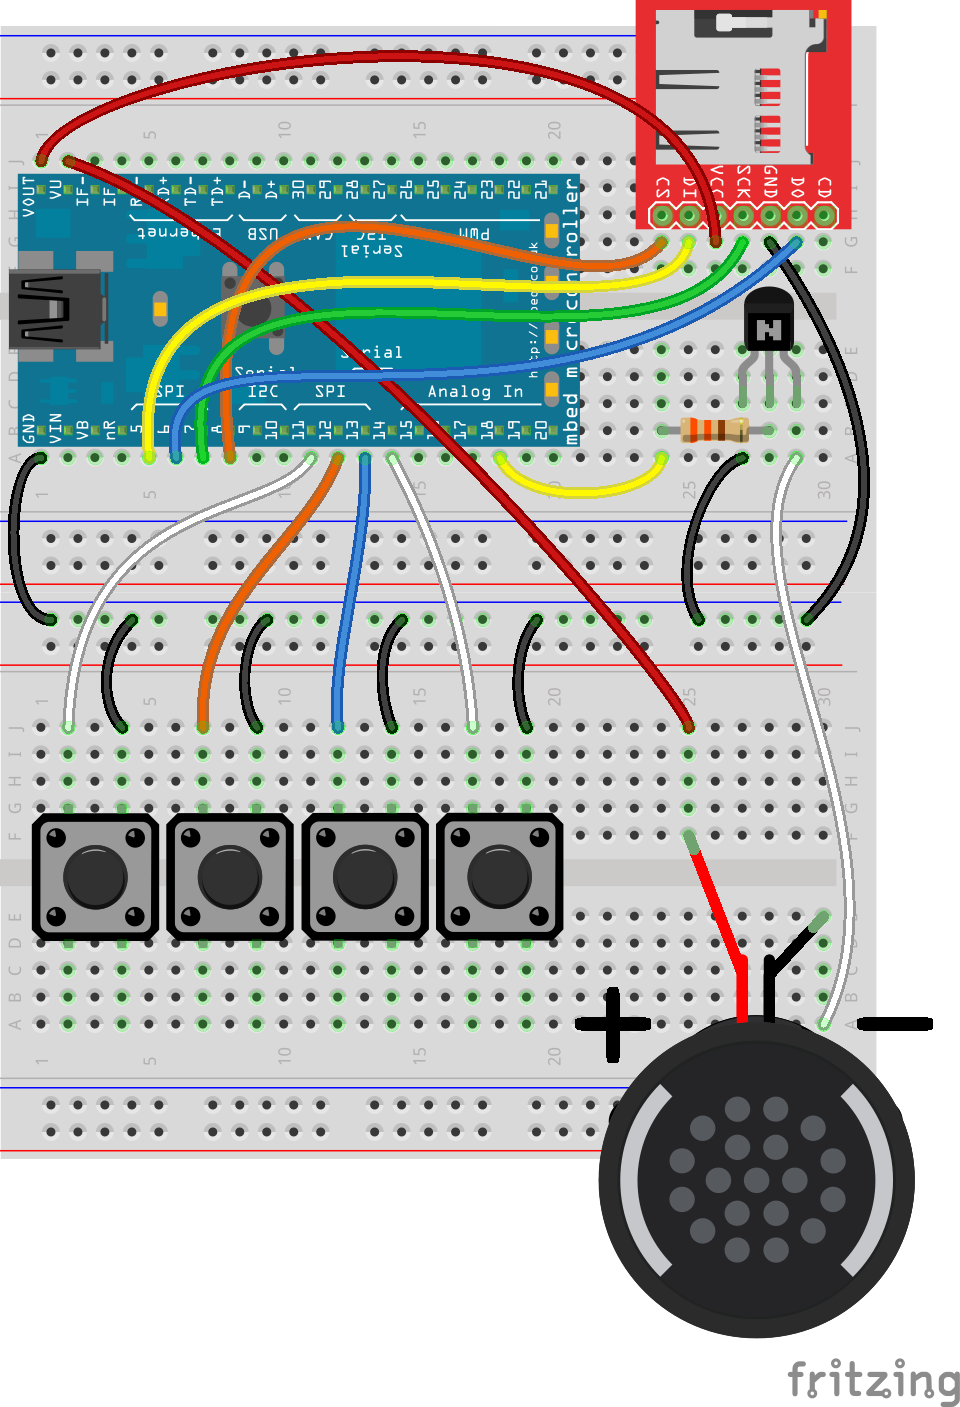
Fritzing Diagram
Hookup Table
Place the LPC1768 in the first breadboard with pin VOUT in position i1 and pin 20 in position b20.
Connect the rest of the components as follows:
| Component | Breadboard 1 | Breadboard 2 | ||||||||
|---|---|---|---|---|---|---|---|---|---|---|
| MicroSD Transflash Breakout* | h24 (CS) | h25 (DI) | h26 (VCC) | h27 (SCK) | h28 (GND) | h29 (DO) | ||||
| Transistor - NPN (2N3904) | c27 (E) | c28 (B) | c29 (C) | |||||||
| 330 Resistor | b24 | b28 | ||||||||
| Pushbutton | d2 | d4 | g2 | g4 | ||||||
| Pushbutton | d7 | d9 | g7 | g9 | ||||||
| Pushbutton | d12 | d14 | g12 | g14 | ||||||
| Pushbutton | d17 | d19 | g17 | g19 | ||||||
| Speaker | f25 (+) | e30 (-) | ||||||||
| Jumper Wire | j1 | g26 | ||||||||
| Jumper Wire | a1 | ( - ) | ||||||||
| Jumper Wire | a5 | g25 | ||||||||
| Jumper Wire | a6 | g29 | ||||||||
| Jumper Wire | a7 | g27 | ||||||||
| Jumper Wire | a8 | g24 | ||||||||
| Jumper Wire | g28 | ( - ) | ||||||||
| Jumper Wire | a18 | a24 | ||||||||
| Jumper Wire | a27 | ( - ) | ||||||||
| Jumper Wire | a29 | a30 | ||||||||
| Jumper Wire | j2 | j25 | ||||||||
| Jumper Wire | a11 | j2 | ||||||||
| Jumper Wire | ( - ) | j4 | ||||||||
| Jumper Wire | a12 | j7 | ||||||||
| Jumper Wire | ( - ) | j9 | ||||||||
| Jumper Wire | a13 | j12 | ||||||||
| Jumper Wire | ( - ) | j14 | ||||||||
| Jumper Wire | a14 | j17 | ||||||||
| Jumper Wire | ( - ) | j19 | ||||||||
* Pins not listed are not used.
Tips
Transistor
Make sure you are using the 2N3904 transistor and not the temperature sensor! Note that the flat edge of the transistor is facing down in the Fritzing diagram.
Speaker
Notice that the speaker has the positive (+) and negative (-) pins labeled on the underside. The speaker will fit directly on the breadboard, as the Fritzing diagram has been modified to show where the speaker should be plugged in (otherwise it would cover up the rest of the components in the picture!).
Place the positive (+) terminal of the speaker into hole f25 of the breadboard and the negative (-) terminal into hole e30. The speaker will be angled across the breadboard, but it will leave enough room for wires to be plugged into j25 and a30.
The Code
For our soundboard, we need to read files from an SD card, which means using the SDFileSystem again. Additionally, we want to add another library that allows us to play .wav files.
Libraries
Navigate to the mbed.org, login, and navigate to your Compiler.
Create a new program with the "Blinky LED Hello World" template. Name it something like "soundboard."
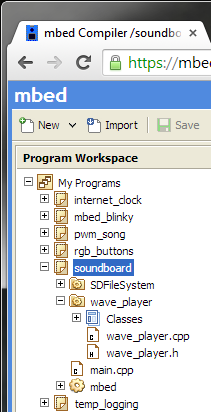
Navigate to the following pages and import each library into your "soundboard" program.
The libraries should appear in your soundboard project.
Program
Click on "main.cpp" in your project, remove the template code, and copy in the following code.
language:c
// Soundboard that plays 1 of 4 .wav files stored on the SD card based on 1 of
// 4 buttons pressed

#include "mbed.h"
#include "wave_player.h"
#include "SDFileSystem.h"

// .wav files to play
const char *filenames[4] = { "/sd/good_morning.wav",
                             "/sd/questions.wav",
                             "/sd/lack_discipline.wav",
                             "/sd/stop_whining.wav"};

// Define buttons
DigitalIn button_1(p11);
DigitalIn button_2(p12);
DigitalIn button_3(p13);
DigitalIn button_4(p14);

// USB serial (tx, rx)
Serial pc(USBTX, USBRX);

// SD card
SDFileSystem sd(p5, p6, p7, p8, "sd");

// Audio out (DAC)
AnalogOut       DACout(p18);
wave_player     waver(&DACout);

// Play a .wav file
int playSound(int file_num) {

    FILE *file;

    // Open sound file for reading
    file = fopen(filenames[file_num], "r");
    if ( file == NULL ) {
        error("ERROR: Could not open file for reading!\n");
        return -1;
    }

    // Play the sound file
    pc.printf("Playing sound clip %i\r\n", (file_num + 1));
    waver.play(file);

    // Reset to beginning of file and close it
    fseek(file, 0, SEEK_SET);
    fclose(file);

    return 0;
}

int main() {

    // Use internal pull-up resistors
    button_1.mode(PullUp);
    button_2.mode(PullUp);
    button_3.mode(PullUp);
    button_4.mode(PullUp);

    pc.printf("\r\nHardware Soundboard\r\n");

    while(1) {

        // Figure out which button was pressed and play that file
        if ( button_1 == 0 ) {
            playSound(0);
        }
        if ( button_2 == 0 ) {
            playSound(1);
        }
        if ( button_3 == 0 ) {
            playSound(2);
        }
        if ( button_4 == 0 ) {
            playSound(3);
        }

        // Wait 10ms before sampling the buttons again
        wait(0.01);
    }
}
Run
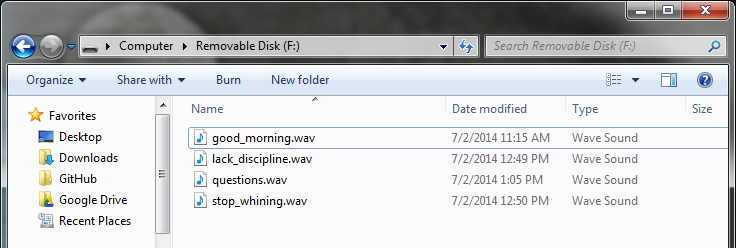
Insert the micro SD card into the USB to micro SD card adapter and insert the USB adapter into your computer. Copy the following .wav files to the SD's root directory:
Remove the SD card from your computer and plug it into the breakout board on the soundboard project.
Compile the program and copy the downloaded file to the mbed. Press the mbed's reset button to start running the program. Press one of the 4 buttons to hear a sound clip!

Concepts
This project was larger than the others before it. There are a number of things going on, but most of them we covered in previous tutorials.
Amplifier
In addition to adding a speaker to play sounds, we created a very simple amplifier to increase the signal strength (and the volume). We used an NPN transistor (specifically, a 2N3904) that converts a small current through its base into a larger current through its collector. If we tried to power the speaker directly from the mbed's pin, we would likely draw enough power to hurt the processor. Audio amplifiers can be quite complex. Read more about them here.
Internal Pull-ups
When we used buttons in previous tutorials, we used external pull-up resistors on the buttons to prevent a floating pin. In order to save board space for this project, we used mbed's internal pull-ups. These are resistors internal to the mbed processor and can be enabled for each of the pins with the following line of code:
pin_name.mode(PullUp);
Going Further
In this demo, we combined many concepts to create a fun project. We made a simple amplifier to play sounds and relied on the wave_player library to read .wav files. Adding sound to a project can add a layer of interactivity and bring it to life.
Beyond the Tutorial
- Download or create your own .wav files and play them using our soundboard. Note: you might have to use an editing program like Audacity to convert sound clips into .wav files if they do not play on the mbed.
- Add lights! Program some LEDs to flash whenever a clip is being played.
- You might need some extra components not found in the kit, but can you get a sound recorder to work on the mbed? (Hint: see the Simple Wave Recorder & Player library)
Digging Deeper
- Read about the internals of a WAVE file
- Look into how analog-to-digital converters (ADC) work
- Want to talk to your mbed with voice recognition? Check out Jim Hamblen's EasyVR tutorial
The End!
This demo finishes up our 10-part series on the mbed. We covered a number of topics that are considered important to embedded systems: buttons, LEDs, GPIO, ADC, DAC, interrupts, SPI, I2C, UART, etc. You had the opportunity to search for libraries on mbed.org, import them into your program, and run some basic firmware on the LPC1768. By now, you have had a good exposure to the building blocks of embedded programming on the mbed and should be ready to tackle your first project.
Make something cool! Take a picture of it and tag @sparkfun or @mbedmicro on Twitter. Or, post your project to the mbed.org Cookbook.