MiniMoto DRV8830 Hookup Guide
This Tutorial is Retired!
This tutorial covers concepts or technologies that are no longer current. It's still here for you to read and enjoy, but may not be as useful as our newest tutorials.
 SFUptownMaker
 Introduction
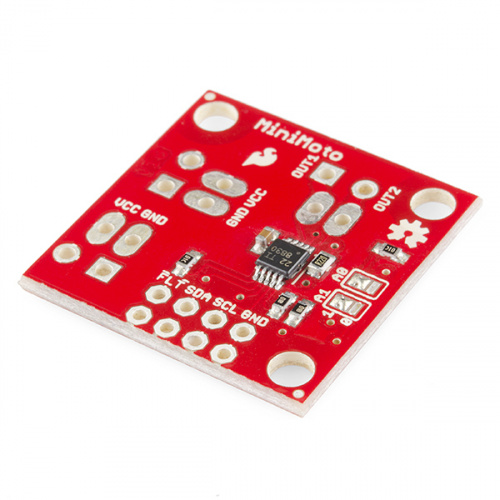
SparkFun's MiniMoto board is an I2C-based DC motor driver. It's designed to be used in a system with up to 8 additional MiniMotos, all on the same data lines.
In addition to the benefit of being controlled via I2C, which frees up data lines and processing on the CPU to be used for other tasks, the MiniMoto has the lowest voltage output capability of any current SparkFun DC motor driver -- 2.7V. This means that low voltage systems running on single-cell LiPo batteries can use the MiniMoto, and low voltage motors (such as those which ship with Tamiya gearbox products) can be used with the MiniMoto.
Before You Begin...
You might want to review some of these documents before you get started, since familiarity with these topics will be assumed for the rest of the tutorial.
- What is an Arduino? - We'll be using the Arduino environment to demonstrate the MiniMoto.
- Installing the Arduino IDE - If you don't have the Arduino software installed, this guide will help you out.
- Installing an Arduino Library - To get the most out of the MiniMoto, you'll want to install our MiniMotolibrary. This tutorial will show you how.
- Pulse width modulation (PWM) - The MiniMoto uses PWM to control the speed of the motors. It's probably a good idea to be familiar with the concept.
- I2C - The MiniMoto uses I2C to communicate with its controlling CPU. While the MiniMoto is accessible through the library with no knowledge of I2C required, if you want to get more out of it, you can check out this tutorial.