Night-Light Pennant with LilyMini ProtoSnap
 Gella
Gella 
Planning Your Project
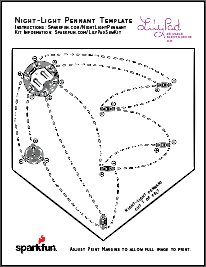
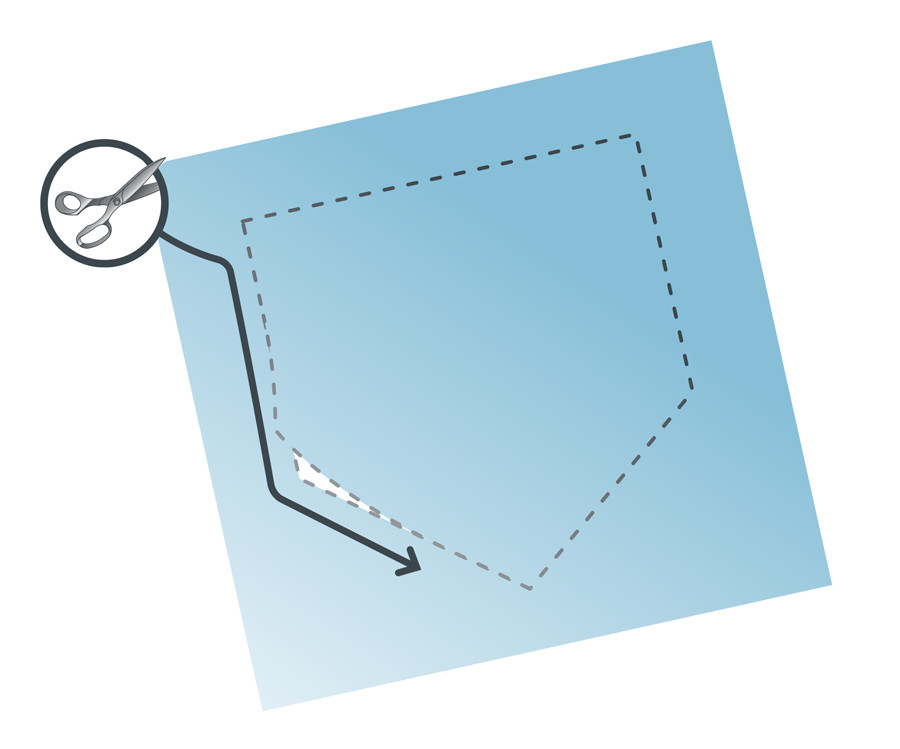
Follow along with the circuit diagram on the template, or design your own layout and shape on a piece of paper. Trace onto the felt, and cut. We’ll add the LilyMini and the pieces from the ProtoSnap to a customized pennant to hang on a wall or sew into a project.
Working With ProtoSnap
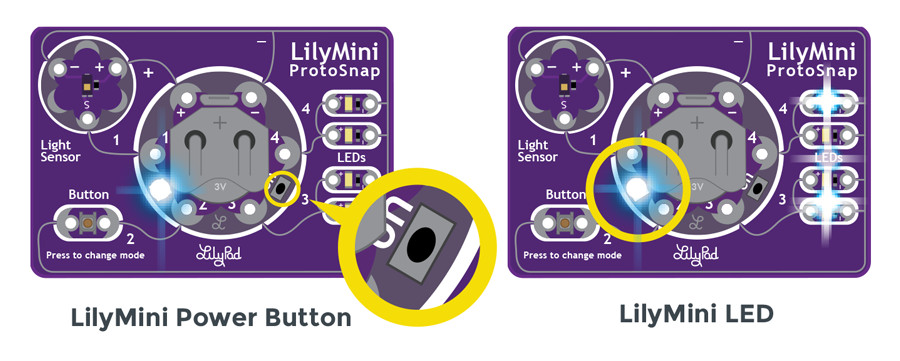
Like other LilyPad ProtoSnap boards, the LilyMini ProtoSnap has all of its pieces wired together, enabling you to test the circuit’s function before you sew.
The LilyMini board has a small push button to turn it on/off, located between sew tabs 3 and 4. With the battery installed, press and release the button quickly to start up the LilyMini. The LED on the LilyMini (between sew tabs 1 and 2) will turn green when it is on and the battery has a charge, or it will turn red if the battery is getting low, then fade off. To power down the LilyMini, press the button again.
Once powered, the LEDs on the ProtoSnap should all be on, and the LilyMini’s LED will glow white (Mode 1). Press the LilyPad Button to cycle through modes, which use the light sensor to affect the behavior of the LEDs. Use your hand to cover the light sensor, and observe what happens to the two pairs of LEDs – when the light level is low, the behavior of the LEDs changes. Press the button again to switch to the next mode.
LilyMini ProtoSnap Modes
| Mode | Color | Behavior |
|---|---|---|
| 1 | White | All LEDs on. |
| 2 | Magenta | LEDs fade in and out in a breathing pattern. When the light sensor is covered, LEDs fade faster. |
| 3 | Cyan | LEDs off. When the light sensor is covered, LEDs will twinkle. |