Nintendo Switch Macro Recording on the Raspberry Pi
 PNP Marcus
How to Use Joycontrol
To run the program and connect to your Nintendo Switch, open the “Change Grip/Order” menu on the Switch, and cd into joycontrol-ms and type the following command:
language:bash
Sudo python3 ./run_controller_cli.py PRO_CONTROLLER

Provided that you have set everything up properly, you should see a controller connect to your Switch.
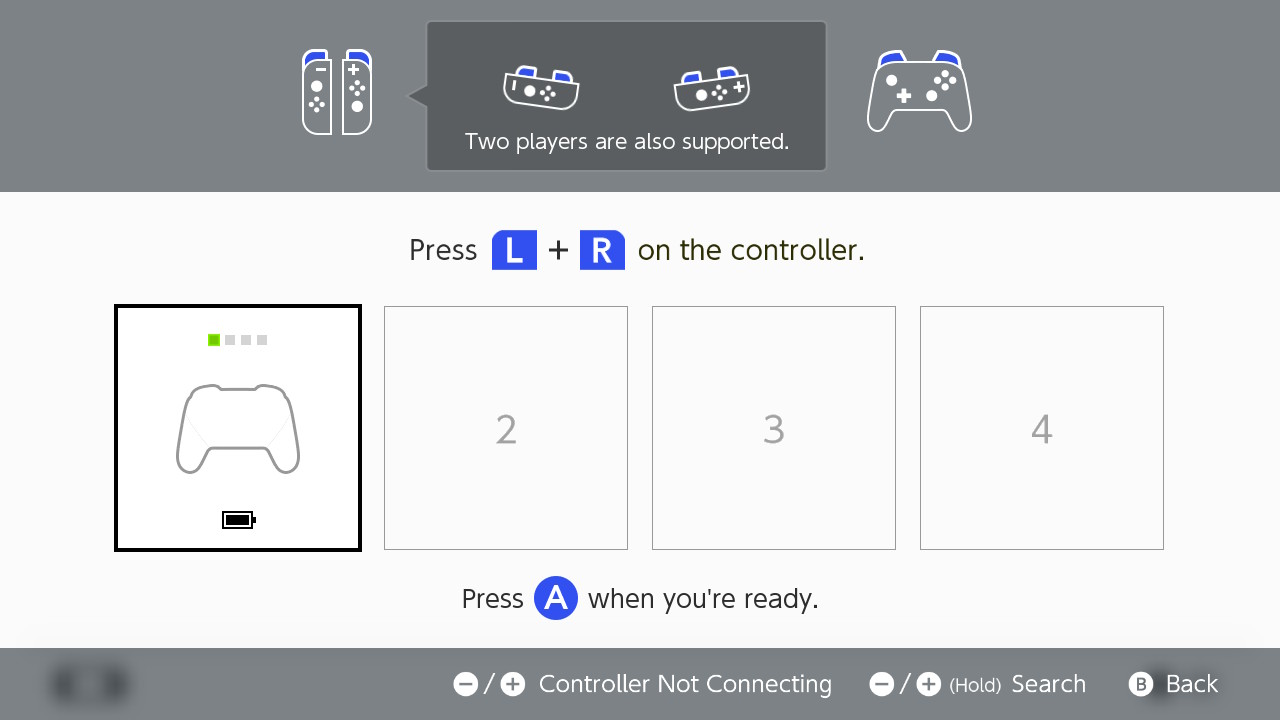
A bunch of info will be printed out to your terminal on the Pi. This can sometimes take a moment or two, but eventually you’ll see “cmd>>” printed in in the terminal. At this point, you’re connected and ready to input commands into the CLI. first try:
cmd>> a
Press enter and wait until the Switch responds. The first few button presses can take a moment to take hold, so be patient and wait for a response even if you see the “cmd>>” prompt. Once your first “A” command is recognized, you will return to the Controllers menu. If you send too many “A” commands, you will immediately re-enter the “change grip/order” screen and the Pi will be disconnected from the switch. If this happens, just use sudo python3 ./run_controller_cli.py PRO_CONTROLLER again to reconnect.
Once you’re back on the Nintendo Switch home screen, type help into the CLI and hit enter. This will show all the available commands and their descriptions, but you may not be able to read the whole thing unless you use your keyboard’s directional arrows to scroll back.
Here are all the commands:
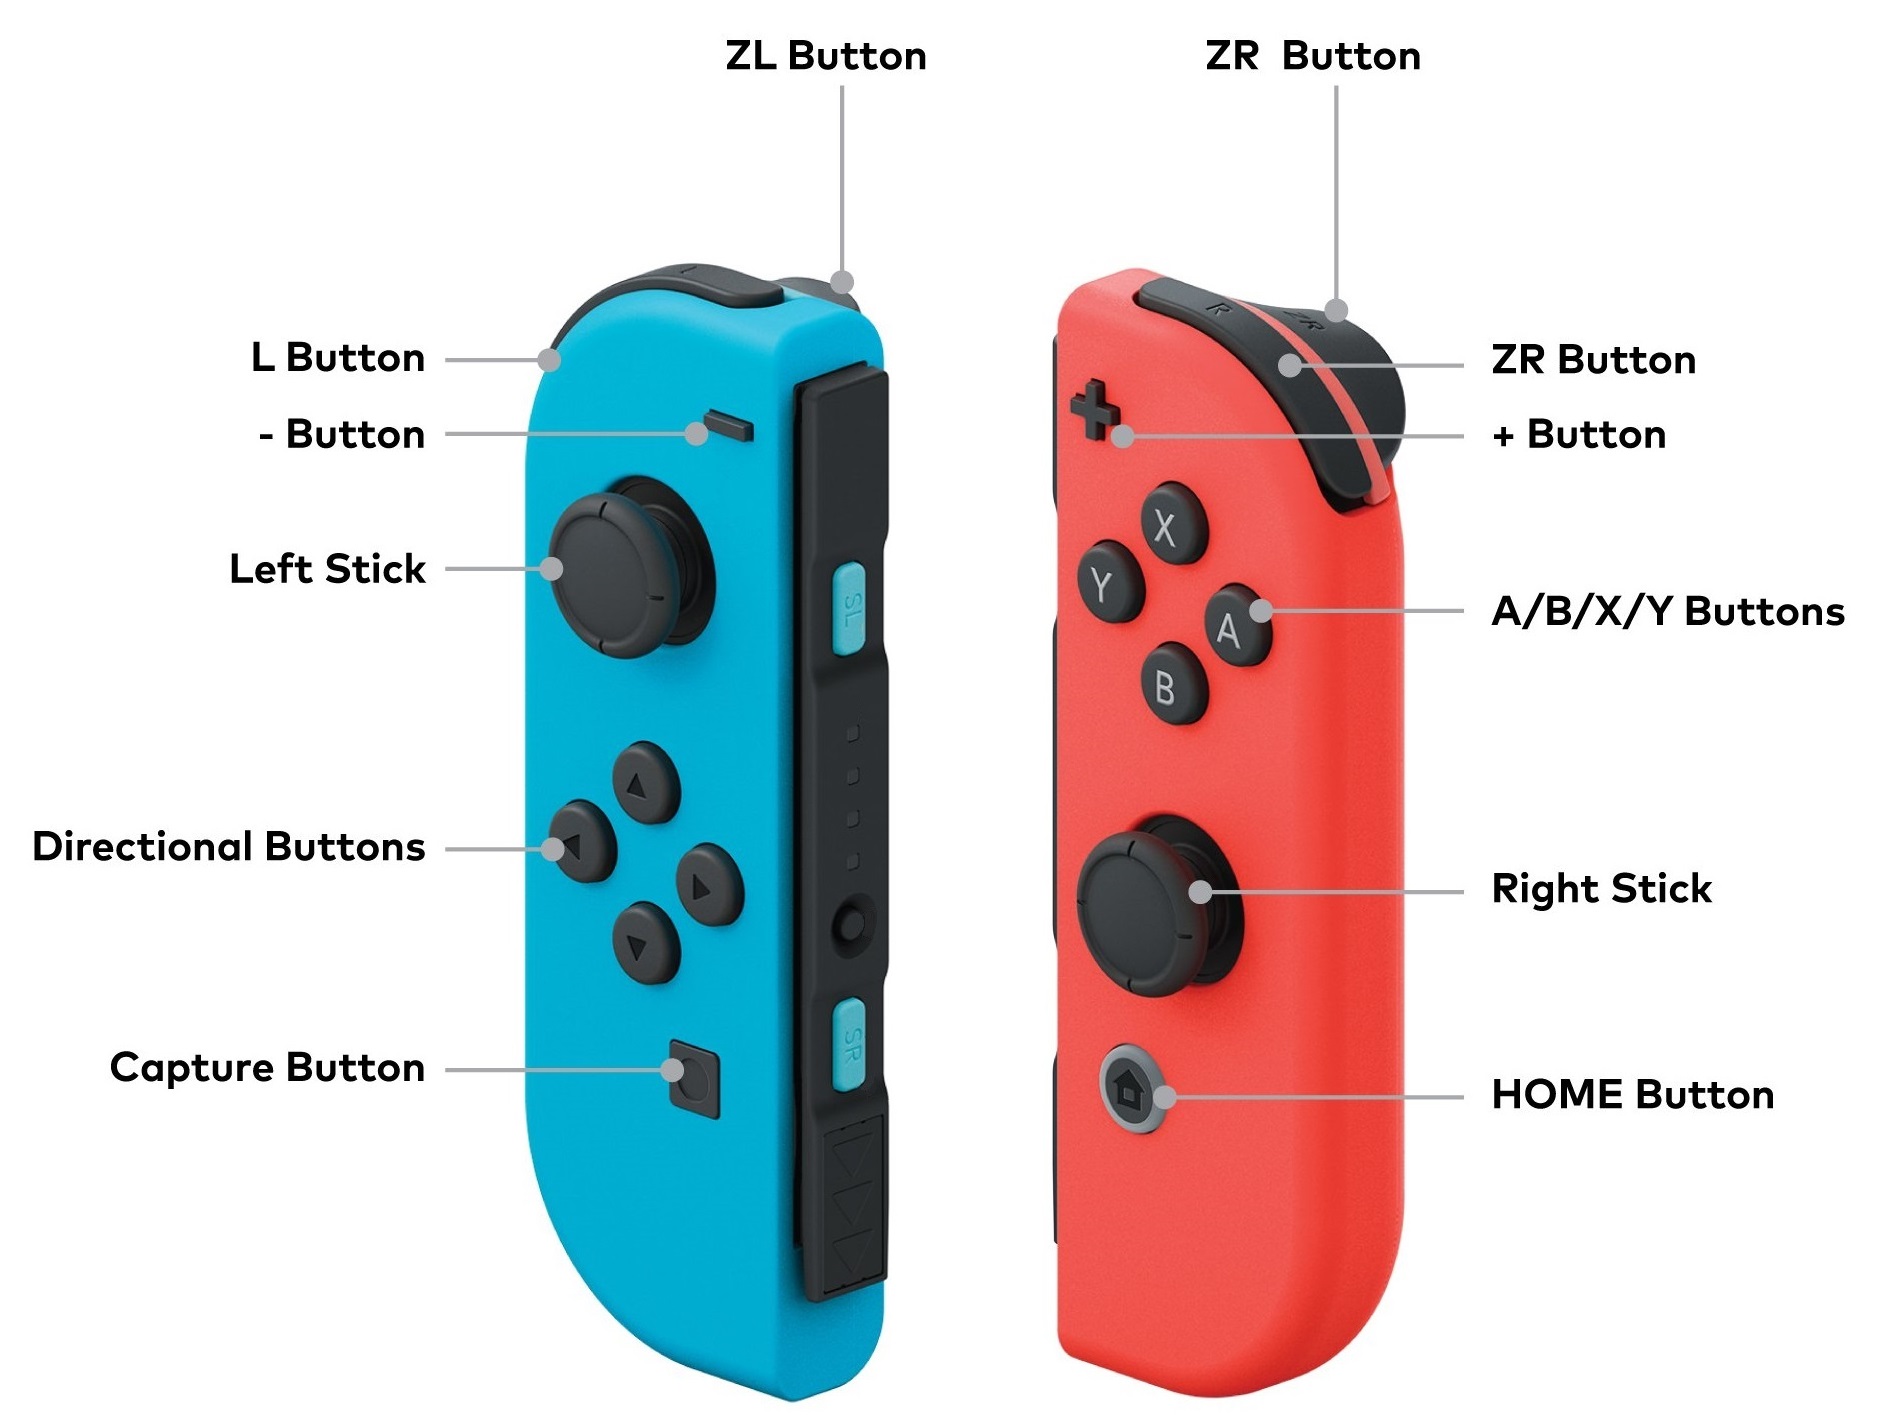
Button commands:
Commands:
stick - Command to set stick positions
- :param side: 'l', 'left' for left control stick; 'r', 'right' for right control stick
- :param direction: 'center', 'up', 'down', 'left', 'right'; 'h', 'horizontal' or 'v', 'vertical' to set the value directly to the "value" argument
- :param value: horizontal or vertical value
test_buttons - Navigates to the "Test Controller Buttons" menu and presses all buttons
keyboard - binds controls to keyboard
- recording - binds controls to keyboard, and records input until recording is stopped. Saved recordings can be replayed using
cmd >> recording_playback
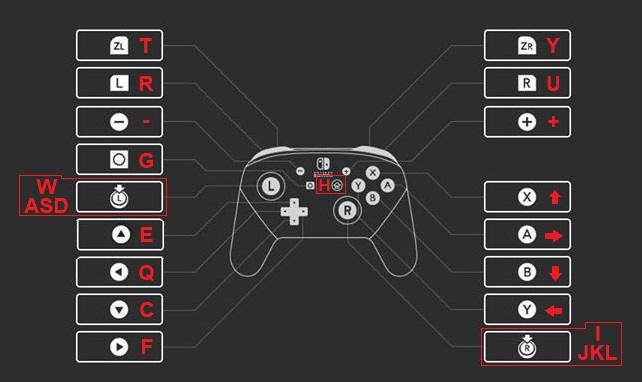
| Key Bindings for Keyboard and Recording | ||
|---|---|---|
| q = LEFT | f = RIGHT | g = capture |
| w = LStickUP | i = RStickUP | h = home |
| a = LStickLEFT | j = RStickLEFT | e = UP |
| s = LStickDOWN | k = RStickDOWN | c = DOWN |
| d = LStickRIGHT | l = RStickRIGHT | up = X |
| t = L | y = R | down = B |
| r = ZL | u = ZR | plus = + |
| left = Y | right = A | minus = - |
- playback - select a saved recording and replay it
- delete_rec - select a saved recording and delete it
- mash - Mash a specified button at a set interval
- Usage: mash <button> <interval>
- nfc - Sets nfc content
- Usage:
- nfc <file_name>: Set controller state NFC content to file
- nfc remove: Remove NFC content from controller state
- Usage:
Starting with the basics, you can emulate the press of any individual button by simply typing in the label for that button and pressing enter. For example:
cmd>> x
cmd>> y
cmd>> plus
cmd>> capture
cmd>> zl
You can chain multiple button presses together using “&&”:
cmd>> zl&&zr
cmd>>left&&left&&left&&a
The joysticks are less convenient to use via the CLI, but you can set them like so:
cmd>> stick left right
This command sets the left joystick to its furthest “right” position. It will stay in this state until you reset the joystick to the neutral ‘center’ position by sending the command:
cmd>> stick left center
You can “mash” a single button until you choose to stop by using the command:
cmd>> mash a 5
This presses the “a” button every 5 seconds until you hit
Macro Recording
While all these cli commands are fun to play around with, they don’t quite provide the functionality that I’m looking for. I went ahead and added a few more commands that allow you to control the Switch directly by binding the controls to the keyboard, to record this keyboard control, to play it back like a macro, and to delete unwanted macros. Macros persist after exiting each Joycontrol session.
First, to control your Nintento Switch using the keyboard attached to your pi, use the command:
cmd>> keyboard
You will be prompted to press < enter > to bind the keyboard to the controller. To stop using the keyboard control, press < enter > again. The Keybinding is as follows:
To record a macro, use the command:
cmd>> recording
You will be prompted to type in the name of the recording so you can replay it later. After you press enter, Joycontrol will begin recording the input you enter as you control the switch using the keyboard control (the keybinding is the same as the “keyboard” command). To stop recording, press 
To play back a recorded macro, use the command:
cmd>> playback
After you send the playback command, you will be prompted to type in the name of the macro you want to replay. The saved macros (if there are any) will be listed. While you are playing back recorded macros, the leds on the HAT should be green.
There should be one macro already present named ‘mario’. This macro beats world 1-1 of the original Super Mario Bros game. If you have the NES virtual console installed on your switch, you can try out this macro yourself by navigating to the NES, picking Super Mario Bros, and pressing “plus” to start the game. Once you’ve started world 1-1, use the playback command and select ‘mario’. You should see Mario traverse the iconic first level of the game. The timing can be tricky, though. If you move Mario before starting the macro, the playback will be mis-timed and mario will die or get stuck in a corner until the macro finishes playing.

Finally, you can delete macros you don’t want any more with the command:
cmd>> delete_rec
You will be prompted to type in the name of the macro you want to delete. While the delete_rec prompt is open, the leds on the HAT should light up blue.

In the next section, we will further explore how we can use the various features of Joycontrol-ms to "play" Animal Crossing: New Horizons.