Nintendo Switch Macro Recording on the Raspberry Pi
 PNP Marcus
OS Configuration and Joycontrol-ms Installation
If you have already set up and configured your Pi for the Top pHAT, you can skip this step. These instructions are the same as OS Configuration part 1, WS2812B LED’s, 2.4” TFT Display, and OS Configuration part 2, from the SparkFun Top pHAT Hookup Guide. Because this project doesn’t use all of the features on the HAT, you can get away with only completing these setup steps if you’re in a hurry.
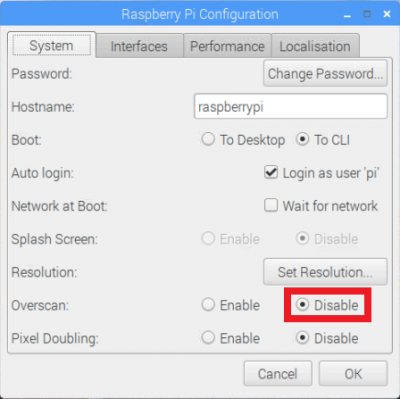
First, disable overscan by clicking on the Raspberry logo > Preferences > Raspberry Pi Configuration.

Next, click into the "interfaces" tab, and enable the SPI and I2C interfaces.
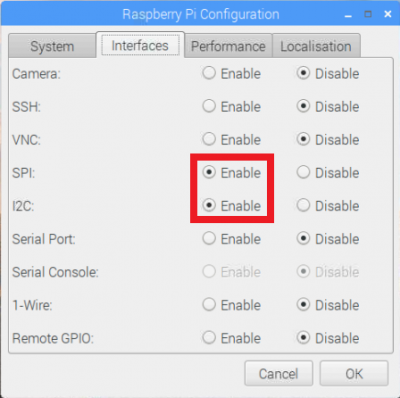
Now you can click ok, but don't reboot the Pi yet. We will return to the Raspberry Pi Configuration window later and reboot then.
Now we need to install the Adafruit Neopixel python package because the project utilizes the onboard adressable LEDs. Open a terminal and copy the following command into the window, and press enter.
language:bash
sudo pip3 install adafruit-circuitpython-neopixel
Next, in order to use the 2.4" TFT display, we need to add the driver modules and a module configuration. In your terminal, copy and paste the following and hit enter:
language:bash
sudo nano /etc/modules
When nano opens, copy and paste the following to the end of the file:
language:bash
spi-bcm2835
fbtft_device
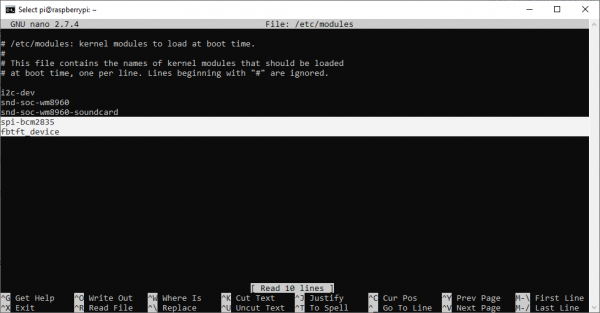
Now, press Ctrl+X to exit, Y to accept changes, and Enter to write the changes and exit nano. You'll then need to repeat this process for the module configuration. In your terminal, copy/paste:
language:bash
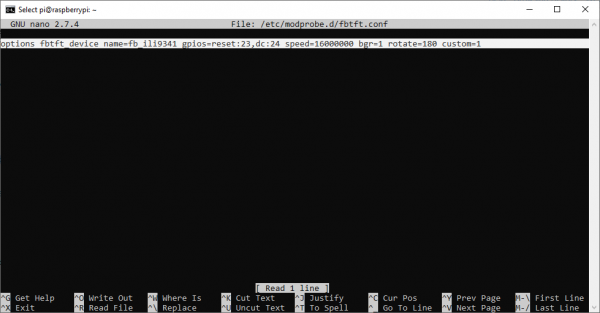
sudo nano /etc/modprobe.d/fbtft.conf
Once nano is open (this time the screen will appear mostly blank), copy and paste the following, then exit and save changes.
language:bash
options fbtft_device name=fb_ili9341 gpios=reset:23,dc:24 speed=16000000 bgr=1 rotate=180 custom=1
Again, press Ctrl+X to exit, Y to accept changes, and Enter to write the changes and exit nano.
Next, we can go ahead and install the dependencies for Joycontrol-ms, of which there are three. All you need to do here is copy/paste the following commands into your terminal.
language:bash
sudo apt install python3-dbus libhidapi-hidraw0
sudo pip3 install keyboard
Once that is completed, you can cd into the directory where you'd like to install joycontrol-ms, and clone the repo there. I cloned mine to the desktop.
language:bash
cd Desktop
git clone https://github.com/marcus-stevenson/joycontrol-ms.git
Then, cd into Joycontrol-ms and run:
language:bash
sudo pip3 install .
Phew! Everything should be set up now. All there is left to do is to return to the Raspberry Pi Configuration window and select "boot to CLI":
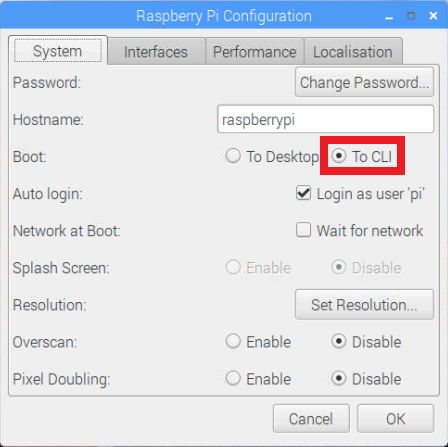
NOW you can reboot your Pi. This is also a good time to disconnect the HDMI display as we will be using the Top pHAT display from here onward for convenience. I recommend fully shutting down instead of rebooting for this purpose. (if you were to replace your power cable with a battery pack, this project could be even more mobile).