OLED Display Hookup Guide
This Tutorial is Retired!
This tutorial covers concepts or technologies that are no longer current. It's still here for you to read and enjoy, but may not be as useful as our newest tutorials.
 Joel_E_B
Hooking it Up
In order to use your OLED Display, the first thing you'll need to do is decide how you want to make your connections.
One option is to solder wires directly to the display. This is only recommended if you are going to be adding it to a final project.
The second, more temporary, way to hook up the display is to solder some straight male headers onto it. This will allow you to connect it to a breadboard for prototyping.

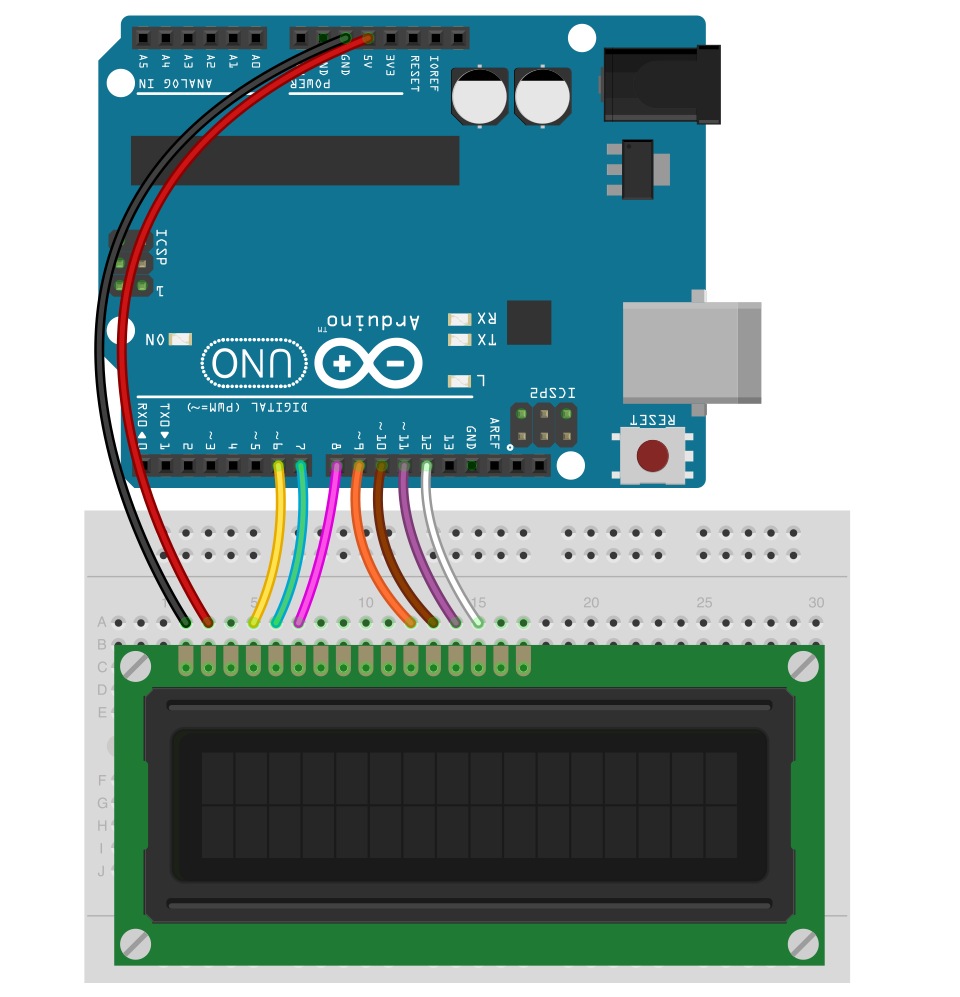
Once you have a way to connect wires to your display, you can now wire it up to your microcontroller of choice. In this example, we're going to use an Arduino Uno to control the display. You will also need some jumper wires to connect it to the Arduino.
Now, let's connect the OLED Display to the Arduino. Using the table from the previous section and looking ahead to the firmware section, you'll see a table in the code. Using both, you can connect every pin used on the display to the corresponding pin on the Arduino. The following digram shows you how to wire everything.
With that, you're now ready to upload some code and get the display printing.