pcDuino Hookup Guide
This Tutorial is Retired!
This tutorial covers concepts or technologies that are no longer current. It's still here for you to read and enjoy, but may not be as useful as our newest tutorials.
 SFUptownMaker
 Changing the OS
The last thing you might be interested in doing is reloading or changing the operating system on the device. There are two methods for doing this: LiveSuit (sometimes found on the internet as "LiveSuite") and PhoenixCard. LiveSuit can be used to load either Lubuntu or Android; PhoenixCard can only be used to load Linux. We'll only be covering LiveSuit, as it is the easier and preferred means for doing this.
LiveSuit is available in a Windows (32-bit) version, a Windows 7 (64-bit) version, or in a Linux (64-bit-only) version. We'll skip over installation of the tool; the linked website explains how to install the Linux version, and the Windows versions don't need to be installed, merely extracted.
You'll also need the appropriate image file. This Lubuntu image is an update to the image that ships with the pcDuino, but it has some serious enhancements and bug fixes, and is well worth the upgrade. There is also an Android image available, but it hasn't received as much attention as the Lubuntu image.
Installing drivers (Windows only)
Before going any farther, you should install the drivers for the pcDuino debugging port. Make sure that you have the right version of LiveSuit--the drivers in the 32-bit version won't work on a 64-bit system!
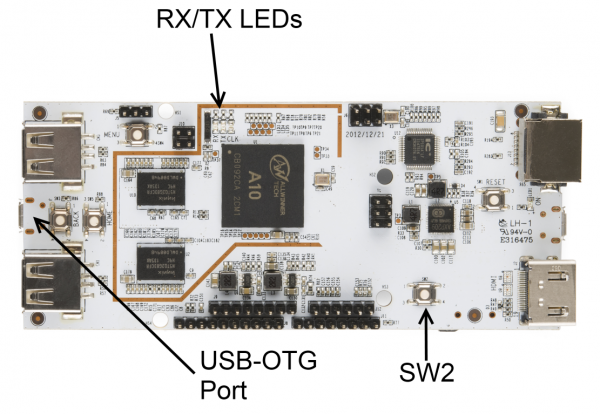
Plug a microUSB cable into your computer. While holding the button marked SW2 on your pcDuino, plug the other end of the cable into the USB-OTG port on your pcDuino.
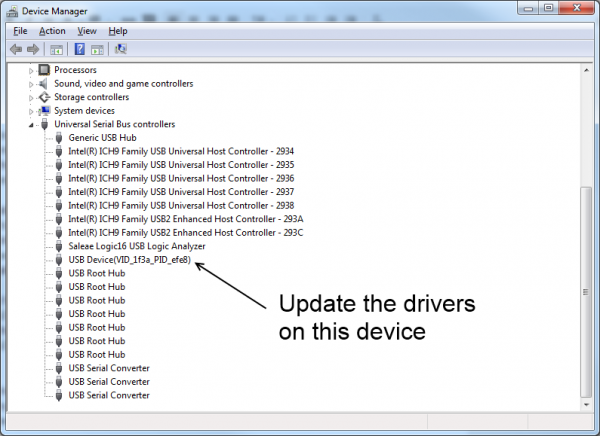
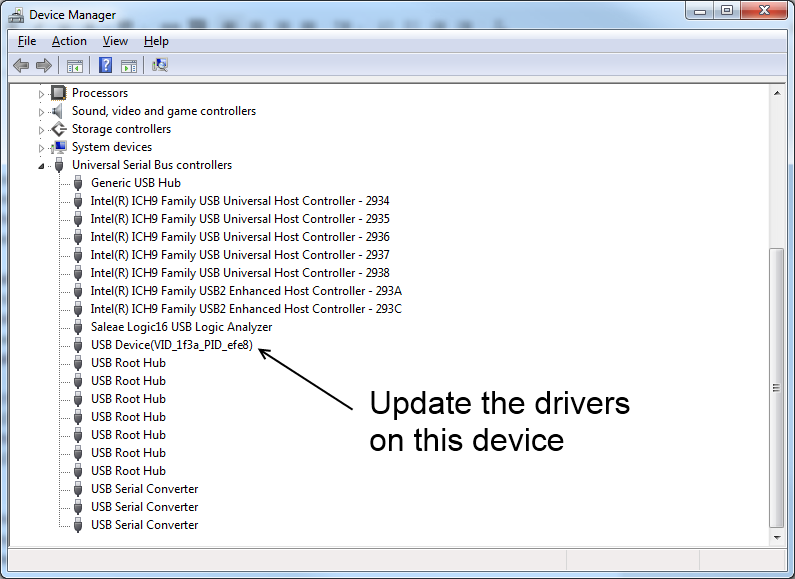
In Windows XP, you'll see a driver installation query pop up. In Windows 7, you'll probably have to open the device manager. The device will appear as "USB Device(VID_1f3a_PIDefe8)" under the "Universal Serial Bus controllers" section. The drivers are in the LiveSuit directory, in the "UsbDriver" directory.
Once driver installation has completed, unplug the pcDuino.

Installing Android
- Launch the LiveSuit application.
- Select the Android image file you downloaded above.
Plug a microUSB cable into your computer. While holding the button marked SW2 on your pcDuino, plug the other end of the cable into the USB-OTG port on your pcDuino.
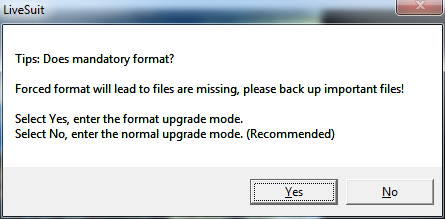
After a few seconds, LiveSuit will popup with a window asking if you want to format the device. Since we're reflashing, choose "Yes". Note that even if mandatory doesn't format, you'll lose anything installed on the device, so back it up!
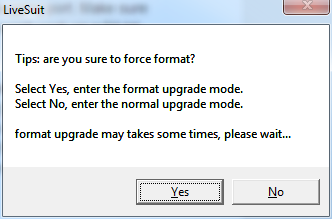
LiveSuit will double check that you want to format the device. Click "Yes" again.
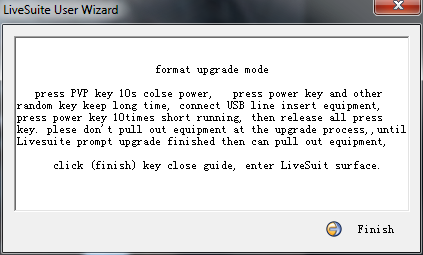
Click "Finish" in the next window. Don't worry about the directions in the window; they're not important. Or comprehensible.
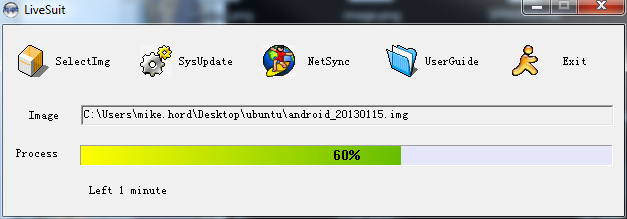
The progress bar will fill in, and if you've got a connection on the serial port terminal, you can watch the progress there as well. Don't be alarmed if there are some long pauses during the update, although the whole process should not take more than five minutes.
LiveSuit will give you an "Update success" window, and the pcDuino will automatically reboot into Android. Note that when watching the serial debugger port output, Android doesn't give you any kind of a prompt--just a blank line, into which you can enter commands.


Installing Ubuntu
- Launch the LiveSuit application.
- Extract the Ubuntu archive you downloaded above. In it are two image files: "a10_kernel_20130203.img" and "ubuntu_20130203.img". Select the "a10_kernel_20130203.img" file.
- Copy the files "env_nandd.fex", "ubuntu_20130203.img", and "update.sh" from the Ubuntu directory you just extracted to either a microSD card or a flash drive. Make sure the files are in the root directory of the drive!
- Insert the flash drive or microSD card into the pcDuino.
Plug a microUSB cable into your computer. While holding the button marked SW2 on your pcDuino, plug the other end of the cable into the USB-OTG port on your pcDuino.
After a few seconds, LiveSuit will popup with a window asking if you want to format the device. Since we're reflashing, choose "Yes". Note that even if mandatory doesn't format, you'll lose anything installed on the device, so back it up!
LiveSuit will double check that you want to format the device. Click "Yes" again.
Click "Finish" in the next window. Don't worry about the directions in the window; they're not important. Or comprehensible.
The progress bar will fill in, and if you've got a connection on the serial port terminal, you can watch the progress there, as well. Don't be alarmed if there are some long pauses during the update, but it won't take more than five minutes to complete.
LiveSuit will open an "Update success" message. Do not disconnect the power from the pcDuino at this time.
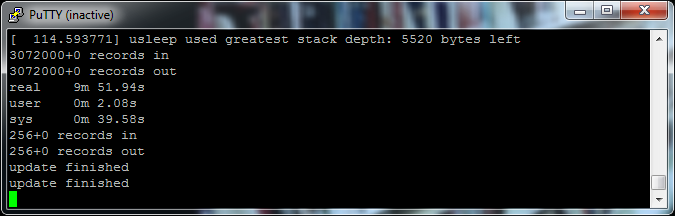
If you're connected to the serial monitor, you can watch the device update from the external memory. It takes some time--several minutes at least--and at the end, an "update complete" message will appear on the serial monitor.
If you're not connected to the serial monitor, you'll know the update process is completed when the RXLED and TXLED will blink slowly, in unison. While the upgrade is underway, RX will be solid on and TX will be blinking.
- Once the upgrade is complete, you may restart the pcDuino.
