Photon Development Guide
 jimblom
Particle Dev (Half-Online, Half Offline)
If you're uneasy about leaving your hard work in the mysterious "cloud," but still want all of the benefits offered by Particle Build, Particle Dev is a great middle-of-the-road option.
Like Build, Particle Dev takes care of your toolchain setup (compiler, linker, etc.) and allows you to program remotely, plus you get the added benefit of keeping all of your source code locally saved to your machine.
For the most part Particle Dev is still an online IDE. Your code is stored locally, but the "cloud" is still required to compile. You'll need to be connected to the Internet to get the full use out of it. (There may be hope though: in Particle's words "This is not an offline development tool, yet.")
Download Particle Dev
Particle Dev is currently available for Mac and Windows. Head over to particle.io/dev to download it.
Follow along with the install wizard to install it on your Windows machine. Mac users can unzip the "Particle Dev" application, and stick it in your applications folder.
Getting Started with Particle Dev
If you've tested the waters with Particle Build, you should already be somewhat familiar with Particle Dev's menu icons. Hover over any icon to get a succinct description of what it does.
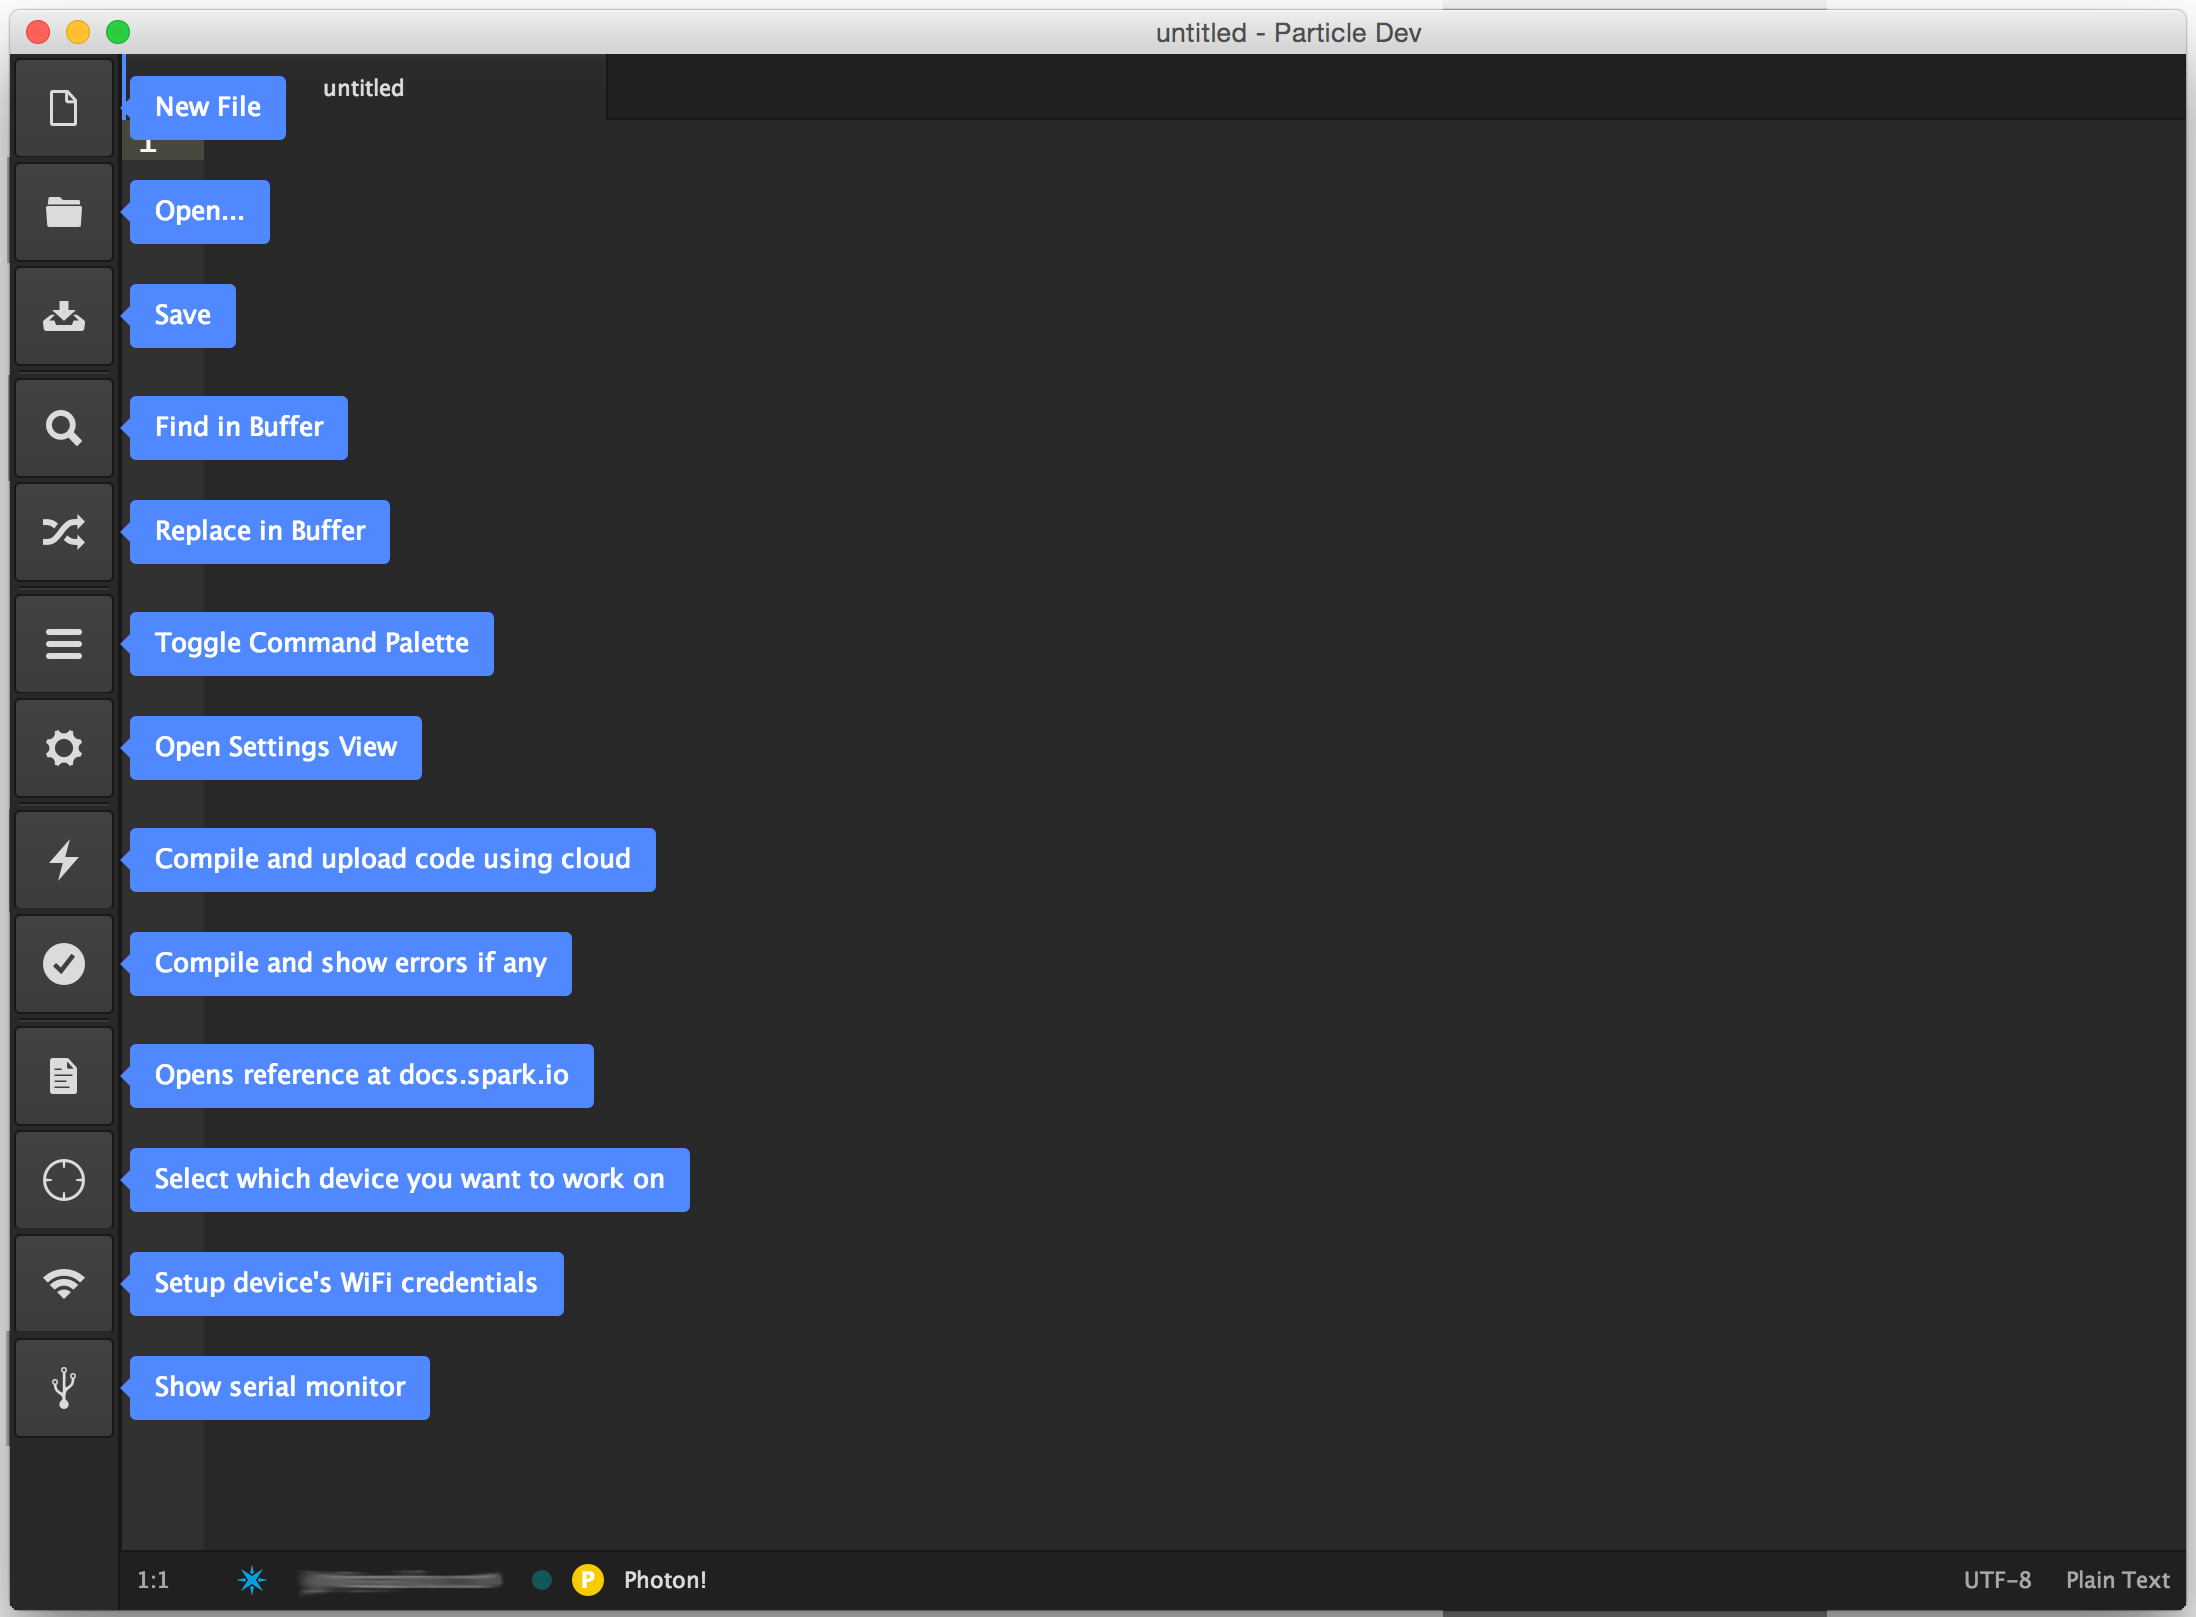
The first time you load up Particle Dev, you'll have to log in to your Particle account. That will give you access to flash your Photons and Cores. Go "Particle" > "Log in to Particle Cloud..." or click "Click to log in to Particle Cloud..." to set it up.
Open a Project Folder
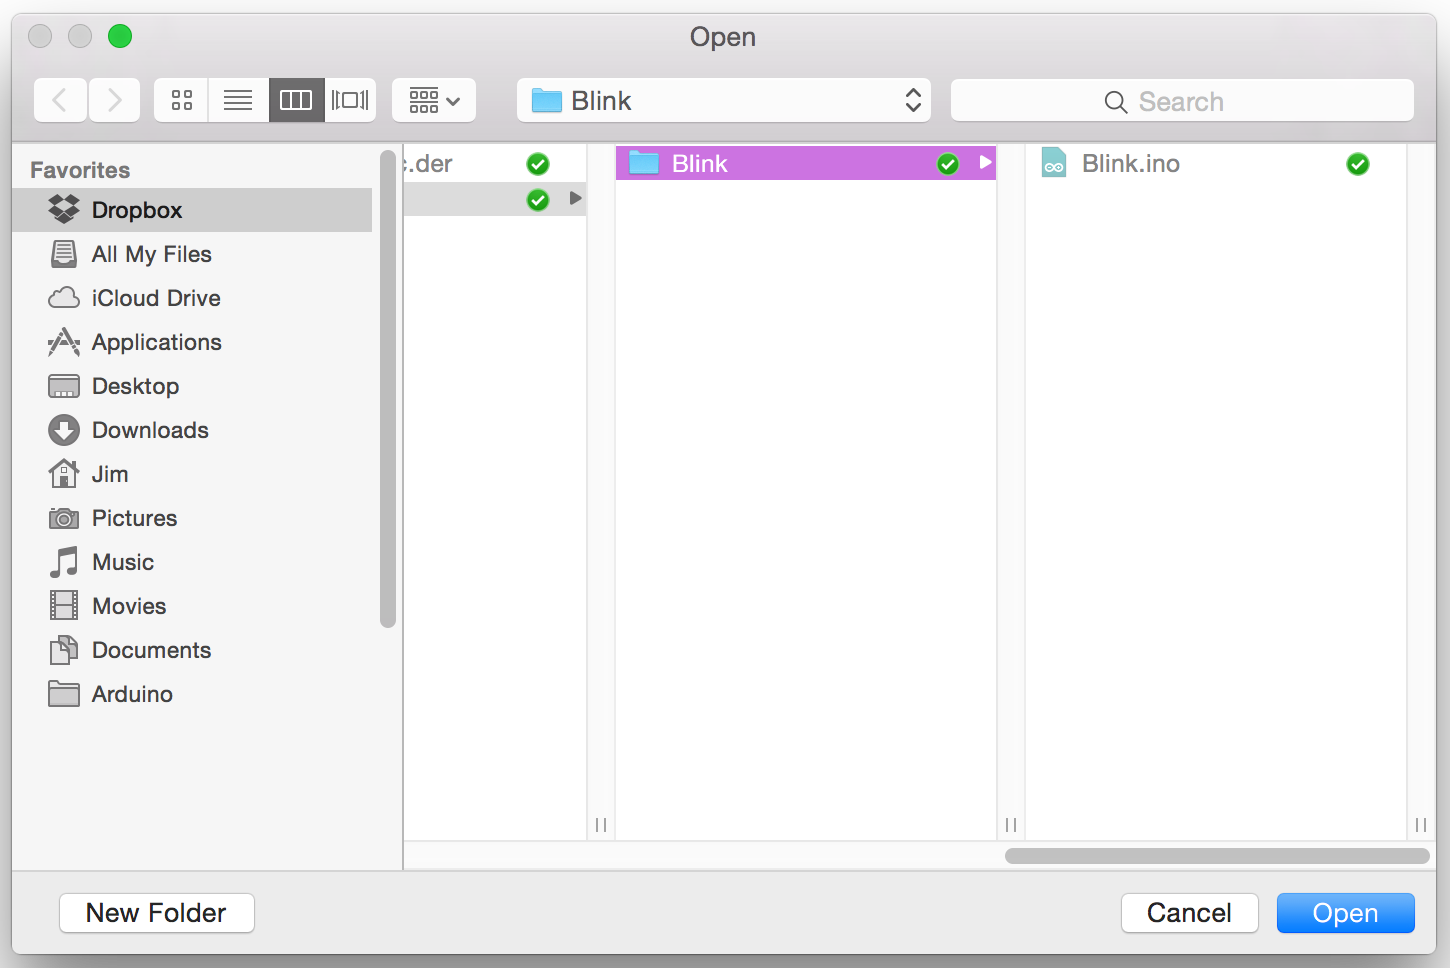
Now it's time to write some code! Projects in Particle Dev are folder-based. If you'd like to follow along with an example click the button below to download a simple "Blink" app -- unzip it anywhere you'd like.
Begin by opening a project using the File > Open Folder... menu option (on the Mac version select "Open Project Folder"). Navigate into a folder, and click "Select folder" (or "Open" on Mac).
The contents of your project folder will be displayed to the left of the text editor window. Click on any file to view its contents.
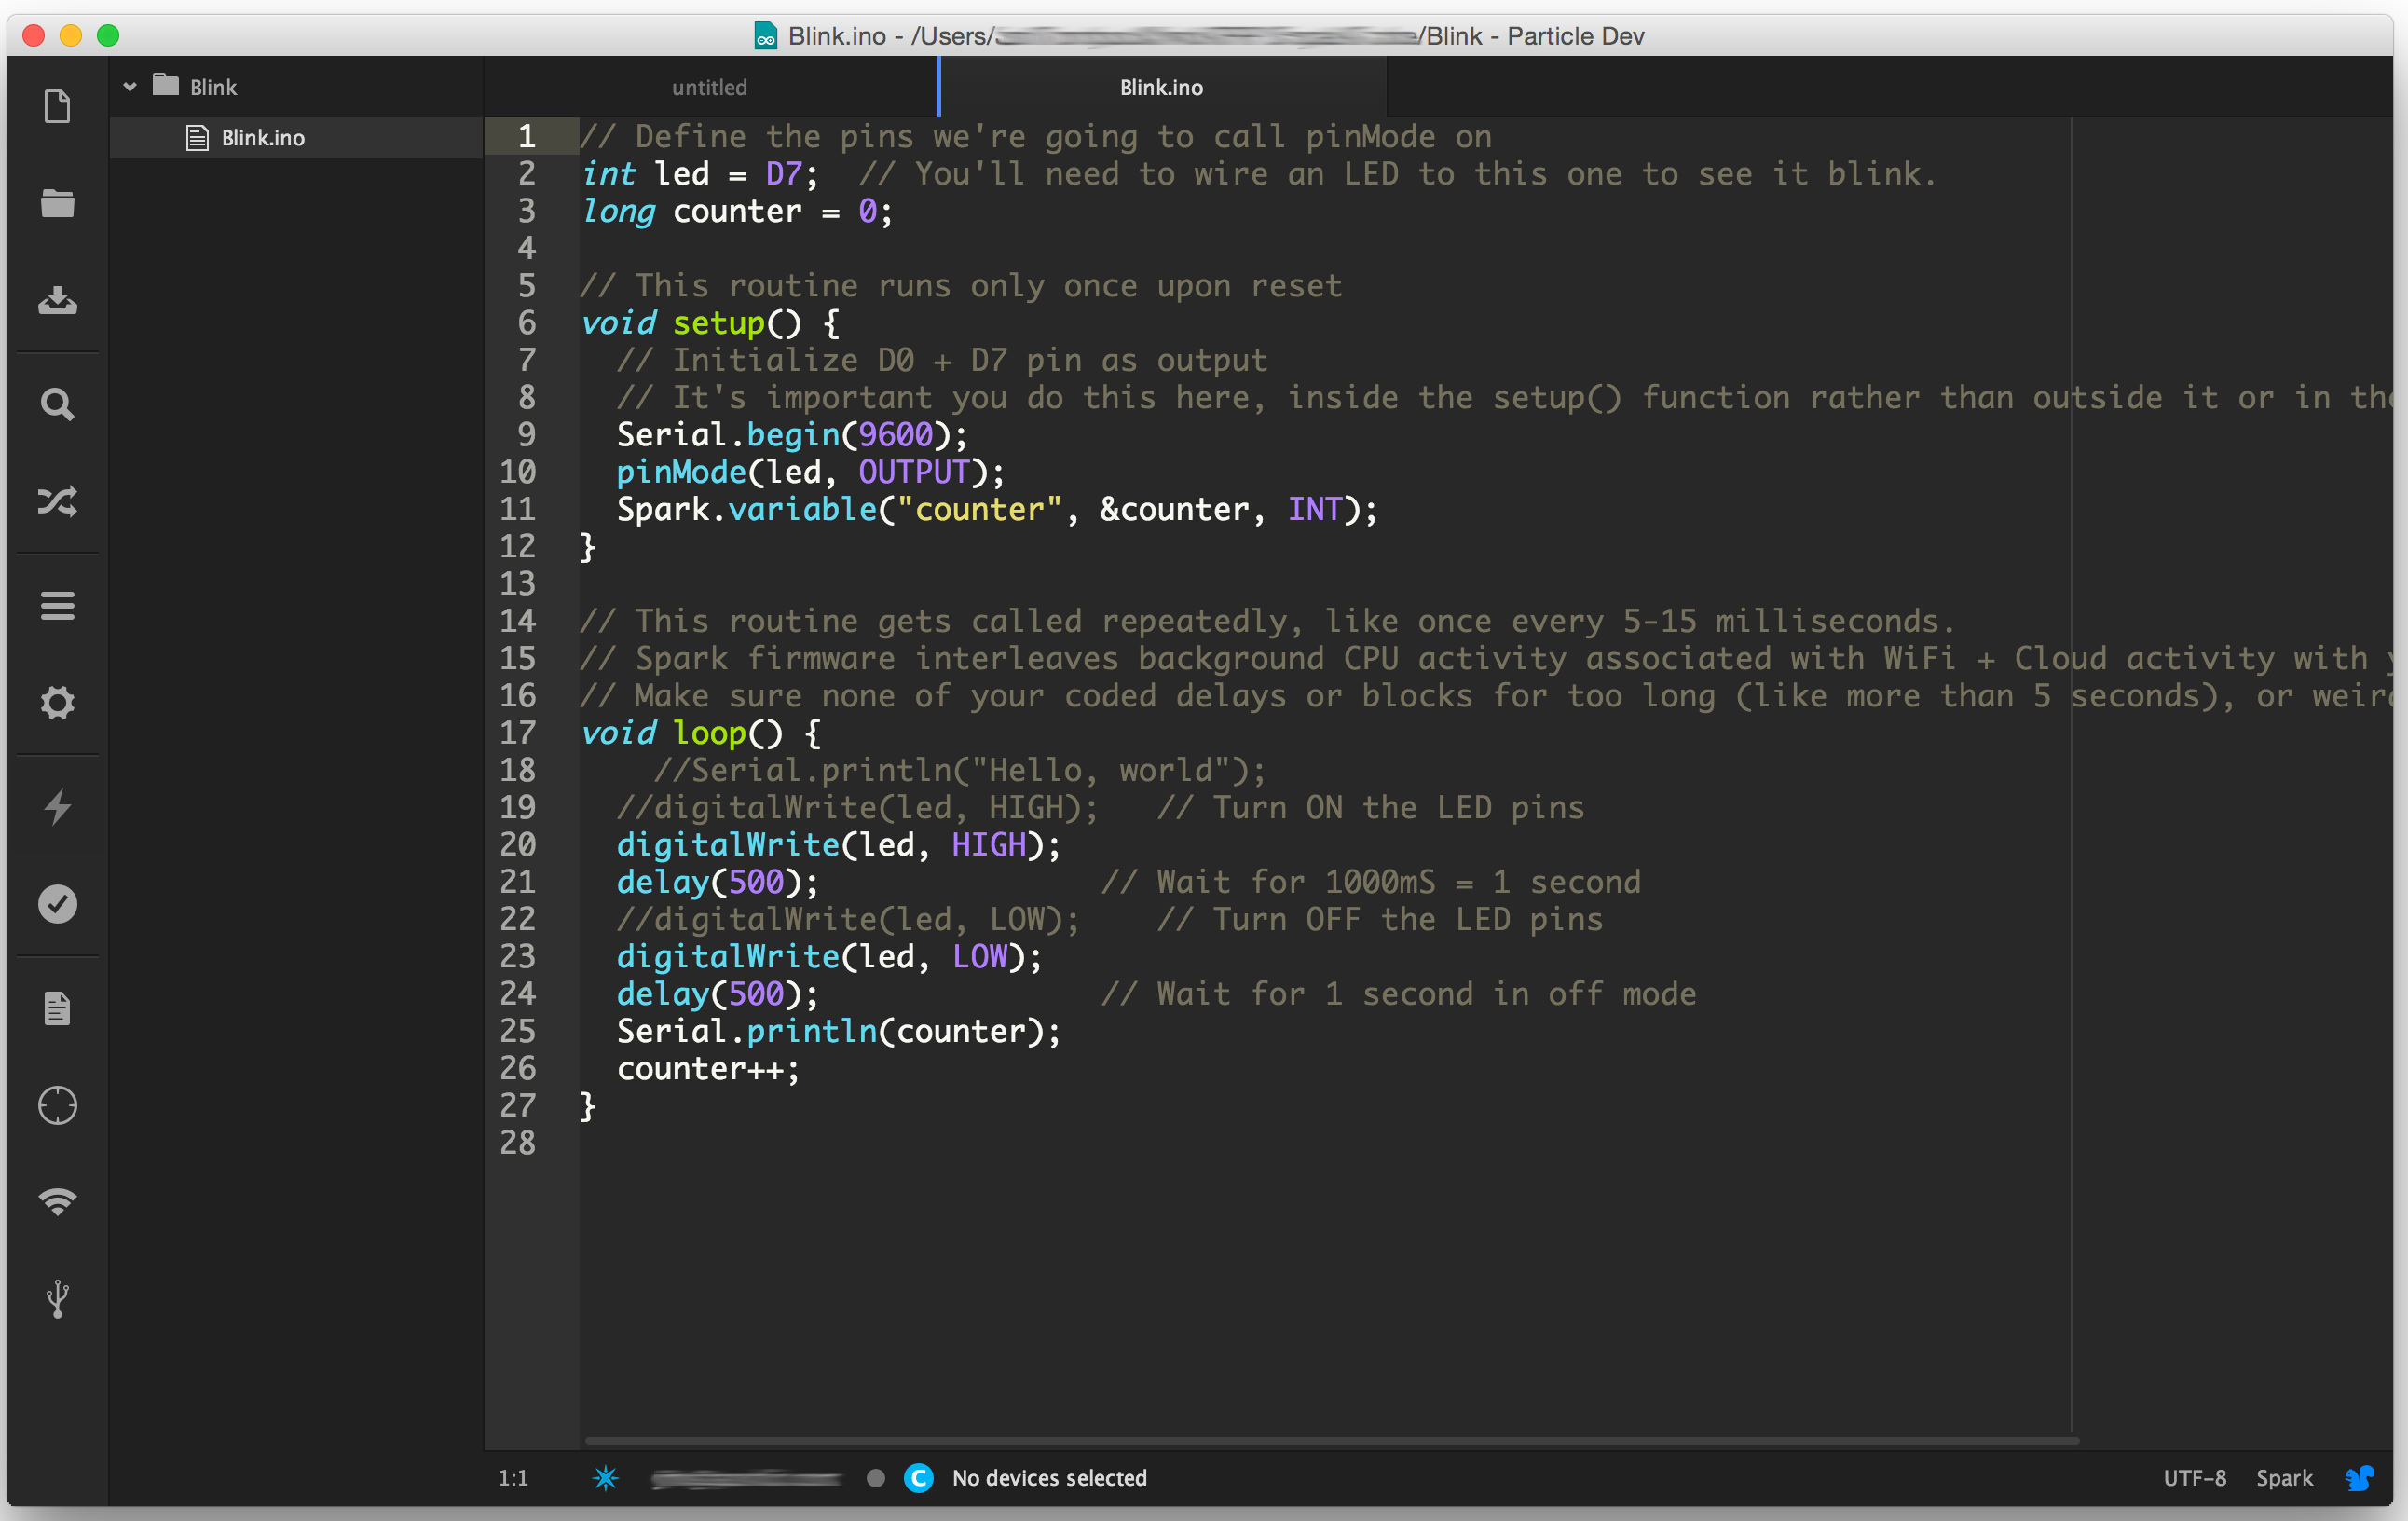
You can edit this code just as if you were in the Build IDE. Click the checkmark icon ("Compile and show errors if any") to try compiling your code. If it builds, you'll see a "Success!" message down at the bottom of the window.
Select a Device and Flash
Once you've gotten your application code to the point where you're ready to upload it save.
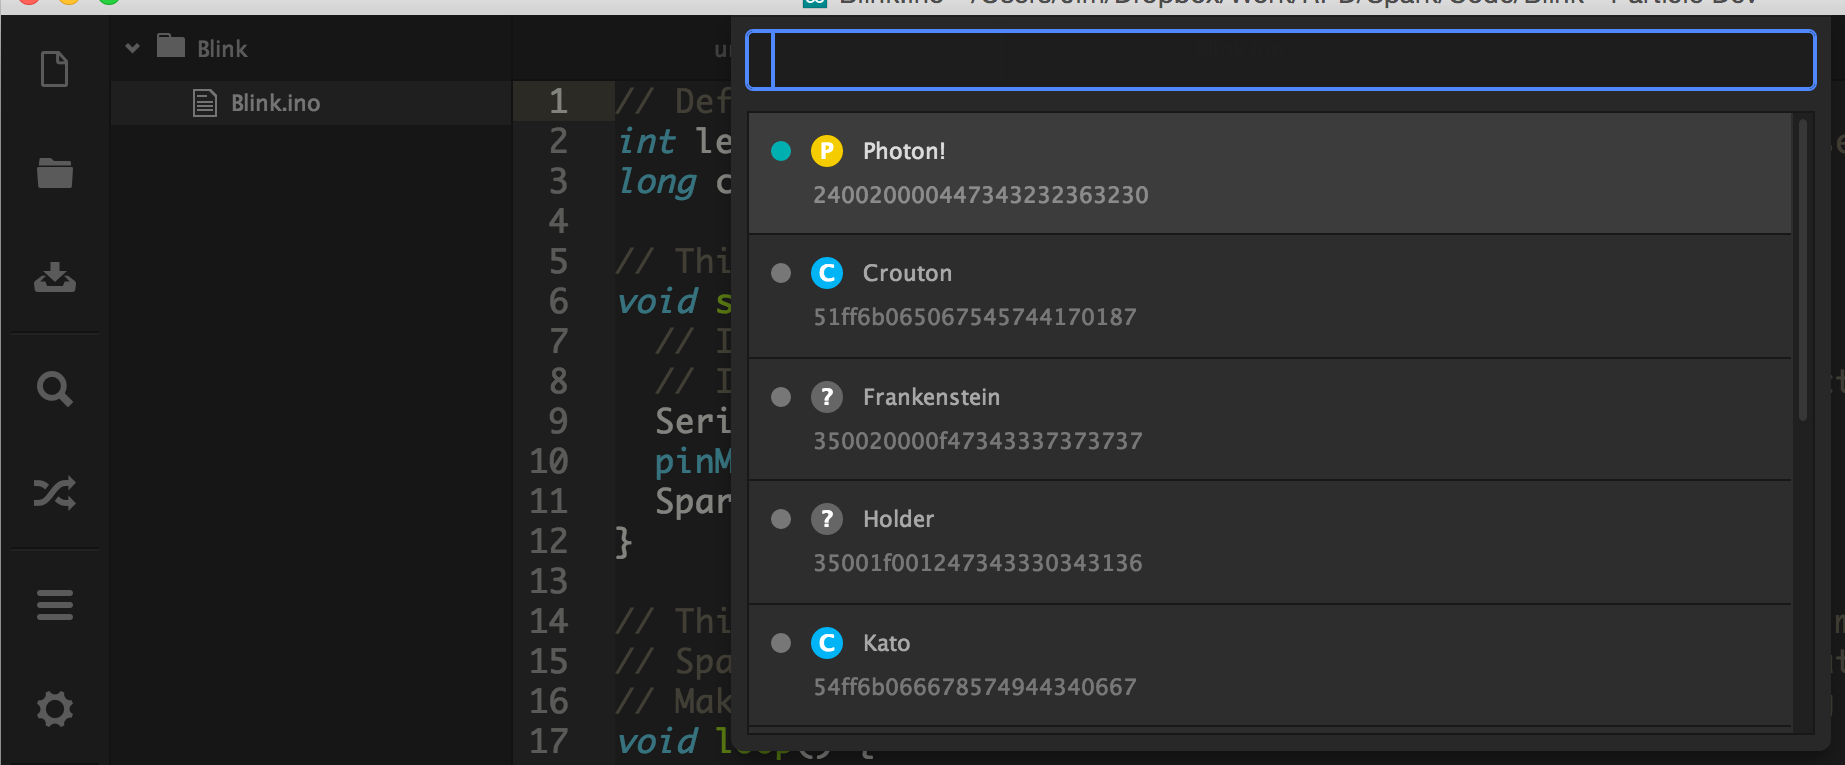
Then select a device by going to Particle > Select device. If your Photon is connected to Particle Cloud, there should be a comfortingly pulsing teal dot next to it.
With your device selected, and code in a compilable state, click the Flash icon ("Compile and upload code using cloud").
The status of your code upload will be displayed in the bottom of the IDE. As code is being flashed, your Photon should briefly blink magenta before transitioning into its new application.
Using Particle Libraries
It'll take a few extra clicks and drags to add a library to your Particle Dev project folder -- it's not quite as easy as Particle Build.
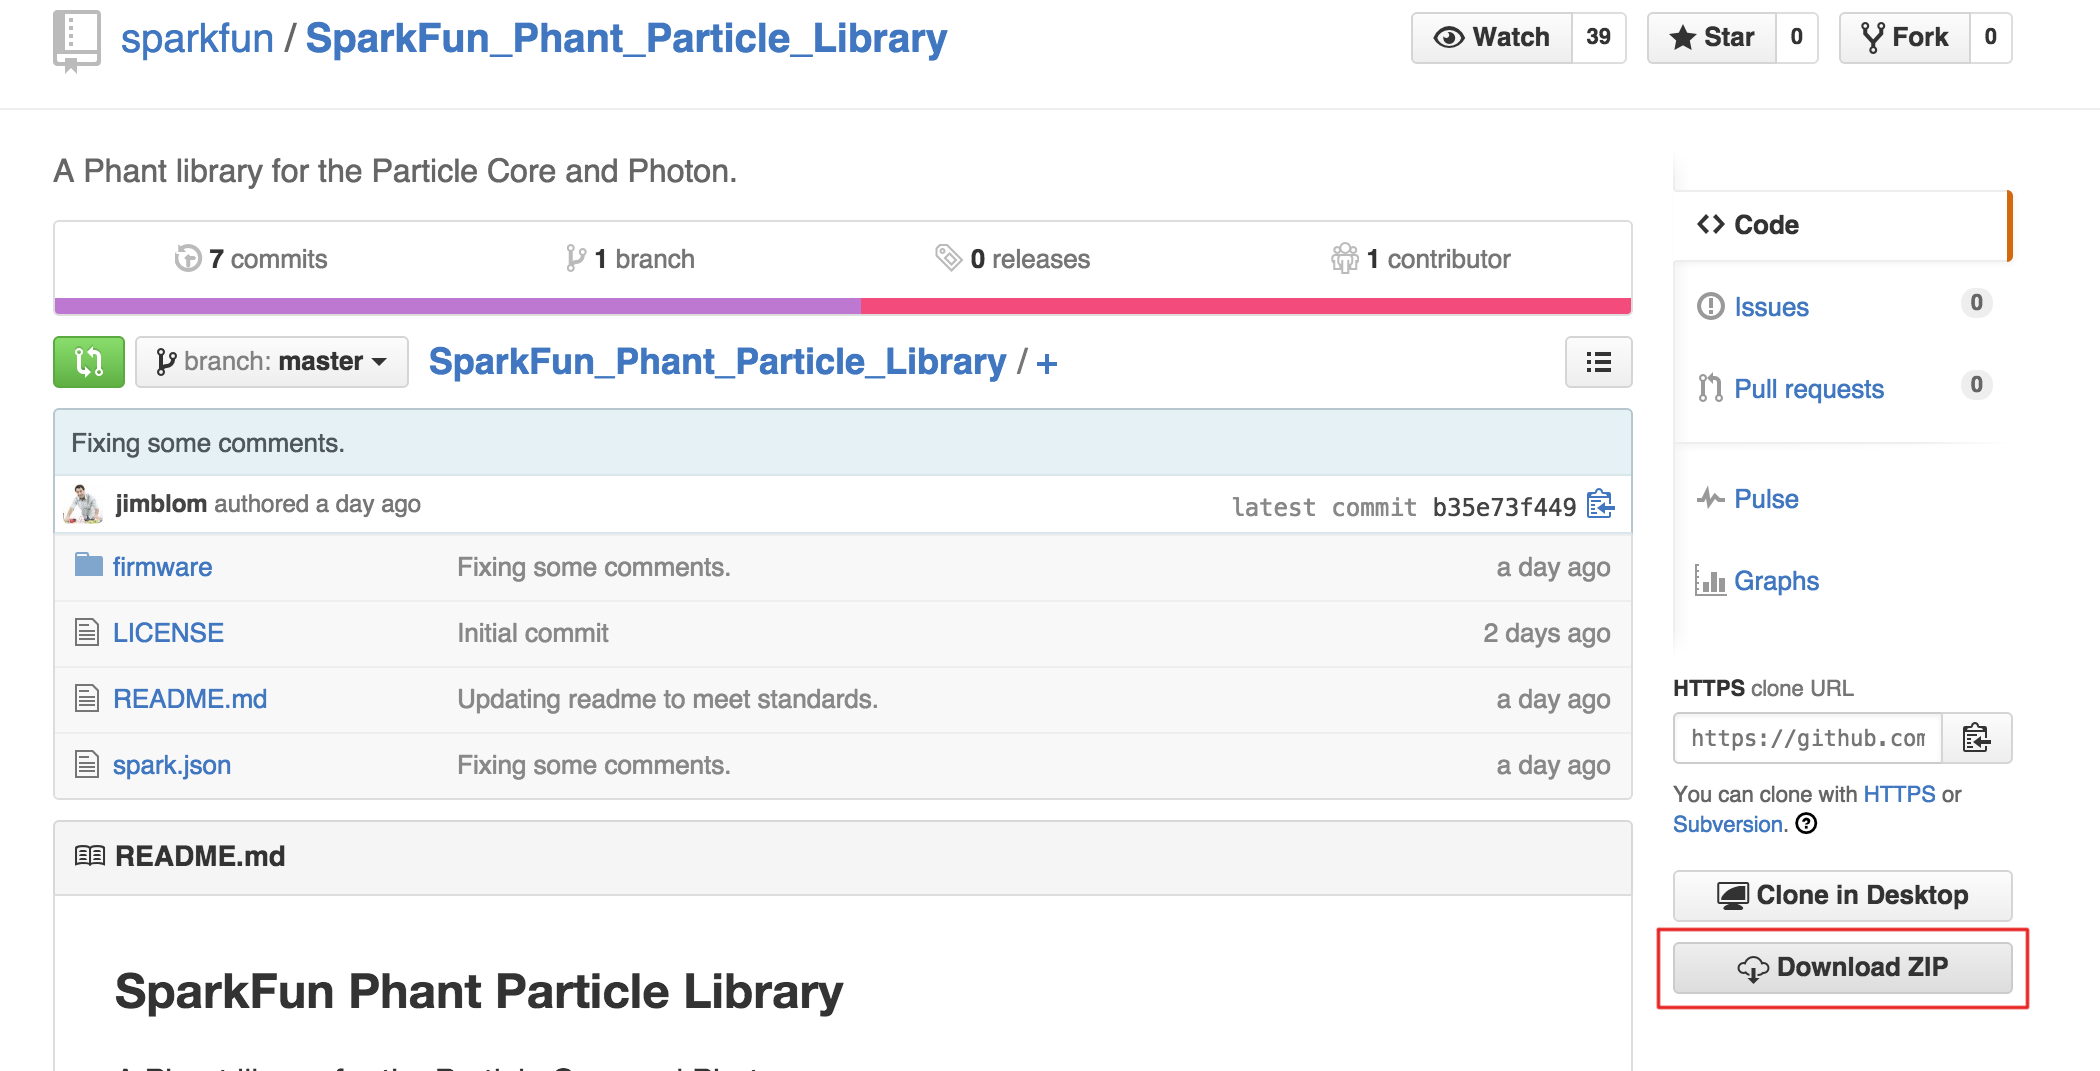
To begin, you'll need to download the library. Most Particle libraries should already be hosted on GitHub, so find the library you want and view it there. You can find SparkFun's list of Particle libraries here.
On the GitHub repository page, click "Download ZIP" to get your own copy of the library.
Unzip the library. Then you'll need to do some surgery on the contents. Grab the library's source files -- they should be in the "firmware" directory and end with either a .cpp or .h.
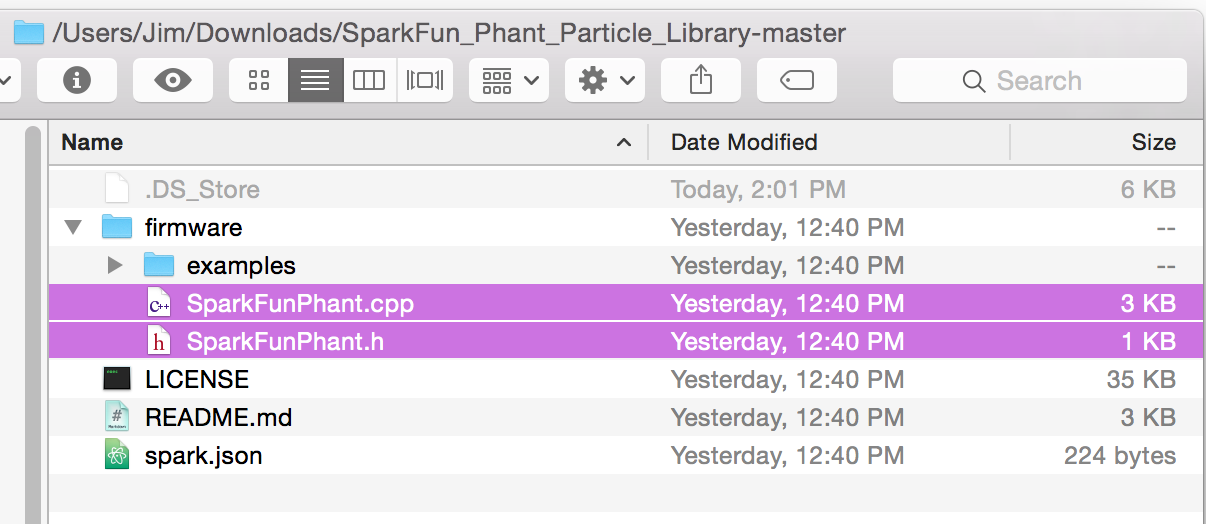
Don't grab the "examples" folder! If you want to use one of the examples as your main application source file, drag it into your project folder as well.
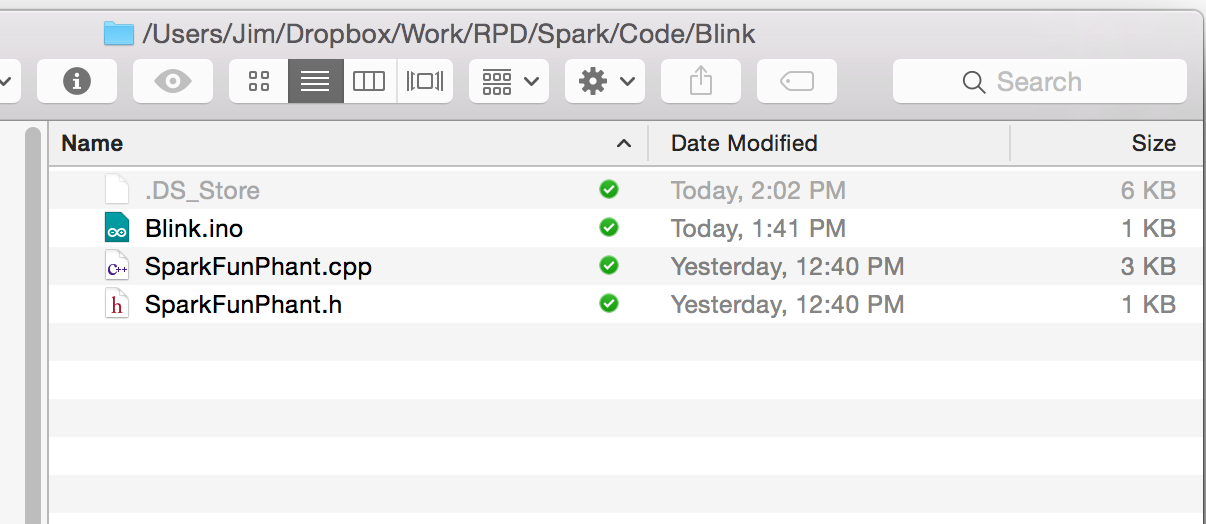
Then open your main source file back up in Particle Dev, and add the necessary #include statement.
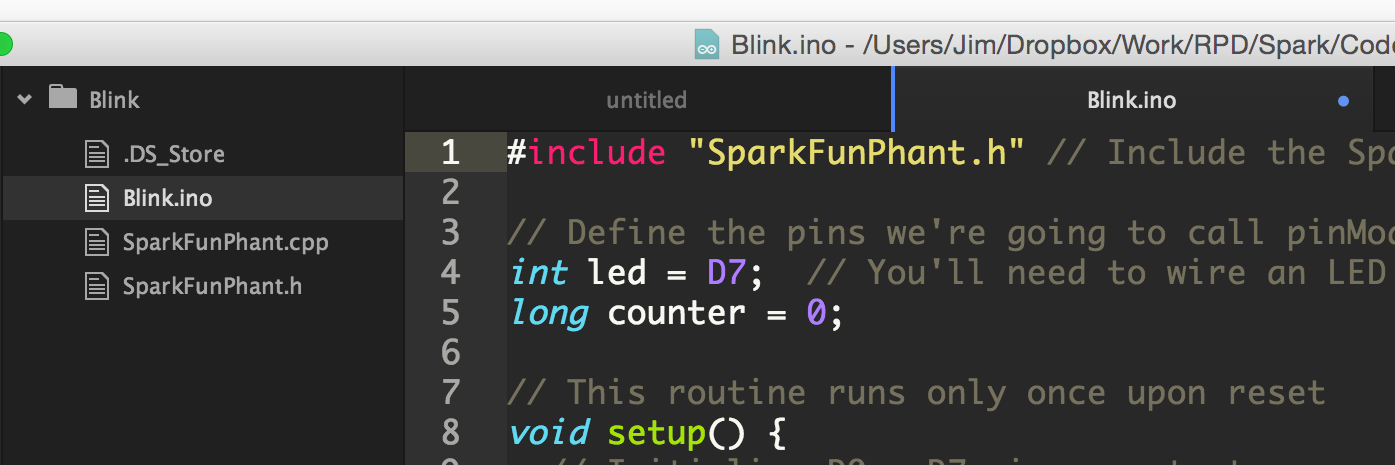
Click the checkmark icon to compile and make sure everything's still happy, and keep on coding!
There's a whole lot more to the Particle Dev IDE. It's fully customizable -- make sure you check out the "Settings" tab. It has an integrated Serial Monitor and Spark Variable viewer. Make sure you check out Particle's Dev documentation to learn more about the IDE.