Pokémon Go Patches with EL Panels
 Gella
Gella 
Installation
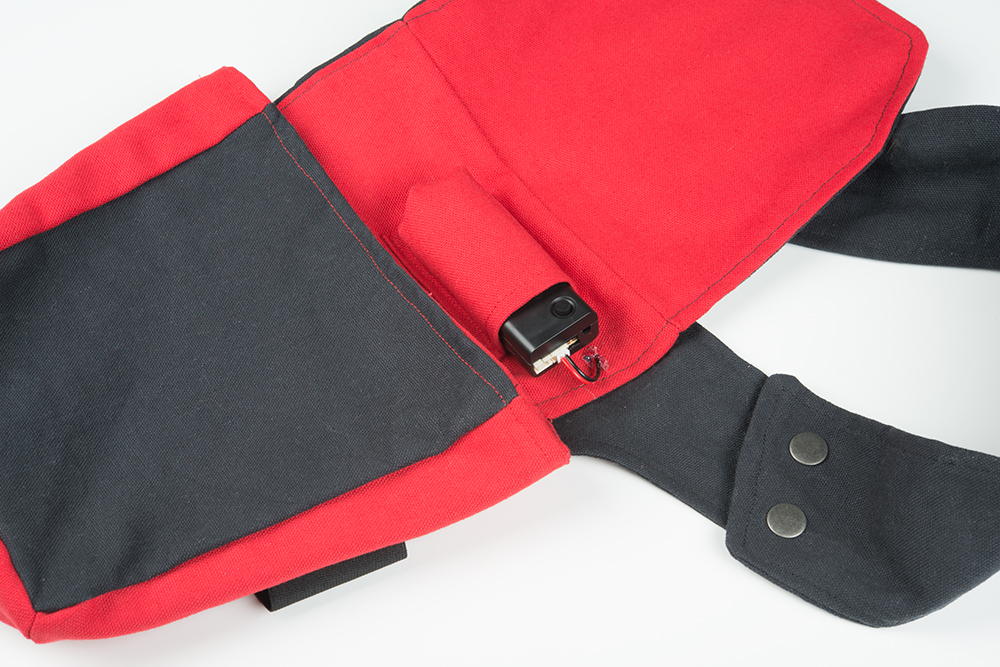
Now it's time to put the patch on something! Position the patch on your item of choice and mark any holes that may need to be cut to thread the cable through. Check the positioning of battery pack so that it is in an easily accessible place.
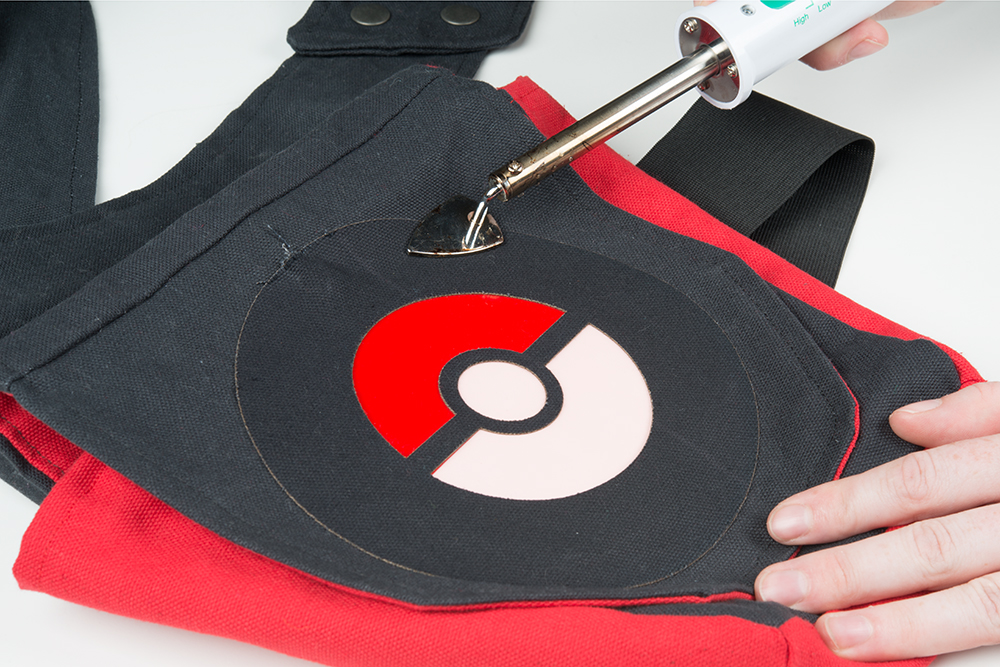
Once everything is in place, use an iron to adhere the patch to your fabric - making sure to iron only the extended edges and not the panel itself.
Alternative Attachment Methods
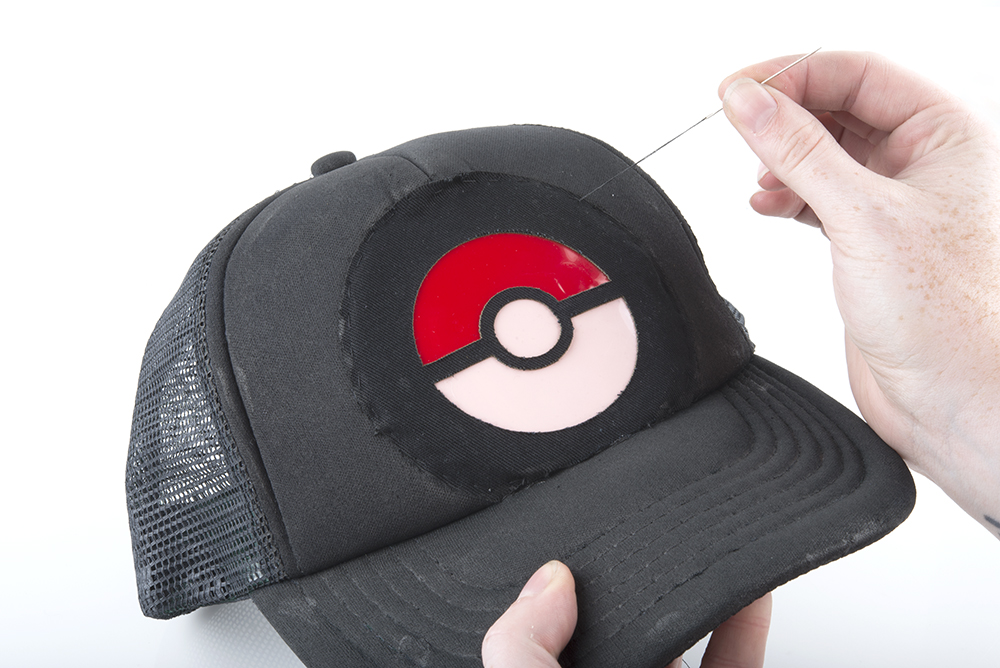
You can also stitch the patch on with a sewing machine or by hand, be mindful of not puncturing the panel with the needle. Decorative stitching is a great way to add some extra customization to the patch.

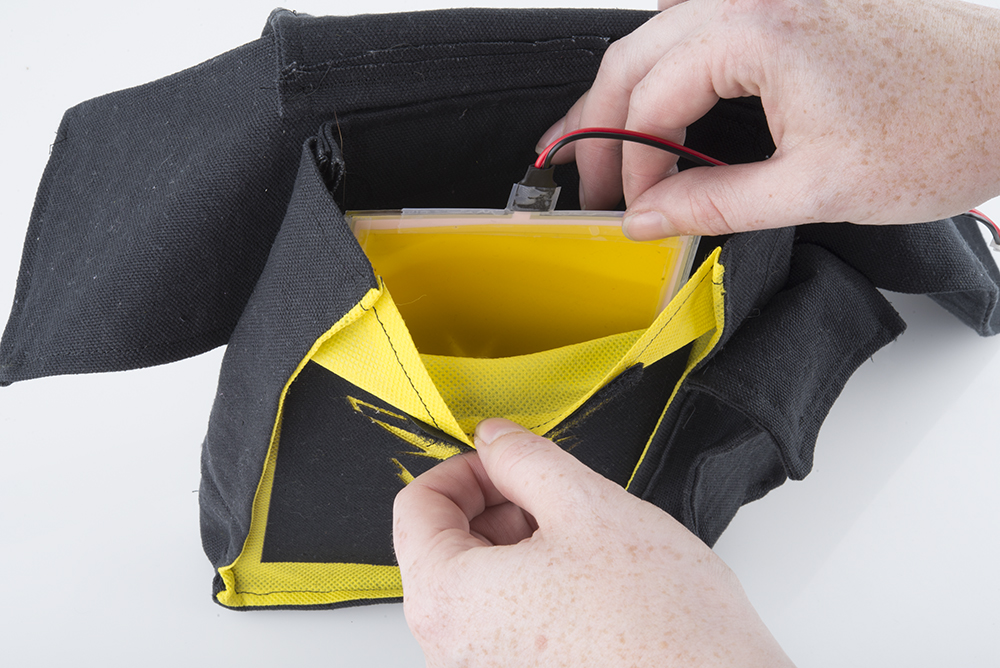
A third option is making a pouch for the panel. This is great for an item that may need frequent washing or if you'd like to switch out the panel for another design in the future. The example below uses the fabric stencil on a pocket and a plain panel to backlight it.
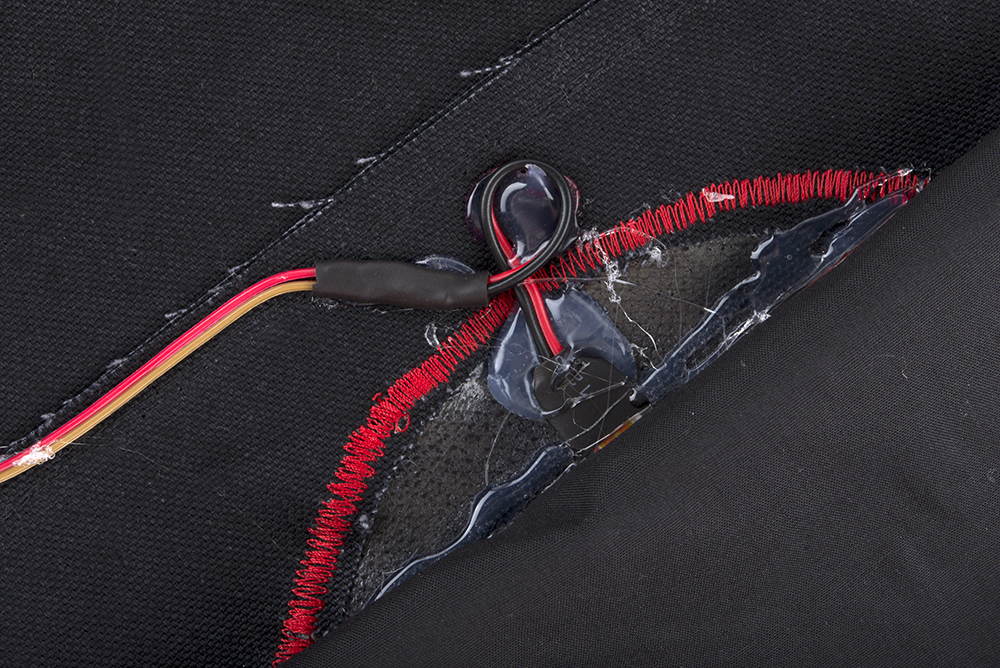
Reinforcing the Connector Tab
The small tab on the EL panels can get damaged from frequent bending or pulling. To avoid the tab breaking or wires disconnecting, take special care in where the patch is placed. After installing, you can add a small loop in the wiring (secure with stitching, hot glue, or secure to itself with electrical tape) to ease the strain of the wires on the connection point.
Finally, feed the cable through your project, and plug it into the battery back. Light up, and enjoy!