Pro Micro & Fio V3 Hookup Guide
 jimblom
Installing: Windows
Getting the Pro Micro or Fio v3 set up on your computer and in your Arduino environment can be difficult. Follow along on this page for a step-by-step guide through the driver installation and Arduino-enabling process.
Windows Driver Installation
Step 1: Download the Driver
Before plugging your board in, get a head start by downloading the drivers. Check the GitHub Repository for the latest files. The same driver file works for both the Pro Micro and the Fio v3. The drivers for both the Fio and the Pro Micro are signed for Windows users. You can download them directly using the link below.
Unzip that zip file, and don't forget where you've left its contents. In that zip file, you should find the .inf and .cat files, which contains all the information Windows needs to install the Pro Micro's driver. The sparkfun.inf driver and sparkfun.cat digitally signed catalog file will be found in ...Arduino_Boards-master/sparkfun/avr/signed_driver .
Step 2: Plug in the Pro Micro / Fio v3
When you initially plug the board in, an "Installing device driver software" bubble notification should pop up in the lower-right corner of your taskbar. After the green dot circles the grey box a number of times, you’ll probably get a sad bubble like this:

Never fear! Windows just doesn't know where to find our driver.
Step 3: Open the Device Manager
From here, the most straightforward way to install the driver is through the Device Manager. To get to the Device Manager, click the Start button, then open the Control Panel. In the Control Panel, click System and Maintenance, and then open the Device Manager.
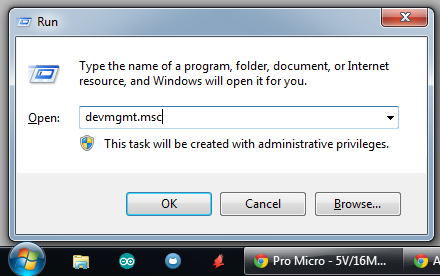
Alternatively, you can open the Run prompt (Windows key+R) and type 'devmgmt.msc' and click OK.
In the Device Manager, expand the 'Other devices' tree, where you should find a 'USB IO Board' with a yellow warning sign over its icon. Right-click the 'USB IO Board' and select Update Driver Software....
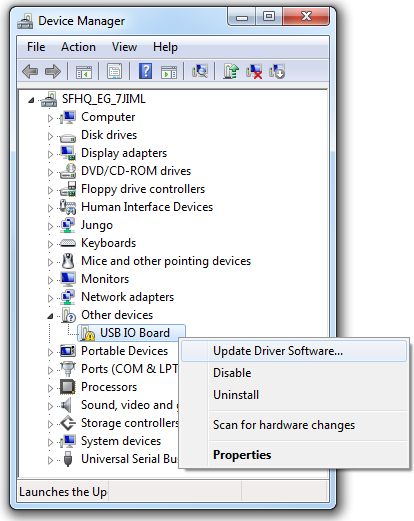
This should spawn an 'Update Driver Software - USB IO Board' window.
Step 4: Finding the Driver
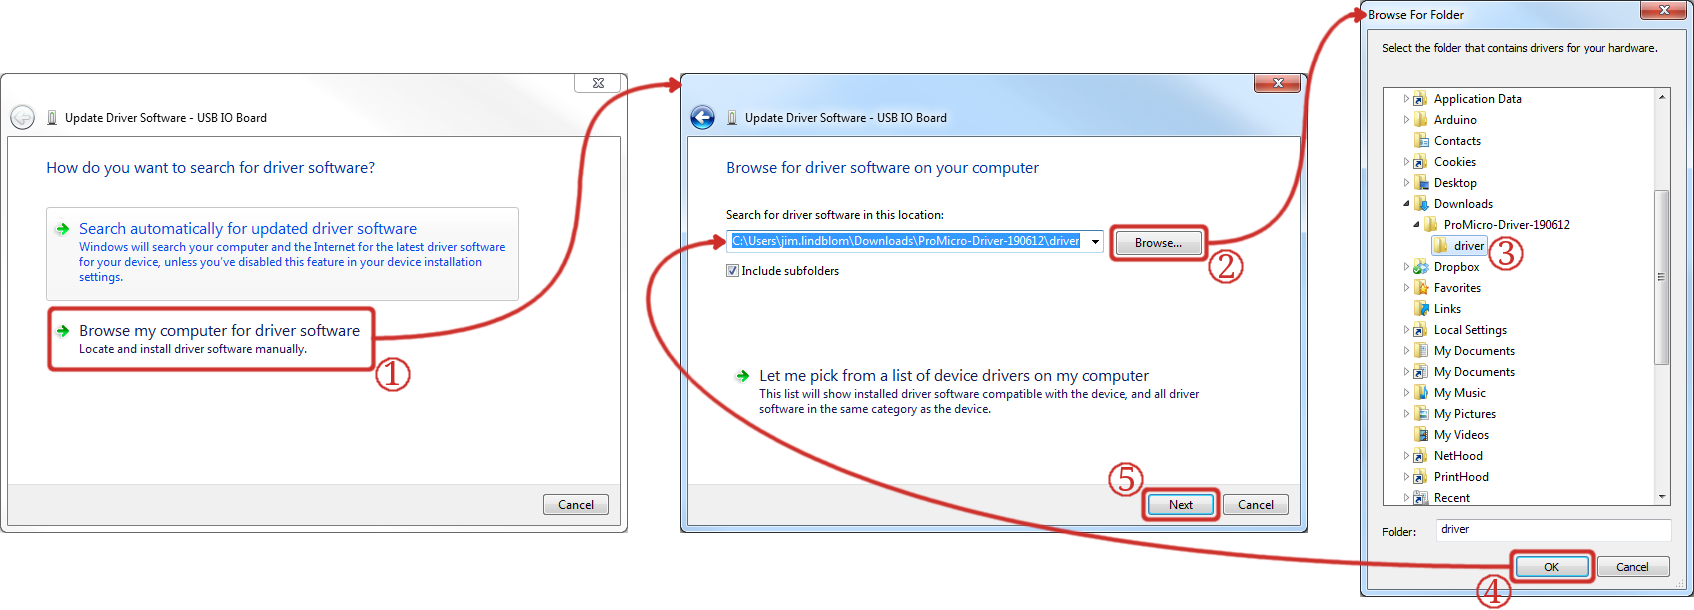
In the first window that pops up, click 'Browse my computer for driver software'. On the next window, click 'Browse...' to search for the driver you just downloaded. It should be a folder named 'Arduino_Boards-master', in a subdirectory noted in step 1. After you’ve selected the 'driver' folder, click OK, then select Next.
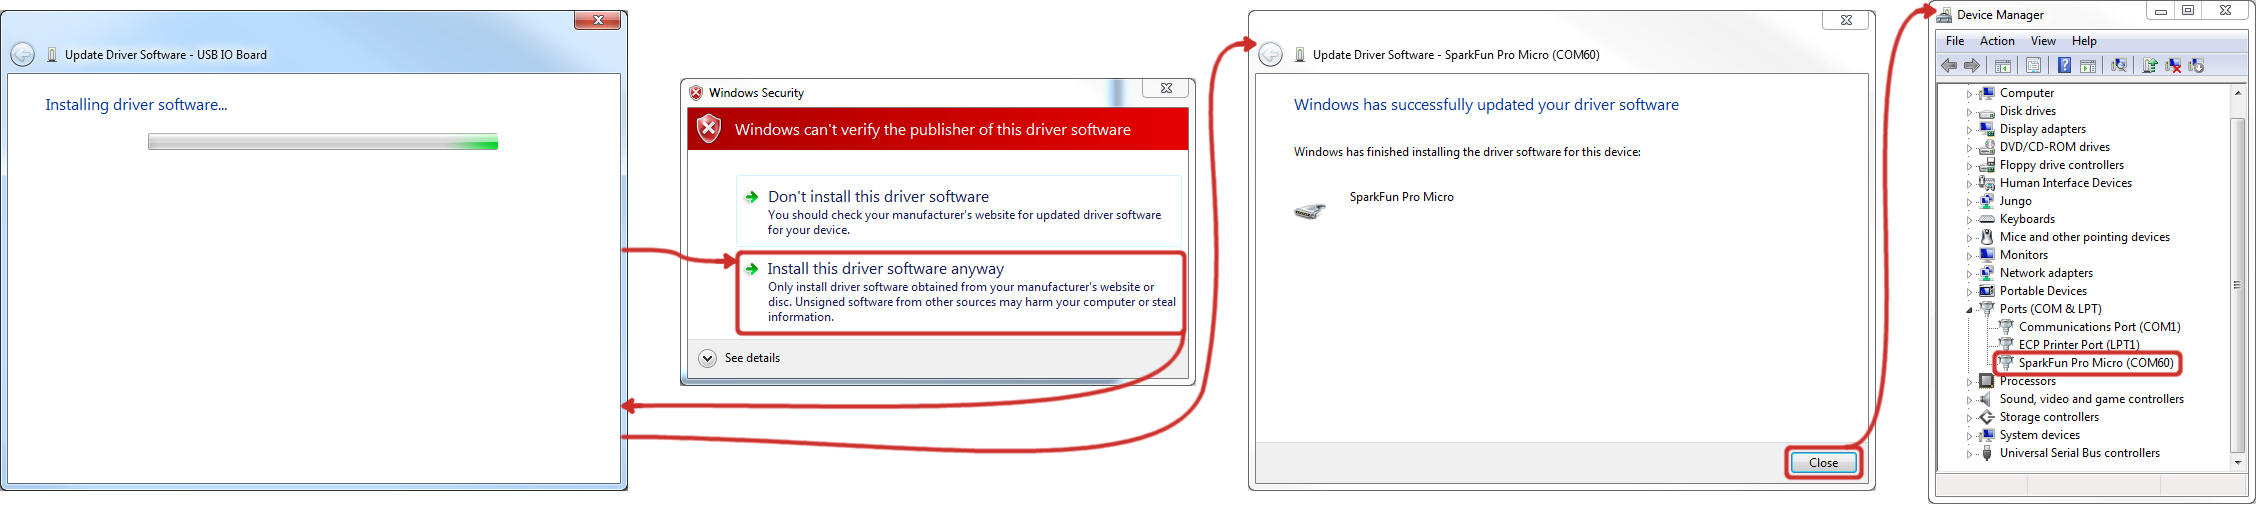
Windows will attempt to do its driver install thing, but not before complaining about the driver being unsigned. It’s safe to select 'Install this driver software anyway' on the warning dialog.
After watching the progress bar beam by a few times, you should get a happy 'Windows has successfully updated your driver software' window. And the 'Device Manager' should have a new entry for the 'SparkFun Pro Micro (COM ##)' (or 'SparkFun Fio V3 (COM##)' if you have one of those) under the 'Ports' tree.
Take note of which COM port your Pro Micro was assigned. We’ll need it soon.
Installing the Arduino Addon
We're still not completely ready for Arduino, but this is the final stretch. Before you can use the ProMicro in the Arduino IDE, you'll need to install the board (.brd) files for the Fio/Pro Micro so the Arduino IDE will know how to communicate with your board.
Using the Board Manager
With the release of Arduino 1.6.4, adding third party boards to the Arduino IDE is easily achieved through the board manager. If you're running an older version of Arduino (1.6.3 or earlier), we recommend upgrading now. As always, you can download the latest version of Arduino from arduino.cc.
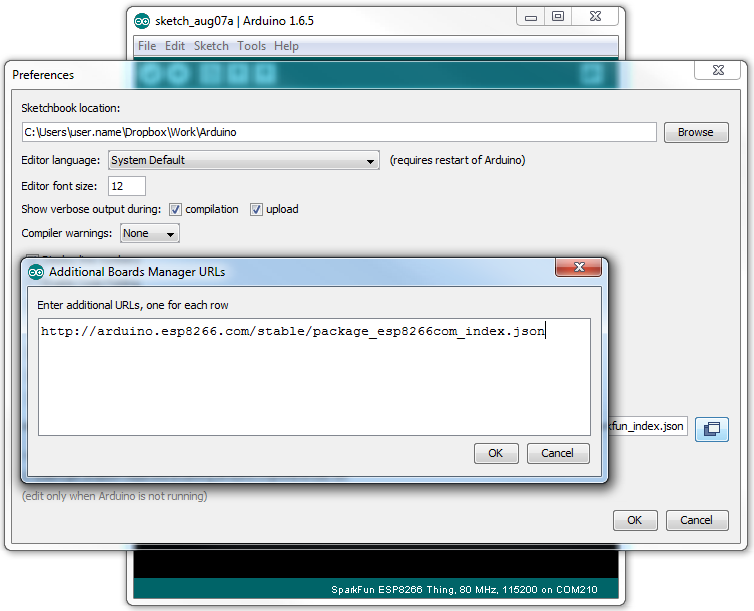
To begin, you'll need to point the Arduino IDE board manager to a custom URL. Open up Arduino, then go to the Preferences (File > Preferences). Then, towards the bottom of the window, paste this URL into the "Additional Board Manager URLs" text box:
language:bash
https://raw.githubusercontent.com/sparkfun/Arduino_Boards/main/IDE_Board_Manager/package_sparkfun_index.json
master" and changed the default to "main". SparkFun has followed this move as well. If you're unable to see a particular board inside of Arduino it may be that you are using the older "master" link. As a result, you will only see the previous changes on the old master branch. Please change to the 'main' json url listed above and all should be well.
You can add multiple URLs by clicking the window icon, and pasting in one URL per line.
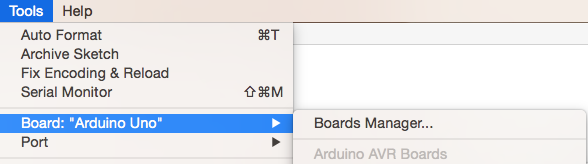
Click OK. Then open the Board Manager by clicking Tools, then hovering over the Board selection tab and clicking Board Manager.
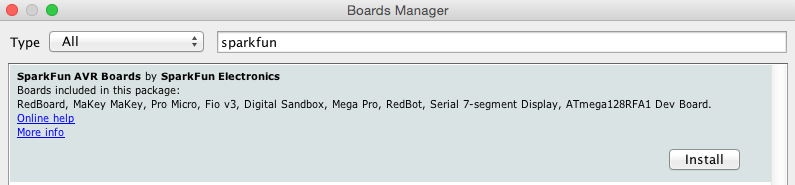
Search for 'sparkfun' in the Board Manager. You should see the SparkFun AVR Boards package appear. Click install, wait a few moments, and all the .brd files you'll need should be installed, indicated by the blue 'Installed' that is printed next to the package.
You should now be able to upload code to a number of SparkFun Arduino-compatible products, including the Fio and the Pro Micro.
Installing the .brd Files Manually
If you are using an older version of the Arduino IDE and do not have access to the Board Manager, then you'll need to install the .brd files the old fashioned way.
To begin, download this zip folder, and unzip its contents into a 'hardware' directory within your Arduino sketchbook.
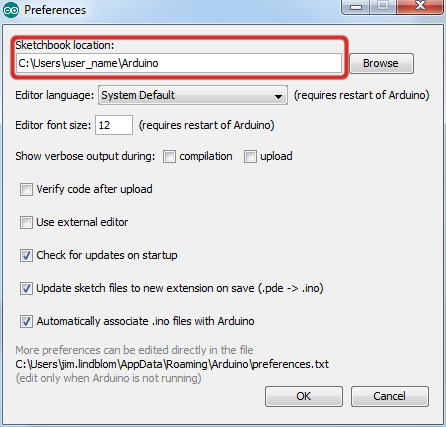
Where's your Arduino sketchbook? Well, by default, it should an 'Arduino' folder in your home directory, but to double check you can go to 'File' > 'Preferences' within Arduino and check the 'Sketchbook location' text box. Just make sure you close all Arduino windows once you're done.
Once you've unzipped that folder into the 'hardware' folder within your Arduino sketchbook (you may actually have to create a hardware folder), your directory structure should look something like this:

The structure of this directory is critical -- it should look something like "Arduino/hardware/[manufacturer]/[architecture]", in this case [manufacturer] is "sparkfun", and [architecture] is "avr."
There's a lot going on in that addon, but one of the most important files is 'boards.txt', which will add a few new entries to your 'Tools > Board' menu.
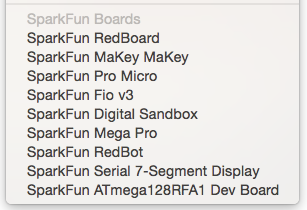
To double-check that the board definitions have been added to Arduino, open up Arduino, and check under the 'Tools > Board' menu. There should be some new entires for 'SparkFun Pro Micro', 'SparkFun FioV3', 'Qduino Mini', and other 32U4-based boards.
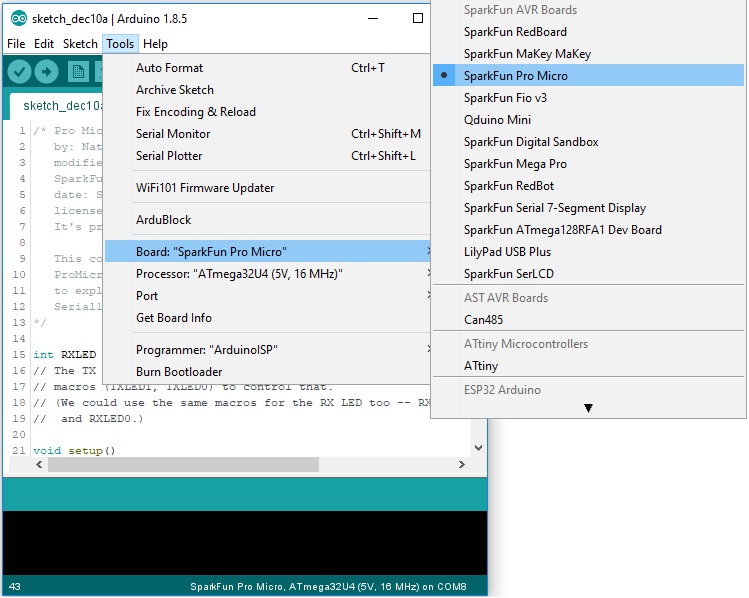
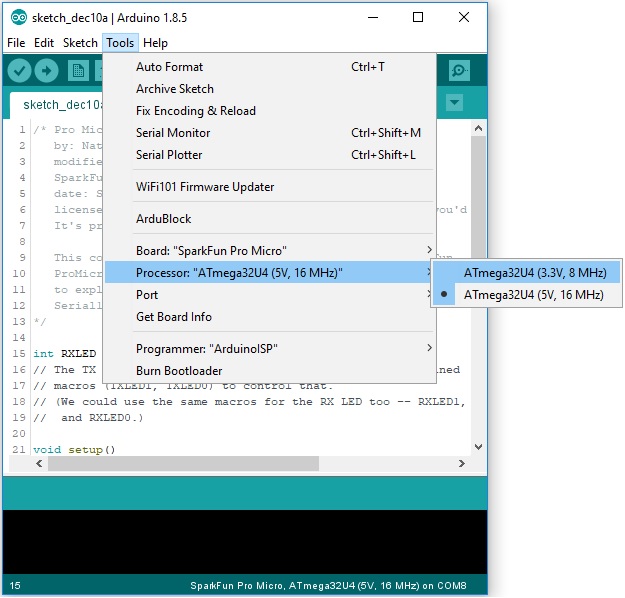
Notice there are two options for the Pro Micro - 8MHz and 16MHz. It's very important that you select the Pro Micro option that matches your board's voltage and speed. This should be listed under the Tools> Processor. Don't know which board you have? Check the bottom of the board, where you should find either a '5V' or '3.3V' box checked.
You should also see your Pro Micro's COM port under the 'Tools > Serial Port' menu. Select it, and head over to the Example 1 page where we'll upload our first piece of code.