Recreating Classic Electronics Kits
 Nick Poole
Add Components
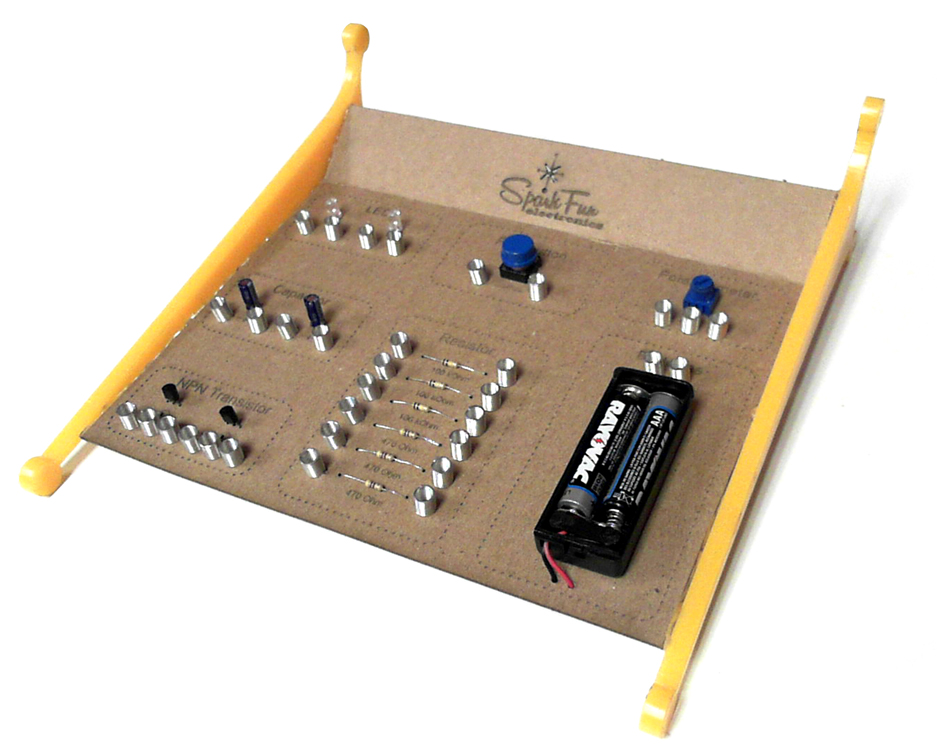
Now take each of your components and find a home for it. If you haven't already, add holes for the leads of your component to stick through the chipboard. They'll connect to the springs on the underside. For small components, they should be held in place by the bending of the leads. The larger components, like the battery holder, will need to be stuck to the chipboard with hot glue or a piece of double sided foam tape.
After all of your components are in place, it should look like the picture below. The next step is to connect all of the component leads to the correct springs!
This isn't a bad time to add your supporting legs. Simply sit the chipboard on its side on top of one of the legs and glue it in place with a bead of hot glue. Turn it over and repeat for the other side. Don't be afraid to really glob it on, as long as you're working on the backside, it'll look fine!