Retired - Electric Imp Breakout Hookup Guide
This Tutorial is Retired!
An electric imp hug! Provides an overview of the imp card and breakout. Both hardware and firmware subjects are covered.
View the updated tutorial: Retired - Electric Imp Breakout Hookup Guide v2
 jimblom
About the imp
It may look like an everyday SD card, but the electric imp is much, much more. It's a WiFi-enabled microprocessor. It's programmable over the air. It's got GPIOs, UARTS, I2C and SPI interfaces, pulse-width-modulation, digital-to-analog and analog-to-digital converters. Basically, it's what you'd get if you smushed an ARM microprocessor and a WiFi module down into a tiny SD-card-sized package.

The imp provides an easy, integrated way to connect almost any hardware device to Internet services. It is well suited to be the backbone of your Internet-enabled project, whether you're remotely controlling your electric blanket or triggering an irrigation system via a web browser. Connecting your imp to a wireless network and programming it is a simple, streamlined process.
The Hardware: 6 Wondrous I/Os
The imp is basically made of pure awesome. But, if we lift the hood of awesomeness for a moment, we can talk a bit about the imp's hardware. The platform of the electric imp is a Cortex-M3 microprocessor. Just like any microprocessor, the imp has a collection of input and output pins, each with unique functions. There are six addressable I/O pins -- not as many as an Arduino, but it makes up for it in terms of functionality. The imp has three UARTs, two I2C and SPI interfaces, and two DAC outputs; plus each pin can act as an ADC input and PWM output.
| Pin # | UART1289 | UART57 | UART12 | I2C89 | I2C12 | SPI257 | SPI189 | DAC | ADC | PWM |
|---|---|---|---|---|---|---|---|---|---|---|
| 1 | CTS | TX | SCL | SCLK | Yes | Yes | Yes | |||
| 2 | RTS | RX | SDA | MISO | Yes | Yes | ||||
| 5 | TX | SCLK | Yes | Yes | Yes | |||||
| 7 | RX | MOSI | Yes | Yes | ||||||
| 8 | TX | SCL | MOSI | Yes | Yes | |||||
| 9 | RX | SDA | MISO | Yes | Yes |
Of course, each of those pins can also be used as a simple inputs (with or without pull-up resistors) or outputs, sinking/sourcing up to 4mA each.
Also in that tiny SD package is a WiFi module, an antenna, and a light sensor. We'll find out why the light sensor is critical in the coming pages.
The imp is a 1.8-3.3V device, supplying it any more voltage than that can be harmful. It can require up to 400mA (worst-case), but it'll usually pull about 80mA (even 5mA in a power-save mode).
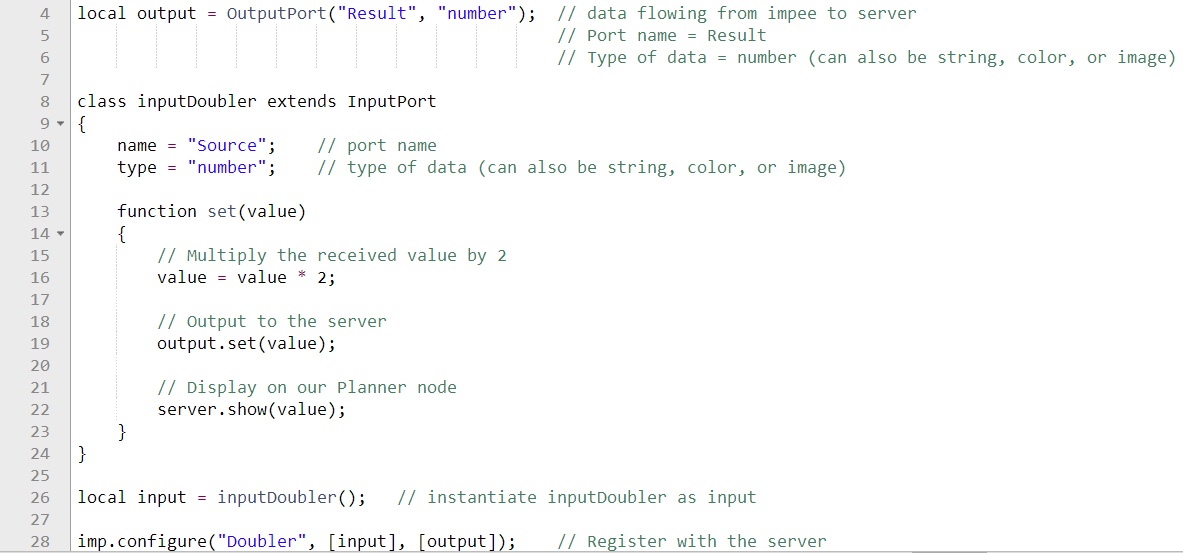
The IDE: The imp Planner
All code written for the imp is done online, in a web browser. The integrated development environment (IDE) for the imps is called the planner. Everyone can (freely) create their own account on the planner, where both your programs and your imps are kept safe and secure.

There are certainly pros and cons to this "always online" approach (though you can write and save every program locally, and upload it when you're ready). Still, it seems like a good solution for this type of platform.
The Language: Squirrel
Firmware for the imp is written in a language called Squirrel. Squirrel is an object oriented language similar to Javascript, but unlike most embedded system programming languages we've encountered (namely Arduino). Entering imp development from the world of Arduino may be somewhat jarring. There are no loop() or setup() functions, instead most actions are event or timer-driven.
There are tons of great examples on electric imp's wiki page, and if you're truly interested in learning Squirrel, check out the Squirrel homepage. There's also the Electric Imp API to familiarize yourself with. These are functions and libraries used to perform actions with the imp's GPIO pins and other hardware functionality.