RFM69HCW Hookup Guide
 MikeGrusin
The Antenna
Creating an antenna is not as hard as it may sound. The simplest antenna is a wire cut to the proper length and soldered to the "A / ANT" pin. The length depends on the frequency of your board and is marked on the bottom of the board for your convenience:
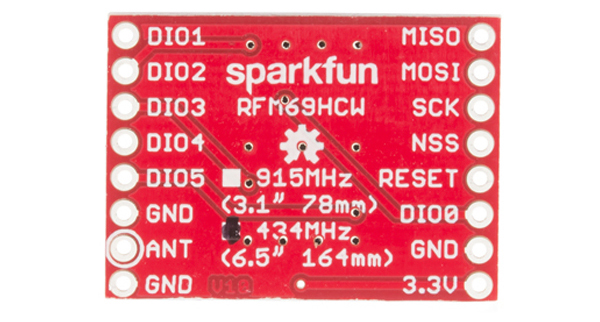
| Frequency | Length (inches) | Length (mm) |
| 915 MHz | 3.07" (3 + 1/16") | 78mm |
| 434 MHz | 6.47" (6 + 1/2") | 164mm |
FYI: This is called a quarter-wave antenna because the length is one-quarter of a full wavelength at the transmission frequency.
Antenna Placement
For antenna placement you have a few options:
Single Antenna
The simplest option is to solder a properly-sized antenna wire to the "A" / "ANT" header hole (the one with the circle around it), and stick it straight up. That's it!
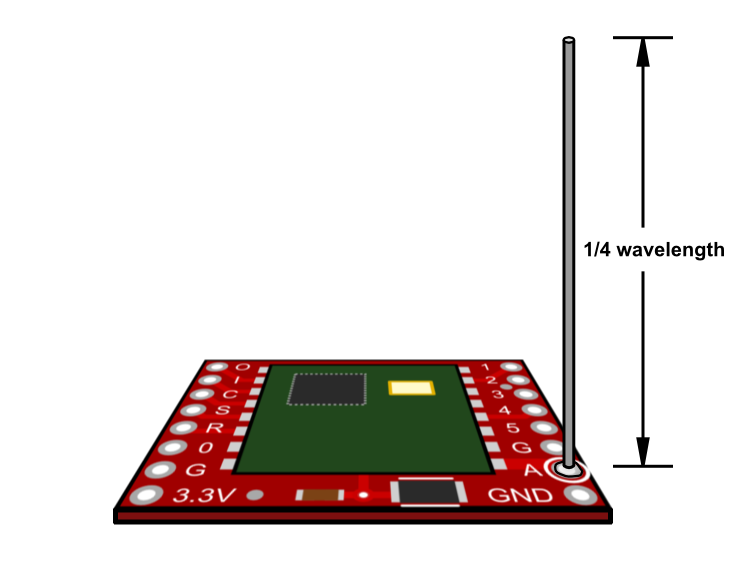
If you need the antenna to be shorter to fit within a plastic box, you can bend or coil the antenna (this will adversely affect the range and directionality), but don't change the length unless you know what you're doing.
If you're using a metal box, you should pass the antenna through a hole and extend it outside the box (see below). Also try to keep your radio module and antenna away from large metal objects, as the metal will disrupt the transmission.
You will get good results from this basic antenna, but if you want to maximize your range, consider the following options as well:
Add a Dipole
Antennas love to have a ground underneath them. The RFM69HCW board contains a ground, but, the larger the ground, the better. A dipole is an antenna that has an equal length of grounded wire extending below the board. This creates a virtual ground that will increase the gain of the antenna.
To make a dipole, cut a second wire the same length as your antenna, solder it to one of the "G" / "GND" header holes adjacent to the antenna, and point it in the opposite direction of the antenna (straight down instead of up).
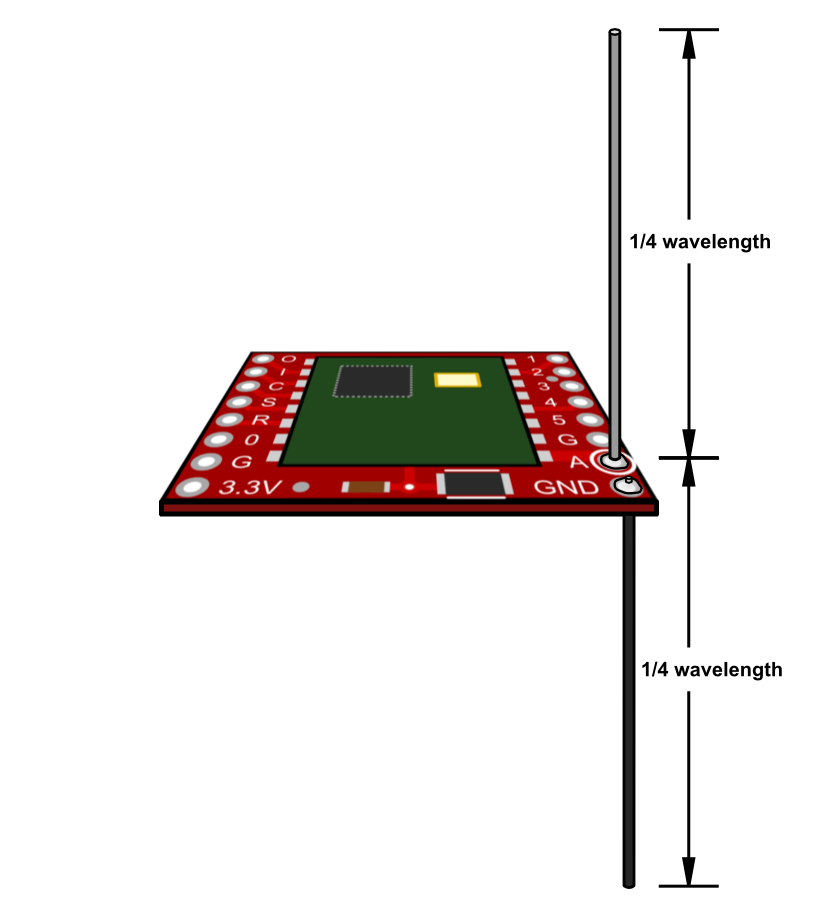
Keep both wires straight, in free air, and away from large metal objects if possible.
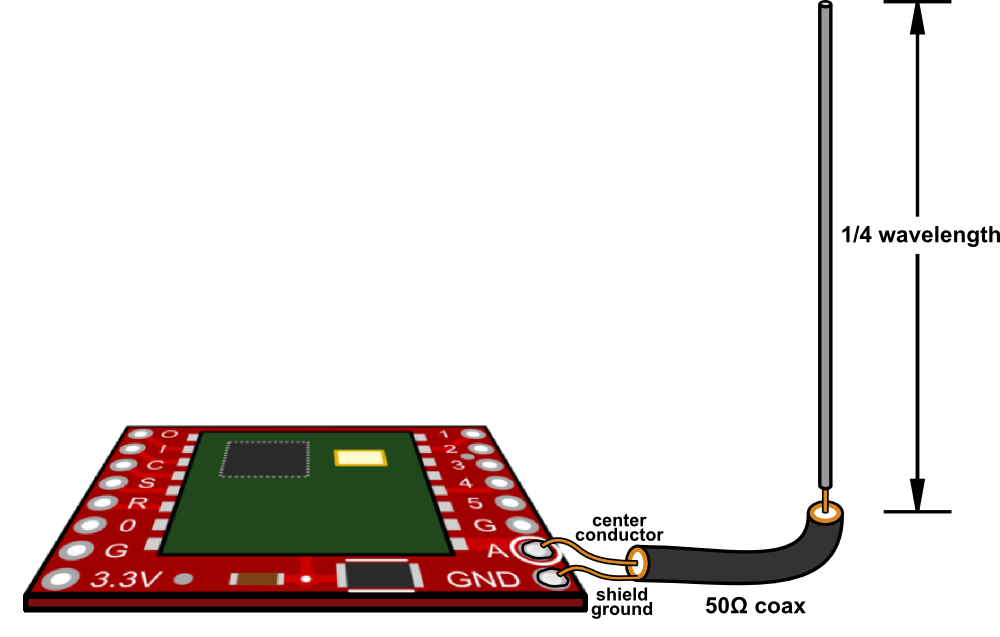
Remote Mounting
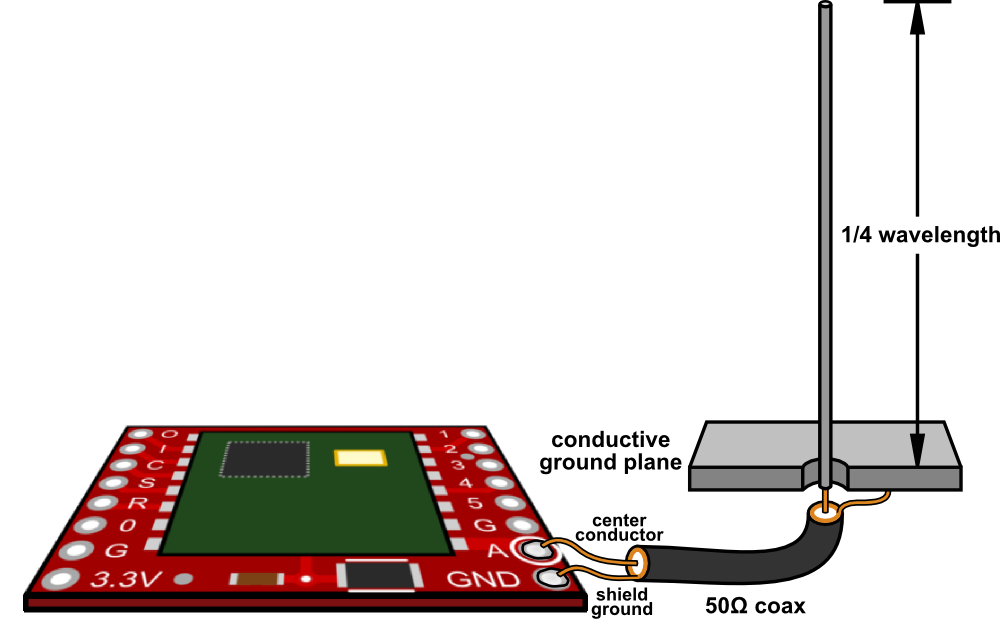
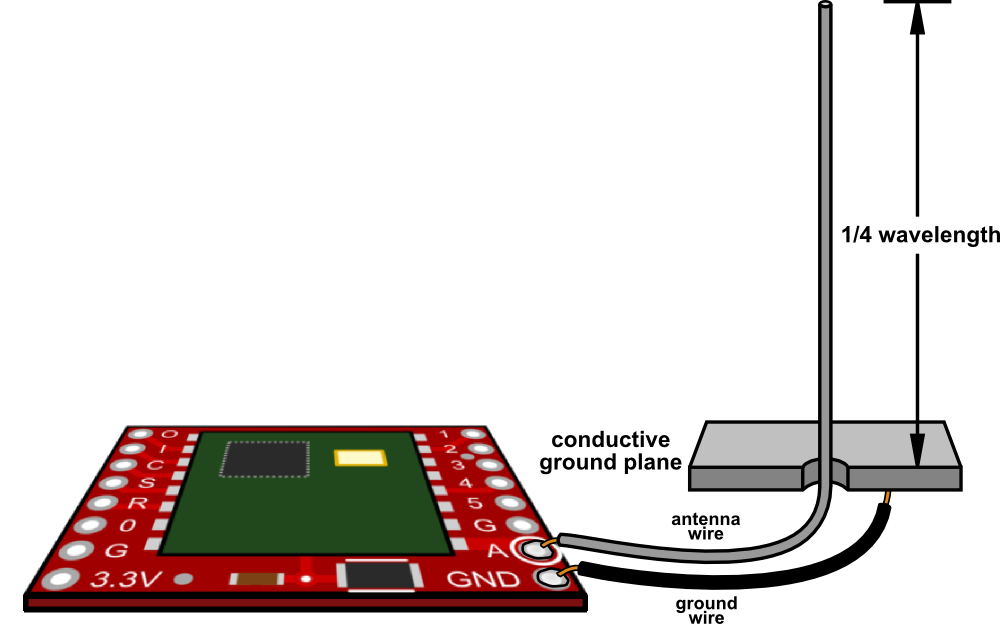
You can mount the antenna a short distance away from the board by (ideally) using 50-ohm coaxial cable, or (less ideally) by running a ground wire next to it. At the point where your antenna begins, simply end the coaxial shield / ground wire, or connect it to your ground plane (see below) or dipole. (The unshielded portion of your antenna should be 1/4-wave long as discussed above).

Using a Ground Plane
Because antennas love to have a ground underneath them, the best antennas stick up above a well-grounded surface. If you're using a metal box,or mounting the antenna on a vehicle roof, you can extend the antenna through and above the metal surface, as long as the surface is grounded. (Ensure that the antenna conductor doesn't short out against the ground plane where it passes through it.) If you don't have a handy metal surface you can create workable ground planes with a grid of copper tape or foil, radial grounded wires, etc.
Connecting a Commercial Antenna
If you'd like to connect a commercially-available antenna, you can solder an SMA Connector to the RFM69HCW board. Position the connector over the three headers marked G / A / G, and solder on both sides to ensure a good connection.
Other Antenna Types
The quarter-wave antenna is simple and effective, but, if you need additional range, there are other antenna designs like the Yagi that are far more directional, which is useful if you can point your antennas towards each other.
We're not antenna experts, so this is where we'll leave you. But if you're interested in this topic, consider getting involved in amateur radio. It's a great way to learn about antenna design and many other things: www.arrl.org.